
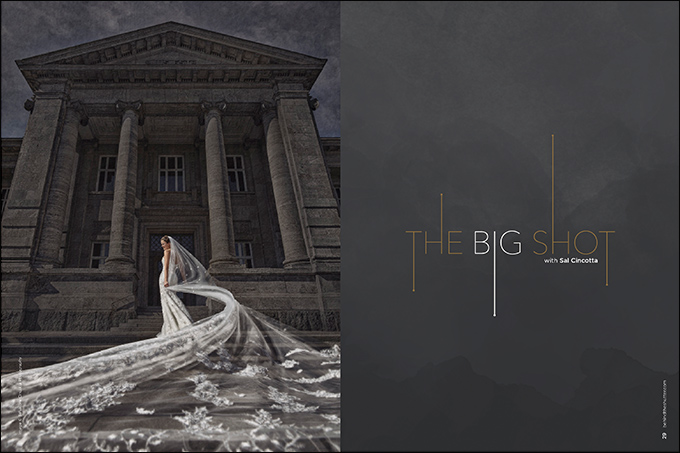
The Big Shot with Sal Cincotta
Want more information on this article? Get access to video content and additional supporting images. Launch the May issue of the magazine by logging in or signing up for a free account by clicking here. Shutter Magazine is the industry’s leading professional photography magazine.
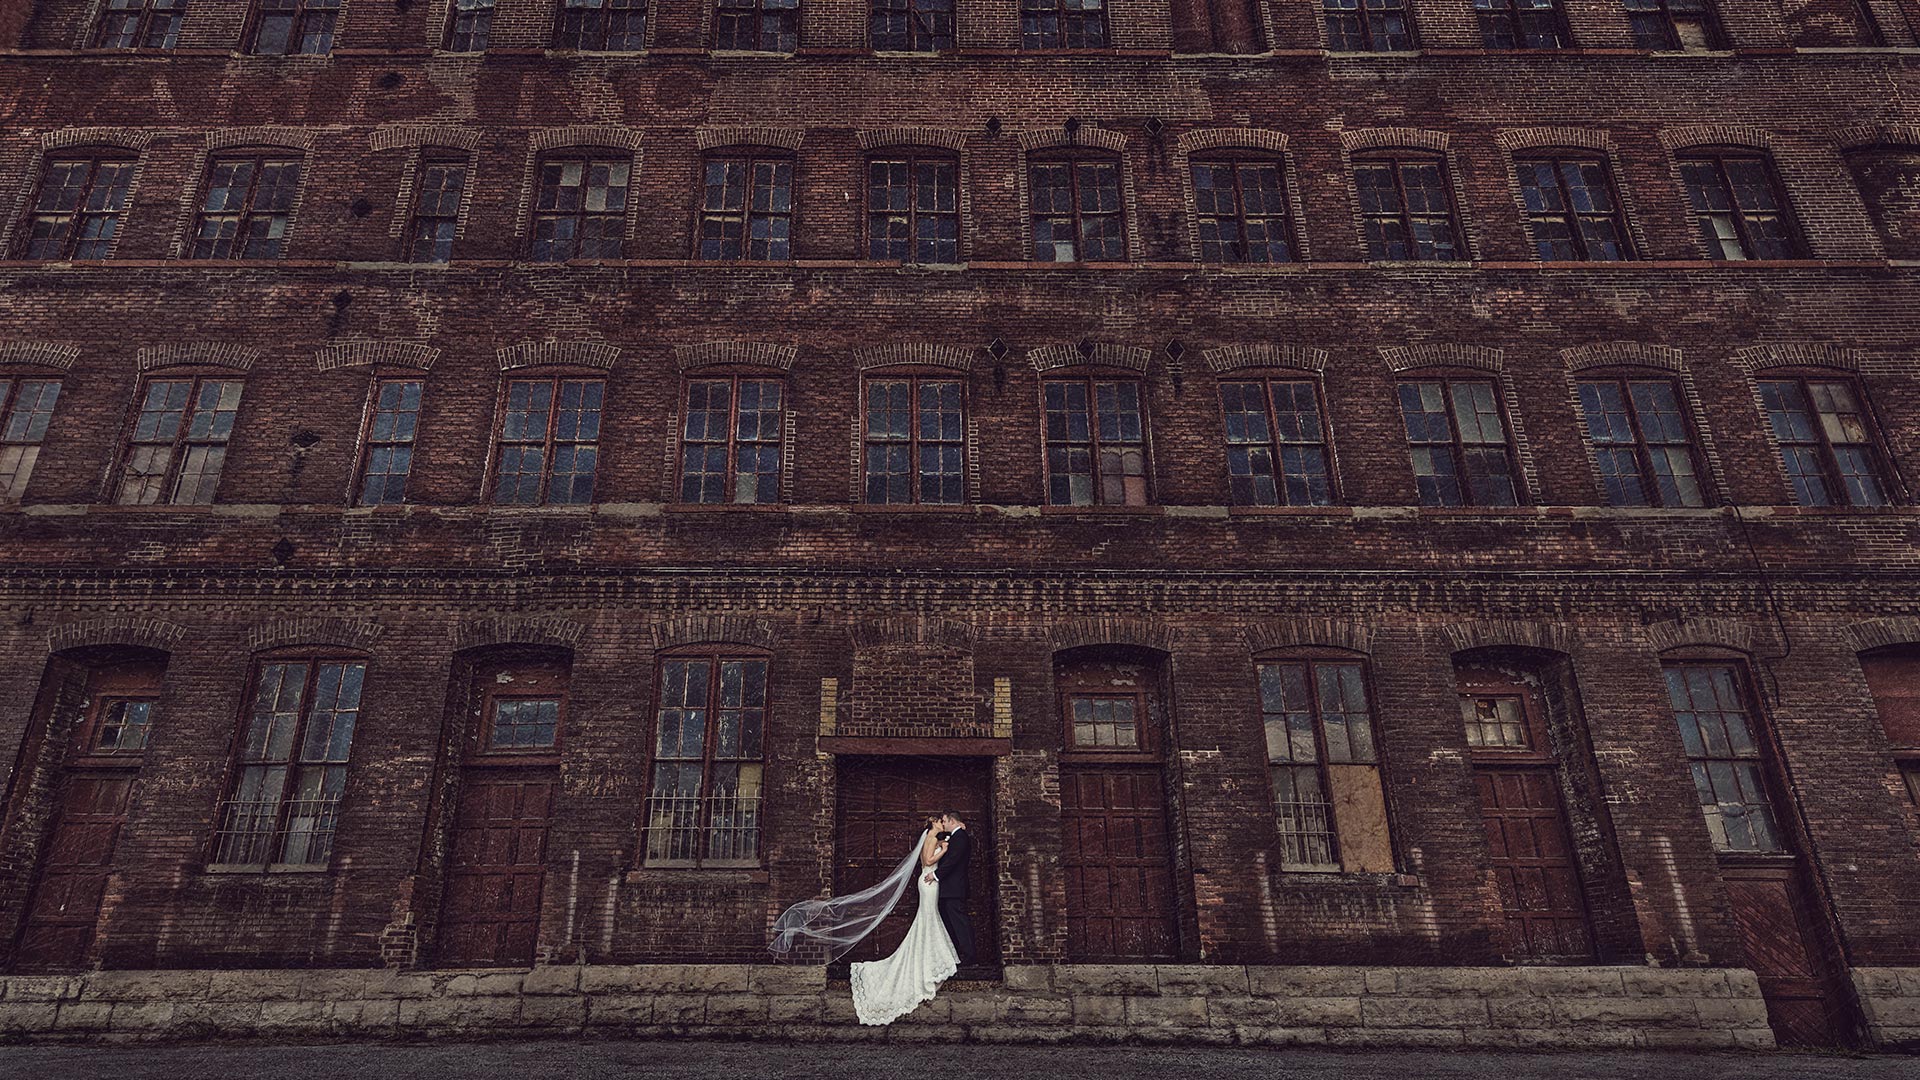
Getting the big shot looks easier than it is. Over the years, it has become a signature shot for my studio. Clients and photographers alike recognize our style. Clients pay a premium for that perfect signature shot of their day.
Let’s explore what goes in to creating that epic shot for your clients.
Seeing the Shot
It all starts with vision. My style is architecture-heavy. Find your own style and look for that big shot that best represents it. I prefer scenes that are somewhat clean—clear of clutter and other distracting elements. Some of that can be edited out in post-production, but there is only so much you can do.
If you are looking for an urban location, find a scene clear of people, trash and cars (mostly). That’s one of the big mistakes I see people make when shooting big. You are showing everything in the scene, so it’s very hard to block distracting elements. Cars are the most difficult thing to remove from a scene, and nothing will date your photo faster than some shitty cars in the background.
If you are looking for more of a landscape scene, don’t go too big. That is another challenge. Your subject will get lost. Keep your subject above the horizon line. If you shoot in a big landscape like in the mountains or a giant park, and your subject is below the horizon line, there won’t be enough separation, and your subject will be lost in the final shot.
Lighting the Shot
I almost always use artificial light in the scene to create separation from the background. I also like more directional light versus flat light directly on the subject. This gives a more realistic and pleasing look overall.
I use the Profoto B1 in the field, especially on a sunny day. I also use speedlights, but on a sunny afternoon, your speedlights don’t have enough power to light the subject. Something much more powerful, like a Profoto B1, is the better choice.
I also use natural light. If I am working on a wedding and the wind is coming from a direction that forces the bride to look toward the sun, I use natural light. This ensures the wind gives me a gorgeous blow of the veil, and it keeps my lighting setup simple. I love when this happens because it makes the shot that much easier to see—and, of course, less editing is always better.
Composition Is Key
Poor composition is by far the easiest way to screw up your shot. If you’re careless, you can wind up with poles coming out of your client’s head, a crooked horizon line or a horizon line through a head.
Composition is meant to drive your viewer’s eye to the primary element. It’s about the arrangement of elements in your frame that best expresses the goal of your image. In a wedding image, the main goal is to showcase the primary element in the shot, the couple. How you arrange the elements can make or break the image.
Is there a path leading to the client? Where does your eye first go when you look at the image? Is it where you want the viewer to go? If not, you might have a problem. What about brightness? Your eye tends to go to the brightest part of the scene. Is that where you want the viewer to go?
Hone your composition skills. It is one of the quickest ways to become a better photographer.
Here’s a trick I still use that can help you immediately. While looking at your image, close your eyes and open them. Where is the first place your eye goes? If it’s not your subject, you need to fix it. This can be done via lighting, posing or cropping. Second, look for natural lines in the scene, like a staircase, horizon line or railing. Look for ways to use that to drive your viewer to your subject.
The Devil Is in the Details
Now you have the lighting and scene right. Perfect, right? Wrong. Time and again, I see otherwise amazing images posted that lack the most basic of details or that have details that don’t make sense, such as an errant sun flare that looks completely fake, or emotion that doesn’t look sincere.
So, you are trying to create this gorgeous bridal portrait, and your couple looks like they can’t stand each other. Who would buy that for their home? What I love even more is when photographers are shocked that they can’t sell these images or that their clients don’t love them. Of course they don’t love them—they are lacking any connection whatsoever. Show your couples in love; that’s what they want to celebrate. This is not only in their facial expressions, but in their body language. If they look uncomfortable in real life, they will look even worse on camera, and they will notice that when they see your final images.
Spend time on the details and make things perfect. Perfect is not just lighting or the scene. Stop tinkering with your gear all the time. Lift your head to engage your subjects and get them relaxed on camera. Their expression and pose are seemingly small items, but so crucial in the final image.
Selling the Big Shot
After making the image, you’re still not done. You have to sell it. What’s the point of having this incredible image if it dies a horrible death on your hard drive? You have to sell it, and sell it big. One thing that has helped us sell big prints is to ensure we have large prints, metals, canvas and acrylics in our studio. If you don’t, how in the world can you expect your client to have enough vision to see how it will look in their home? It’s impossible.
Big dramatic shots are meant to be displayed big. When clients try to buy them as 8x10s, I immediately tell them no. I explain that it will look ridiculous, and then show them the size of an 8×10 on our wall. They see that they will be the size of an ant in the frame.
Something that has helped drive this message home visually is the new N-Vu platform (at N-Vu.com). It has a free built-in tool called Room-Vu. A client takes a picture of a room in her home, and with Room-Vu, she can see what various sizes of an image will look like on the walls.
The best way to improve your skills and wow your clients is to get out and practice. Push yourself hard to look for your mistakes. We all love to celebrate our victories, but the details matter. Every time you shoot, ask yourself, what did I miss? What can I fix the next time I do this? This is the quickest path to success.
I should know. I have been pushing myself for 10 years, and I have gotten better and better every year. It’s a journey, not a destination.
Want more information on this article? Get access to video content and additional supporting images. Launch the May issue of the magazine by logging in or signing up for a free account by clicking here. Shutter Magazine is the industry’s leading professional photography magazine.


