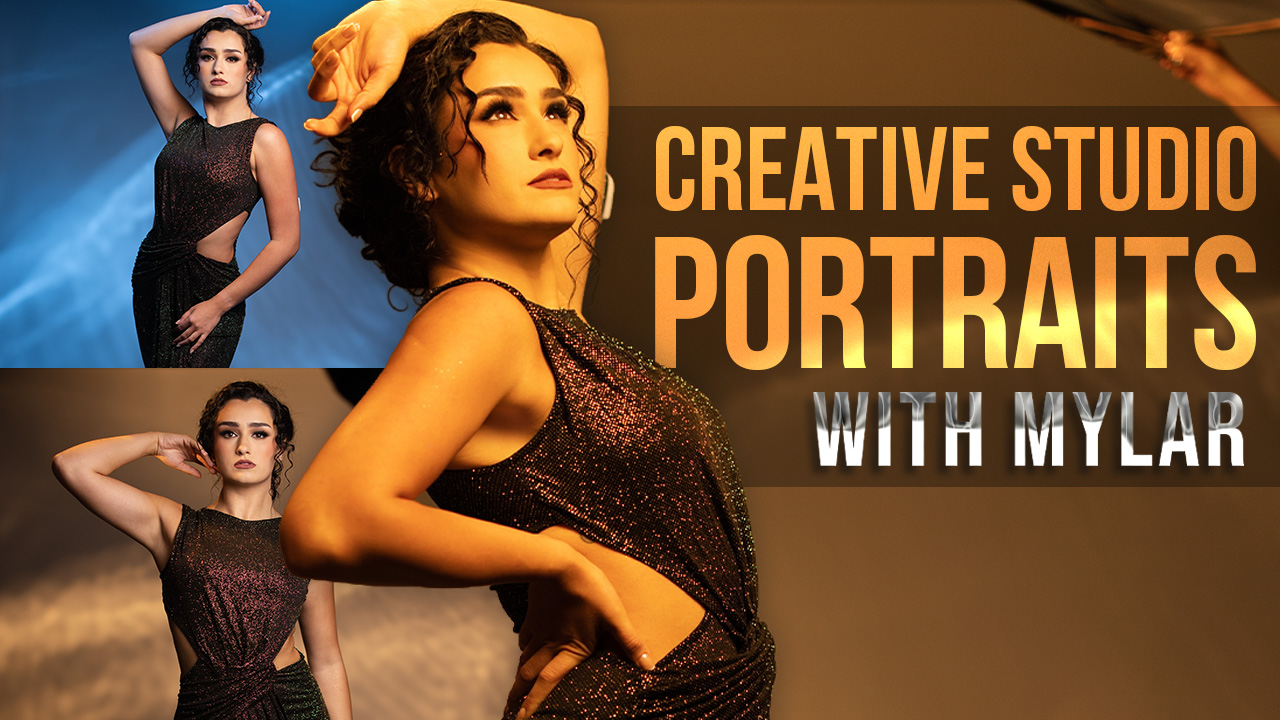
1 Modifier 4 Ways: Getting the Most out of Light Shapers with Michael Corsentino
The prospect of adding a new modifier to your arsenal of light shaping tools is exciting. New modifiers carry with them the promise of new looks and techniques, broadened avenues of creative expression.
As much as we all enjoy a good shopping spree, I suggest building your inventory of light shapers slowly, one at time. Get to know each piece of equipment inside and out before moving on to the next. This way, you’ll be able to squeeze every last bit of productivity, creativity and bang for the buck out of each new tool.
Lighting nerds like me are giddy with anticipation when a new modifier arrives. After the initial setup and a few shoots under your belt, it’s easy to fall into a pattern of complacency. You can end up repeatedly using the modifier exactly the same way you did when you first set it up. When you do this, you’re leaving a lot on the table. It’s likely you’ve only scratched the surface. I know this all too well. I’m betting you do too. It’s easy to understand why. Working this way keeps you in your comfort zone, the results are predictable, you’ve found something that works—so why not stick with a softbox at 3 feet, interior and exterior baffles, and repeat?
It’s important to remember that even the most rudimentary light shapers can be exciting multifaceted tools. They’re designed to be modified in numerous ways, and are able to produce myriad looks. Have you ever thoroughly tested your light modifiers and explored the full range of what’s possible with each? The same softbox close, far, with and without the interior baffle, with the exterior diffusion panel only, with no interior or exterior diffusion panels, with both diffusion panels in place, aimed directly at the subject, feathered away from the subject, used in front, used from the side, used from above, used from below, used with a white reflector, used with a silver reflector, used with a subtraction panel, etc., etc., etc…. Each of these options can be combined in endless variations for different looks.
I’m using softboxes here as an example, but any modifier, from a beauty dish to a convertible umbrella, can produce a wide range of effects. The variations and modifications are large and small, depending on the modifier. A solid understanding of the breadth of each tool is guaranteed to dramatically increase your options.
When a new light modifier arrives at my studio, I’ve gotten into the habit of painstakingly documenting each of its many possible uses. First I do some research and look at how other people have used it. I investigate their experiences and results. Next I put together a list of every variation and combination I can think of for that modifier, and bring in a model to shoot each and every look.
Each step of the way, I take detailed notes to keep track of each combination, the results produced, and what worked and what didn’t. This isn’t the most exciting, heart-pounding thing you’ll ever shoot. Quite the contrary. But investing the time and energy pays huge dividends in the long run. Though tedious at times, the process becomes one of discovery and does an incredible job of educating you about what you can achieve with a tool, in a very clinical and controlled environment. It’s time well spent, and something that needs to be done once for each modifier. Once it’s done, muscle memory has a way of kicking in, and you have reference files for each modifier when you need them.
A perfect case in point for this exercise is the Elinchrom 190cm Litemotiv that I recently added to the studio. This giant 6-foot-plus parabolic has several unique attributes that add to its incredible versatility. Chief among them is the ability to shoot in front of it without blocking any of its light. This is a function of its size. Because it’s such a large, broad source, its light simply wraps right around the photographer and provides gorgeous head-to-toe illumination of the subject in a variety of looks, such as with and without diffusion and the use of “deflectors” (described below).
The Litemotiv is also unique because you can remove the fabric skirt circling the flash head behind it and shoot with your lens stuck through the back of the parabolic. This, combined with the Litemotiv’s silver interior and nearly perfect catchlights (due to its 16-sided construction), produces a variety of awesome looks, each open to further modification with deflectors. Despite the title of this article, four looks is the tip of the iceberg with this modifier. The unique deep parabolic shape of the Litemotiv also sets it apart, providing ample contrast that doesn’t overwhelm when needed, and a much faster falloff than shallower modifiers of similar size.
Deflectors
Elinchrom heads allow the use of optional translucent, white, silver and gold diffusion discs known as deflectors, which are placed in front of the flash tube. This option increases the number of possible looks by a factor of four for each iteration: no diffusion, interior baffle only, exterior baffle only, etc. It also allows the Litemotiv to be used as a giant beauty dish when no diffusion material is employed. This was something very appealing to me for fashion and beauty shoots.
With respect to interior baffles and exterior diffusion panels, keep in mind that they each create a progressively more diffuse light with a lower degree of contrast and texture. They reduce output, broaden the light and create an increasingly softer quality of light. Elinchrom deflectors can also be used to heighten and subtly modify these effects.
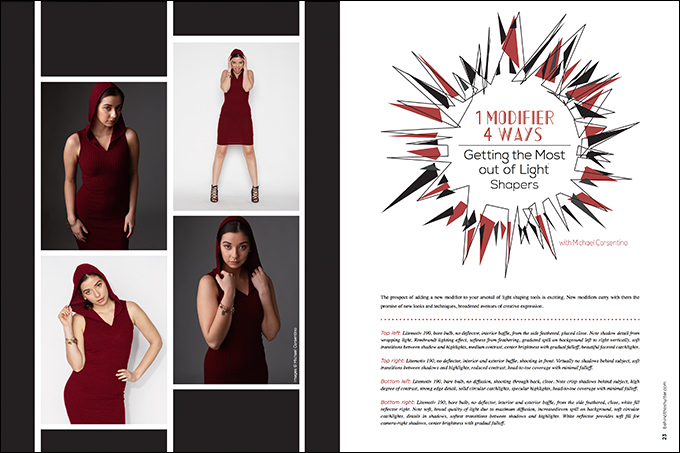
Looks & Test Results
- No baffles, bare bulb: Hard shadows, direct punchy light, bright center with falloff, specular light, high degree of texture. Ideal for high-key head-to-toe fashion and portrait light.
- No baffles, with silver, gold, translucent and frost deflectors: Hard shadows, direct punchy light, bright center with falloff, specular light, high degree of texture modified with deflectors. Ideal high-key head-to-toe fashion and portrait light. See deflector list below for individual properties.
- Shoot direct through the back, next to the head, bare bulb: Direct, specular, hard and punchy, near-perfect catchlight shape, high degree of contrast, high degree of texture, strong center illumination with falloff. Ideal high-key head-to-toe fashion and portrait light. Use a lens hood to kill flare, or create a flared look without one.
- Shoot direct through the back beside the head with silver, gold, translucent and frost deflectors: Direct, specular, hard and punchy, near-perfect catchlight shape, high degree of contrast, high degree of texture, strong center illumination with falloff. Ideal high-key head-to-toe fashion and portrait light. Use a lens hood to kill flare, or try a flared look. See deflector list below for individual properties.
- Inner baffle only: Reduces output, broadens the source by 50%, diffuses the light, lessens contrast and texture, softens the shadows and overall quality of light.
- Inner baffle only, with silver, gold, translucent and frost deflectors: Reduces output, broadens the source by about 50%, diffuses the light, lessens contrast and texture, softens shadows and the overall quality of light. See deflector list below for individual properties.
- Inner and outer baffle: Maximum reduction of output via fabrics, broadens the source to 100%, maximum diffusion of light (use deflectors for even more), maximum reduction of contrast and texture, maximum softness in the shadows and overall quality of light (use deflectors for even more).
- Inner and outer baffle, with silver, gold, translucent and frost deflectors: Maximum reduction of output via fabrics, broadens the source to 100%, maximum diffusion of light (use deflectors for even more), maximum reduction of contrast and texture, maximum softness in the shadows and overall quality of light (use deflectors for even more). See deflector list below for individual properties.
- Outer baffle only: 100% broad source, increased center illumination with falloff compared to use with interior baffle, midlevel contrast, midlevel softness in the shadows.
- Outer baffle only, with silver, gold, translucent and frost deflectors: 100% broad source, increased center illumination with falloff compared to use with interior baffle, midlevel contrast, midlevel softness in the shadows. See deflector list below for individual properties.
- Close to subject: Soft, specular light, beautiful catchlights. Variety of possible effects based on modifications employed. Even light with lovely, gradual falloff. Great for beauty, portraits.
- Far from the subject: Harder light, increased contrast, still a relatively soft light due to size. Great head-to-toe fashion and portrait light. Variety of possible effects based on modifications employed.
- From the side, bare bulb, no diffusion, directly at the subject: Hard light, rapid shadow and highlight transitions, lots of contrast and texture, bright center with falloff.
- From the side, interior baffle, exterior diffusion panel, feathered: Amazing soft light, one of my favorite ways to use this modifier. Even coverage, very gradual falloff, broad source. Close to the subject provides soft, slow transitions between shadow and highlight; large size creates lovely quality of light that wraps around the subject, providing subtle shadow details.
Deflector Properties:
- Translucent: Removes one stop of direct light, less direct light, softens shadow/highlight transitions, creates a more reflected light, reduced contrast and texture.
- Frost: Reduces half a stop of direct light, boosts character of light reflected from the interior surface of parabolic, increased softness in shadow/highlight transitions, further reduction of contrast and texture.
- Silver: Removes all direct light, uses only light reflected from the interior surface of the parabolic.
- Gold: Removes all direct light, creates a subtle bronze color cast by warming up the color temperature by 200 to 300 degrees Kelvin.
As you can see, there is a dizzying number of combinations and looks possible using just one modifier. I’m using an Elinchrom modifier here, but the same is true for any brand and virtually any type. The key is to experiment. Don’t be a one-trick pony. Investigate the full range of possibilities with each of your modifiers. You’ll be glad you did.