
The images:


Click to enlarge
Image #1
I can’t tell if this is a senior shot or a Quinceañera, but it’s a beautiful shot. In and of itself, its a strong shot but let’s dig into what we can do to make it better.
Take a step back
As I’m looking at this, the first thing that’s jumping out in my mind is where did the chimneys go? To me, cutting those off is no different than cutting off a limb on a body. This can be easily fixed by zooming out a little bit and giving yourself some breathing room. You can always crop in, but you can’t add pixels back. I do like that the sky isn’t competing with our main subject because it’s nice and dark.
The lights
Another thing that’s catching my eye in this photo are the lights. It looks like the lights were turned on or enhanced in post-production. I don’t have a problem with the lights being on, but I’m not loving the light on the right hand side. As I zoom in, it looks like a glow was added in but you’re losing the light itself. It doesn’t look right compared to the light on the left, it looks a bit soft and misty. I’m not going to tell you what you did or did not do in post-production, I just know that I am visually seeing it and that’s a problem. It should not be a distraction to me, and it is.
Little distractions
Here are some other little things we can do better. The shadows are distracting and there’s a couple of hot spots, like the dog and the foreground. I’d like to see that foreground burned down a little bit so it’s not distracting me from the main subject.
Bring the subject closer
The final thing that I would do for this image is bring the subject closer to the frame. I would’ve brought her up enough so she is filling the frame of the door for the most part. By bringing her up, she will become larger and not be dwarfed by the building. Otherwise, this is is a very good image. We’re just talking about how to make it better, so keep up the good work.
Image #2
Impact
First of all, I love this image. It’s impactful, I love the feel of it. But like all things, we can make it better. Always ask yourself, “What’s wrong with this image? What could be improved?” Of course, everybody gets excited when they see a shot like this come off their camera as they should be, but make sure your excitement doesn’t allow you overlook what could be fixed. I’m not going to lie and say I don’t make any mistakes because of course I do, but my job is to find what we can do better.
Here we go. First thing that’s jumping out to me is that white area in the back behind her hand. It is an absolute distraction mainly because it is eye level, it’s the brightest part of the image, and it’s pulling me away from the model. There are a multitude of ways to fix it; here are two specific ways:
- Clone it out.
- Burn it down.
This is a common mistake that is seen a lot in photos. You need to be mindful of the brightest part of your shot and make sure your subject is the brightest, so you aren’t taking away from that.
Composition
The composition of this photo is not the best. This image is a little cockeyed and it immediately stood out to me. The lines in the brick wall are a dead giveaway, as well as the vertical lines in the back that were created by the lights.
This is something we can easily fix just by slightly rotating the image; little things, big difference. The reason this becomes so important is because since there are multiple lines in this photo as well as the curve from her arm, the crookedness of all of them really start to stand out. Maybe the photographer wanted it that way, I don’t exactly know but to me, it’s distracting.
Skin & post-processing
The last part I want to focus on is her skin. I’m not going to say it looks plastic; I hate that feedback, but it looks splotchy. It could be the resolution of the image, but this is something that can easily be fixed in Photoshop. Her eyes look a little over sharpened and over-processed. These are all things that you can absolutely control. Overall, great image.
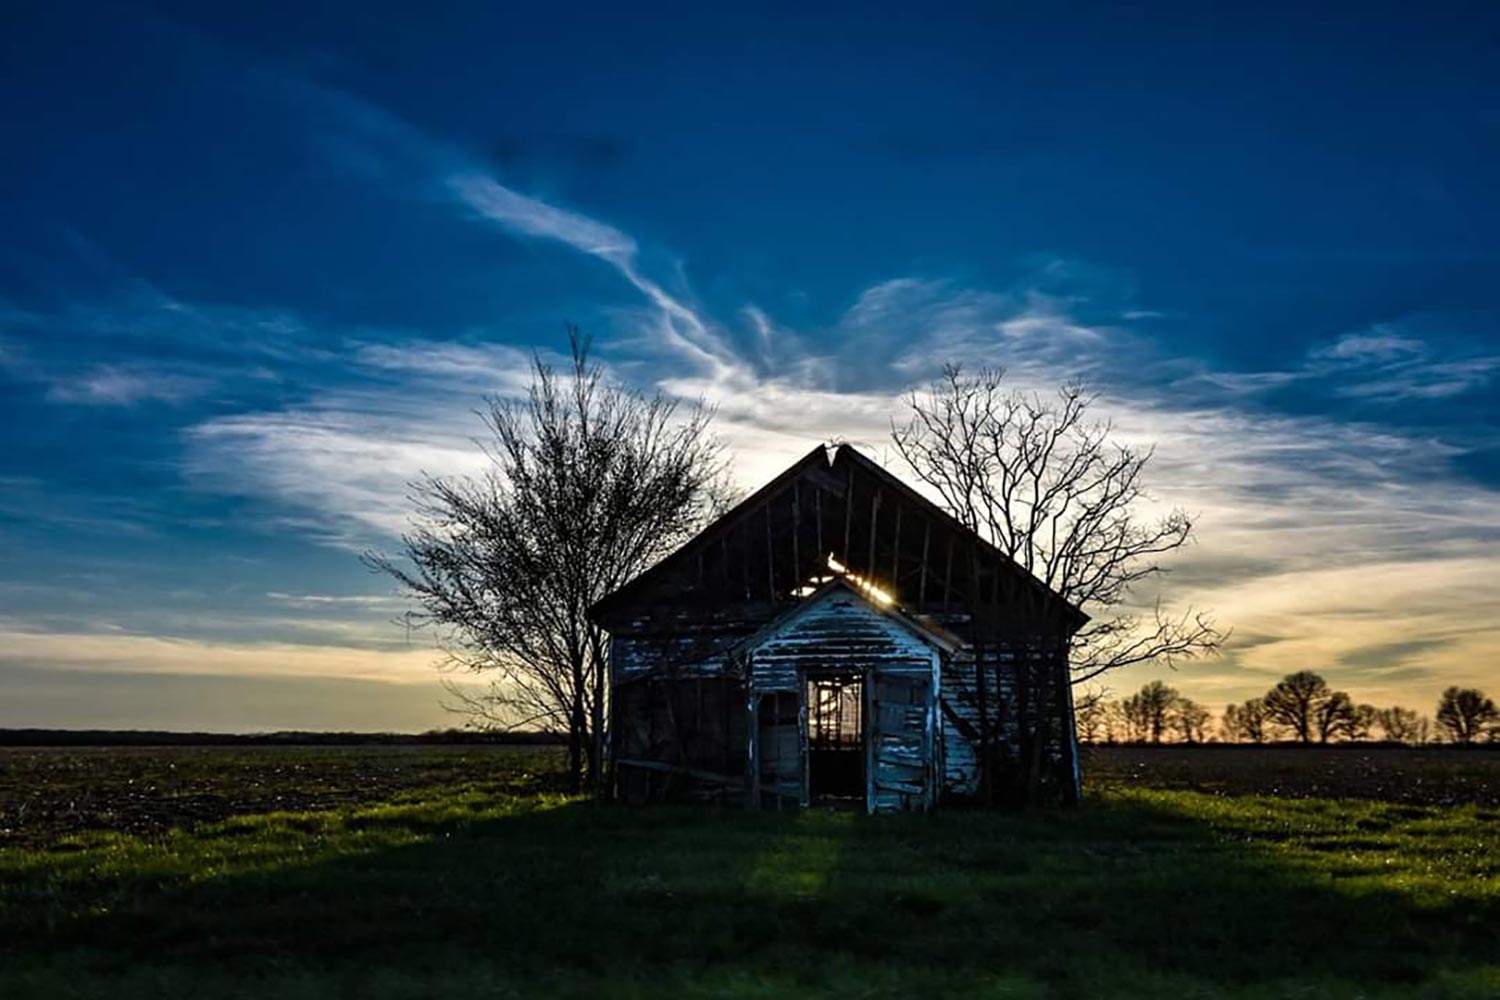
Image #3
For starters, this is a beautiful landscape image. The image is extremely pixelated on my end; I’m going to give you the benefit of the doubt that we just have a low resolution file.
Sensor Dust
But something I cannot give you the benefit of the doubt on: the sensor dust in the sky towards the top of the image. This stuff is brutal especially when you’re shooting in bright environments and you’re shooting at F/16 or F/22, because you’re going to see everything that’s in focus. If you even think about doing any HDR on a blue sky, think again; the sensor dust starts screaming at you. So you’ve got a couple choices to avoid this: clean your damn sensor… or remove this in Photoshop, because it is a distraction.
Composition
Let’s get into the composition of the shot. I like what we’re doing here, but if you find the middle of the image, the shed is so close to the center, but it’s not quite there, which makes it looks like a mistake. To make this image better, all you need to do is recompose. Even if you missed it when you were framing it up, this can be done in post-production. You can either extend the image a bit to get the peak of the roof right in the center, or crop in to get the top of the shed in that center area. This instantly makes the shot compositionally stronger.
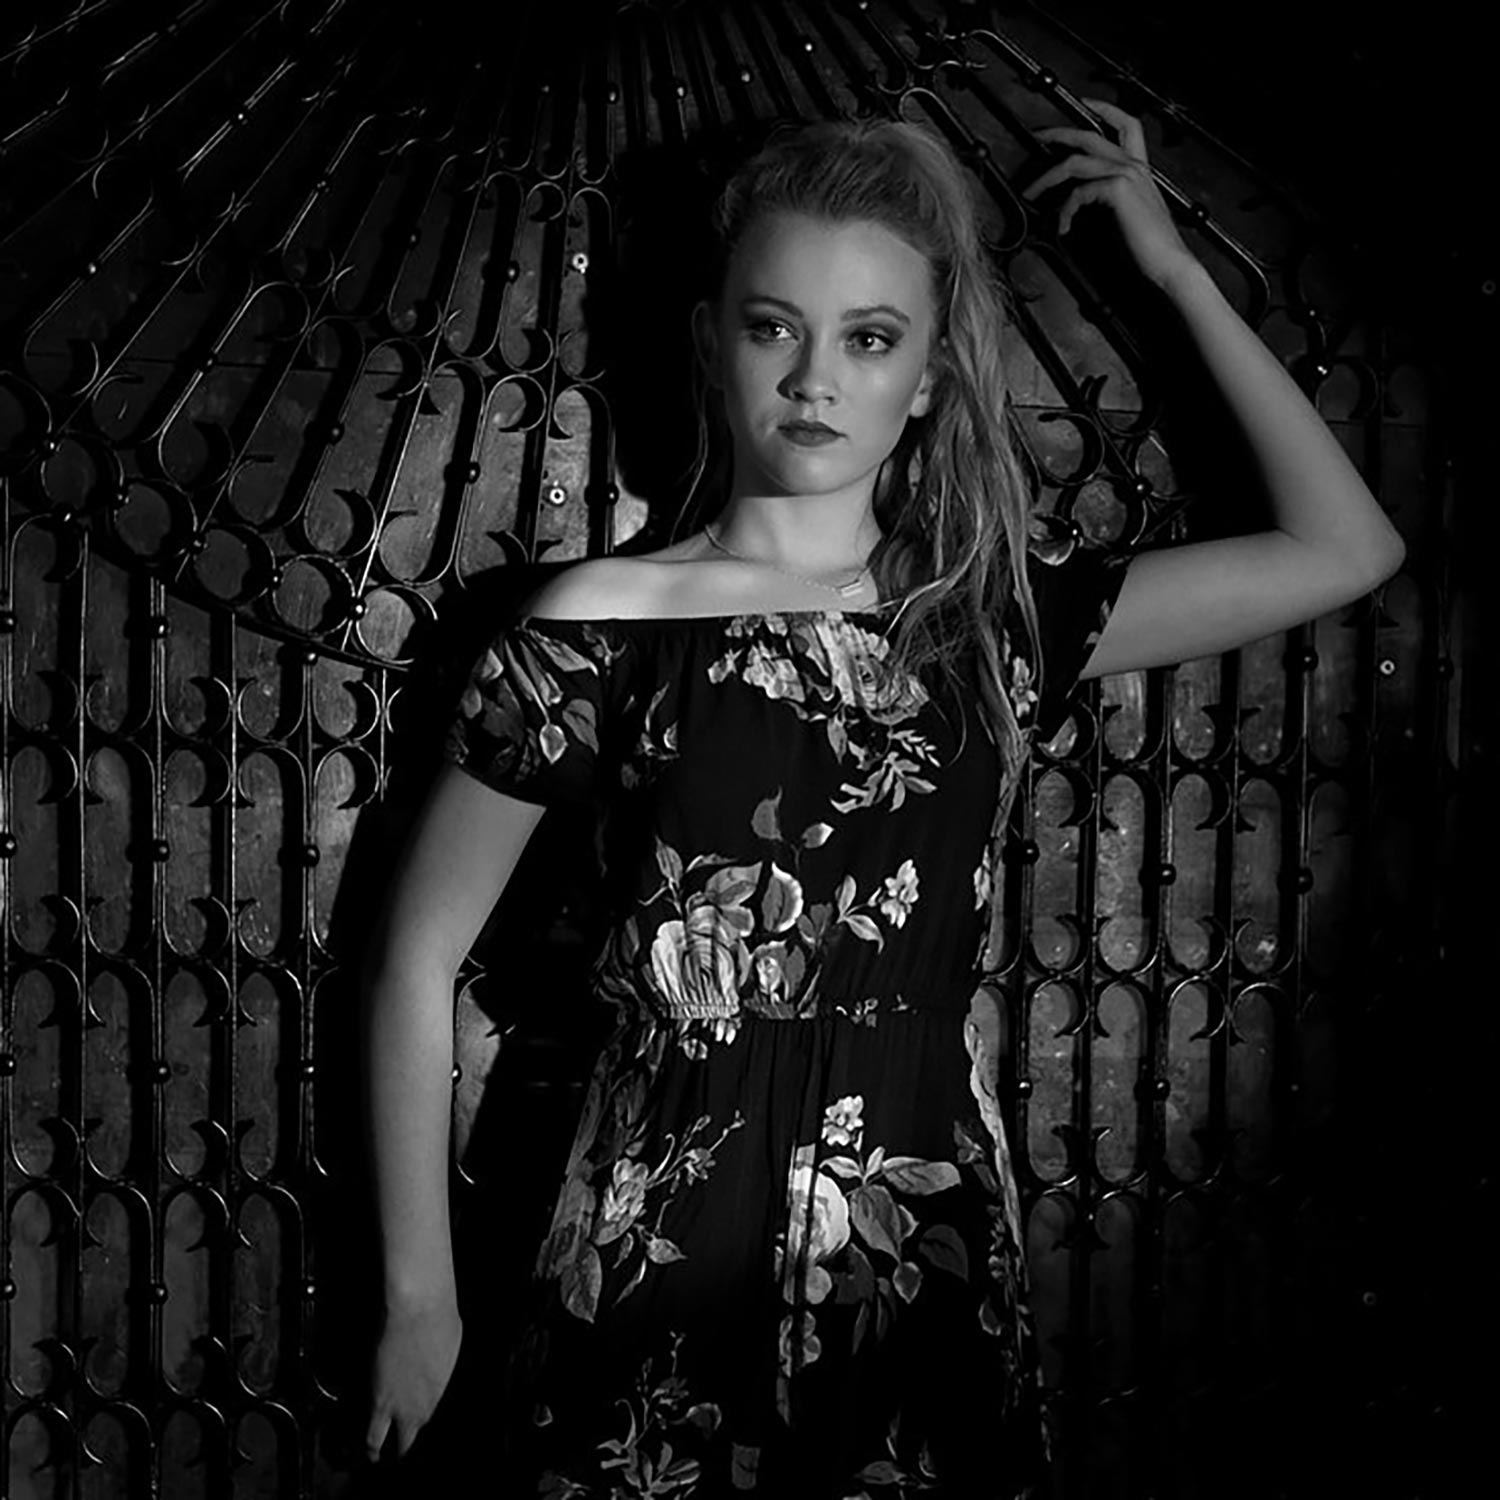
Image #4
I like this, it’s got that kind of noir look with this hard contrast look and lighting, but the model’s expression doesn’t match the look you’re going for. She looks dead inside. It’s the eyes, looking at those eyes she doesn’t feel like she’s there.
Pro Tip: Be sure to coach your model on how to give you the expression you’re looking for. Communication is vital.
Match the model with the lighting
There are all sorts of other problems with this shot. You want this dark, dramatic look but this outfit just doesn’t seem to match the hard edge lighting that you’re wanting. This hard edge lighting is good for fashion which is a very specific look, but here we’ve got this 15 year old in a summer dress; those two things don’t go hand in hand. Now I know what I’m critiquing is not about the exposure or composition, etc., but it still matters. This stuff absolutely matters, so pay attention to that.
Range of light
Take a look at the range of light in this shot. Look at the light that’s on her collarbone and compare that to the light that’s on her hand. I’m okay if you burn that down a little bit but we’ve made her two different colors, and it doesn’t look natural. That’s the problem I have, it’s not that they’re not perfectly even because there’s light fall off. You can dodge and burn this stuff and bring some brightness back to her arm to make it look more natural so she isn’t different colors.
Where does your eye go?
Here’s the final problem that could make this image better, I want you to close your eyes and open them. Now, where’s the first place your eyes go? The first place my eyes go to are the bright flower on her dress, her collarbone, or the brightness on the wall above her collarbone. That can not be where you want me to go. Where’s the first place you should want my eyes to go? Her face, right? Some simple dodging and burning is the easiest way to accomplish that.
Get critiqued!
Have you ever wanted PERSONAL feedback on YOUR photography from Sal Cincotta?
Enter your images for a chance to see your work being critiqued by Sal! Need some guidance? Want to show off some of your best work? Submit your images here for a chance to see them critiqued.


