
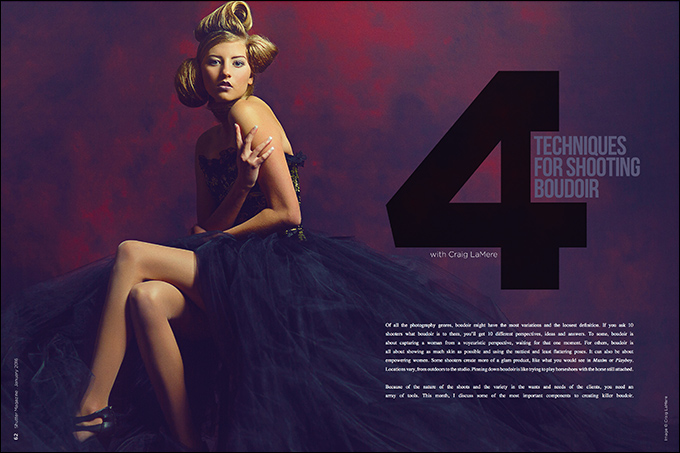
4 Techniques for Shooting Boudoir with Craig LaMere
Of all the photography genres, boudoir might have the most variations and the loosest definition. If you ask 10 shooters what boudoir is to them, you’ll get 10 different perspectives, ideas and answers. To some, boudoir is about capturing a woman from a voyeuristic perspective, waiting for that one moment. For others, boudoir is all about showing as much skin as possible and using the nuttiest and least flattering poses. It can also be about empowering women. Some shooters create more of a glam product, like what you would see in Maxim or Playboy. Locations vary, from outdoors to the studio. Pinning down boudoir is like trying to play horseshoes with the horse still attached.
Because of the nature of the shoots and the variety in the wants and needs of the clients, you need an array of tools. This month, I discuss some of the most important components to creating killer boudoir.
Shooting High Aperture (“Open”)
One of the techniques I use in the studio to produce the mood I want is to shoot at a higher aperture, or more “open.” Shooting open means shooting at the highest aperture on your lens. For example, if you had a Canon 135 L 2.0, your highest aperture would be f2. If you had a Sigma Art 50 1.4, your highest aperture would be f1.4. When you are shooting “wide open,” the lens opening is at its widest, letting in the most light it can in the fastest amount of time and producing the greatest depth of field based on the focal distance of the subject. A lot of people think if you just put a lens at its biggest aperture, everything behind the subject will have the creamiest, dreamiest bokeh ever. That is not completely true, since the bokeh is dependent on a few other things.
There’s a big difference between shooting wide open and shooting with the correct depth of field. When I say shooting “more open,” I mean choosing an aperture that gives me the shallowest depth of field. This usually means shooting somewhere between f1.2 and f4, depending on the lens. Instead of picking an aperture that best fits the conditions, people often automatically default to the lens’s largest aperture. Defaulting to wide open anytime you want a shallower depth of field is like eating only with a fork. Sure, when you are eating spaghetti, it’s a pretty good tool, but the day you have to eat soup…not going to be as good a time.
Shooting Lower Aperture (“Closed”)
Shooting closed is the opposite of shooting open. Instead of choosing an aperture with the largest opening, you are choosing an aperture with the smallest. When you are stopping down, you are closing the opening for the light to get into the lens, so there’s longer time to achieve proper exposure since less light is getting in at a much slower rate.
If you are shooting the Canon 135 L 2.0, your smallest aperture is f32. If you are shooting the Sigma 50 ART 1.4, your smallest aperture is f16. In general, stopping down your lens two stops from open produces a much sharper image than would be created by having your lens wide open. So, your 135 L 2.0 would be most sharp at f4 and your Sigma ART 50 1.4 would be sharpest at f2.8. The interesting thing about the default built into us when it comes to stopping down is that people almost always consider f11 to f13 as the top end. When we shoot closed, it is very rare that we push past those f-stops.
Distortion: Your Friend
One of the most important things to know when dealing with the depth of field is the understanding of the focal distance and f-stop combination, and how they work together with different lenses. Understanding what each lens does when framed equally is one of the most important principles to grasp. A 24–70 2.8 at 24mm produces a much different image than a 70–200 2.8 at 200mm. A 50 1.2 is very different from an 85 1.2 if all are given the same framing and f-stop. The reason all these lenses shoot differently is most commonly called lens compression. Compression is the amount of distortion of a lens at a given distance. As a general rule, the wider the lens, the more it distorts as it gets closer to your subject and the more you fill the frame.
If you are shooting a headshot with a 200mm and you are filling the frame with the subject’s head, you physically will be a considerable distance away and there really will be no significant distortion. The subject will look just like herself. Now, if you shoot the same shot and frame it equally with a 24mm, you are going to be almost standing on top of your subject, and you will be in for quite a different experience. Your subject is not going to look quite like herself, especially in the area closest to the lens. You should always keep this idea in mind.
Creating Mood
To me, the mood of the image is everything. The mood is what conveys the feeling and creates the story. I tell my stories in boudoir by combining certain lenses and apertures to get very specific looks. I’m going to go over my thought process for a couple of different scenarios so you have a better understanding of how all of this ties together.
Situation 1: Shooting High Aperture
I have a client come in who is a romantic type, and all about being soft, pretty and dreamy. She has given me examples of what she likes, and all of it is very simple and clean. I know right away I want to shoot very open and give the image the softest feel and look that I can. I lay her on her side, facing the camera. I know I can push the focal point to get the most depth of field possible because her body will pretty much be all on the same plane, so I will shoot the 50 at f1.6 without worrying about part of her being in focus and part of her not. Shooting very open works just the same with standing clients, or anytime your subject is completely on the same focal plane.
Situation 2: Shooting Medium Aperture
With the same client, we are shooting closer-up images. She has the brightest blue eyes, and I want to emphasize them. I pose her lying on her stomach facing the camera. I plan to fill the frame with her face and let the rest of her body fall off. Because of the distance between her face and the lens if I used the 50, and the distortion that would happen to her face, I go with the 85 L 1.2. I shot the last image at f1.6, and I could do the same with the 85. But because the focus is so narrow, unless she is looking totally straight into the camera, the eye I focus on will be sharp and the other will not be. I don’t want to limit the movement of my client, so I move the aperture down to f4. I know at f4 my client will have the freedom of movement, and if the eyes get off plane, they will still both be in focus, or a lot more in focus, than at f1.6. Because I have framed so tightly, the rest of her is far enough from the focal point that the f4 depth of field is enough to make the rest of her fall off, so the eyes are the stars of the image.
Situation 3: Shooting Low Aperture
My client who wanted soft pretty images tells me she has these killer boots and a wild leather outfit she would love an image or two in. She comes out in 8-inch stilettos and a Catwoman leather body suit. The outfit is dramatic and powerful, so I want my images to match. I want to make her as powerful, sexy and badass as I can. I use my 24–70 L 2.8 for the job. Shooting down to up is a power angle, and I want to push that power angle to the edge, so I put my lens at 24mm. The reason I switched out the 50mm for the 85mm in Scenario 2 is the reason I switch out the 85mm for the 24mm here: distortion.
When you shoot down to up at 24mm at a close enough distance to almost fill the frame with your standing subject, you get a very dramatic change in what is closest to the lens, which in this case is the legs. They can look a mile long depending on the tilt of your lens. The length you create from the distortion is seasoned to taste.
There are a couple of reasons for using f10 in this situation. One is that at f10 you get all the detail of the client and the outfit. The outfit in this situation is as important as my client. It is so dramatic that you lose the power or mood of the image if you do not show the details. The other reason I go with f10 is because of the angle and the focal distance. If you ever tried to focus and recompose wide open, you found out in a hurry that, unless you were very steady, you got a lot of soft images due to the focal plane changing when you recompose. At f10, that is no longer an issue. You are free to create as you please.
There are a million and one combinations for creating boudoir images. I hope this gives you some food for thought to help you become an ever better boudoir shooter.


