
5 Tips for Getting It Right in Camera with Michael Anthony
Since I began teaching photographers back in 2014, the question that I’ve gotten asked most often on social media and in person is, “How do you edit your photos to look like that?” My answer is always the same, yet people never seem to believe me. My editing consists of curve layers and Lightroom RAW processing. Yes, there is a technique to editing, but I will be 100% honest with you—if you don’t shoot things right in camera, you will never get the effects you are looking for.
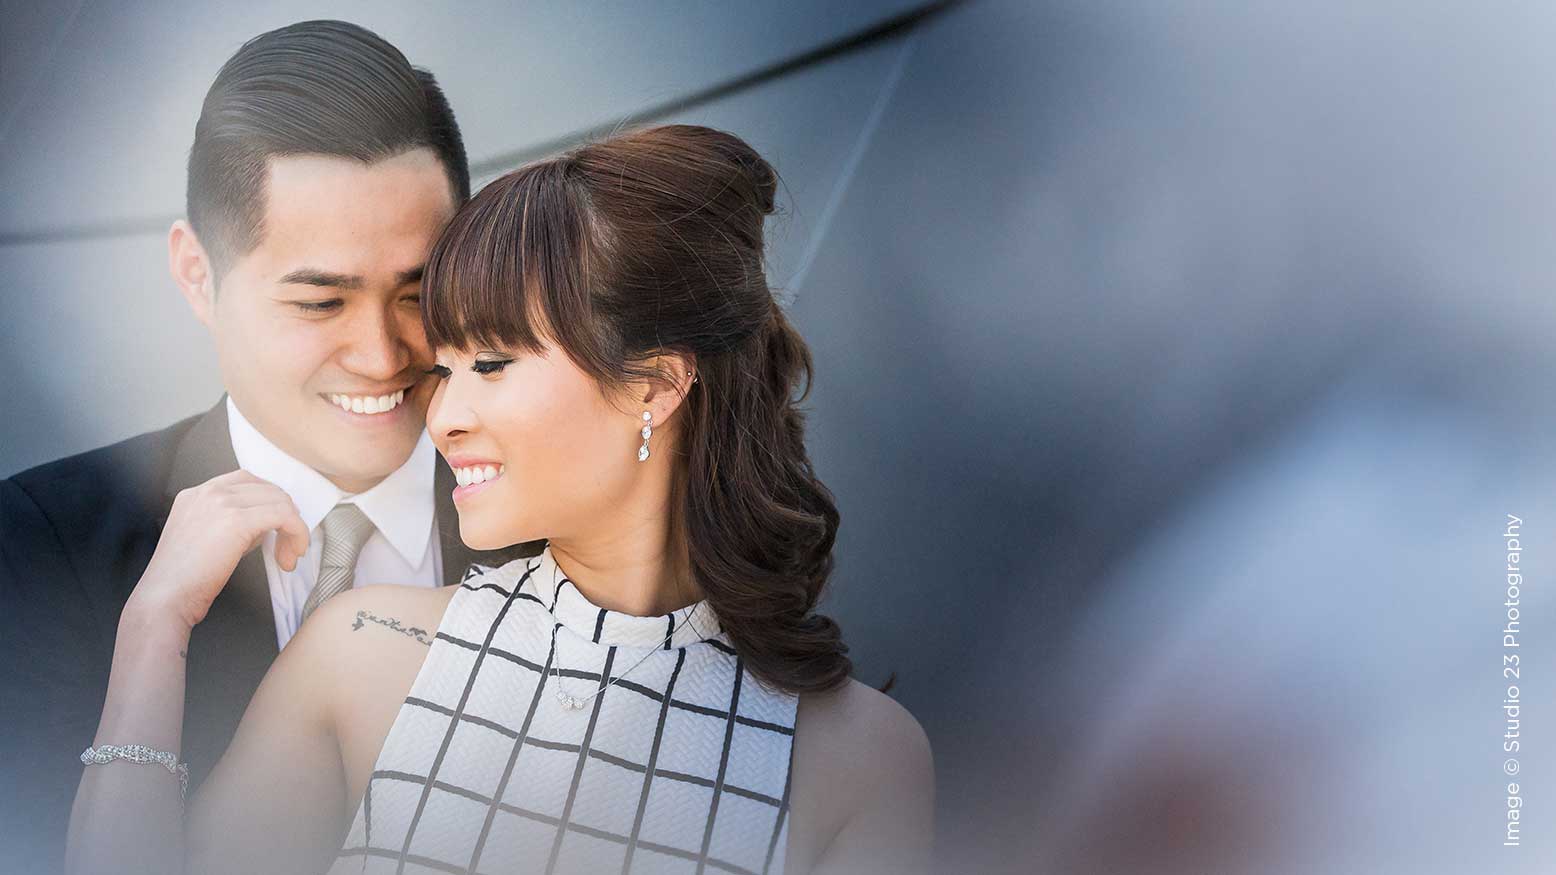
Photographers seem to obsess over editing. They treat it like it’s the special sauce that, once mastered, will bring you in new clientele. Nothing could be farther from the truth. I will let you guys in on a little secret. Our clients come to us for cinematic, dramatic environmental portraiture, yet the images that they love, and the ones that we choose for our portfolio, are typically the ones for which we diverge the least from the original file.
The reason for this is that, as photographers, we are not graphic artists. Therefore, most of the time when we spend time editing an image and manipulating its pixels, we are making it look less believable to the eye. About a year ago, I took a look at much of my work, and made the conscious decision to tone the Photoshop down a bit in favor of a more realistic scene, and to really focus on in-camera proficiency.
Does that mean we don’t edit our images? Of course not, it just means that rather than run two layers of plugin x over an image, swap a sky, or HDR it to unrealistic levels, we are deciding to work using curves to dodge and burn selectively, and do basic RAW processing and conversion. Even when outsourcing our image competition prints or portfolio pieces, we are opting for dodging and burning, light sharpening, and more realistic tonal ranges on our images.
Our clients see their images almost straight out of camera. When we started outsourcing our edits, I stopped shooting for “fixing it in Photoshop” and switched to shooting for the final image. The reason for that is simple: workflow. There was only one way to give the clients the best balance between final imagery and efficiency, and that was to get it right in camera. I have even toyed with the idea of delivering my clients the JPEGs as their digital negatives.
The point I am trying to make with this long-winded intro is that, in order to progress in our work, it may be time to spend more time behind the camera and less in front of the computer. That’s what we all tell ourselves is our goal anyway, right? Ok, so let’s do it.
Tip 1: Make Your Light Source Realistic
It’s time to stop underexposing your scenes three stops while your subject is in the shade and then blasting them with a hard flash source. It just doesn’t look real. Good light means you will illuminate your subject, drawing your viewers’ attention to them without it obviously looking like flash. The key to achieving this is balance. We typically operate our scenes in the one-stop underexposed background range, and if the scene has no natural contrast, then it’s usually one-third to two-thirds of a stop. We don’t need to make it look obvious that we are using flash.
Flash isn’t a photography style, just like natural light isn’t a style. They are both tools we use to accomplish an objective, which is to bring the viewer’s eye to your subject.
Tip 2: Control Your Light
This is another one that is often overlooked. If you are lighting your subjects from above, you will likely need to feather your light source if the floor is visible in your composition. We typically want to light our subjects with the edge of our light source, because that will give us the most gradual light fall off anyway. It’s completely typical for us to be pointing our light source one to two feet over our subjects’ heads to avoid spill on the floor.
Use grids when in small spaces to control your light spill and make your room look realistic. You can also bounce light off walls while using flags in order to get softer light, but make sure you are controlling your angles.
Tip 3: Focus on Your Story
Incorporating story into your posing or posing sequences can take an image from good to great. You should always ask yourself what the story you are trying to tell is. I will argue that a couple staring off into a light source is not a strong story on its own, but if combined with other images that supplement it, it can be a great set for a couple’s wall.
More often, however, I think you will create a better emotional connection to your clients’ imagery by asking them to interact with one another. It’s one thing we have done with our work in 2019 that has not only helped increase our clients’ satisfaction with their images, but also the amount of revenue we are able to generate. Pro tip: Happy clients spend more money.
So in order to create connection between your clients, I recommend giving them prompts when posing. Ask him to caress her cheek or kiss her shoulder. Ask her to jump on his back. All of these things will give you natural emotion and help them to have fun with their shoot.
If you read last month’s article, you know that the correlation between their experience with you and their perception of their images are directly related, so use this as an opportunity to create something great for them.
Tip 4: Check Your Compositions
Ok, let’s talk about a truth—photographers have issues shooting straight. When I made the switch back from mirrorless to DSLR, I noticed that right away, I have a built-in right lean on my vertical images. I was conscious of that and able to correct it by activating the grid display in my optical viewfinder. If you don’t have this enabled, go do it now, because it will help you to line up your lines so much better.
When I first begin to train photographers in our style of photography, the main issues that I run into deal with composition. You simply can’t fix bad composition in post-production. It has to be done in camera. So look in your frame for ways to fill negative space. Look for ways to find balance. Look for ways to eliminate distractions. Clean up the borders of your composition. All of these things are crucial to developing beautiful compositions for your clients.
Tip 5: Be Meticulous about Details
This will be the most important tip that I leave you with. It is incredibly important to be meticulous with your details. Commit yourself to one month of not using Photoshop to correct things in your images that could have been fixed in capture. Make sure you pay attention to your backgrounds, your highlights and shadows, and the distractions in your posing.
More importantly, be aware of your clients’ insecurities, and work to fix them through light, shadow and posing. It’s important to pay attention to attire as well; often, clothing can become a distraction if not managed properly.
And let’s talk about something obvious, like camera settings. If you are shooting bridesmaids interacting with each other in a bridal room, you should not be shooting at F/1.8! Just because your lens is fast doesn’t mean you need to use it. During bridal prep, we are often shooting at F/5.6-F/11. This means my ISO is often around 6,400-10,000, but truthfully, it doesn’t matter with today’s modern full-frame cameras ,because they are so great at working with low light.
Conversely, you should not be shooting moving subjects at 1/125th of a second with a 70-200mm lens. I know this stuff sounds basic, but raise your hand if you make these mistakes during a wedding, when a DJ gives you no time to set up your stuff and all of a sudden the grand entrance is happening. All wedding photographers should be raising their hand reading this right now. It happens all the time. The way that we stay ready for that is through repetition and creating a repeatable set of starting points for different parts of the day.
There is a saying that some people would rather be lucky than good at something. The truth is, if you become good at something, you will get lucky much more often. So work to perfect your in-camera skill set and help yourself get work done faster on the backend, have happier clients, and save your sanity long-term by creating work that will not be dated in 10 years.


