
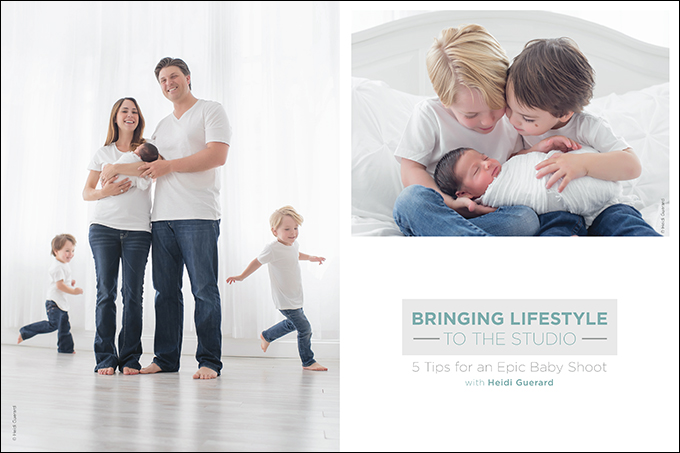
5 Tips For An Epic Baby Shoot
I never dreamed that I would one day own a portrait studio. I have big dreams, but studio owner wasn’t one of them.
When I started photographing babies, I worked off of my laptop and traveled to clients’ homes. The commute into Boston, paired with three- to four-hour sessions, quickly took their toll on my young family. Having a small space where clients could come to me seemed like a logical solution.
I opened the doors to my first studio in 2009. It was a tiny space with big windows and cheap rent. Signing the lease was terrifying. It was a humble start, but the decision to open a studio ultimately launched Heidi Hope Photography into what it is today.
Today you can find me running a 3,000-square-foot studio alongside my husband, Shaun. We employ three photographers and a support staff while hosting workshops and traveling to speak.
My studio is a dream I never even knew I had. I still pinch myself when I walk in and flick on the lights. Much has changed since the days of lugging a carload of newborn gear to my clients’ homes. One thing you learn early on as a studio owner is that the old adage is true: Time is money. Every hour that your doors are open costs you.
Whether you own a studio or not, streamlining your business practices and becoming as efficient as possible in your sessions doesn’t just mean bigger profits, it means shorter days and more time with your family. Eventually I realized that shaving half of the time off my newborn sessions would mean a big difference for our bottom line and our schedule.
It’s easy to streamline a newborn session when the baby is a sleepy angel, but what could I do if the baby wasn’t sleeping? How could I still create beautiful, memorable portraits with a baby that wasn’t putty in my hands during that first hour? What about all of the older babies who missed the newborn-photography window?
Time wasn’t my only concern. A few years into photographing clients in our studio, I started to feel bored. Eventually in a studio, you can’t help but feel you’ve done it all. Though I didn’t miss the commute, I missed the unique challenges each new home provided. I missed the energy and spontaneity of lifestyle photography. I missed scouting for the perfect background or pocket of light. I grew tired of studio backdrops and the same poses over and over.
I knew I had to make some changes to my work to keep the passion alive.
That’s when I began incorporating lifestyle-inspired photography into my studio work. Not only did my sessions become more interesting and fulfilling, my clients had more fun. I began providing larger galleries, and my sessions were over much faster. Long gone are the days of three-hour newborn sessions. All of those benefits equal bigger sales, higher profits and happier clients.
Of course, when clients come to a portrait studio, they expect a certain type of portrait. They want all four kids in focus and smiling at the camera or in a traditional pose to hang over the fireplace. I couldn’t neglect those requests.
At the same time, our studio is well known for our creativity and unique perspective. Our clients want a one-of-a-kind experience, portraits that aren’t like everyone else’s. How do we achieve the consistency and quality of studio work while incorporating the fresh energy of lifestyle photography? Learning to balance these different desires through studio photography with a lifestyle spin has been a large part of our success.
Try these five tips to add a little lifestyle to your baby sessions and give your clients the best of both worlds.
- Pose, unpose, repeat.
Pleasing our clients is our number-one job. We always have a presession consultation and write down all the must-have images that families are hiring us for. I call these the money shots because they always order them in the end.
Though our generation takes millions of photographs each day, we very rarely have quality portraits of the whole family looking at the camera. That is something consumers are willing to hire a professional for. It is always at the top of the money-shot list.
I like to ensure we get the money shot at the very beginning of the session, and then I allow myself to be a little more creative as time goes on and the family loosens up.
To do it, I begin with a traditional pose, take a few photos and then encourage my subjects to loosen up and interact within that pose. This ensures the strong composition and great lighting of studio work with the beautiful expression and spontaneity of lifestyle work. While the portraits appear candid in nature, the pose and composition were well thought out and executed first.
For every pose you photograph, try starting with a formal pose, get the shot and then allow your subjects to loosen up. They can talk to each other, sing songs or play a game.
- Get personal.
One of my favorite ways to add variety and a personal touch to studio work is to have clients bring in some favorite toys or books. It’s a great way to get a family interacting and help them to forget about the camera. Sometimes we will have an older sibling read to a baby brother or sister. Other times we have the whole family read together. Favorite toys are also a great to keep busy one-year-olds in place.
I especially like incorporating these types of images at the beginning of the session when clients are still a bit nervous and stiff.
Personal touches help to make a session more unique and sentimental. All parents have an emotional connection to the stories they recall reading to their children. I can still remember my daughters’ favorite bedtime stories. Often, these personalized portraits become some of the parents’ favorites.
- Switch it up.
One of my favorite things about incorporating lifestyle-inspired portraits in my studio work is that I can play. Lifestyle photography lends itself to experimentation with different angles and lenses. When clients are interacting within a pose, I walk all the way around them to look for unique perspectives, or switch my lens out for variety. The more variety a final gallery has, the harder it is for clients to leave without all of them at the sales appointment. Plus, I have much more fun and often stumble upon some really great results.
- Get moving.
My best piece of advice to achieve natural expressions and real smiles is to get clients moving. Have them run, spin, play tickle monster—whatever it takes!
If I have clients in a pose and it just isn’t working, we get moving. Even if not one photo turns out from our silliness, just the act of moving helps them warm up to the camera and shake off the awkwardness. It makes the session more enjoyable, and all of the subsequent portraits are sure to be filled with natural smiles.
- Break the rules.
There are so many photography rules, especially in newborn photography. I was initially self-taught in newborn posing, so I missed many of the rules about how many fingers are supposed to be showing or which way the toes should be placed. I often joke that I’m a lazy poser.
That’s why I love lifestyle newborn photography. It allows me to focus on what I really love about newborns. I can capture the bond with family and the priceless expression of an older sibling. I can use light, interesting angles and raw emotion to create a beautiful portrait, whether baby is awake or asleep. In a final gallery, I tie lifestyle portraits in with more advanced posing so clients get the best of both worlds.
It’s real and it’s beautiful and it’s often imperfect—but isn’t life?


