
Creative Lighting for Self-Portraits with Sarah Clements
Want more information on this article? Get access to video content and additional supporting images. Launch the August 2017 issue of the magazine by logging in or signing up for a free account. Shutter Magazine is the industry’s leading professional photography magazine.
Self-portraits are not easy. They’re hard mentally and emotionally for myriad reasons, and they’re hard physically (especially if you don’t use an assistant). Lighting doesn’t have to be difficult, though. On the contrary, lighting your self-portrait should be a fun challenge. I’m going to outline some ways I’ve lit my own self-portraits to give you a good foundation.
One-Light Setup
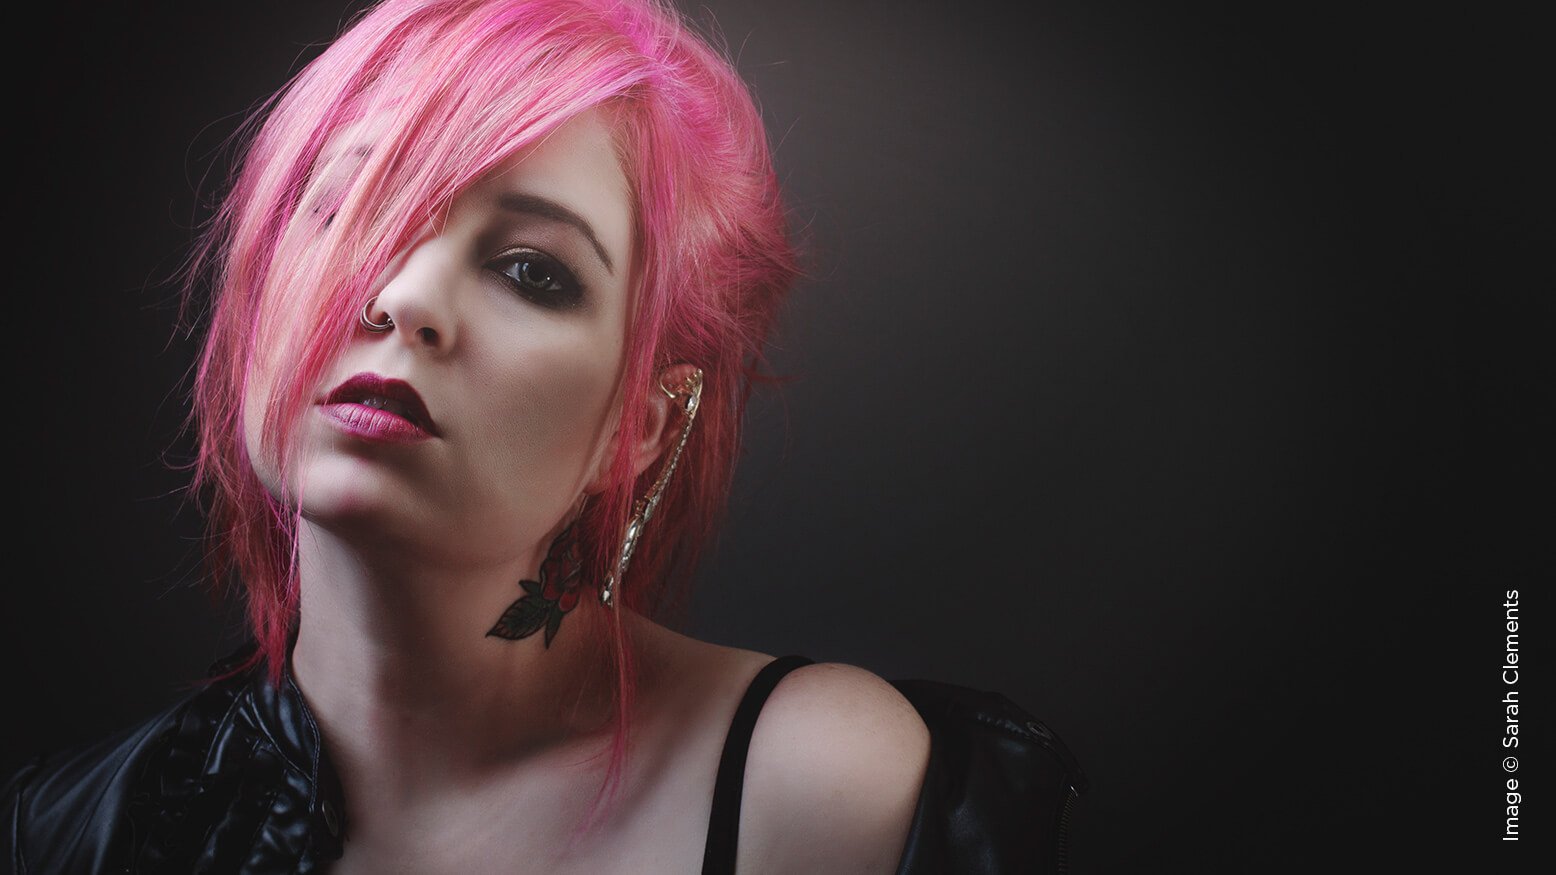
The one-light setup is by far the most common lighting I use for all of my portraits, especially self-portraits. It’s timeless. I can use my AB400 and beauty dish to emulate a Renaissance painting, or I can move it around a few inches and make the image incredibly dramatic.
My go-to is typically a Rembrandt style of lighting. To achieve this look, you need a strobe and a modifier such a beauty dish or softbox. Set the light to one side of the subject, approximately three quarters. You’ll want the light up high and tilted down. This gives you that lovely triangle of light on the opposite cheek—aka Rembrandt lighting. Or turn your face a few inches and get that beautiful loop lighting. These types of lighting will never go out of style and are easily achieved. From a headshot for your website to a painterly work of art, this setup is all-encompassing.
Alternatively, just shifting your light by a few inches can create some serious drama. Pulling your light up higher and having it more directly overhead can give you dramatic butterfly lighting. This style looks especially lovely in high-contrast images and black and white. This look was popular in Old Hollywood; the screen sirens of the past were the epitome of glamour and class. Use this setup to create an image worthy of the big screen.
Now you know how to effectively use a single light and modifier to take some classic self-portraits. Let’s move on to something more creative.
Natural Light
If you are a natural-light photographer, you can still get some killer self-portraits. Not having a light is not an excuse. In fact, whether you have a light or not, I encourage you to get creative and see the light. Look through your studio, through your house or outside. Challenge yourself to shape the light and create something grand. And don’t think you’re limited to a certain time of day. Sure, the golden hour is gorgeous, but there’s zero challenge in that. Use direct sunlight. Use filtered light. Use shadows. You shouldn’t be afraid of these things. Use them to your advantage.
For these example images, I used light from my window in my living room. The sun was shining straight through, so I used this to my advantage. The light was coming through the mini blinds in a perfect way, creating delicious shadows, so I set my camera up in the window and positioned myself below the window pane, with the blinds angled down toward me. I also used the hat I was wearing to add an extra shadow and create more dimension.
In this second example, the sun was rising and I didn’t have the awesome shadows I had just minutes before. I still had one sliver of bright light coming in. I knew this could really pop if I could position my eye in just the right spot. I accomplished this by lying on the floor and holding my Canon 6d right above my head. (Bonus about self-portraits: No one is there to see how ridiculous you look. Double bonus points for not dropping your camera on your head.)
These were just two quick shots I took in my living room. I didn’t even bust out my tripod or go look in a different room. The possibilities are endless for natural light. Ask yourself how you can use traditional crappy light to your advantage. Learn to see it differently and watch a new world open its doors to you.
Creative Lighting
So you can take photographs with studio lighting and natural light, now what? Now it’s time to get creative. Push yourself and see what’s available to you. How can you think outside the box?
Do you do in-person sales using a projector? That’s a fun new light source. Hook that sucker up to your laptop and pull up a picture of something fun: funky tree silhouettes, an underwater image, gorgeous clouds. Use your imagination to create a real-time in-camera overlay.
For this image, I put on a YouTube video that showed ink being splashed in water. I used Chromecast to play it through my projector and sat on my bed and posed away against my white wall. The different colors were so much fun to work with; it added a new dynamic that I hadn’t tried before. Try some looping videos of colorful glittery animations. Get creative with this one.
A projector is only one way you can use alternative lighting. What about the bedside lamp? Create something moody and warm. Remember all those cellphone selfie ring lights everyone had at ShutterFest? Guess what? They also work with a regular camera. Just clip it to something near you (or have an assistant hold it) and play around until you get a dramatic shot. The possibilities are endless if you open your mind.
Photographing yourself is a richly rewarding experience that every photographer should do at least once. It helps you direct your subject once you realize how hard it is to be in front of the camera. It helps you empathize with how vulnerable it feels to be in front of the lens. And there’s something satisfying about finishing an image of yourself that you’re proud of. It’s a lot of work, it’s not easy, and you’ll likely feel like giving up. But don’t. Step outside your comfort zone and use some things you’ve learned in this article to create an epic image—of yourself.


