Ready to incorporate some fine art photography into your studio portraits? In this video, Sal and team break down studio lighting techniques in this easy to follow how-to lighting tutorial for fine art photography. In addition, there is a little bonus section for how to create some double exposures to really create a unique work of art for your photography clients.
Equipment Used:
Camera: Canon EOS R5
Lens: Canon RF50 f1.2
Light: Westcott FJ200, Westcott Mega JS Apollo, Westcott 7FT Umbrella
Equipment: Avenger C-Stand
Team:
Photographer: Sal Cincotta
Hair & Makeup: Brandi Patton, Refine Beauty
Today we're going to talk about fine art photography lighting for your portraits.
What’s up, everyone? My name is Sal Cincotta. Today we are going to cover fine art portrait photography. Before we even get started, what is fine art photography? Well, the answer is different depending on who you talk to. For certain people, they say certain elements must happen for something to be considered fine art. But for others they say, “Well, as the photographer, as the creative, you get to determine what is fine art photography.” Well, that’s not very helpful. At the end of the day, this is just my spin on what I like to do for fine art photography. It’s a combination of lighting, it’s a combination of styling. But ultimately, you are the artist, you are the photographer, and you have to determine what fine art is.
Now, with all that being said, I’m going to give you some tips and tricks that I like, but some things to consider here, all the gear that we’re using, I’m going to list down in the description. So go down in the comments of the video on YouTube and I’ll have everything listed, because I am using some new equipment from Westcott that I’ve never used before in my shoots, so I think you’re going to like the way it looks. For the main light, I’m using the Mega JS Apollo by Westcott. This creates a super huge light source. And then for the light above, I’m using the Standard Umbrella – Silver Bounce 7’ with a large diffusion fabric underneath, both utilizing the Westcott FJ200 strobes. So we’re just using two light sources here, and it’s supposed to be soft. By the way, with both of these light sources, the light is indirect, meaning the strobe, the FJ200, is firing back into the umbrella, creating a very large light source before it comes straight down, versus a lot of softboxes will fire that light directly at your subject. Even through diffusion material, it’s a much harsher light.
And so that’s one of the things I like about this light setup. It creates this big soft, light source. So here are some simple rules to follow.
- Keep the background simple because you want to focus on your subject, not the background. I like to use grays or blacks, master style backgrounds with a subtle texture on it.
- Incorporate inanimate objects like flowers, jewelry, books, headpieces.
- Be creative with hair and makeup. This should not look like a standard portrait. Keep in mind, I believe with fine art and beauty portraits, there’s absolutely a fine line between the difference. It’s very close.
- Wardrobe has to be something unique, but feel somewhat vintage in my opinion.
- Watch expression. Again, in my opinion, subjects should not be smiling at the camera. Expression matters, so they should be somewhat neutral in their expression. I don’t want them looking happy. They’re just sitting there looking off into never, never land. Again, these are my personal preferences when I’m creating something that’s fine art.
- I like to use soft light. That’s why I have this setup here. I don’t like harsh light or just beauty portrait light for fine art, so I like big, soft light sources.
- Create your own work of art. You do you. Understand the rules, season to taste, and make something that feels right, so let’s get to shooting on this.
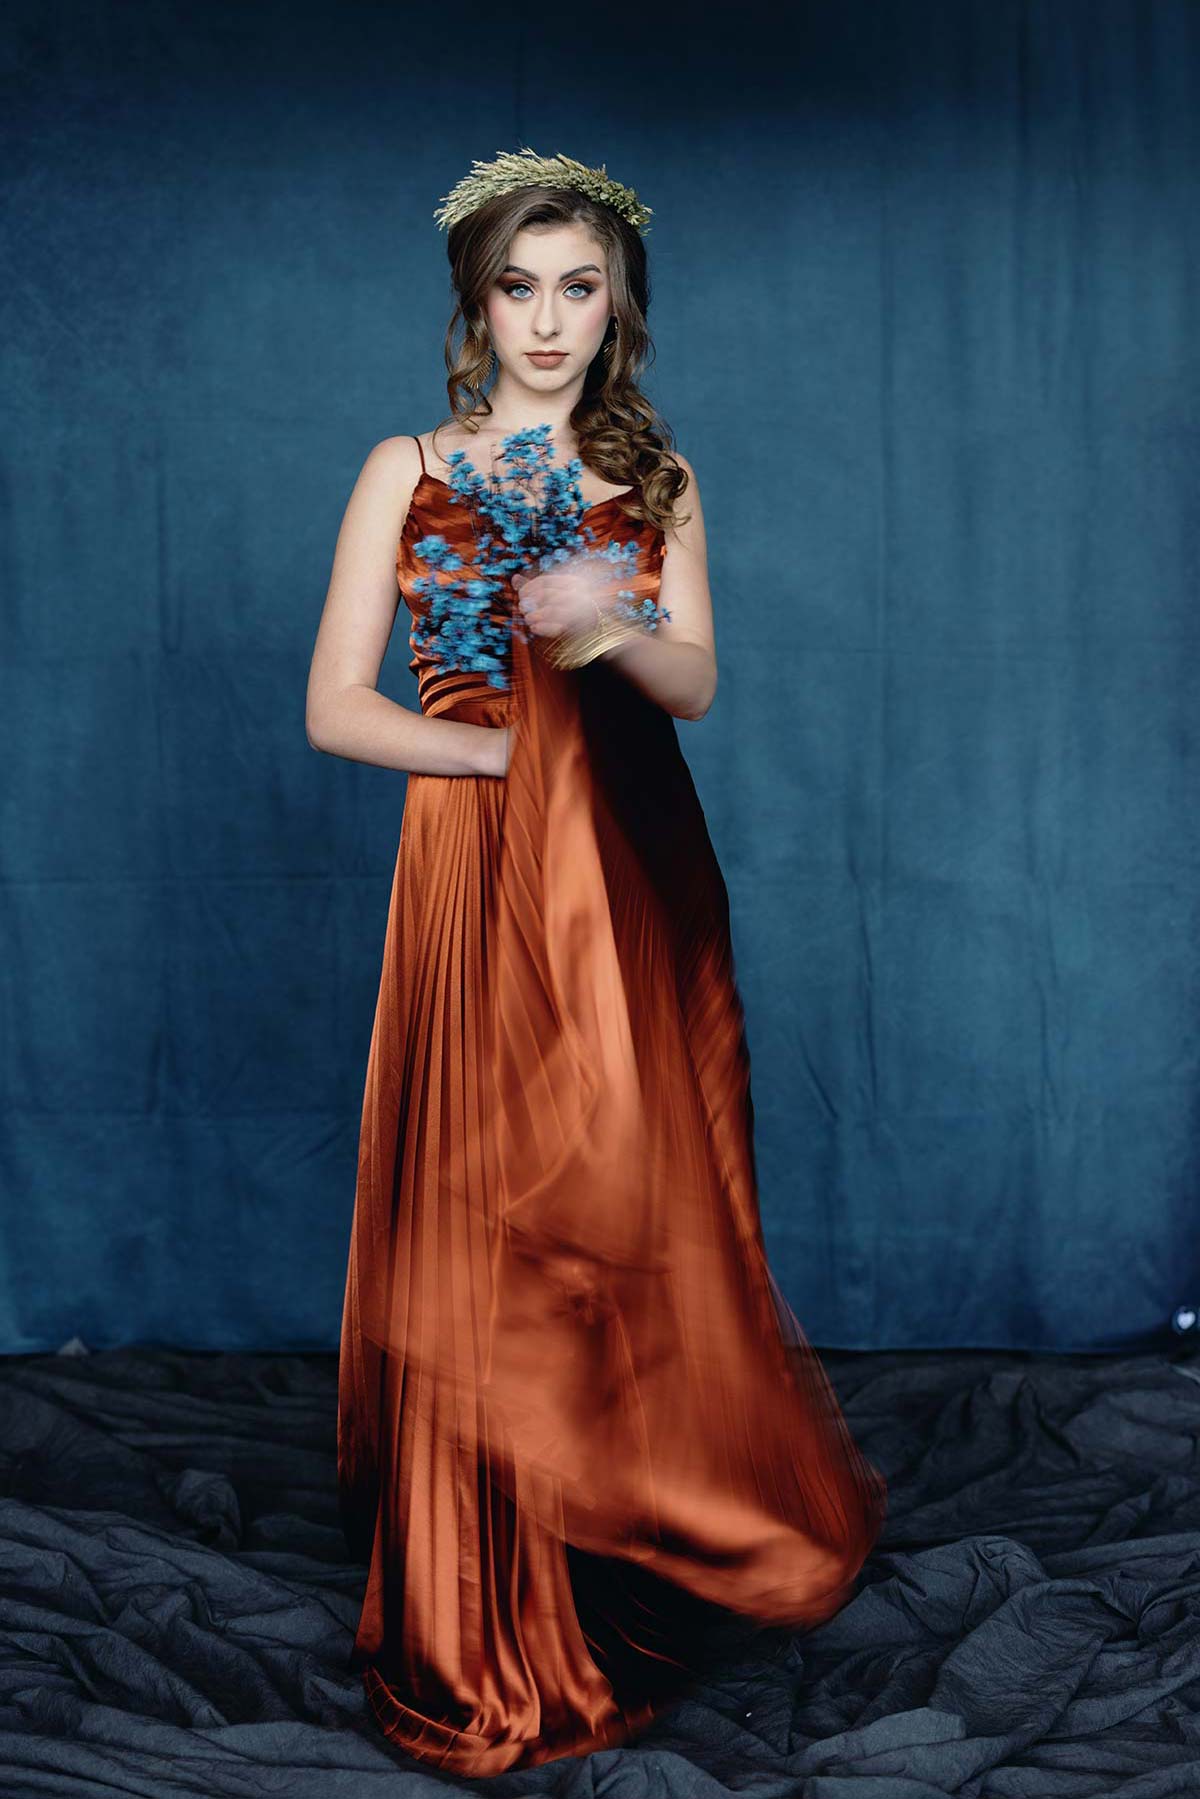
So for the main light, I’ve got 2.83 on the meter reading. And then for the overhead light hitting her hair, I’ve got 2.09. So there’s the half stop difference between the highlight on her hair and this big light source here off to the side. I do want to get one more shot of her standing with this lighting, so not much has changed. Then what we’re going to do is experiment, which I think is part of fine art, and do a double exposure.
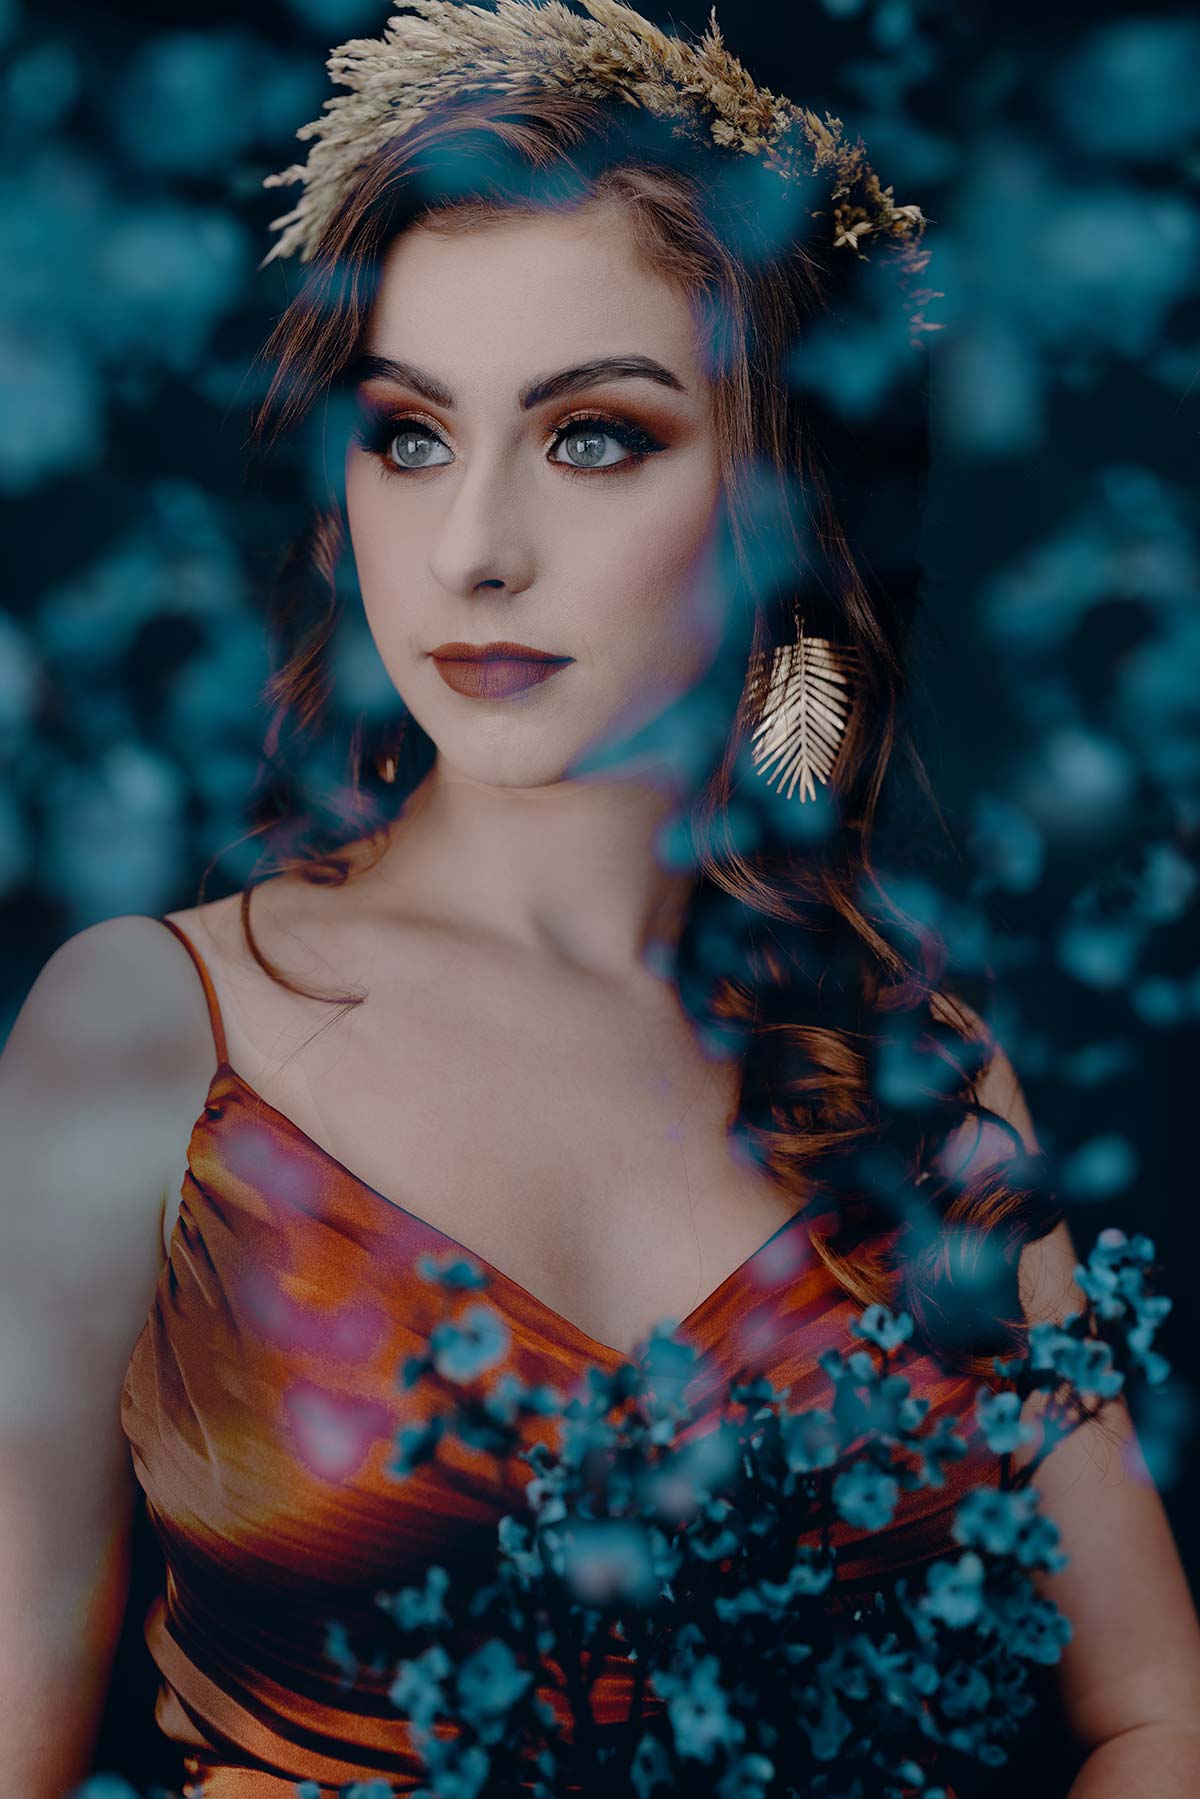
All of your cameras are set up a little bit differently, so what I’ve done on my camera is set it up as a shortcut menu item where I can just hit enable. Make sure to test it a few different ways, so you’ve got additive, average, bright, dark. For this particular shot, I’m using bright and its two different exposures that we’re going to use to create one shot. And what I want to do is get a picture of her, that portrait, and then use the flowers as a backdrop to fill in certain areas. So this is experimentation. This is what being a photographer and an artist is all about, so let’s do it.
The first frame I’m going to get, none of my exposure settings change. So I’m just going to get this nice portrait of her straight up. And now your camera’s going to give you a sense of what part of the image it’s going to use. Then I can start overlaying and to get a sense of what that’s going to look like. So I want to put it over the flowers, and I’m okay if some of the flowers are actually blurry for this. And let’s see what this is going to look like.
That is super, super cool. They look like little butterflies in the frame. I could lie like a YouTuber and just be like, “Yeah, it was just that easy. Two frames, magic,” but it wasn’t. We had to spend a little bit of time testing each of the methods, whether it was bright, dark, additive, and so that’s the “season to taste” I’m talking about. So I had to go through all four to see which one I liked and we ended up on that, and now I feel super confident and just continuing to shoot and do super cool stuff like that. And when you’re experimenting like that, all of the shots may suck. It’s okay. That’s what I think being an artist is all about. It’s that failure, learning from it, and growing from it.
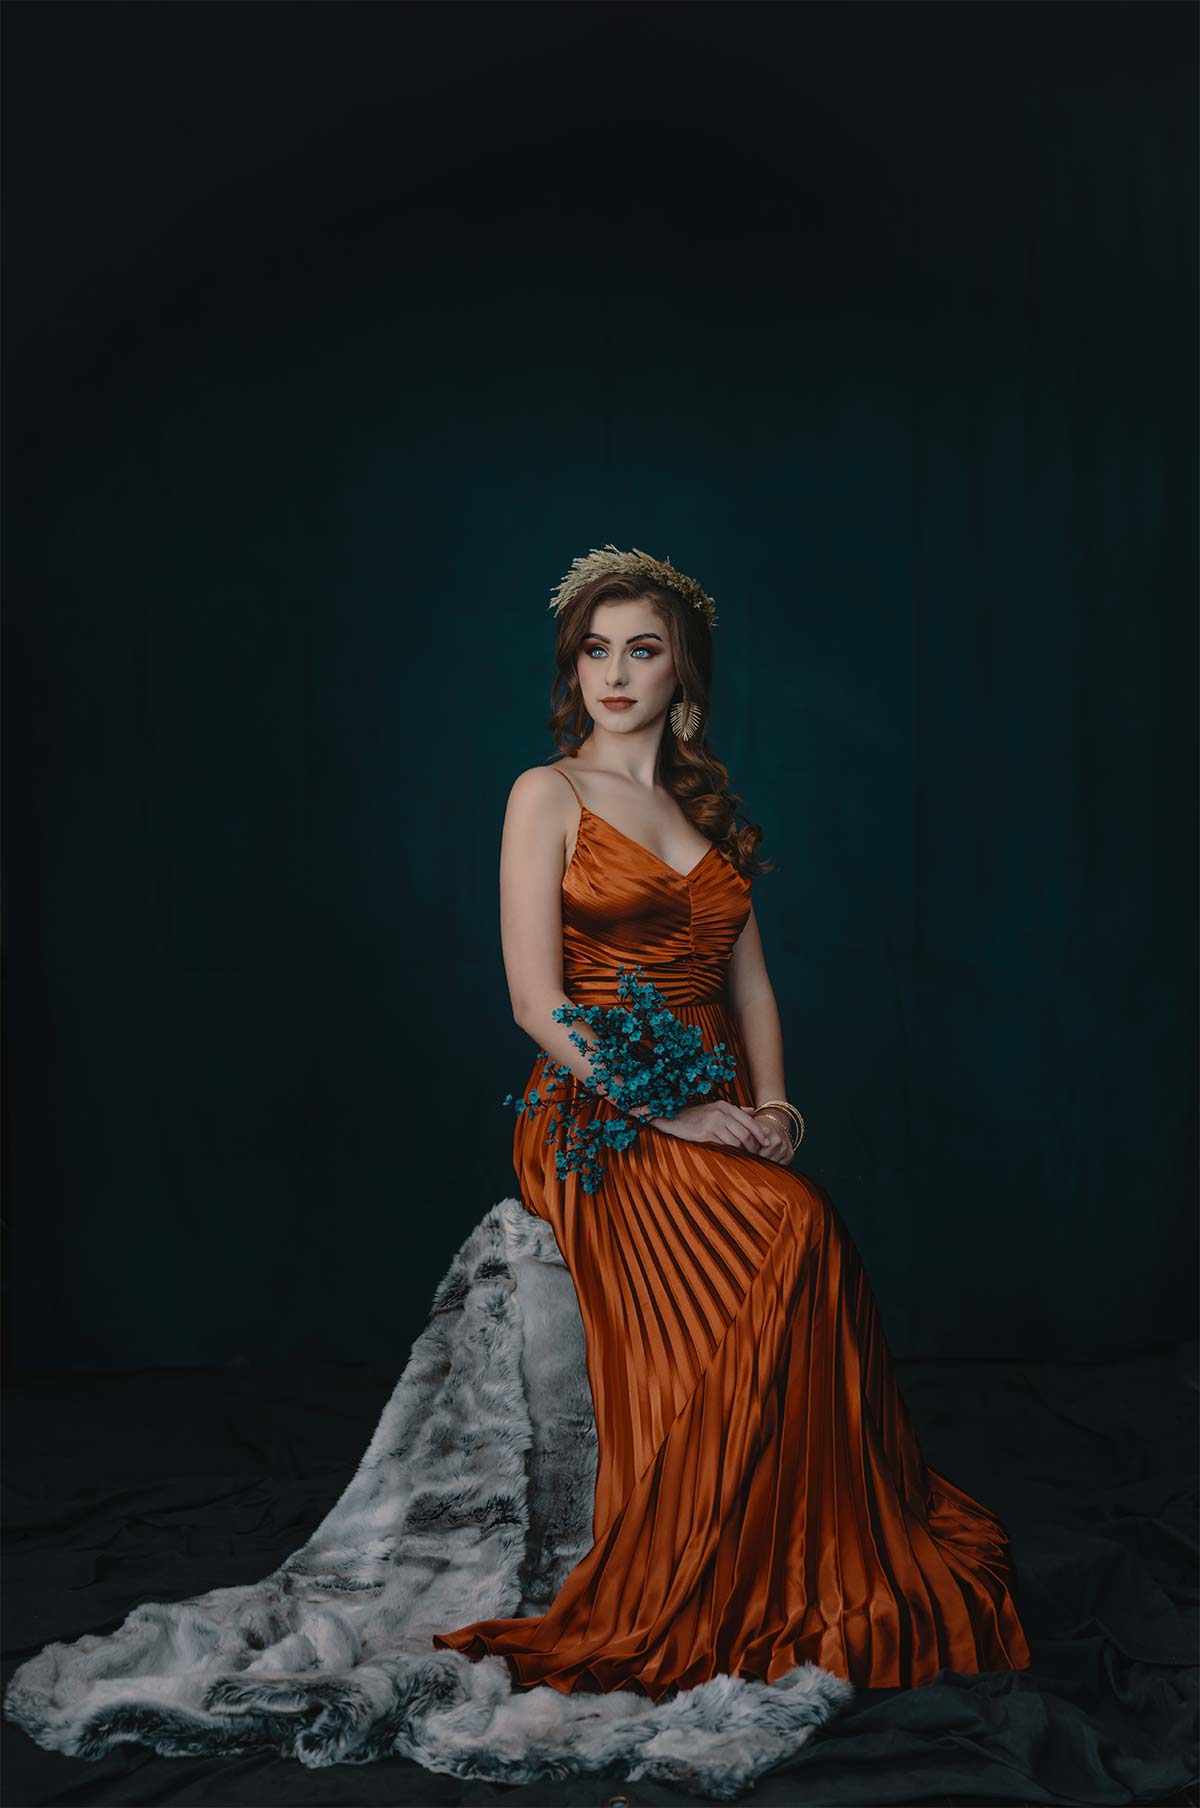
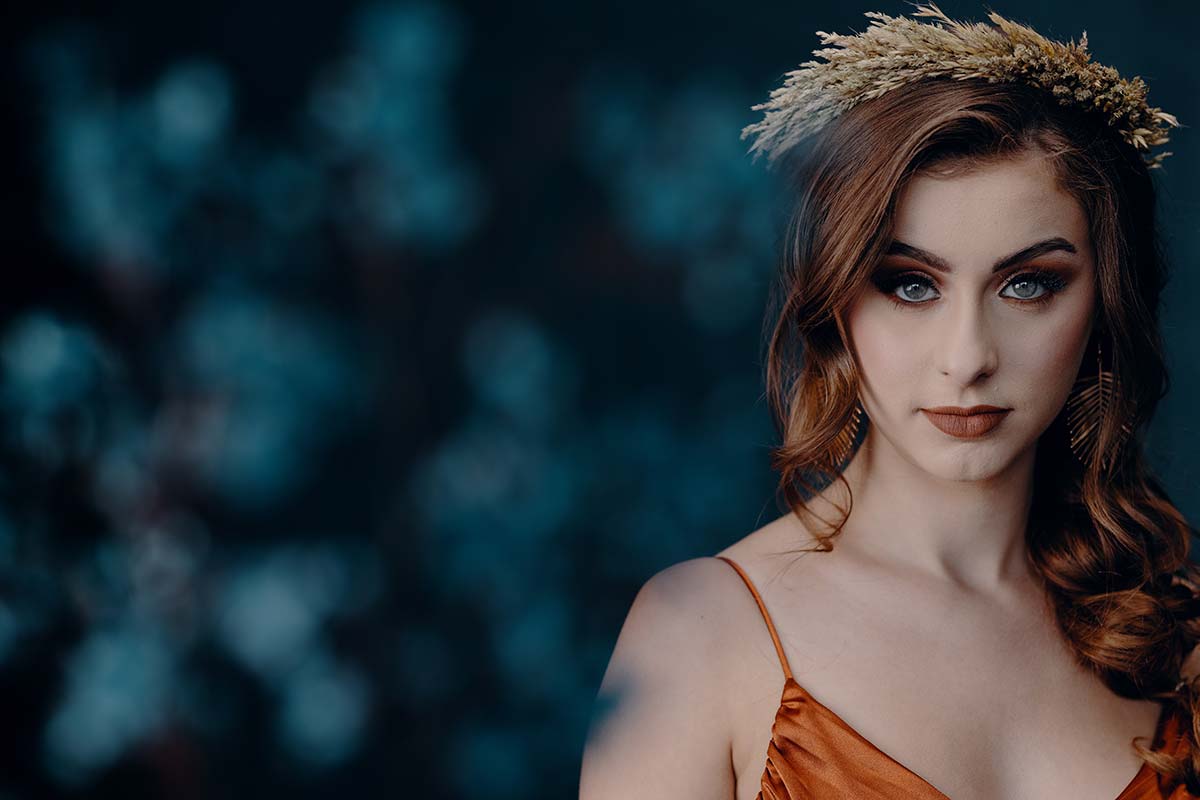
Final Fine Art Portraits
Settings: f/2.8 @ 1/200, ISO 100
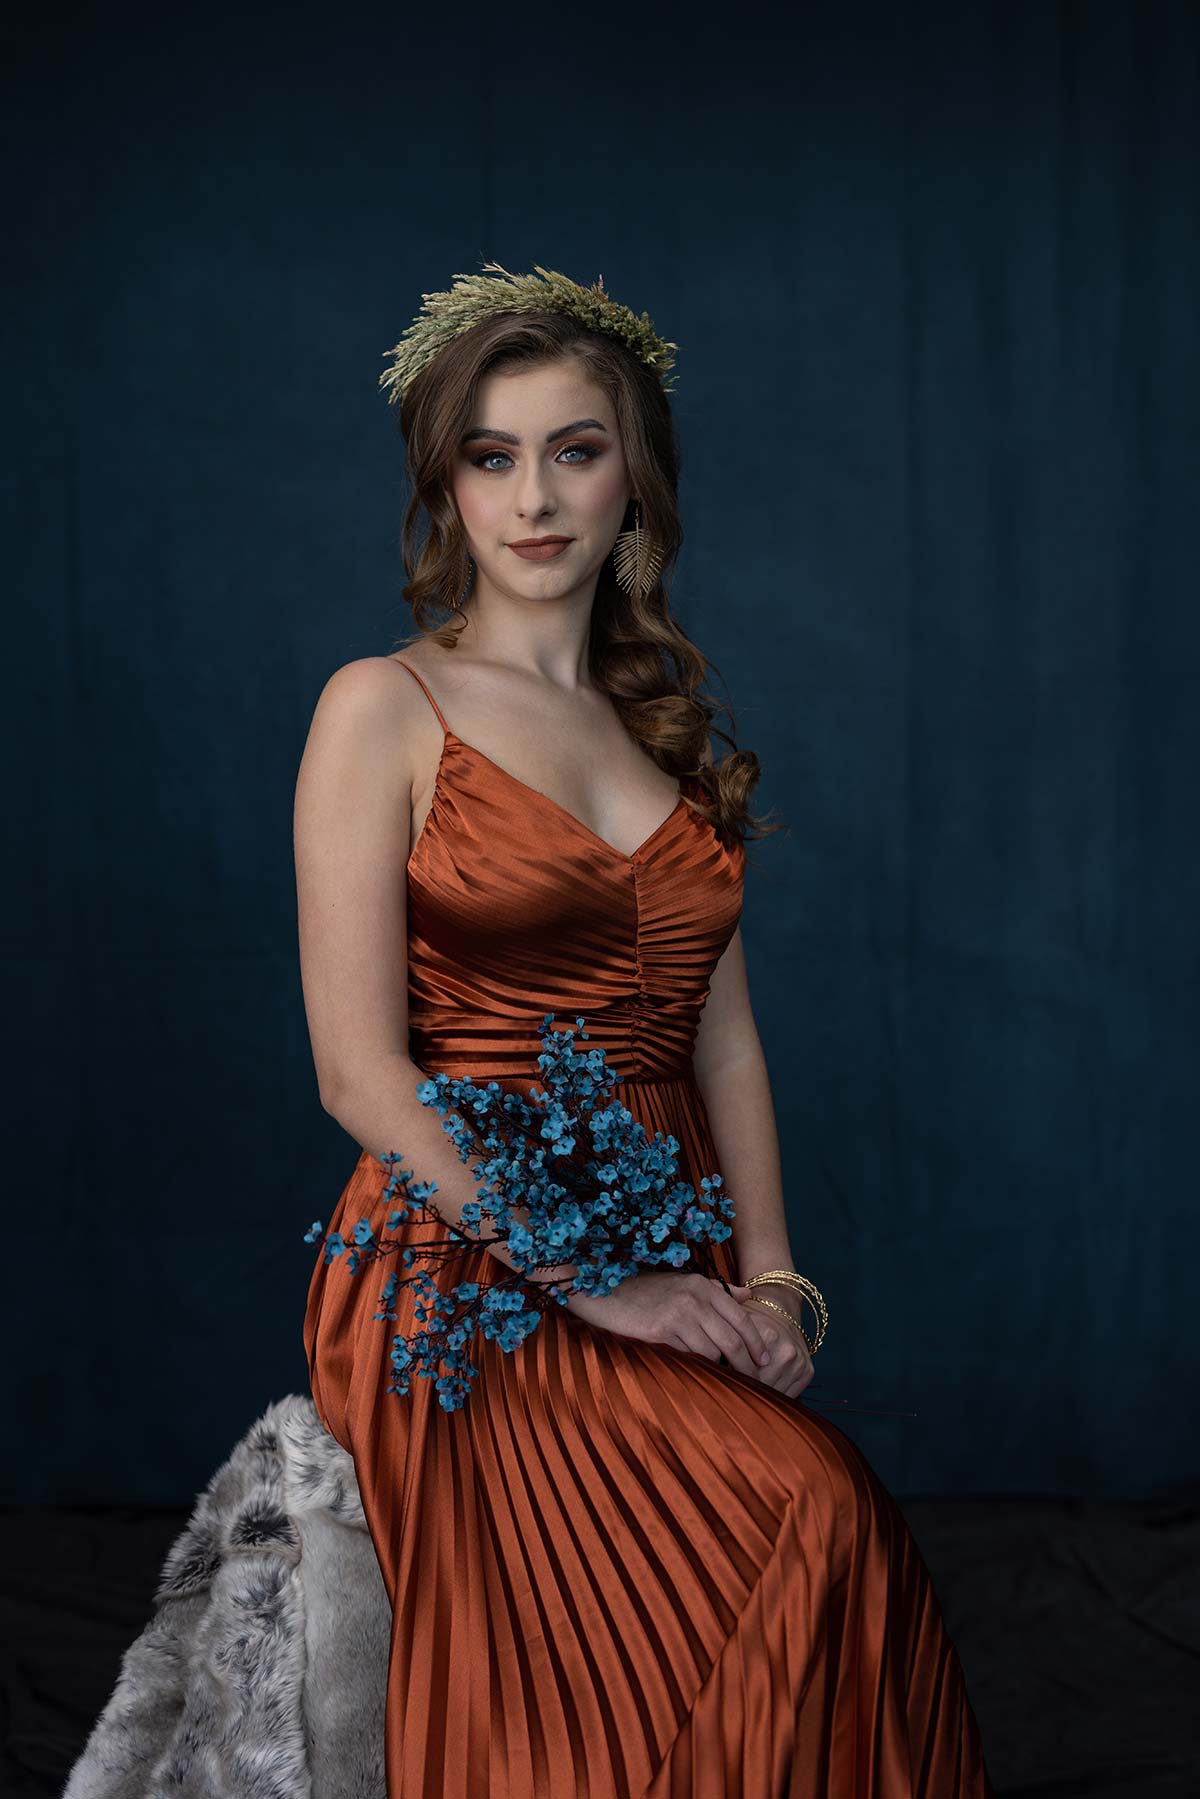
Settings: f/2.8 @ 1/200, ISO 100
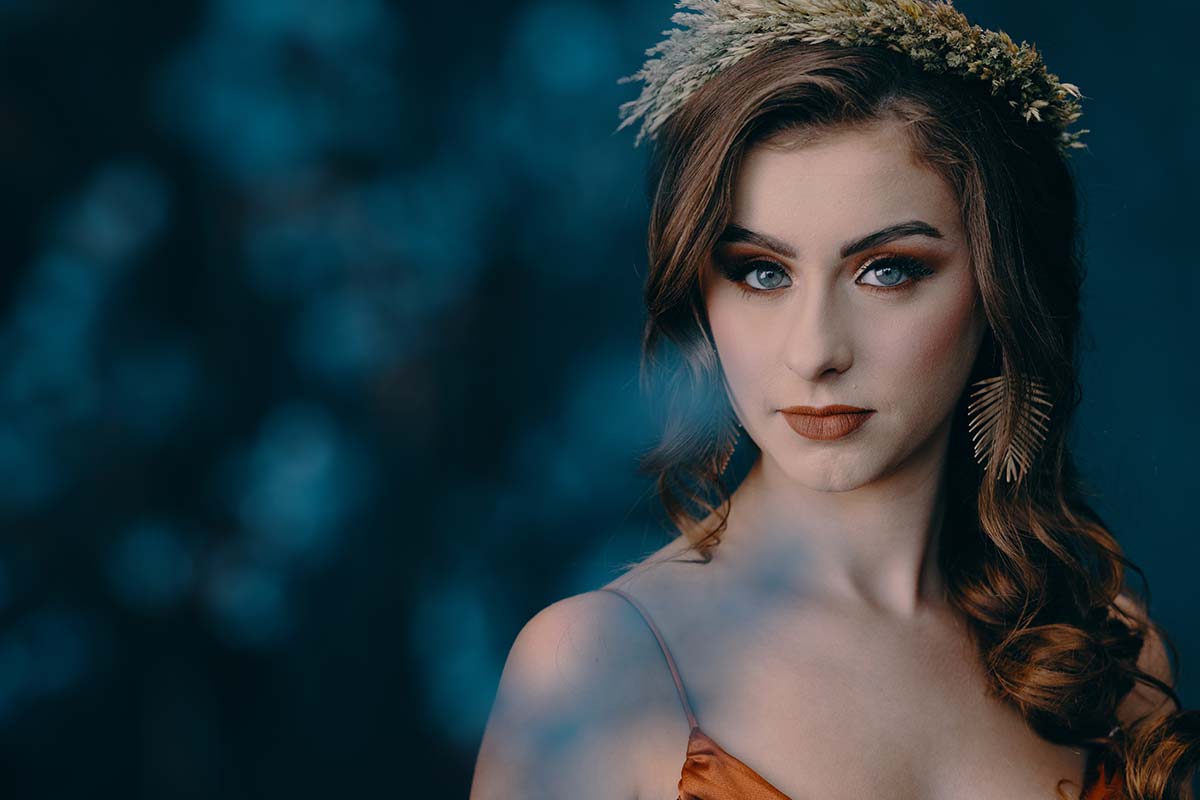
Settings: f/2.8 @ 1/200, ISO 100
Settings: f/2.8 @ 1/200, ISO 100

Settings: f/2.8 @ 1/200, ISO 100
Settings: f/2.8 @ 1/20, ISO 100
Final Fine Art Portrait Using Double Exposure