Gelled Lighting: Mysterious, Yet Familiar Magic with David Byrd
At some point in our image-viewing lives, we’ve all been enamored with a photograph where gels and color were used to augment it. Whether this image has a small kicker accent of gelled lighting or is created entirely with it, we respond to that infusion of color—the image has a larger impact on the viewer. In many ways, the underlying story of a certain image can only be fully revealed through the use of color and gels.
Stepping into gelled lighting, however, can be a tough road to navigate, as some of the initial attempts do not achieve the desired visual outcome. When I first began to use this image-making style, my work looked like a (colorful) hot mess. It was quite by accident that I discovered my fatal flaw, and that began my deep dive into the genre.
My first inspiration for this type of photography came from the beautiful work of Jake Hicks. His command of color and lighting in order to bring his subjects to life was utterly mesmerizing. I felt as if an he was creating an entirely new world, even though the pose of the subject, the clothing, all of it was somehow familiar. Surely, this was some secret that had taken years to perfect. I wouldn’t even know how to begin.
I was pleased to find out that it wasn’t a secret at all.
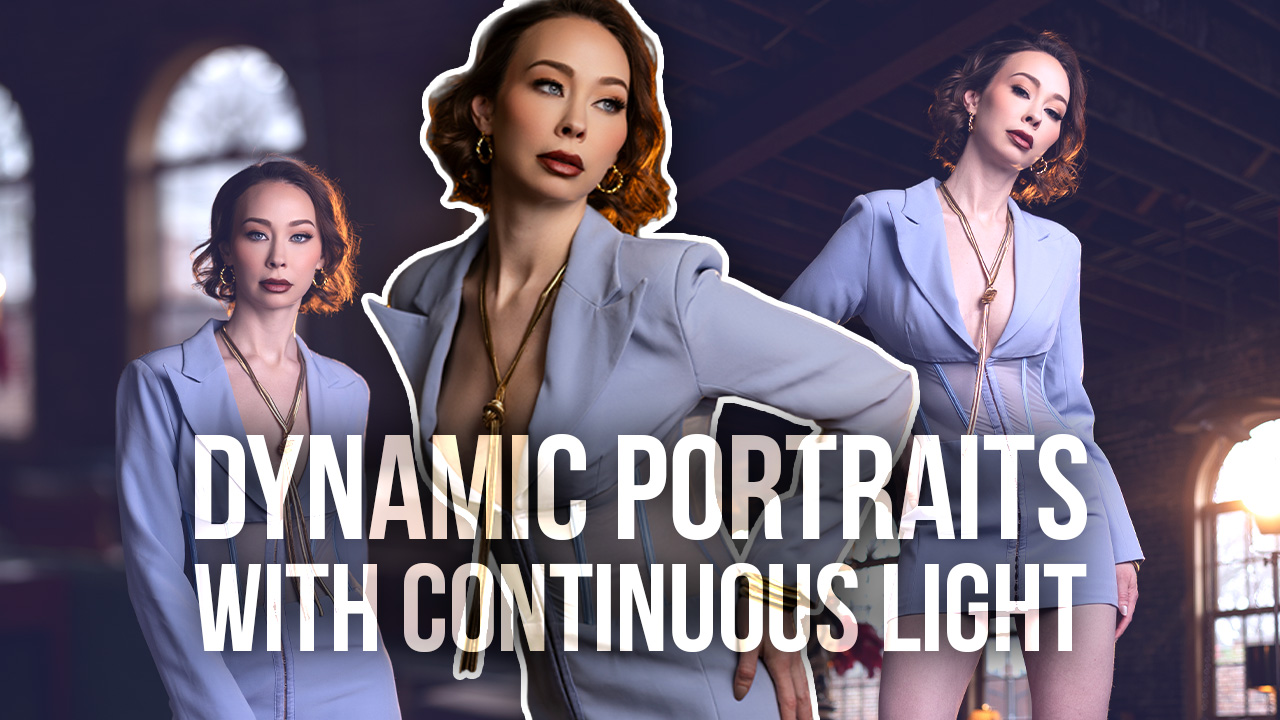
When I looked at where the light was hitting the subject, I quickly realized that this was a recognized lighting pattern for athletic images. You know the look: Your main light is slightly elevated in front of your subject, and they are rimmed on either side by two strip lights. That cast of three lights competing against each other usually creates a dramatic image that brings the details of the subject to life using the folds of the fabric, then sculpts them. However, that look wouldn’t be appropriate for a glamour subject … unless color was added to the mix.
Rad. I had figured it out.
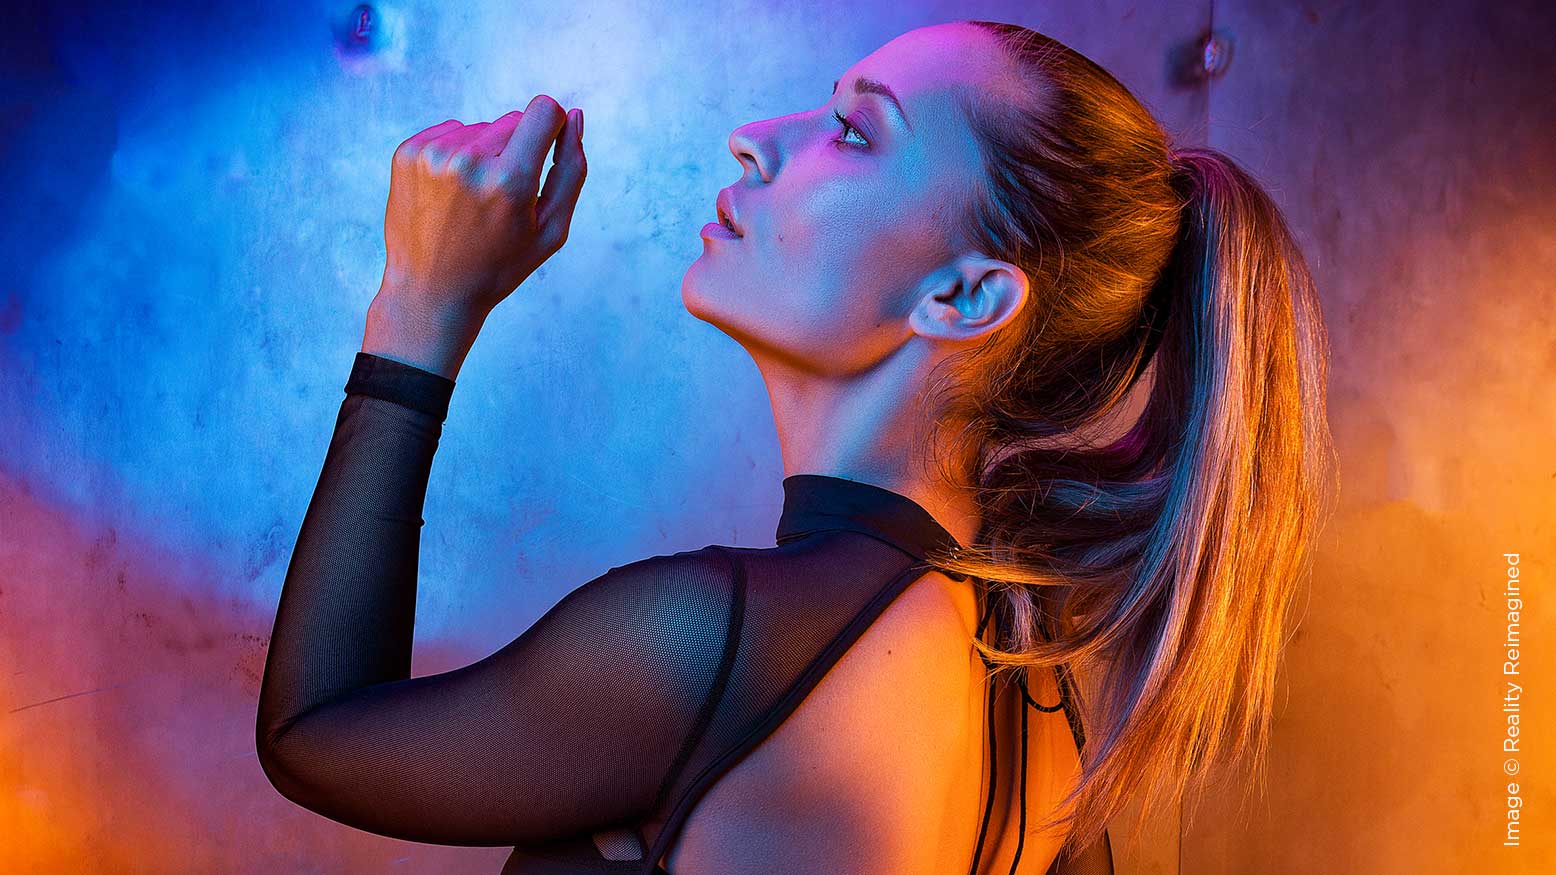
I rushed to the studio with a model and a concept of my own design, and got ready to make some magic. I set up the three lights, metered them all to be at a pleasing portrait level of f/8, and fired away. The image looked like the typical athletic, dramatic image. Perfect. I added color to the mix with a blue gel on the main and orange on the two strips. I chose that pattern because blue and orange are opposite of each other on the color wheel. I adjusted the power of the lights to make sure we were still at f/8 on all sides and then fired away.
ENTER THE HOT MESS
It looked like two colors were at war with each other, and the innocent glamour model was the casualty. I checked my settings, checked the color wheel, took another shot, and … same results. I moved the lights further away. Hot mess. I moved them closer. Hotter mess. I almost gave up, but accidentally took another shot out of frustration. Thankfully, the main light didn’t fire, but the strips did. I quickly realized the whole issue: the blue gel light was overpowering the others. This was simply because I had set them all to the same power setting.
So, I changed it up by reducing the main blue light to f/5.6 and left the strips (orange gels) as they were. I took the shot, and there it was—the beautiful image that I’d seen in my imagination.
I decided to do the reverse and test out the look. I brought the main back to the previous f/8 and reduced the strips by one stop of power. Holy cats. The image was vastly different—the blue was such a strong focus point. The orange caught accents in her body and clothing that had previously been washed out by the intensity of the light.
Over the rest of that session, I tested all types of power settings, camera settings, color combinations, positions of lights, and so forth. I even called a hair-and-makeup artist whom I absolutely love working with and said, “Can you come style my next model, and bring some Crisco? I want her skin to really shine!” (She informed me that it’s called “highlighter” and that she would be leaving the Crisco at home.)
After I started sharing my work on social media, I was blessed to get a ton of messages from the community telling me they loved the work and they would never be able to do that themselves. I started asking them the same question, “Do you know how to light a general, simple portrait with three lights?” Many proudly said that was easy to do. I then replied, “Congratulations, you now know how to do gelled glamour lighting. Hop to it!”
The position of the lights and the intensity you use in normal portrait photography are the same foundation you use in gelled lighting—the color pallet and dominant color are the only things that change.
YOUR FRIEND, THE COLOR WHEEL
The basis of all color theory is born out of this little circle of colors.
What colors can interact with each other, complement each other, and of course should never be seen together—all that is dictated by this wheel. Different art disciplines have their own theories as to what is “right” and “wrong.” These decisions is born out of hundreds, if not thousands, of years of experience in art and creation. What has amended the rules is the evolution of different artistic mediums. Photography and gelled lighting let you test new theories and perhaps evolve old ones.
A great place to choose your color pallet for a session in gelled lighting is the Adobe Color app.
This free service from Adobe allows you to select a main color and then bounce between all the various color harmonies to the associated color. For example, if you start with the color blue and choose its complements, you’ll see the color orange on the opposite side, as well as analogous colors of both.
With that in mind, put a blue gel onto one light and an orange one on the other. If you use the app and select the “Triad” feature—you can then see other options that might mix with your initial choice.
In this case, if we choose a deep blue, we’ll see red and yellow as the completion of the triad. Now experiment with a blue and red gel, or a blue and yellow. You can add all three, but that is where the blending of colors will create new ones (we’ll discuss that a little later). For now, the best course of action is to pick your main color and find the complements or the completion of the triad, and begin experimenting.
Some combinations are more favorable than others, but I want to stress that there is no “wrong” way of doing this. It’s up to the artist and the vision you want to create. Yes, there are color theories out there that will ring true no matter what you choose, but they do not mean you shouldn’t try something new. Experimentation is the key. To help you get started, I’ve included some of my standard combinations.
NOW YOU’RE COOKIN’ WITH CRISCO
When approaching hair and makeup, you have to make choices that are just as important as choosing spots on the color wheel. After all, depending on how many lights you are using, the makeup can be washed out or change significantly with each gel.
The best makeup application is the use of a highlighter product or glycerin. Glycerin will give the model’s skin a reflective surface for the lights to pop off of. However, it tends to provide a flat level of shine or specular highlight. The use of a highlighter creates a sparkle within that shine, due to the crystal infusion of its components. (I have yet to experiment with adding actual glitter to the glycerin/highlighter combo and painting the model to look like they waded through a unicorn battlefield, but that is my next adventure to go on.) The product used during this session was Glossier Haloscope in Moonstone.
Clothing choices play such a powerful role in all of this as well. For the images captured here, I chose to have the models each wear a predominately black costume made of dull fabric. I wanted you to see how the colors play off of their skin tones and the variety to be found therein. Of course, the color and light will play differently off of actual fabric versus skin, so how much clothing your subject wears is key.
To demonstrate how different clothing choices can change the tone of the images, I included a highly reflective piece of clothing labeled “Unicorn Suit.” Getting that invoice from Amazon was the highlight of that particular day.
PAY ATTENTION TO THE COMPLEXION SPECTRUM
As photographers, we always have to be prepared to adjust our skills and tools to the subject. Based on the unique aspects of the human being in front of us, we may choose to change the light angle to flatter their particular facial features. We can choose a different pose that alters body shape. Skin tones are no exception, and how the color of your gels harmonizes with various skin tones will showcase a unique result. Essentially, the color stays the same, but it takes on a different tonality as it interacts with skin tone. This is different than mixing colors to produce a new one. If you point a blue gel and a yellow gel toward the subject, inevitably you are going to start seeing a shade of green. The yellow and blue gels will have a different tonal range based on the skin tone of the subject, but they won’t change colors entirely. The farther you move into a pure white base of any aspect of your subject (usually clothing, hair or background), the less your gel colors will be seen.
In the examples below, I am using a blue gel for the main light and two magenta/pink gels for the strips on either side of the subject. As you can see, the two varying skin tones cause a small tonality change to the colors, but they practically remain the same. As with all skin tone variance, the only change you need to consider is the power of the light. The light may need to be increased to illuminate different skin tones or decreased to properly illuminate lighter hair color.
WHERE DO I START?
Begin with a three-light setup, placing the main light at a pleasing front angle to the subject. Now, add the other two lights, either to the side or slightly behind your subject. Let’s add some color by placing a blue gel on one of the side lights and red on the other. Sculpt the light until you see the pattern of highlight and shadow that you prefer. Does the red highlight speak to you more than the blue, or is it the reverse? Whatever color you favor, position that light to fall more onto your subject, and feather away the other color.
Now it’s time to add color to the main light itself. Place the blue gel on the main light, and place a red gel on the remaining lights. Move the lights around in the pattern that makes the most sense to you. Once you find your preferred method of lighting, change the gel colors by going to the color wheel.
Introduce two more lights, for a total of five. Balance the fourth light on a boom, directly above the subject. Select a color that is analogous to the main light’s color, and keep that light’s power a stop lower than the rest. For that fifth light, select a color that clashes with all of them, and point it toward your background. If it’s too much, then select a color that complements them all.
Once you find the favorable lighting pattern you prefer and the color theory to match, test different clothing choices and different make-up options—even throw glitter into the mix. Emboldened by that success, now photograph your subject on a white, high-key background. Keep them a few feet away from the background, and repeat your light pattern and color choices.
The possibilities are endless, and once you accept that this genre of photography is almost the exact same process as standard portraiture, you will be well on your way to creating some great gelled-lighting artwork!
In part two of this series, we’ll take some of the images into Photoshop and go over the best practices to bring them to life.