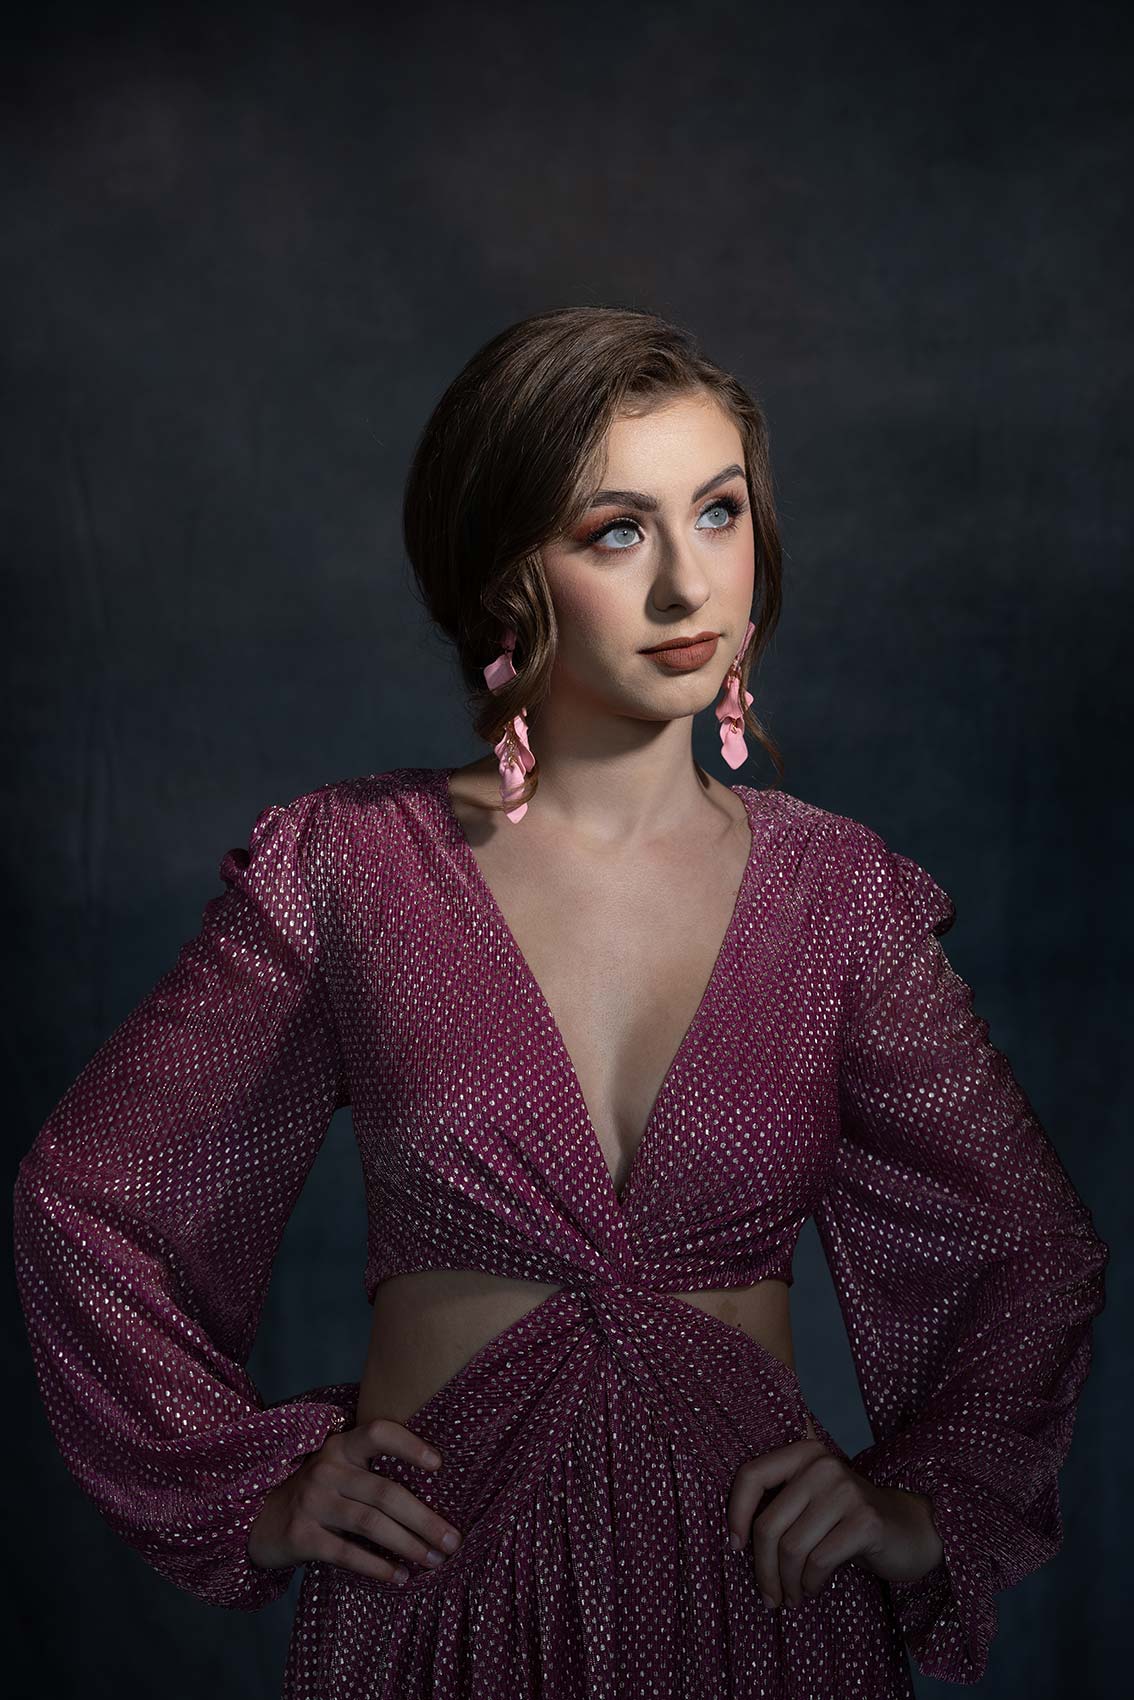
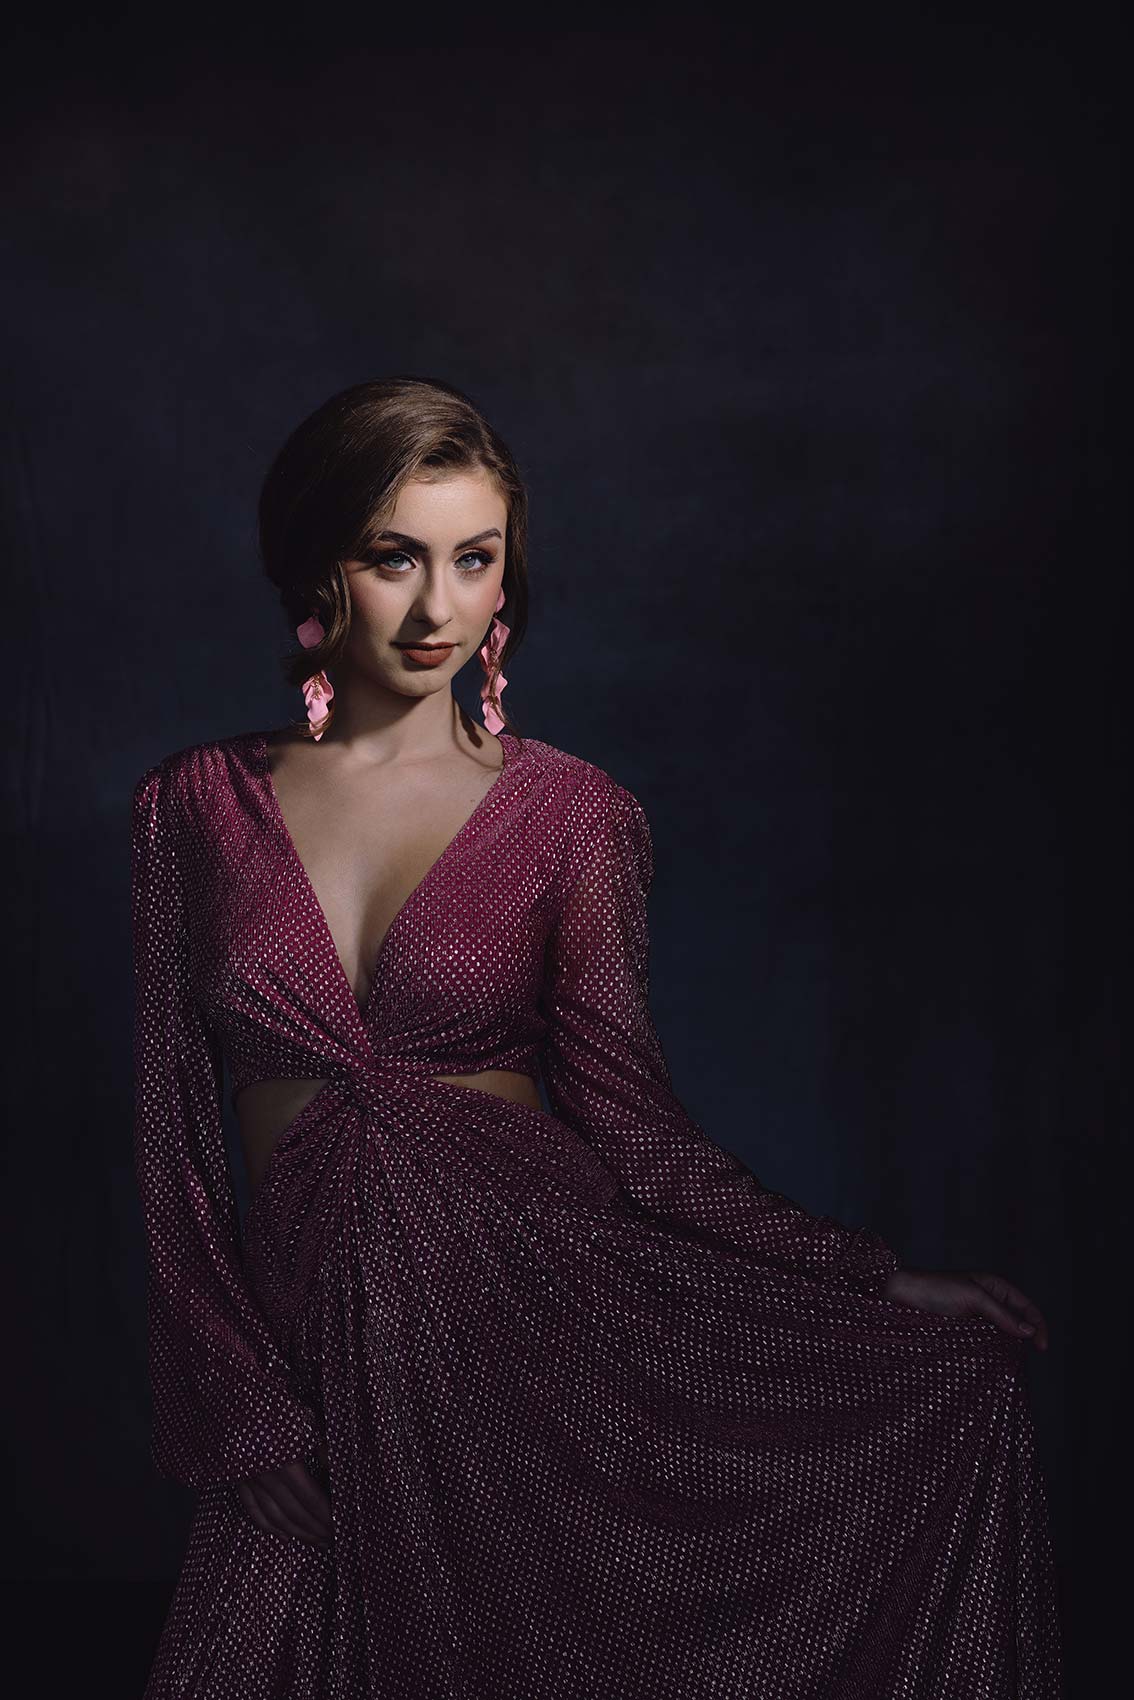
In this how-to photography tutorial we explore the differences between hard light and soft light when it comes to studio lighting techniques.
Equipment Used:
Camera: Canon EOS R5
Lens: Canon RF50 f1.2
Light: Westcott FJ200,
Modifer: Octa-Large Softbox, Grid System
Background: Pastel Bokeh by BackgroundTown
Team:
Photographer: Sal Cincotta
Model: Layla
Hair & Makeup: Brandi Patton, Refine Beauty
Ready to learn the difference between hard light and soft light? Let's get to it.
Today we are going to take two types of portraits, one using hard light and one using soft light. And I know what you might be thinking. You’ve heard it. Hard light is horrible. We can’t use hard light. We don’t get beautiful portraits. Well, nothing could be further from the truth. There’s a time and a place for each one. So let’s just start really super simple. What is hard light versus what is soft light?
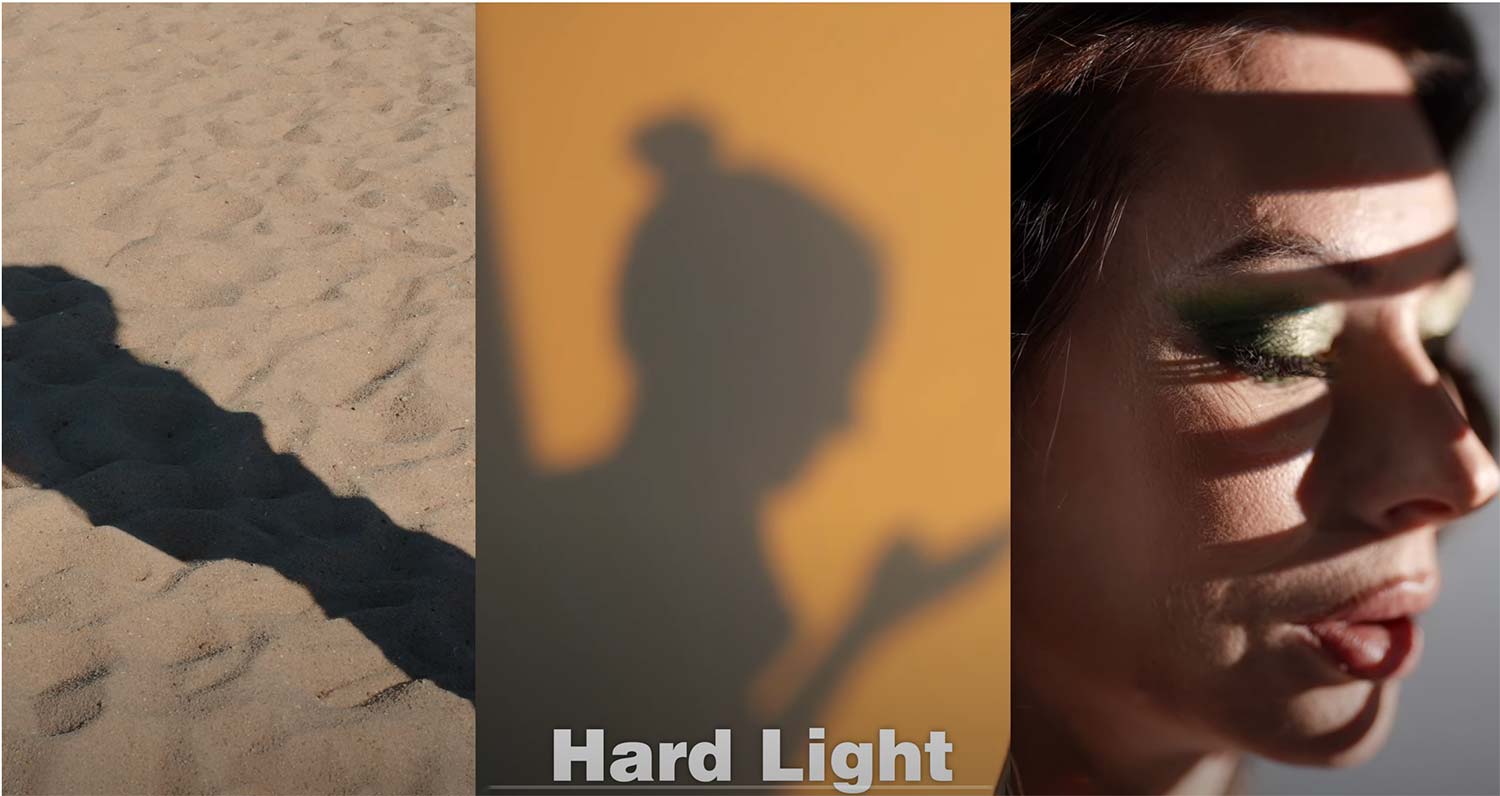
Hard light, it’s not only the sun or outside light sources. We could create hard light with a light bulb, and what it really comes down to is the defined shadow. So when you’re using hard light, you’ll see a very distinctive shadow line going from highlights to shadows, and that’s usually because you have a very focused light source and it’s casting that shadow.
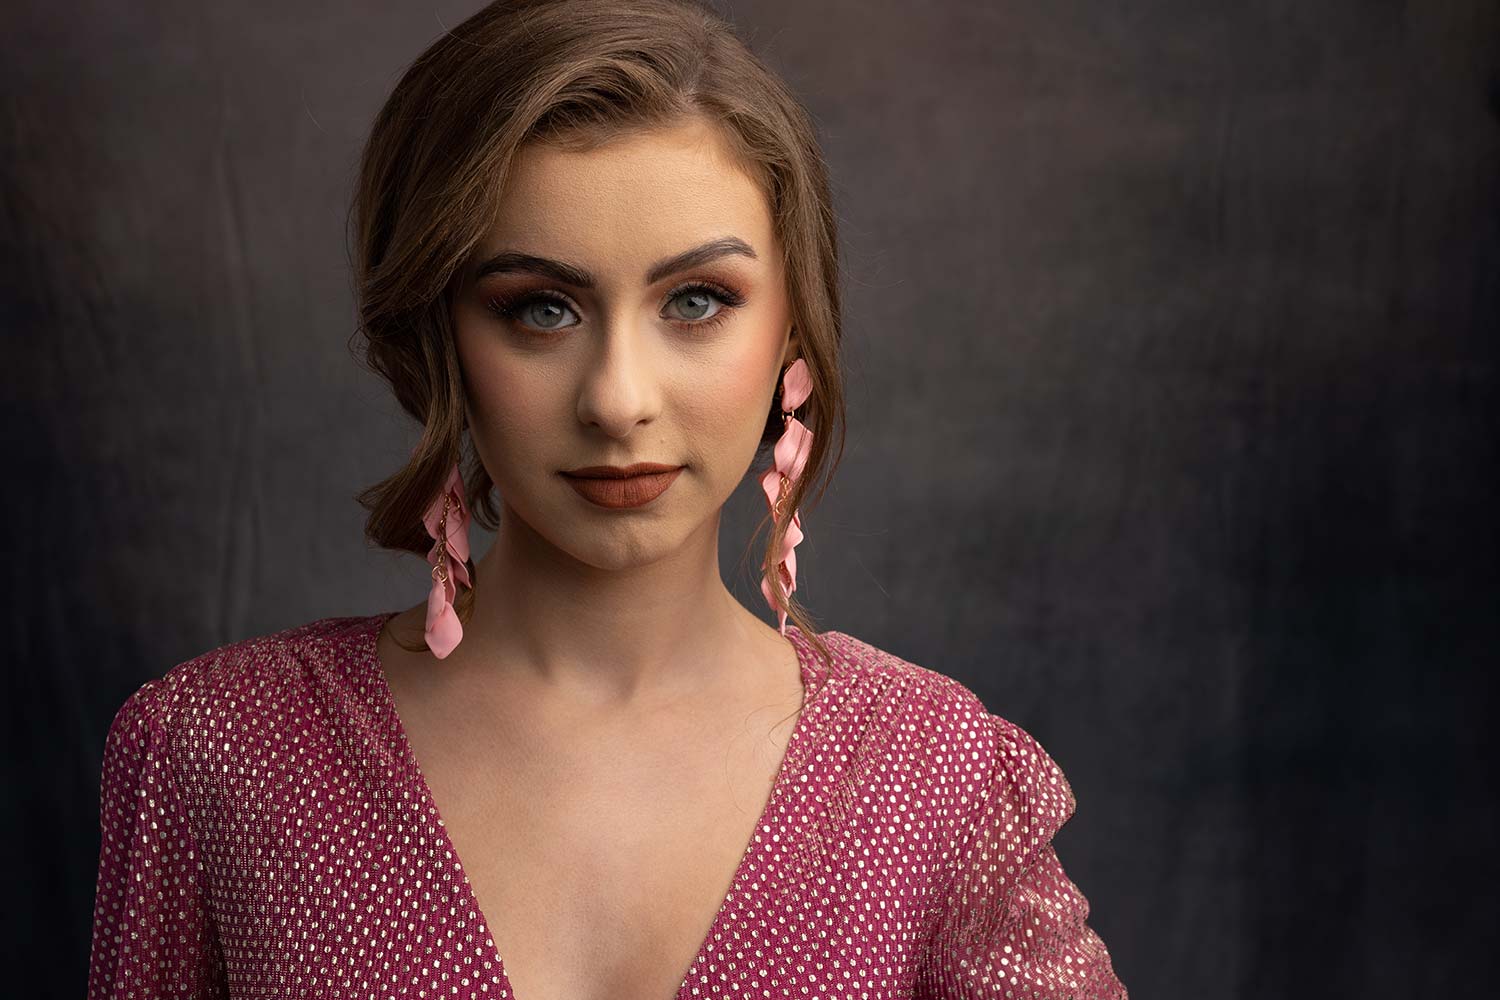
Soft light, by contrast, is more diffused light, so it’s a softer light. The difference between light and shadow is much more subtle, so you don’t have those hard, defined lines. Each one has its place in what we are doing as photographers. You can create beautiful portraits with hard light, and you can create beautiful portraits with soft, diffused light.
When we say hard light and soft light, it’s usually tied to size of the light and its proximity to your subject. So that’s something else to think about, because a lot of people will say, “Well, the Sun is huge. It’s the biggest light.” Not really. The Sun is huge if we’re right next to the sun, but from Earth to Sun, the Sun is actually a very small light source in proximity to your subject, so it casts those hard shadows. However, when the Earth’s atmosphere has tons of clouds in the sky, it’s being diffused, that light, you can actually go outside even though the sun’s out and get a more softer, diffused light.
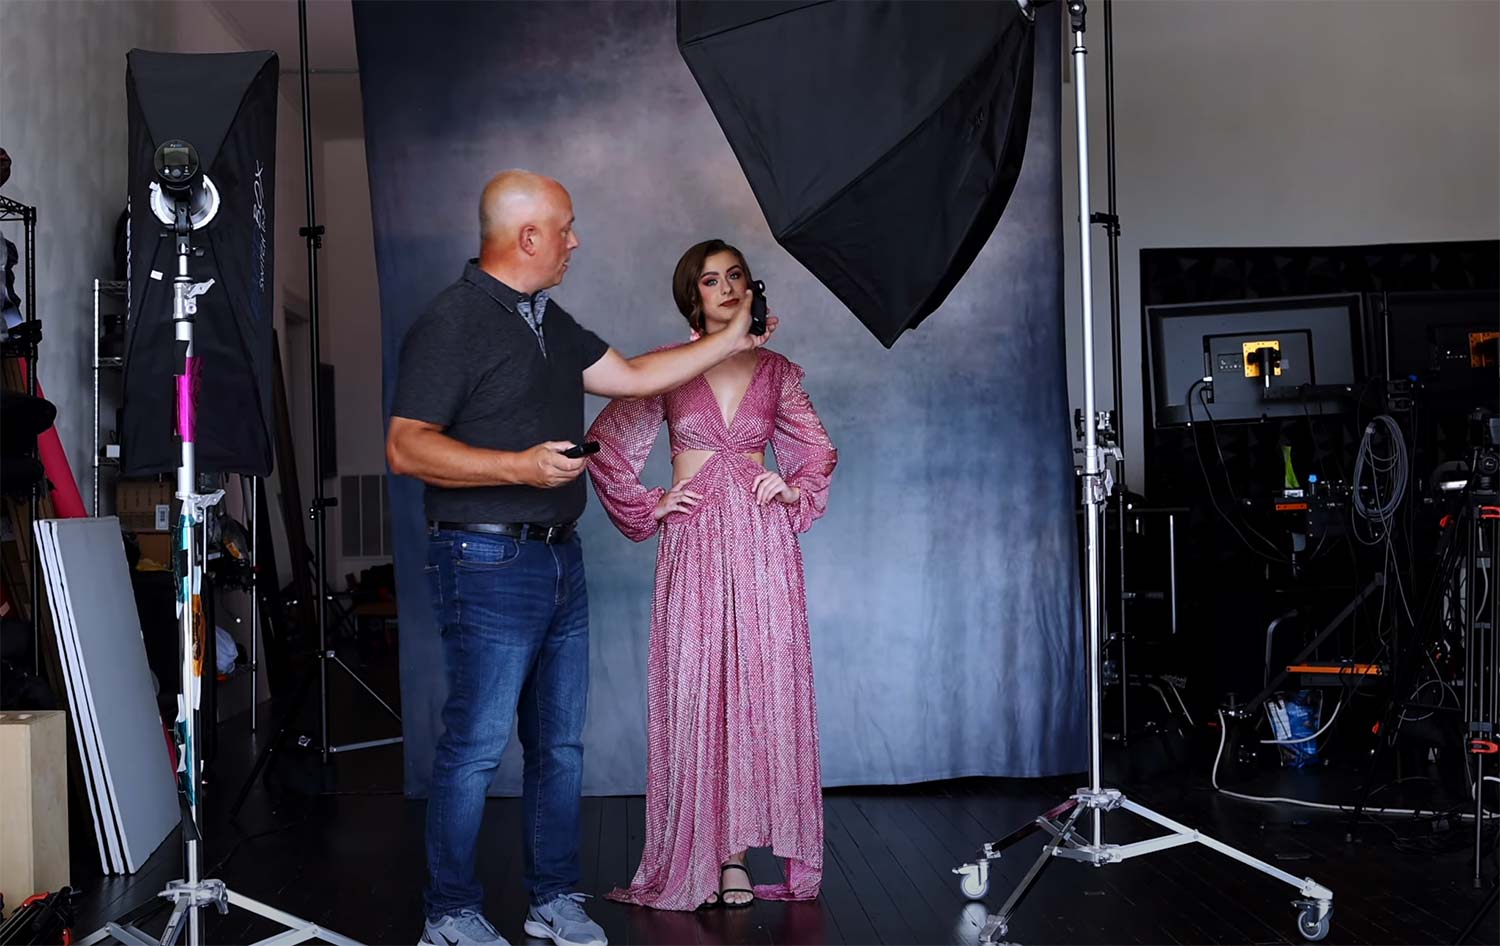
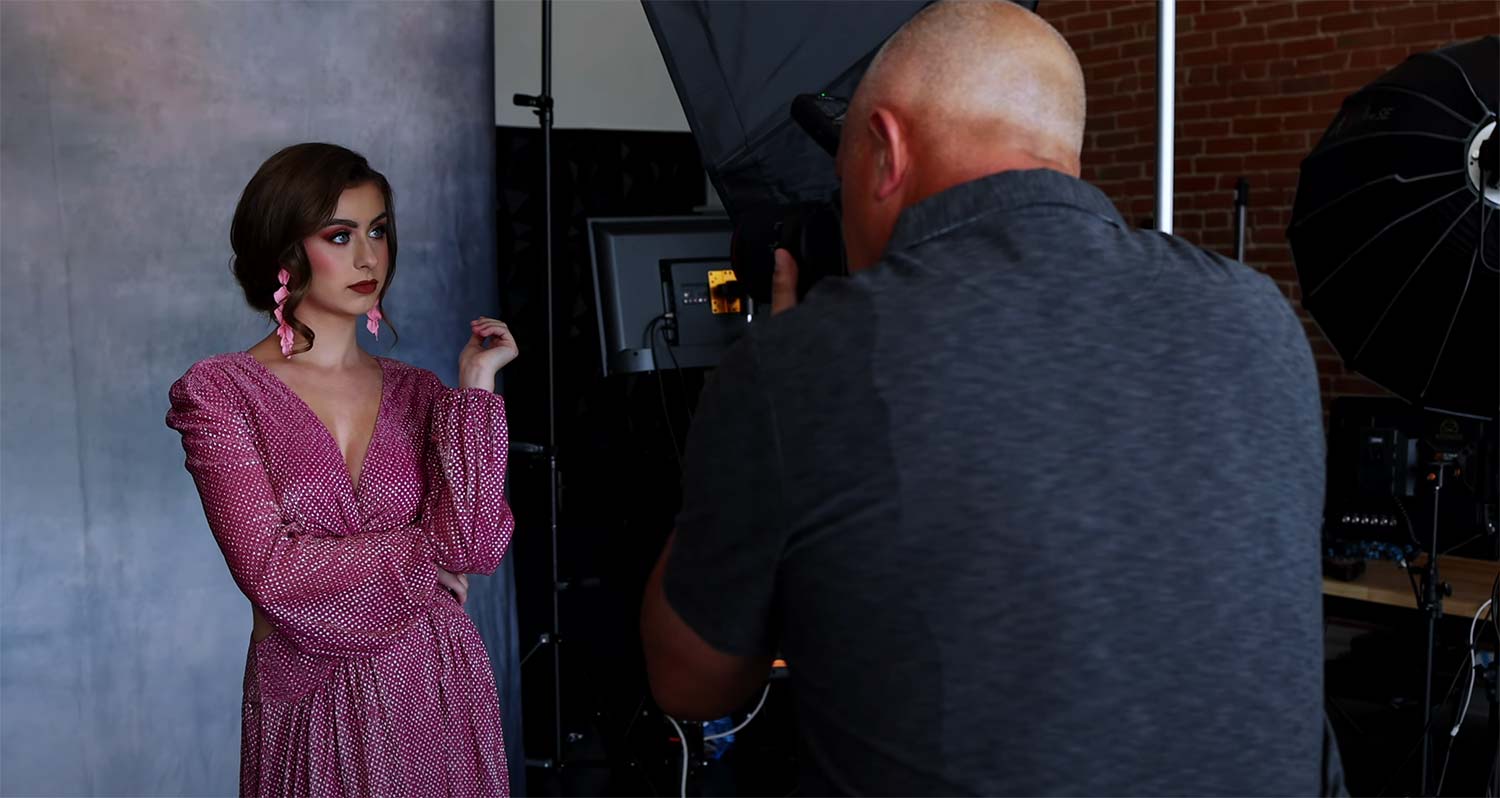
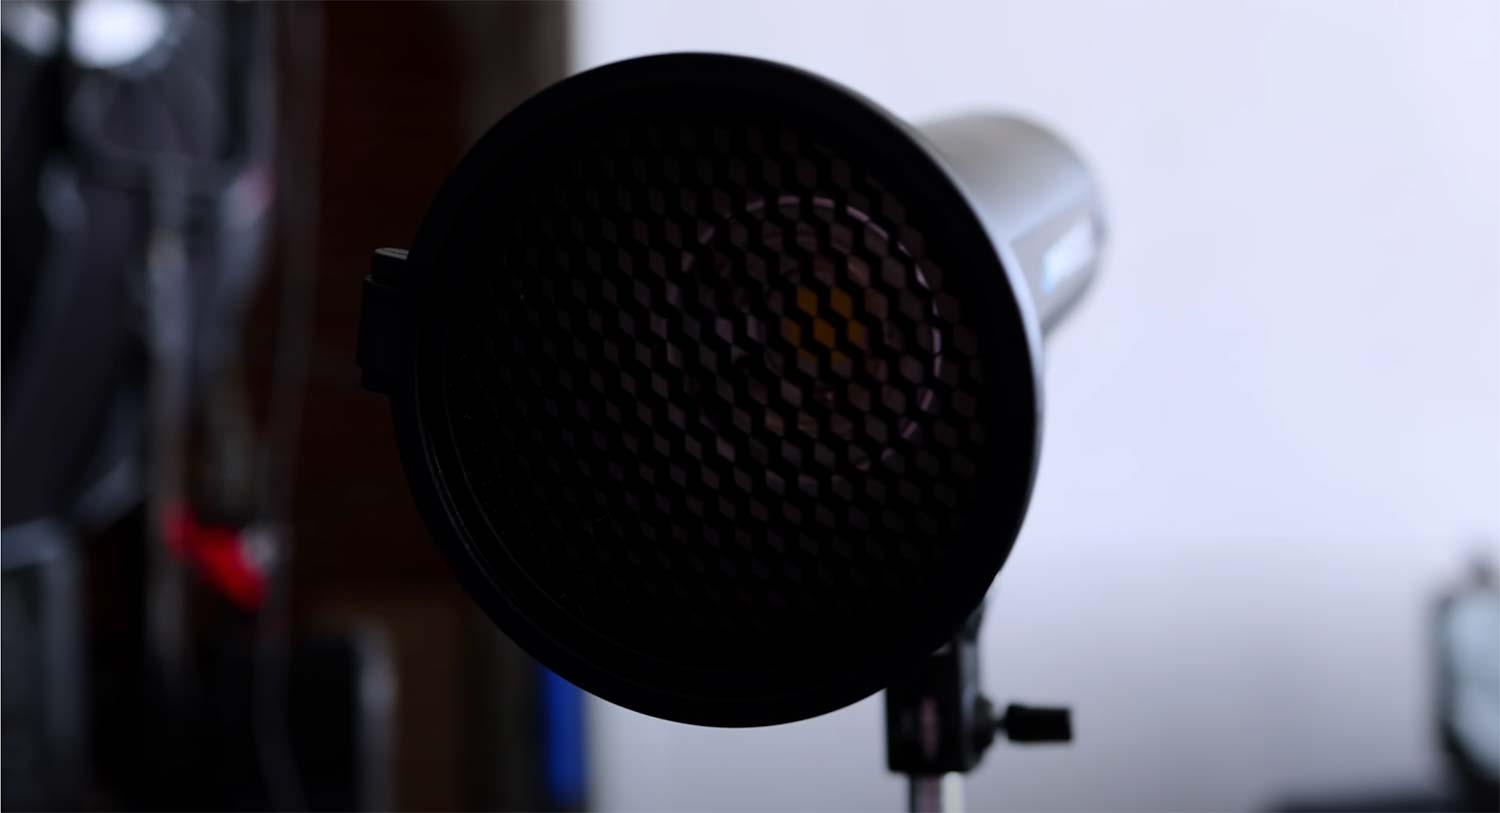
Well, the same thing’s going to hold true in the studio. If we take, like I have behind me, an octabox from Westcott with an FJ200, I’m going to take that in proximity and put that extremely close to my subject’s face. Therefore, we’re going to have a very large light source in regards to her face, and that’s going to be a softer light. We’ll get some shadows, but that fall-off from light to shadow is going to be very, very soft, and again, diffused. When we go to the hard light, I’m going to take that same light, but put a grid on it, and with that grid now, we’re making the light source smaller and a little bit further away from her face, and that’s going to create harsher, more dramatic shadows.
So let’s just get to it, but keep in mind, in the back of your head, there’s no right or wrong answer here. It’s as simple as understanding those two concepts and how you work with them to create your own style of portraiture. So let’s get to it.
All right, so what I’m going to do: I am going to take this large octabox, large light source, and in relation to my subject, I’m really going to make it even larger. So I’m going to put it here so that this light is wrapping around her. And I know you’re going to have a hard time seeing it. It’s going to feel like it’s enveloping her, but that’s what I want. And then, of course, I’m going to use my camera and focal length to block this light out, but I want soft shadows. With something like this, it becomes very important that your subject doesn’t move.
Now I can see on my light meter, I’m getting right here f8.6, so very close to 11. So we will adjust on camera to make sure this is looking right, and I’m going to take a nice test shot here, nice and close, and that is creating a very nice, soft light. Now, I can wrap this as much as I want around her so I can have it right in front of her. We can keep cheating this to wrap around her face a little bit.
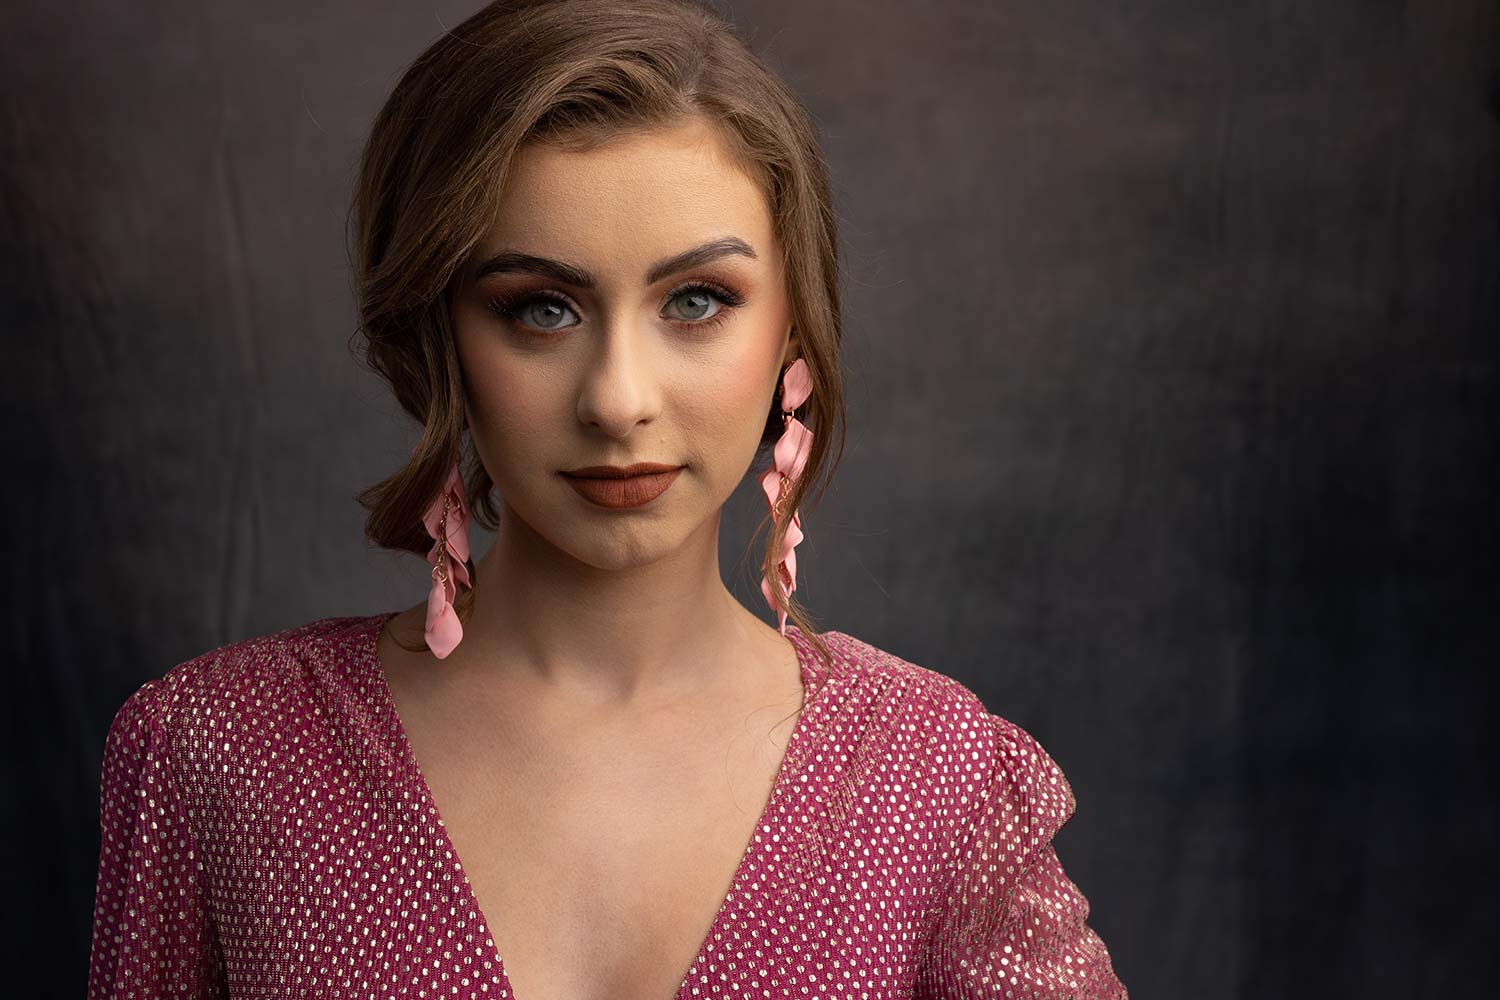
So now we’re going to take this same shot and make it vertical. What you’re seeing there on camera is a very soft, Rembrandt style of light. Now, we’ll do another video on that where we talk about Rembrandt lighting, butterfly lighting, all those types of things, but that has to do with where the shadow is located. Well, because of the position of that light, we’re going to get more of a Rembrandt style of light pattern on her face. Don’t confuse hard or soft light with lighting patterns. Those two things are not the same. Again, we’ll talk about that in another video. So you’re seeing straight out of camera, no fill, no reflection, a very soft light.
I’m going to add in a white reflector to the side, but it’s still going to be soft light. So what we did was we added a white V-flat just to fill in those shadows and reflect a little bit of light. I don’t want to get rid of the shadows by any stretch, but I just want them to be even softer. So now a combination of this light source being extremely close to her and just a little bit of fill, now you’ll see the difference between the two shots. And this, I would say is very much soft light.
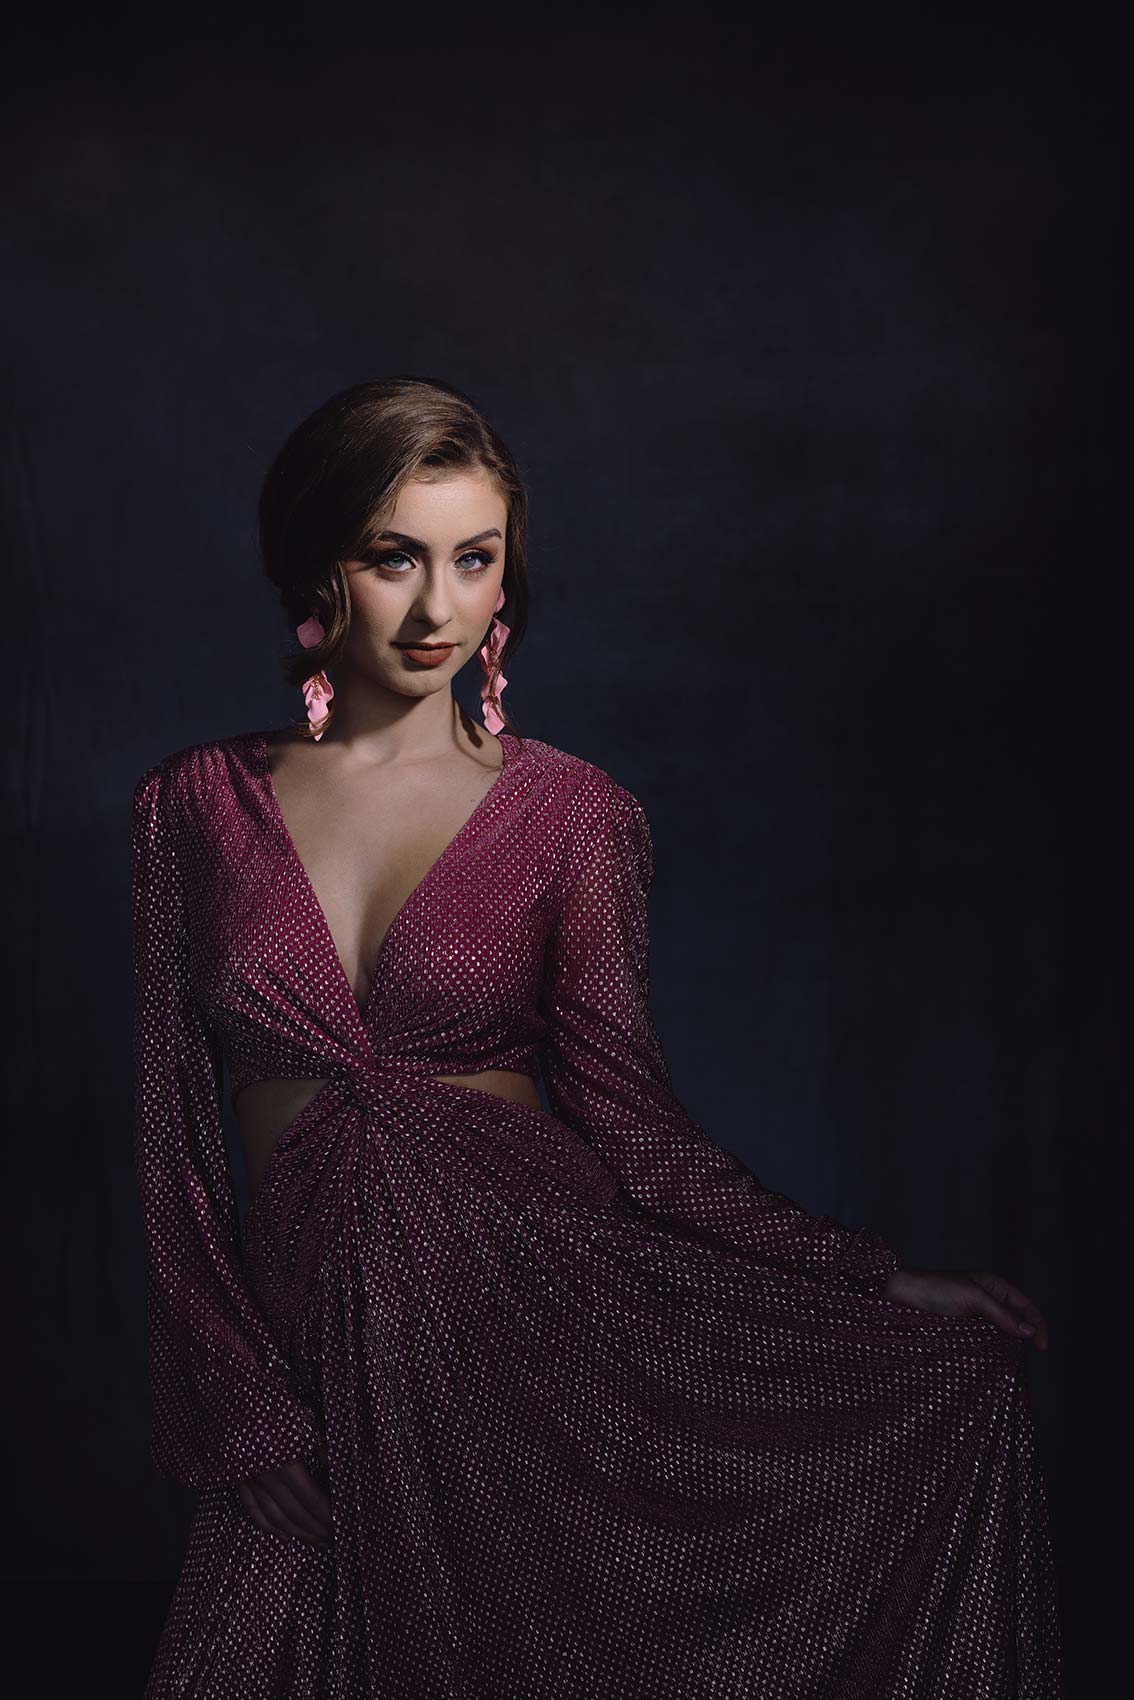
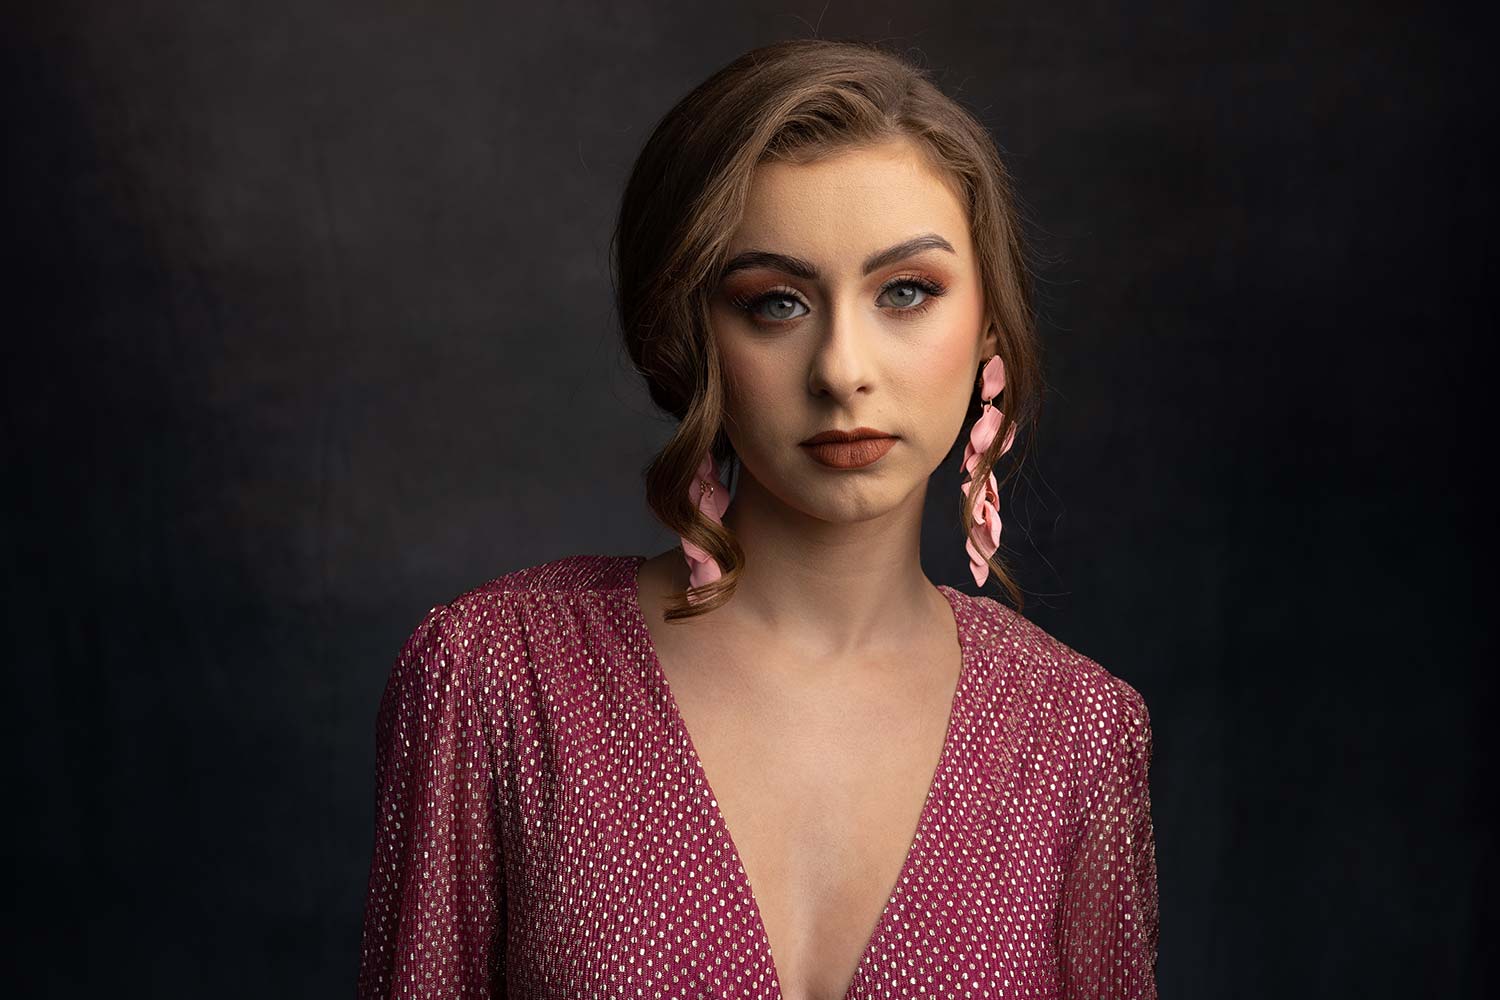
All right, so now with this light, because it’s gridded, it’s not soft, there’s no diffusion, right out of the gate this is firing at almost f22. So a little hot. We’re going to come down in power. If I can get it to 5, 6, I think that’ll be a good range. Now we’re at 5, 6 on camera with a gridded FJ200, and let’s see what that light’s looking like. But you are going to see now very harsh shadows. These are completely different-looking portraits.
All right, so there you have it in a nutshell, I showed you soft light, hard light, how to move between the two relatively quickly on both of those, and again, there’s no right or wrong answer. It’s just understanding the difference between the two. Both can create professional-looking portraits, but I’m sure you’ll agree. Let me know in the comments below, did you like the softer light or the harder light better? But no matter what, they are two completely different portraits in the same scene, same outfit, same hair and makeup, same background. So get out there, create, and we’ll see you in the next video.

