High Key, Low Budget with Michael Corsentino
High key lighting is a highly sought after and easy to create technique when you know how to do it. In this month’s feature, I’ll show you how to create beautiful high key lighting on a low budget. I’ll take a reductionist approach, walking you step by step from the most complex, pro level, gear-intensive method, to a great 50% midway point, and then to our final 1-light method, the subject of this month’s tutorial.
Method 1
The first method requires the most gear and, by extension, is the most expensive. The payoff is maximum control. With this method, the light is broken down into 4 separate zones comprised of 8 strobes, each individually controlled. You read that right: 8 strobes. Don’t worry, in method 3—which is the focus of this month’s tutorial—I’ll show you how to create a very similar high key effect with only 1 strobe! I’m including methods 1 and 2 for those who find themselves with more lights or want a deeper dive with greater control. Breaking down high key techniques from the most complex to least complex will give you a better understanding of what we’re attempting to recreate with 1 light in method 3.
For all methods, the first lighting zone is the key light, typically modified with a beauty dish. Zone 2 is made up of 2 strobes typically modified with stripe boxes, placed on the left and right side of the subject’s face, and set at equal power. These act as kicker lights, providing illumination on the sides of the model’s face. Zone 3 is a fill light placed below the subject’s face, waist level or above, to open up any shadows created by the key light in the subject’s eye sockets or under the chin. This arrangement is known as Clamshell Lighting and we’ll use it with all 3 methods in one form or another.
The last and most demanding zone is zone 4, which is used to create a high key background that can be controlled independently from everything else. This zone is typically comprised of 4 strobes, 2 on the left and 2 on the right, behind the subject, fired into v-flats and bounced back onto the background for an even high key effect. This is the pro method used in studios the world over as it requires zero compromises and gives photographers independent control of each lighting zone.
Method 2
The second method requires half the number of lights, which is 4 strobes, and therefore half the cost. That said, it’s still a lot of lights for many people. Here again, as in method 1, zone 1 is the key light, more often than not a beauty dish placed directly above the camera position and in front of the subject. Zone 2 is again made up of 2 strobes typically modified with strip boxes, placed on the left and right side of the subject’s face, and set at equal power to act as kicker lights, providing illumination on the sides of the model’s face.
Zone 3 is a fill light placed below the subject’s face, waist level or above, to open up any shadows created by the key light in the subject’s eye sockets or under the chin. The method used for creating the high key background is where this method parts company with the last. Here, instead of using 4 strobes to illuminate the background, 1 strobe modified with a large octabank is placed directly behind the subject and facing the camera position. This strobe is used to create an illumined background. Simple but effective.
The drawback here is that your framing is limited by the size of the octabank. Therefore, this method is effective for headshots, 3/4 length, etc., but not full figure work. When using an illuminated background pay special attention to light spilling onto your subject from behind and creating a milky washed-out effect.
Method 3
Alright, we’ve looked at 8 lights, we’ve looked at 4 lights, now let me show you how you can get pretty close to the techniques above with just 1 light. What you lose here is the independent control you have with a multi-light setup. Despite that, it’s possible to achieve very acceptable results with this greatly pared-down technique.
As with the methods above, zone 1 is our key light. For this technique, we’ll dispense with the beauty dish I’d typically use and recommend in favor of a medium-sized octabank. This is done to maximize light output and create a larger circle of light with less falloff than is possible with a beauty dish. The key light is the only powered zone in this method. For zones 2 through 4 we’ll swap strobes for reflectors, specially a combination of 2 white V-Flat panels and a 3×4 reflector.
For the purposes of illustration, I’ve broken each step down for you, building the lighting effect by adding one panel at a time. Once you understand this method you don’t need to do that. Feel free to set it up completely and shoot. For zone 2, our light under the model’s face, a 3×4 silver reflector is used. The intensity of fill can be controlled by adjusting the distance of the reflector from the key light above it. I choose silver fabric for maximum intensity and heightened specularity.
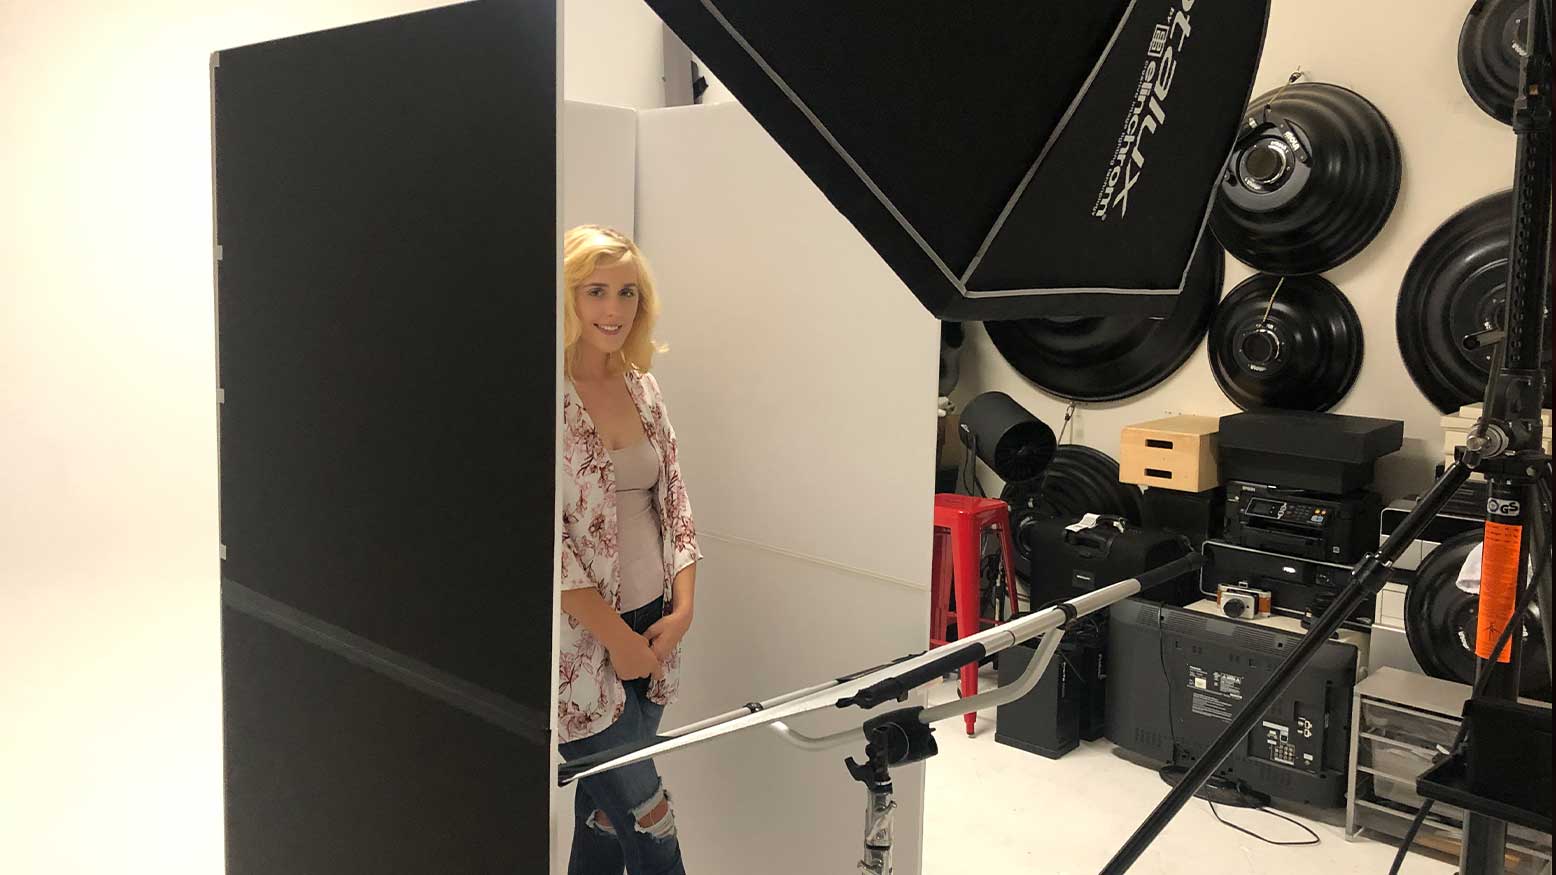
For the background and side accent lights, we’ll build a 3-sided box around the model using white faced V-Flats. With the octabank firing into this box, a beautiful and easy high key effect is created. While the background isn’t the blow-away background you could create with a separate zone of 4 strobes, it’s pretty close. The shallow distance between the subject and the V-Flat panel used for the background gets us close enough to white for many applications.
So, as you can see, you don’t need a king’s ransom worth of strobes to create perfectly acceptable high key lighting. If you have more strobes, by all means use them. If not, the 1-light method pictured here has got you covered.