

How to convert your dslr to a pinhole camera
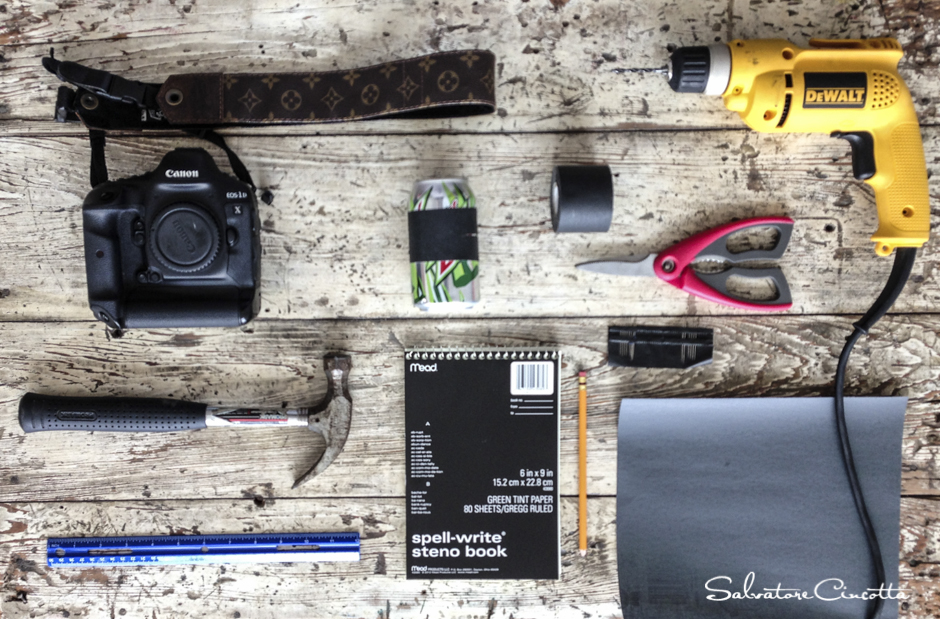
So, I had a little free time yesterday, dont as me how, but it was there and like the neurotic person I am, I decided to fill it with some play time. I wanted to do something different – so, I converted my dslr to a pinhole camera. Below is a list of items I used for this exercise, minus some tinfoil, which I will expand on later.
1) dslr camera
2) hammers
3) ruler
4) notepad
5) pencil
6) 800 grit sand paper
7) scissors
8) soda can
9) gaffers tape
10) drill and drill bit (9/64th)
11) sewing needles
Now, you might be wondering why in the world I would want to do this. Well, I am always looking for new ways to do something a little different and stand out from the crowd. Obviously, pinhole cameras are nothing new. but, could I modernize it and use it in my wedding and portrait business? See, the allure of a film based pinhole camera was not that tempting. I felt like that would be riddle with issues. I mean, how in the world would I know if I got the shot, or if I was even pointing the camera in the right direction? I would have to wait until I got home and developed the film. Wow, that sounds like I am playing the lottery hoping to win every time I step out the door. Forget that. I needed something more reliable.
Converting my dslr was the way to go. This allowed me to make real time adjustments to composition and exposure – something not possible with an oatmeal box converted to a pinhole camera. Now, I know the pinhole enthusiasts will point out, “Sal, you are missing the point! The beauty is in the unknown and experimenting.” Um yeah… no thanks. I have a business to run. I want predictable results. At the end, I will explain to you how I envision using this in my real business and monetizing this for my weddings.
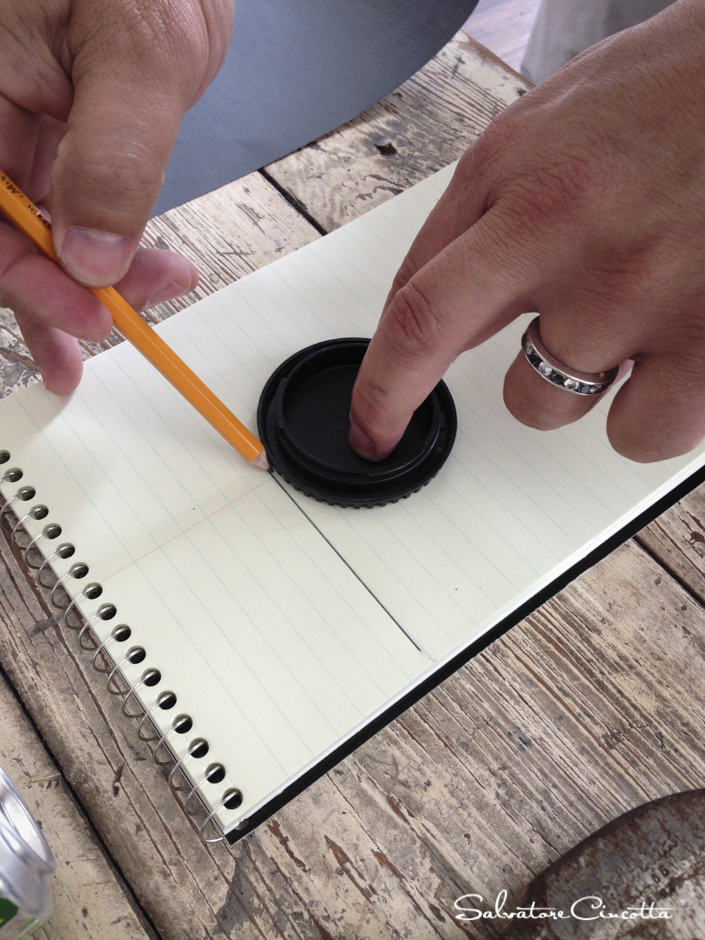
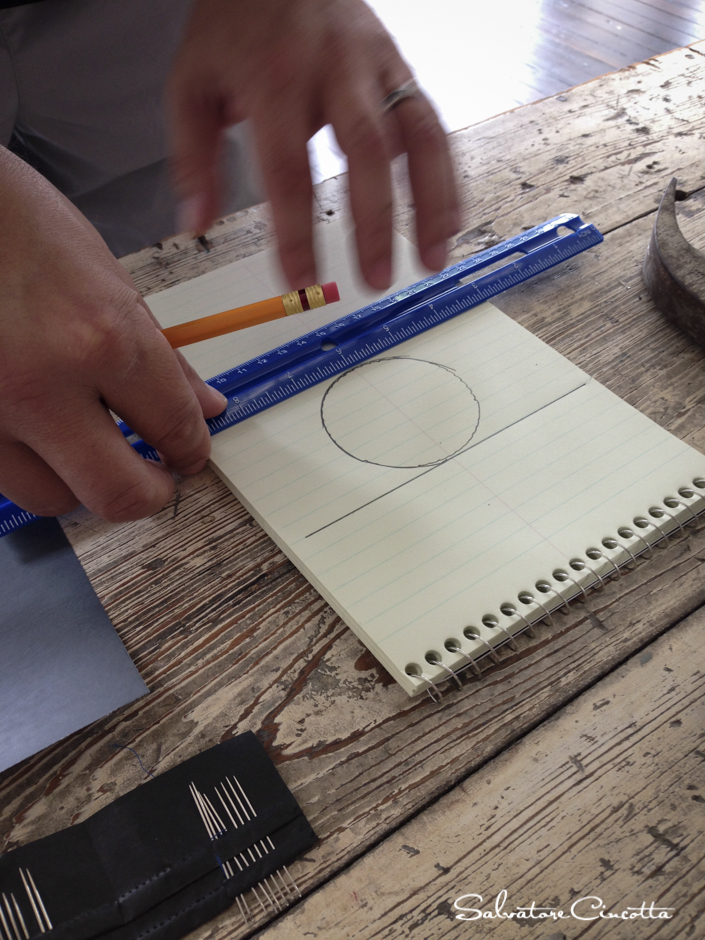
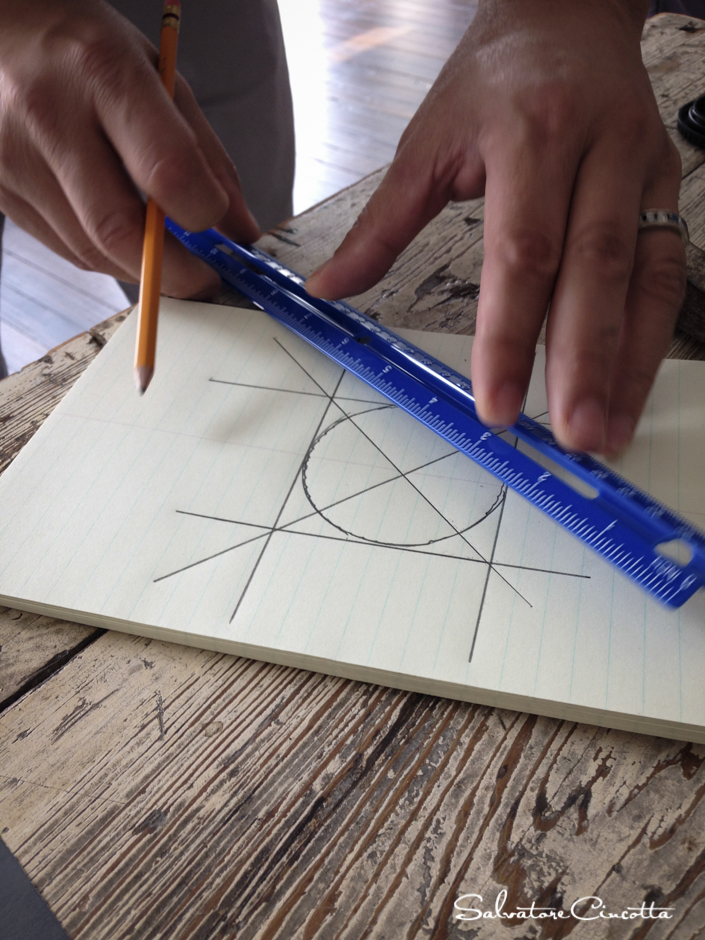
Finding center:
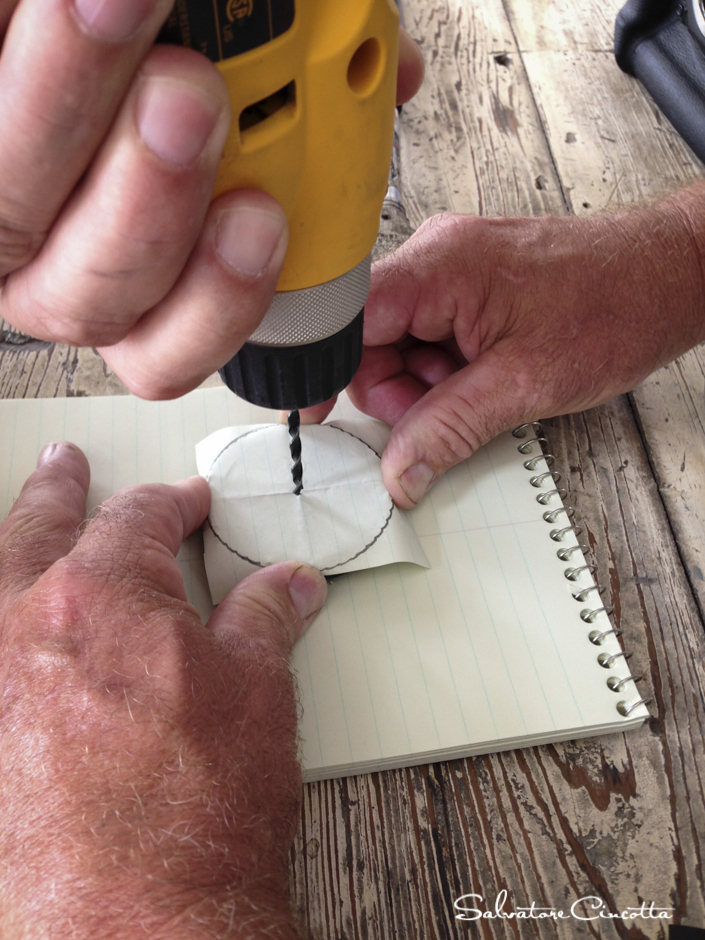
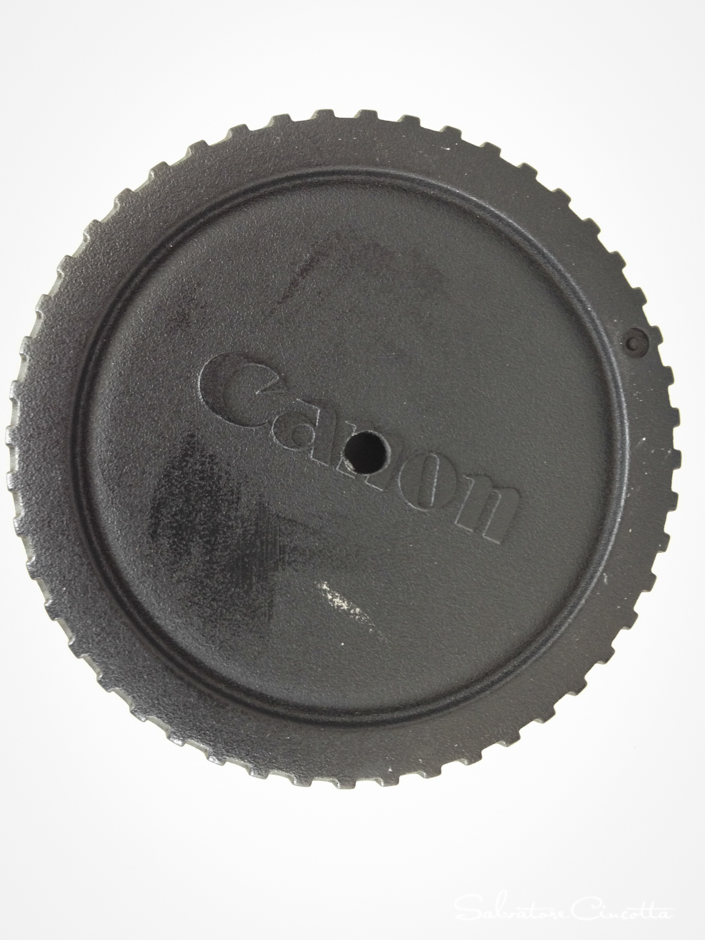
Take your body cap (and you are about to destroy it), the pencil, notepad, and the ruler. You are about to draw a circle and find center. Its important that you get to center on your body cap – this is your new lens housing. Draw a line and then a circle around the actual lens cap. Once that has been completed, use the ruler to go from corner to corner on a diagonal to crisscross through the center of the circle – this is your center. Cut out that circle and place it over the top of your body cap, grab your drill, and drill into the center of the cap. You should end up with a body cap that looks like mine (shown below).
Now, this will be just the beginning. Next up, cutting and creating the pinhole. Your lens.
Creating the pinhole.
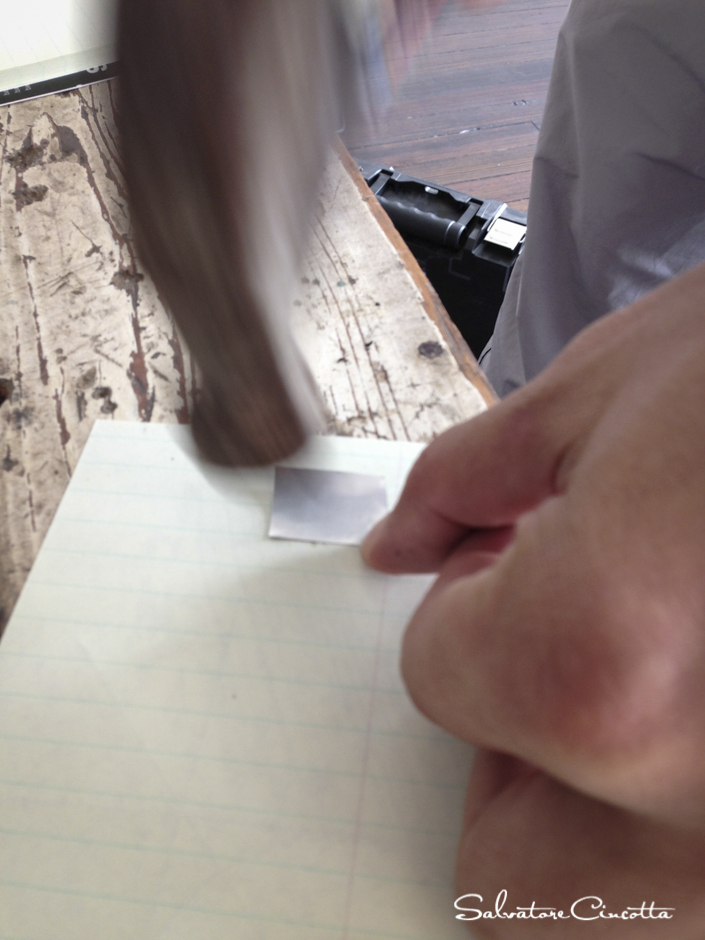
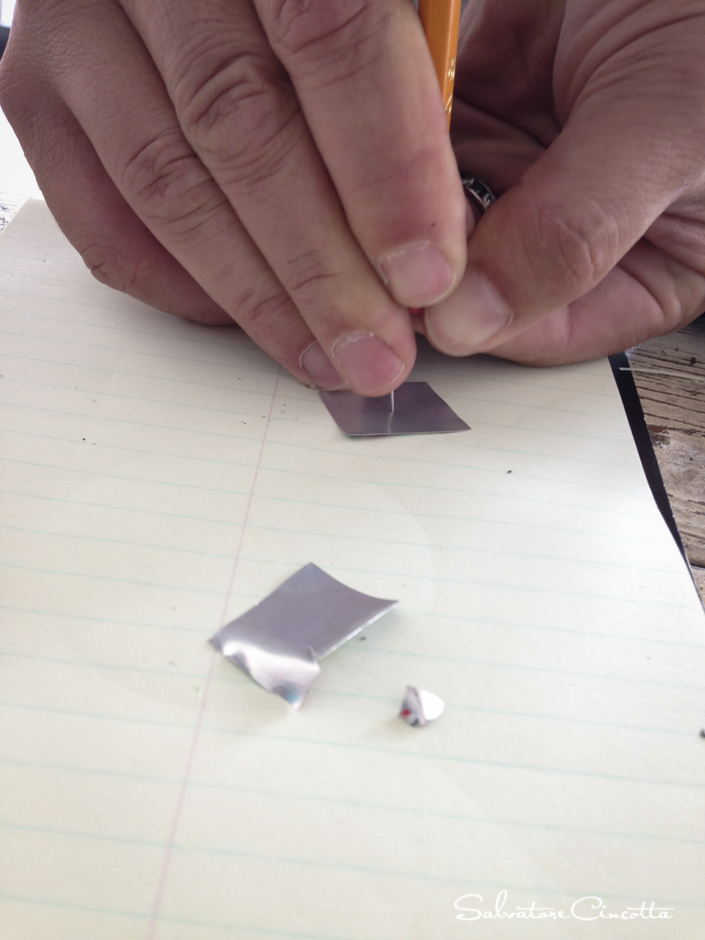
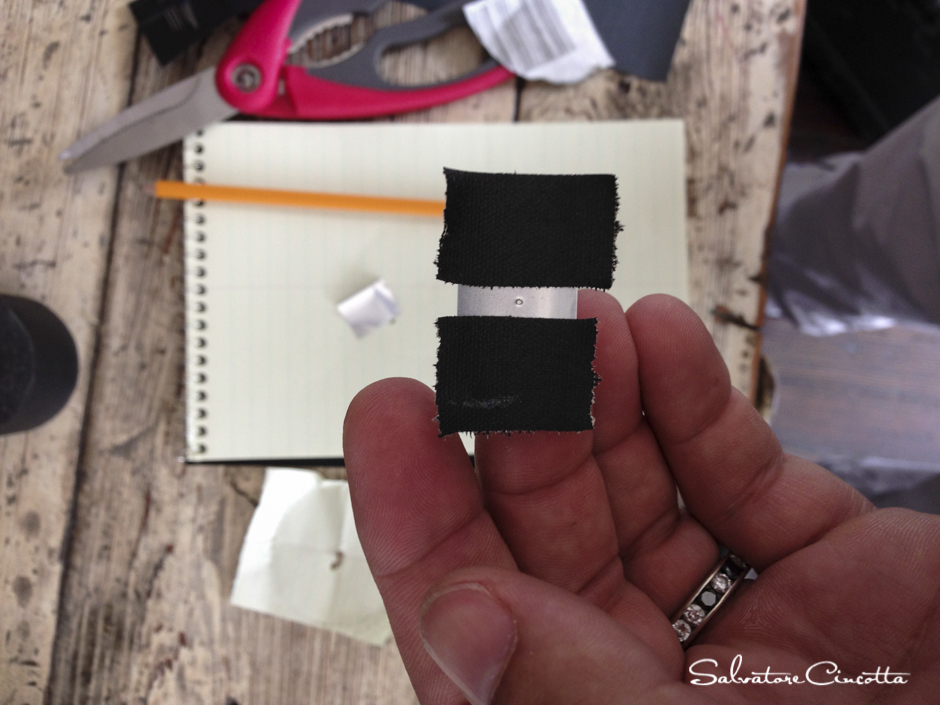
Ok, next up, take that soda can and cut it, use a small square, one that will fit inside the body cap. Then, grab that hammer and bang the crap out of it. Do not dent it. You are looking to thin out the metal. So, be sure to make flush contact. Worst case, cut a new piece, you will have more than enough metal. Next, take that pencil with the eraser and stick the pin in the eraser. This is going to be your tool to puncture the metal can.
Something to understand. This hole you are making. It is your aperture. The bigger the whole the shorter your depth of field because its letting too much light in and nothing is in focus. Think f2.8. The smaller the hole, the greater the depth of field. Think f22. Needles come in all different widths, select the smallest you can find. Using the pencil, pierce the tin can as shown below.
***Special update***
Once I used the soda can – I could not get the pictures anywhere near focus. The reason, I realized after experimenting, was that no matter how hard I hammered the metal, I could not thin it out. Because of that, the images were blurry because the material was just to thick to let enough clean light through. I then adjusted and used tin foil. No need to hammer the tin foil because its already thin enough. Use the same techniques I have listed and the tin foil will do the trick.

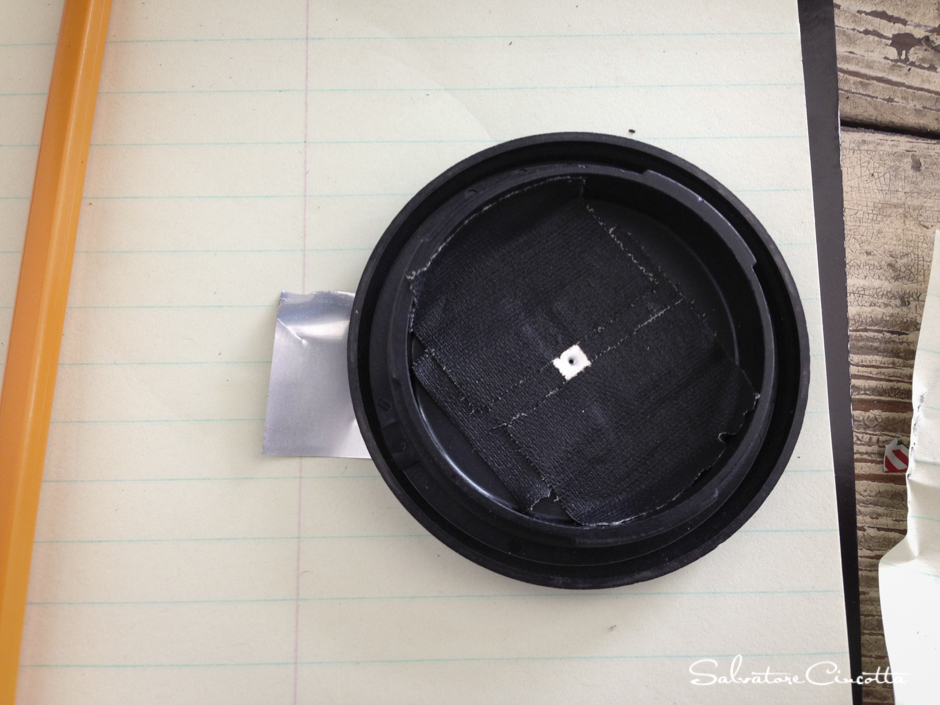
Adhere to body cap.
Once you have created the pinhole, you have to adhere it to the inside of the body cap. Its important that you get this centered inside the hole you already created in the body cap. Using gaffers tape, cover up as much of the metal as you can and then adhere it inside the body cap as shown below. The reason you are covering up this metal is because its reflective in nature and will actually bounce light rays inside the camera if you dont cover enough of it up.
Start shooting.
Believe it or not, that’s all there is to it! You are ready to get out there and start shooting. Because there is no viewfinder and no metering, you will have to experiment on your own and find the right ISO and shutter speed settings. This is also dependent on the size of the hole you have created. A bigger hole will let in more light and require a shorter exposure, while a smaller hole will let in less light and require a longer exposure. This is the beauty of creating a pinhole camera from your dslr. You can see the results immediately.
Below are some results from us setting this up and just going outside to play.
What I love most about this is just the pure experimentation of the shot and not seeing it 100%. The look and feel is also very unique and something I think will work well for fine art weddings. The images have this surreal soft look to them. I love the natural grain that is present on them as well from shooting at a higher ISO. The images below have had very little done to them. I set up my camera to shoot BW so I could get a feel for the way the image would look. Once I got them on my computer, I adjusted the color and contrast and thats about it.
Here is how I plan on incorporating this into my business. Imagine if on a wedding day, you bring your nifty new pinhole cap and shoot 5-10 frames from each part of the day. Bridal prep, groom prep, ceremony, reception, creatives. Then, take those images, edit them in a fine art way AND then print them on art paper. These will be gorgeous on art paper. Here is what I am thinking. Print them on 5×5 art paper and then create a 10×10 mat. I would have this printed for the client when they arrive at the studio – probably 7-10 total in a nice photo-box. I would then offer this as a pull through item in my top level package as a free add-on if they purchase it. While this might not be something the average client would say they wanted up front, I think if done correctly and presented to them, it will more than likely blow them away.
Stay tuned to see how this turns out. I have a wedding coming up this weekend and I will be busting this out for sure!


This Post Has 8 Comments
Just a thought- I bought a roll of aluminum foil at the dollar store for a craft and it was super thin. Could you use this for your pinhole?
where did you get that Louis Vuitton strap
Hi. Silly question but will this method of pinhole work with a dslr (canon 1200d)
Many thanks.
it will!! now get out there and play!! 🙂
…or you can buy one for $10 on eBay.
definitely an option.
Sal, Thanks for putting in so much time to create the tutorial. Awesome! Rachel bought me a bodycap for this couple years ago. I never really used it. This has certainly inspired me to go back to it. Cheers!
This is absolutely brilliant, thanks for the tutorial! I will surely try it out. A nice excuse to buy some soda, too.