
How to Embrace the Magic of Golden Hour with Ashley Behrle
The golden hour, in my opinion, is one of the great wonders of the world. The time of day just before sunrise or sunset (I prefer sunset) when the light streams in with its red and orangey glow, warm and oh-so-satisfying to bask in. As a photographer, there is literally nothing quite like shooting at this time of day. This particular lighting creates an atmosphere that you just can’t manage on a cloudy day. It is unique. It is heavenly. Its vibrancy can be playful, dramatic, and addicting. I cannot tell you how many times I have stopped what I was doing just to stare in awe at the sky before me. How many nights there have been when I am not shooting and wishing I were, craving it.
Does anyone else stop on the side of the road just to grab a cell shot of the sun and sky? I remember when I first began photographing people—I would pick any old time of day. I would be frustrated with my images, because they didn’t evoke any emotion. They didn’t make me feel. Over time, I tried out this whole golden-hour thing and fell in love with my work and photography again. The sun and the golden hour are what makes my soul sing—they still get me excited to photograph my clients all these years later. Simply put, images turn into magic, and I cannot wait to share with you how I capture the sun in all its golden-hour glory.
First things first! Settings and equipment: Settings are so incredibly important when photographing at the golden hour. To get that dreamier, glowier imagery, you have to be bold! Shoot wide open. Don’t be scared—embrace the lower aperture! Typically during my shoots, I am at f1.8 with a lower ISO around 160/200 and then adjust the shutter accordingly. I shoot in Kelvin, around 6200, and adjust as the evening goes on. Utilizing a lens hood and a lens filter is also key; both play a huge role. A lens hood reminds me of a hat brim. Tilt your face up, and the sun illuminates you. Tilt your head down, and it’ll filter out just the right amount. Same with your lens hood! You can move your camera and tilt it just right to allow the rays to cast onto your subject in the most beautiful way. I also love using a lens filter. Not only does it protect your glass (hello, mom of four here) but it also helps with the flares. There’s some science behind it and I am sure some math, neither of which I am knowledgeable in, but it does a wonderful job in allowing the light to come into your camera the way it should, leaving you with a beautiful haze and glow and no washed-out subjects.
Now that we’ve got settings out of the way, here’s an important list of things to remember when you’re photographing for this light:
Move
I think when people first begin shooting at this time of day, or photographing in general, they’re so afraid to move to get THE shot with THE light. You are not a statue! You are in control. Let me give you a scenario:
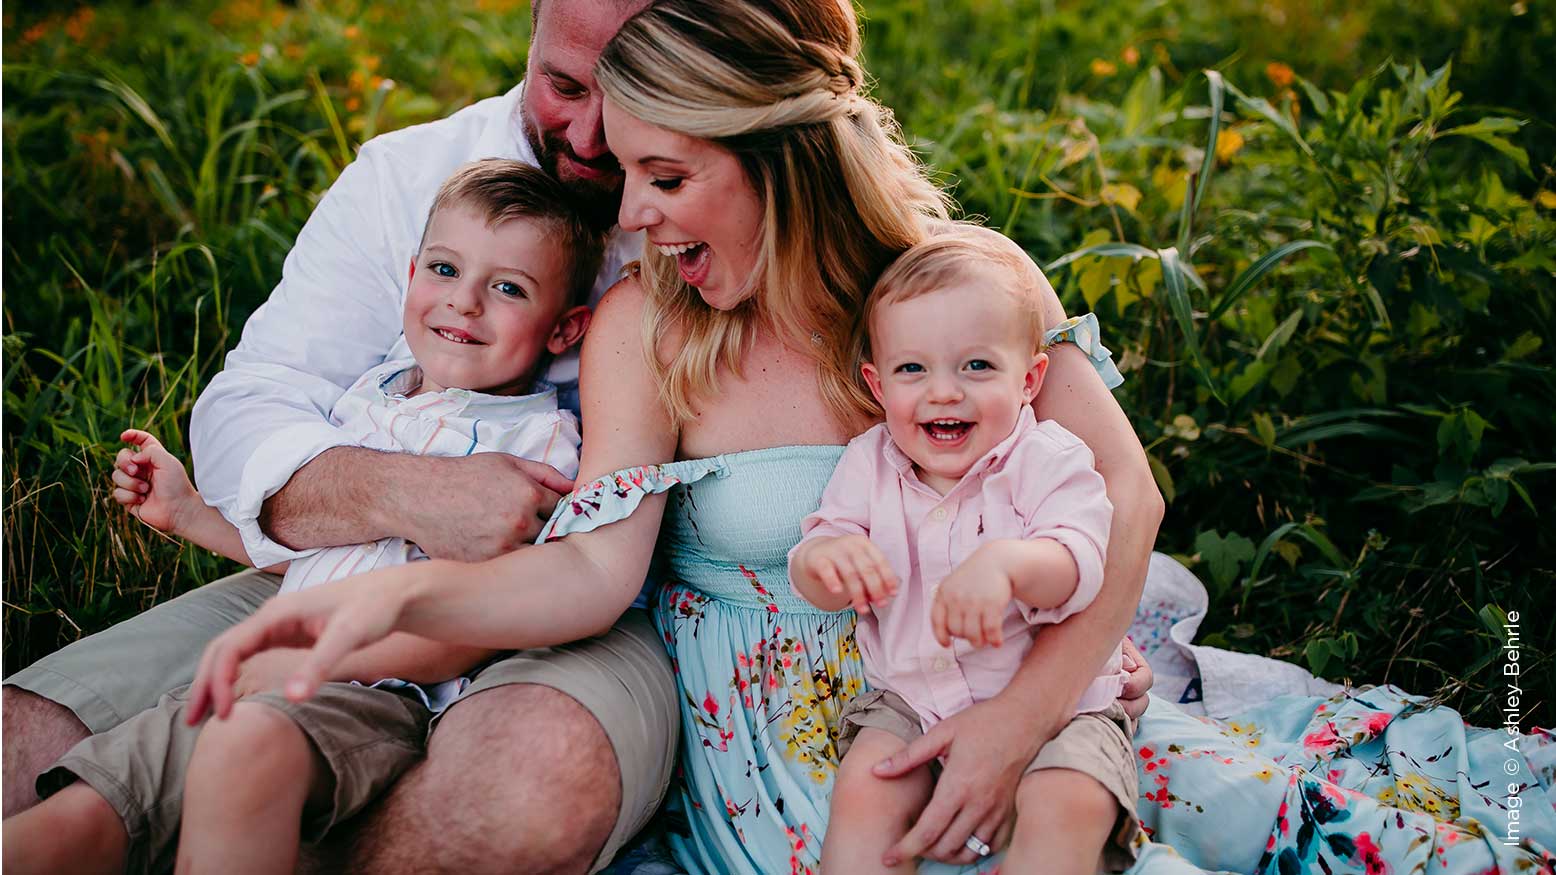
You have your clients in a field and the sun is still fairly harsh—it doesn’t yet have that glow you desire. Have them go toward the tree line, where the sun is setting. This will help filter out the harsh light while still allowing the warmth to come through. Now, you will realize after about five minutes of shooting that the sun is moving, and it’s moving fast! It looks completely different, requiring a change of location. The light moves quickly and also disappears quickly during the golden hour. Be okay with moving your subjects to an ideal pocket of light farther from the tree line. During this particular session, we began downhill and then went uphill to the top by the end. The beginning was all about the sun-drenched images, with a ton of movement and a carefreeness. By the end, there was the last little bit of glow coming through the tree line, which created some really beautiful, even light on their skin. You may not be in control of how long light is available, but you are in charge of maximizing the time you have with it. Be okay with uprooting your subjects to a spot that lets in more light. Find the light, chase the light, and embrace that glow!
Be intentional
I do not go into my sessions crossing my fingers and toes, hoping and wishing to capture the sun in its eminence. I know I will! I do not haphazardly go in and snap this and that and pray later when I sit down at my computer that my clients aren’t all washed out. I am intentional with my placement; I am intentional with how I tilt my camera to allow the right amount in; I am intentional about my angle. Specifically, during this session, there were a ton of intentional actions on my part even though we were moving, playing and having fun. At one point, I was photographing from above them while they were lower to the ground. I knew that I was allowing in just a hint of sun around the top rim of my lens hood. I did this knowing that their coloring would be truer and less hazy when I went back to edit later. There were times where I had the light to the right or left, making sure they were the focus. There were times where I used the sun’s rays as backlighting directly behind them or (gasp) in front of them. There were times during this session I took them by the hand and moved them ever so slightly, because I could see the sun hitting their face too harshly or not enough. There was a purpose in every shot I took, and at the end of the day, I want them to look back on them and feel. Feel the love between them, the playfulness of their kids, and the warmth that surrounds them.
Consider the Source
You will find that often, where there is some seriously beautiful sun coming through (usually toward the end of the golden hour), there is an equally beautiful sky happening in the opposite direction. Turn your subjects! Have the sun be a light source instead of backlighting. During this session, I had the mom facing me with the sun just behind me. It created even light across her and the boys. Think of when you take a selfie—facing a window will create evenness on your face. Same goes for here! There were also times I would have them facing me with the light coming in from their left—this created dynamic shadows on their faces and bodies. I also knew I would love these in black-and-white because of the dynamic range in shadows and highlights. Shooting at golden hour doesn’t have to just be about the sun coming through and behind your subjects—the sun can also be used as a giant light source! Don’t miss the opportunity of having fun and creating unique imagery. Opportunity is all around you!
Practice
I remember years ago when my first sessions were just terrible. I was fighting the sun, I didn’t have my settings the way they needed to be, my timing was off, the light was too harsh, and I was so afraid of speaking up and moving my families to a better sun-kissed location or positioning them to get more even coverage. Over time, I have found my style and I have found my voice. As silly as this sounds, I feel one with the sun! But this came with lots and lots of practice—knowing my equipment, knowing what my lens can handle, and knowing what angles will be best for sun. I encourage you to go out and try some of these tips. Be in control and be confident. Try, try and try again! Embrace the haze, embrace the warmth, and embrace the emotion that it will evoke. I promise, you will fall in love—it’s truly magic.


