
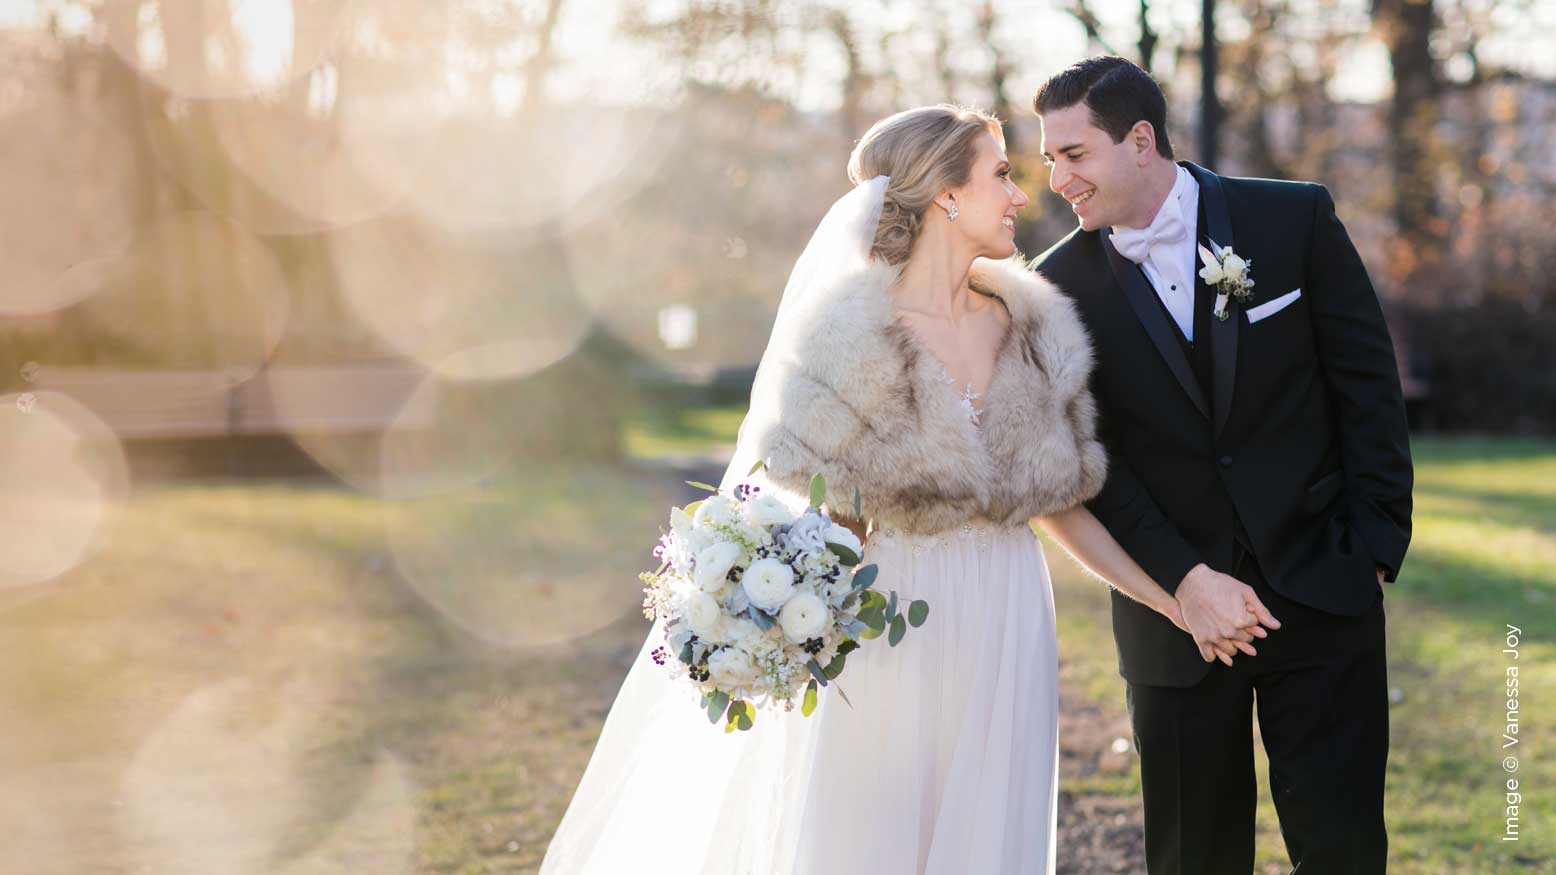
How to Take Bright & Colorful Photos with Vanessa Joy
I would have titled this month’s article “How to Take Light and Airy Photos,” but that carries some negative connotations these days. Light and airy is often equated with overexposed photos and blown-out wedding dresses. (Side note: You do not have to blow out your whites to get a light and airy look—more on that later.)
One of the hardest jobs we have is to determine the style of photography we want associated with our brand, and to replicate it for each client. Some days I feel like creating dramatic photos. Some days I want chipper, bright pictures. Some days I go for the moody hipster feel that’s been trending.
As a business owner, I need to show my clients what to expect and then deliver what they’re expecting. My clients come to me because they like “bright and vibrant colors” (that is a quote from an inquiry I had just today). If I want to add some moody or dramatic ones, I certainly can, but I need to deliver what they’ve been told to expect. If I tell them to expect bright and colorful photos, here’s how I ensure that happens every single time.
Choose What You Photograph
When scouting locations for shots the day of a wedding, I look for an area where the amount of light in the background is the same amount of light that will be hitting my subject’s face. This way, the entire picture matches in exposure, and the background isn’t blown out or dark.
I make sure my backgrounds are as colorful as they can be and free of darker colors and shades. This is one reason I love using longer lenses like the Canon 85mm 1.4 and Canon 135mm 2.0. Long focal lengths make it easy to bring the background closer to you, eliminating undesirables in your images. For the most background control in your photos, go long.
A photographer in my area who does a lovely job at selectively photographing to match her light and airy brand is Susan Tibak of Susan Elizabeth Photography (Instagram @SusanElizabethWeddings).
Here’s how she explains how she maintains consistency in her images:
My brand is light and airy. To keep this consistent look, I am very strategic in the backgrounds I choose when shooting and posing my couples. Dark backgrounds, such as evergreen trees, photograph very heavy and can look like a black hole in images, so I look for neutral backgrounds without a lot of color.
When it comes to editing in Lightroom, after applying my custom preset, I often use the radial filter to brighten up the entire image without overexposing the couple. I always bump up the shadows and blacks to keep the images consistent to my style.
I am a big believer in educating clients. I send out an 80-page bridal guide to all of my couples, as well as an engagement guide with outfit and bouquet inspiration, and other tips and tricks. I do this not only for their benefit, but to ensure each session is consistent with my signature style. My brand focuses on details that tell the story of the day and the sweet moments between my couples. Because I am always posting detail photos on my social media, my clients have come to expect that on their wedding day.
This is all part of a consistent brand that is recognizable as mine when the viewer is scrolling through Instagram or Facebook.
Light Consistently
In addition to choosing what should go into your images, keep in mind how you light them. For brighter photos, I keep a fairly low-contrast lighting scenario and don’t shoot the shadow side of my subject.
If it’s a dark day, I don’t have the luxury of just looking for this kind of light—I have to make it instead. Just this past weekend, I had a dark and rainy wedding. I brought my couple outside, put a CTO gel over my Profoto B1 and created a beautiful, warm light that looked like the sun behind them. I tell my clients that it’s never their job to worry about the weather. I bring the sun.
Here’s a chance for you to see these tips in action. Visit https://bit.ly/2krAcO8 to see a real engagement shoot. It’s a true behind-the-scenes video and not a workshop with fake talk-to-the-camera models. Trust me, it’s worth your time.
Edit to Enhance
The power of cameras and editing software these days is incredible. But they shouldn’t be a crutch for your style. They should enhance it. The more you mess with an image, the more its quality deteriorates, especially when you print it.
Editing is all about the skin tones. My goals in Lightroom are to:
- Brighten and color-balance the skin
- Bring up the color vibrancy
- Add a bit of contrast and pop
- Correct lens distortion
- Add a bit of sharpness to the edges
- Lessen noise/grain
It doesn’t take much to do that. Visit https://bit.ly/2Ja1QwT to see live editing of the pictures in Lightroom from that live engagement shoot above (there’s also a link to my Lightroom preset if you want it).
Be Choosey When Posting
Show off only your best work, in your style, for consistent branding. That doesn’t mean you shouldn’t photograph different styles once in a while. But if you do, don’t throw them in the mix with other photos. That leads to brand confusion and a messy look in your portfolio or on social media.
When I talk with a new bride, I don’t explain my photographic style to them. I like it when they try to explain it to me. It reassures me that I’m on the right track with my branding and that I can easily set and fulfill the expectations of my client.
Repeat
Repeat these tips over and over again until your images represent a perfect, consistent flow of your brand. Before you know it, you’ll have a gorgeous portfolio of images and clients that come to you specifically for what you do best.


