
Struggle using a light meter? Well in this video, I show you how simple and easy it is to get started using a light meter for your in-studio portraits. We are using a Sekonic light meter in this video.
Equipment Used:
Camera: Canon EOS R5
Light: Westcott FJ200
Modifiers: Sekonic light meter, Westcott Rapid Box Switch Octa-L
Team:
Photographer: Sal Cincotta
Afraid to use your light meter for in-studio portraits? Let me show you how easy it can be.
All right, what’s up everybody? This is one of the most highly requested videos that I constantly get messages about in the comments. “Do a video on light meter. Do a video on light meter,” because you’re always seeing me use it. Now, if you don’t currently use a light meter, don’t skip the video. Pay attention, learn, master your craft. Give me a second to show you how easy it can be. So first of all, there are a lot of photographers out there who just muddle their way through it. They figure it out, they take a test shot, they adjust, they take a test shot, they adjust, and they get it to the way they want it to look. And look, I’m not here to throw shade on you. You do it your way, you figure it out. But there is a better way, and the light meter is that way, and it’s not overly complicated to use.
In fact, I think for many of you who don’t use a light meter, you’re going to be, a little embarrassed on how easy it is to actually use. So, the reason you don’t use it is because you don’t know how to use it. It’s one of those things. “Well, I don’t do it because I don’t know how. I don’t know how because I’ve never tried.” Let me show you how, it’s super easy. One thing to keep in mind, you’re operating on the same exposure triangle if you will. It’s ISO, shutter speed, F-Stop. That’s it. This is giving you a reading based on two settings. So you’re going to work with your camera in manual mode. You’re going to set whatever your shutter speed, usually it’s going to sync, you have a sync speed at 200th of a second. You already know that if you use flash photography in your studio.
So that’s one thing that’s demystified. Just set your shutter speed to your sync speed. That’s 200 or 250th of a second. Whatever your camera requires. Then what you’re going to do is set your ISO. Most of us working in studio, unless you have a camera that’s natively operating at a different ISO, you’re probably going to work at ISO 100, ISO 200. Maybe you’re pushing it because you need more speed, or you’ve got some action, low light situation. Just set those two numbers. Once you set those two numbers, you’re using a light meter to get that final number, your F-Stop, and that’s it. Now, you might be thinking to yourself, “Well, I can already do that as I take a test shot and adjust.” And the answer to that is, you are correct. So why would you use a light meter? Well, here’s where that theory falls to complete shit.
If you’re using one light, that’s fine. I’ll acquiesce, maybe it is a little bit faster to just take your test shot, adjust, move the light forward, move the light back. Maybe that is a little bit faster, but here’s where things fall apart. When you’re in a multi light setup, that’s not going to work. Why? Because you should be trying for lighting ratios. And I did a lighting ratio video, you should watch. These are things like 2:1, 4:1, 8:1 lighting ratios where, and I’ll put a link up here, I think that’s where it goes, to that video and you can watch that. When you’re trying to get lighting ratios, that’s when you have a main light, maybe that’s firing at F/5.6, and maybe you have a fill light that’s firing at F/4.
What’s the difference? One stop of light. How do you manage that if you’re just willy-nilly moving things around? You’ll never get it right, it’ll never look correct. And that’s where a light meter is absolutely crucial to getting that right. I would measure in individually, and I’ll show you how in a second here, the first light, my key light, okay, 5.6. I know now, I will turn that key light off and measure my fill light, and I’ll hit the button, fire that fill light and look for an F/4. That’s going to be a one stop difference in the light. Now I might measure my hair light, I don’t want to blow out highlights in somebody who’s got blonde hair. I also don’t want to lose shadow detail in somebody who’s got dark hair. I need to know that the exposure is correct and that’s how easy this thing is to use.
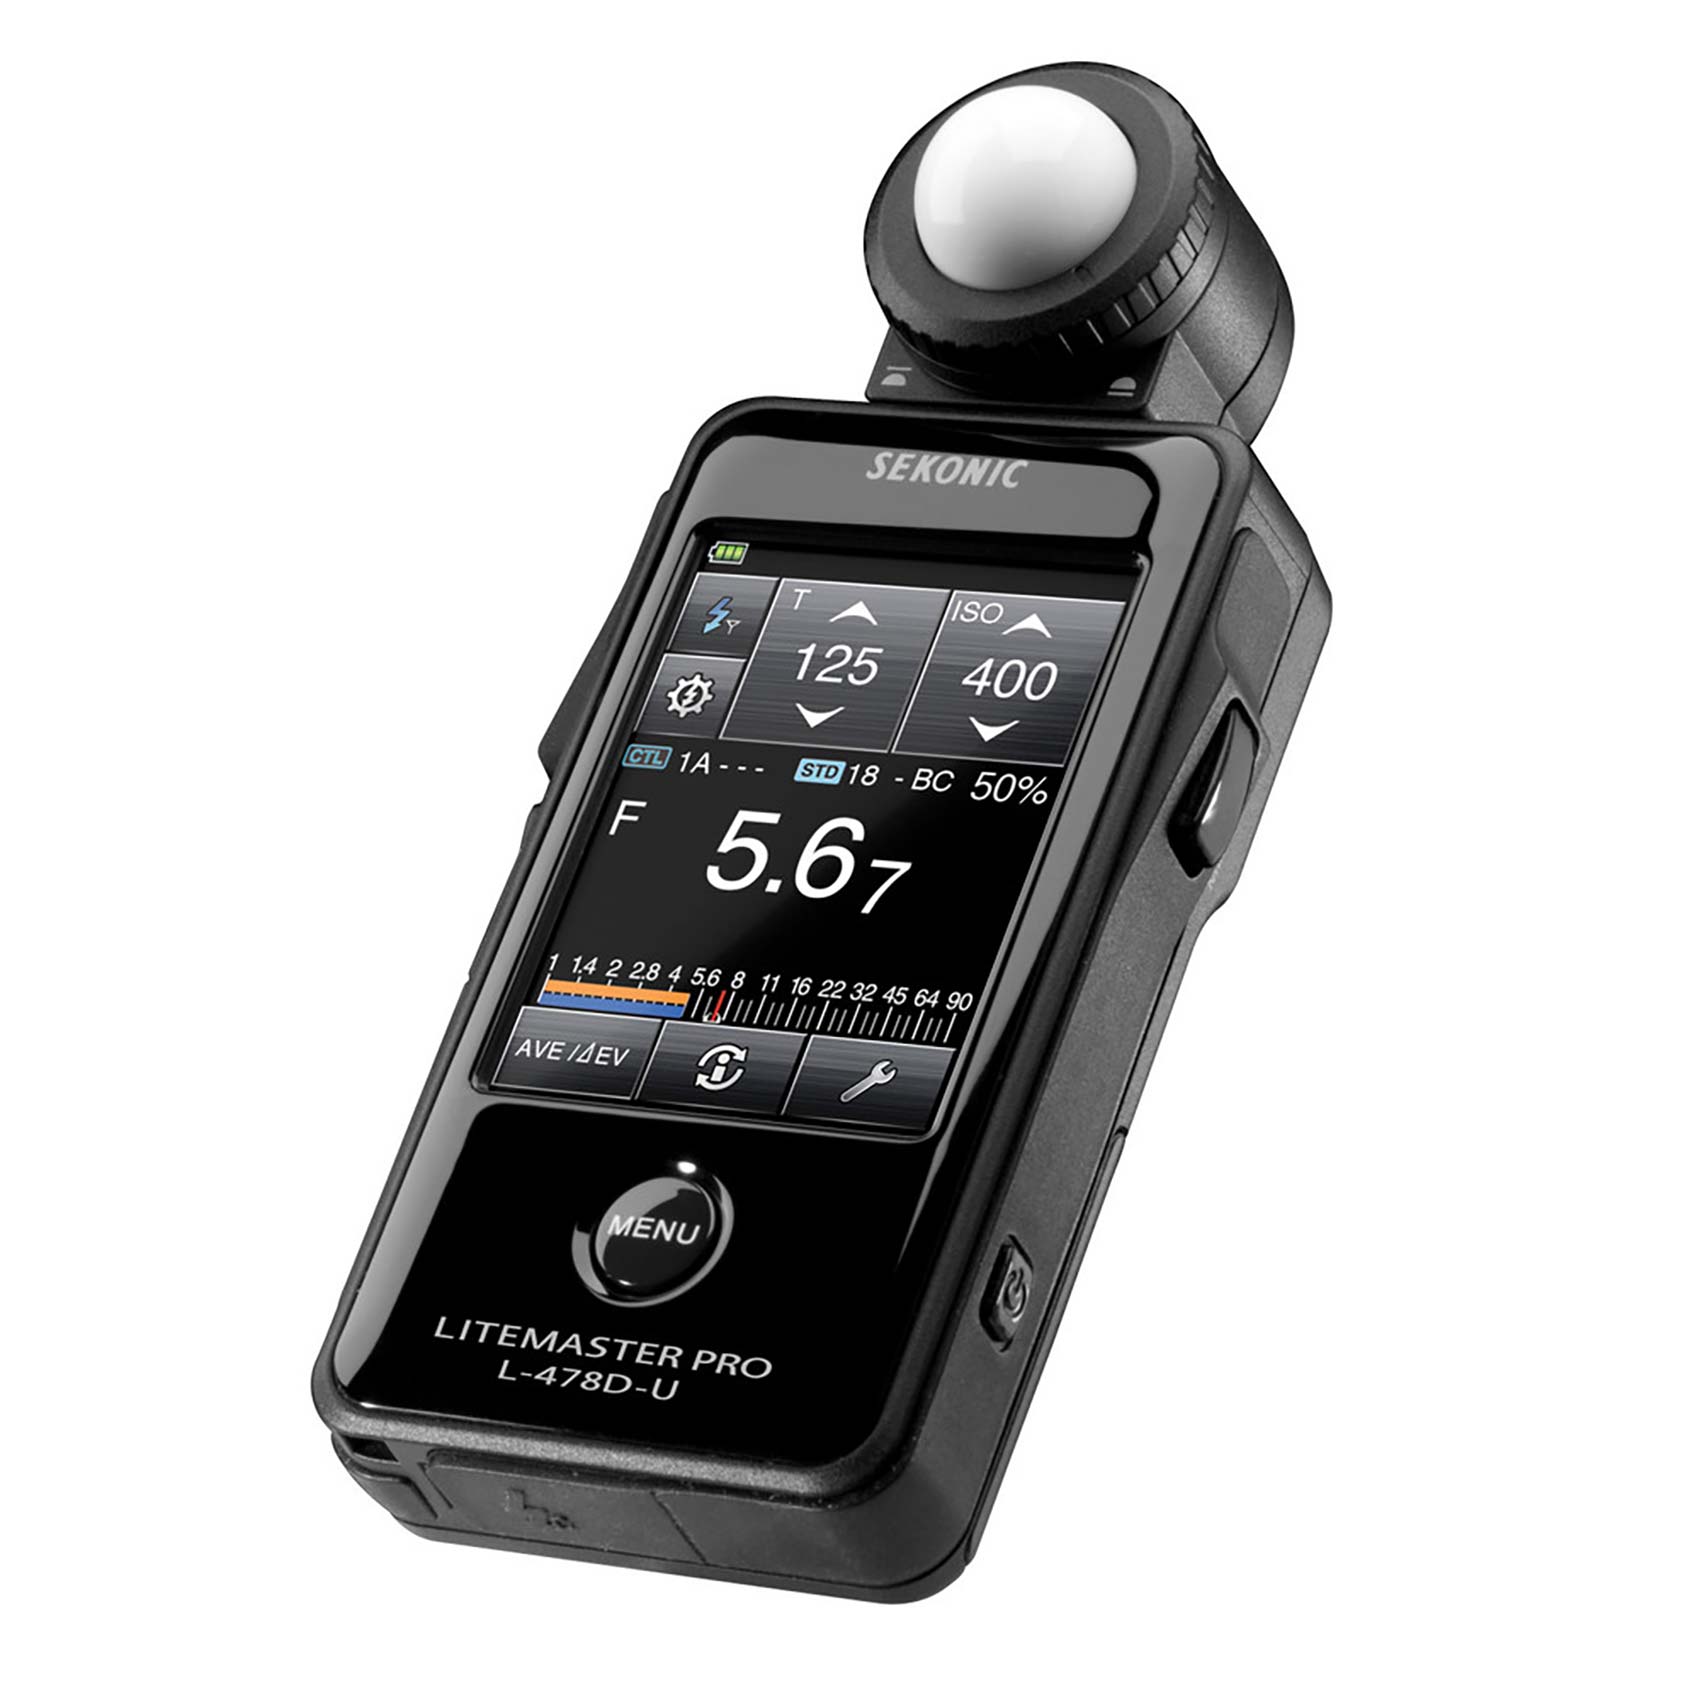
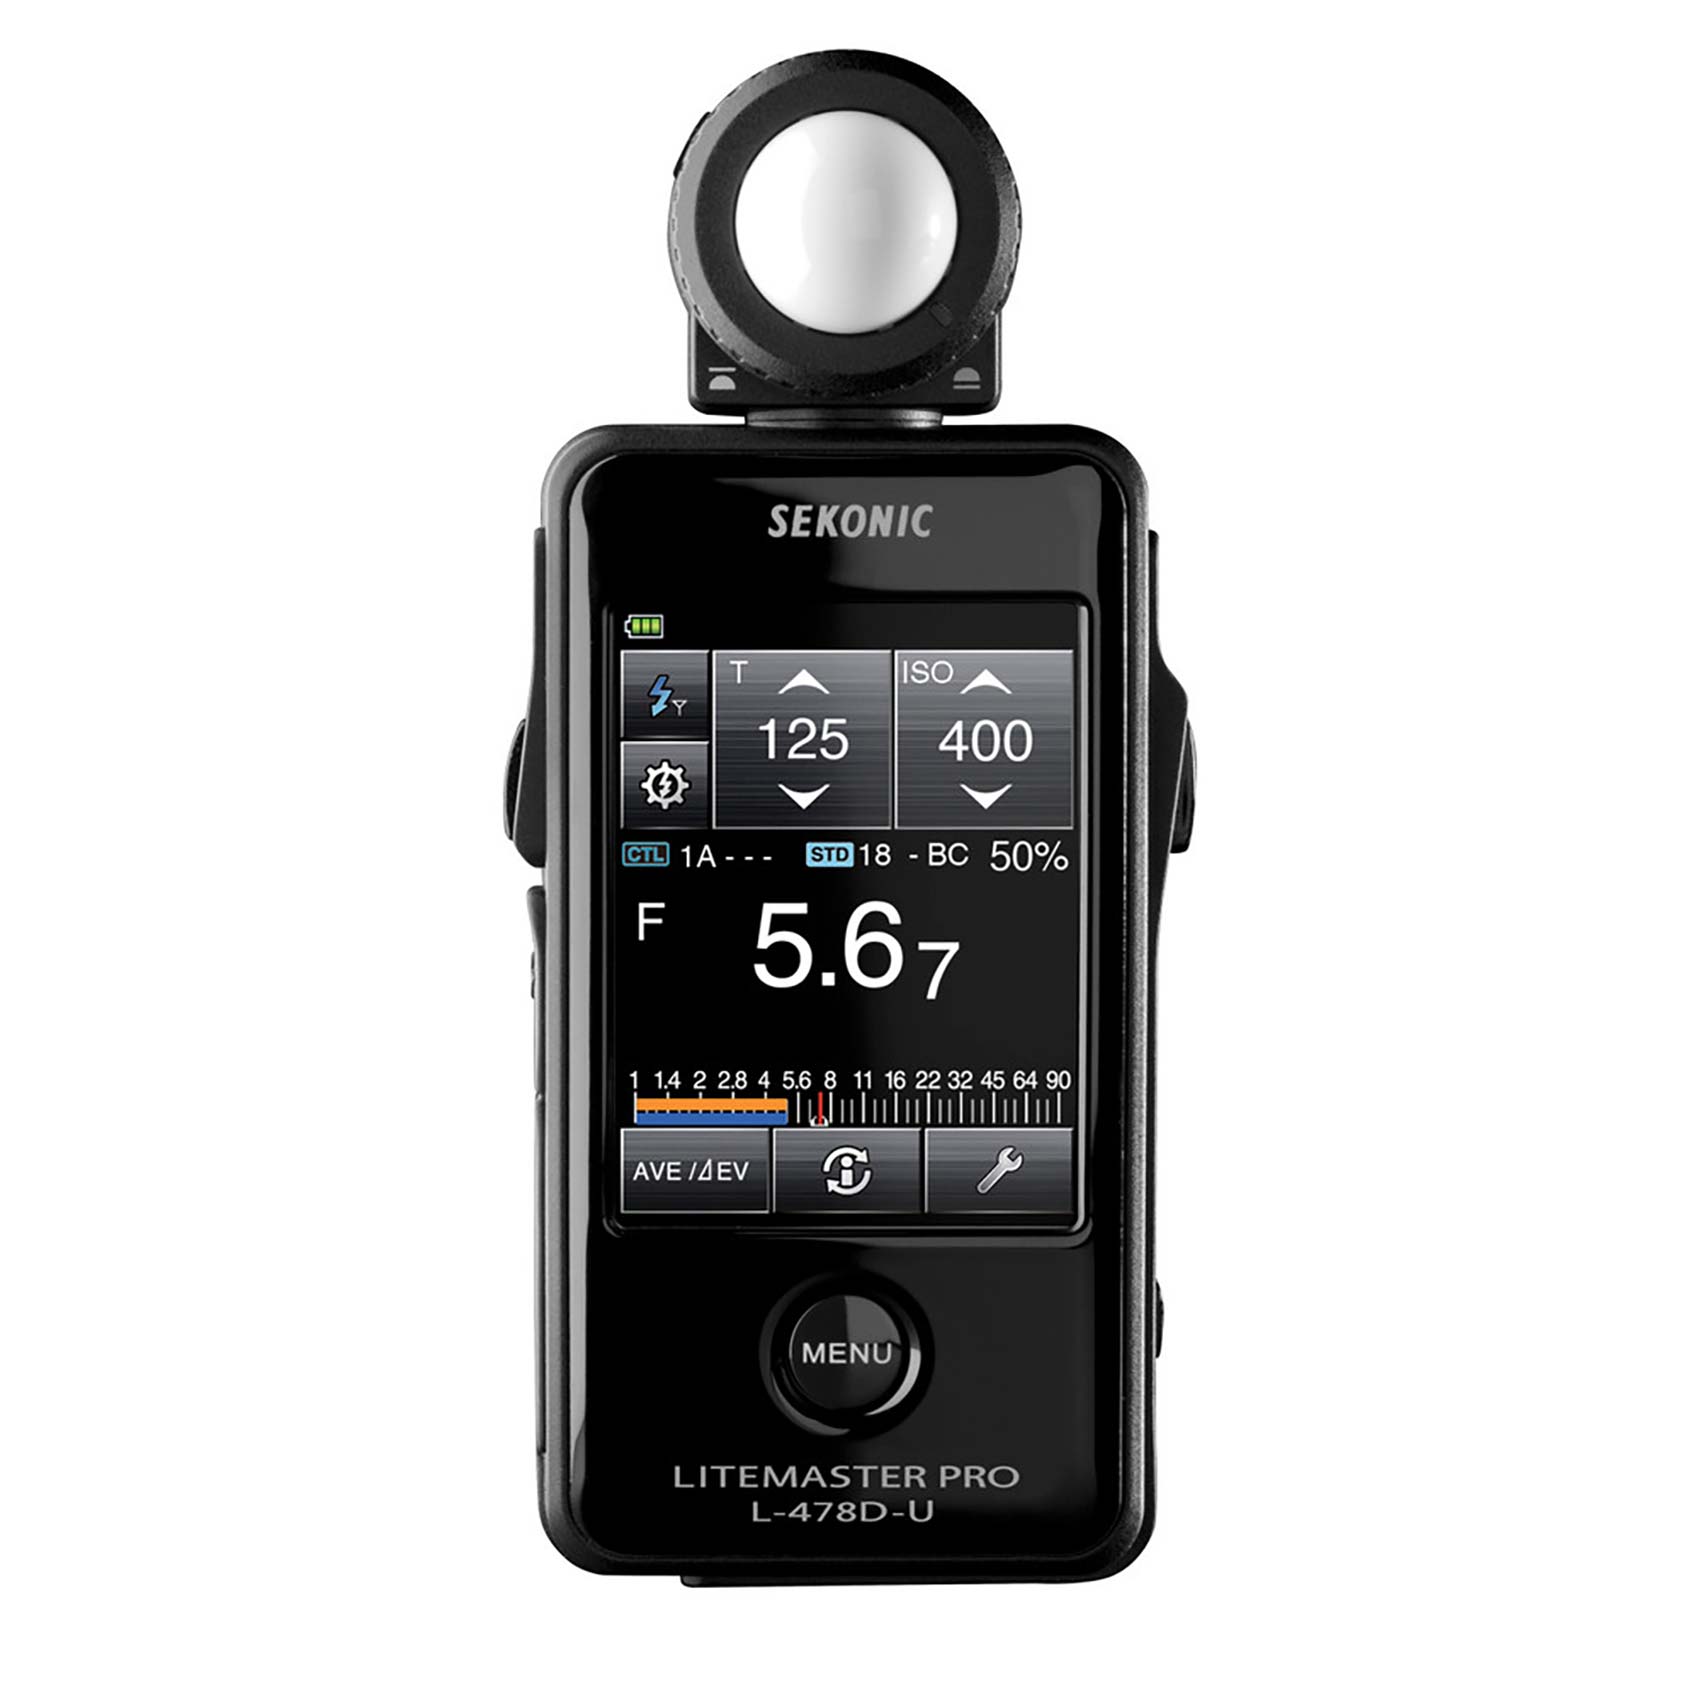
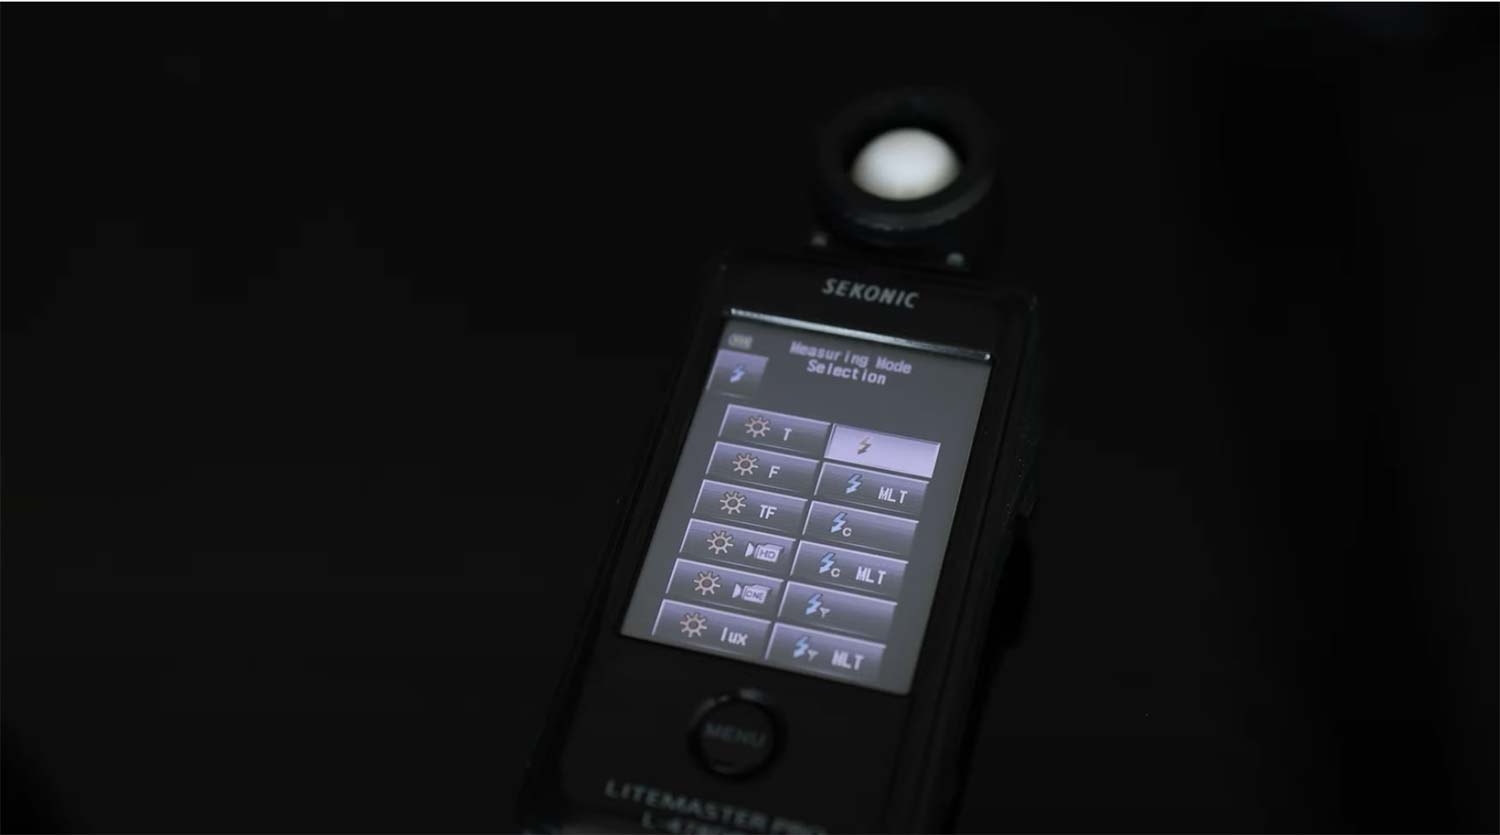
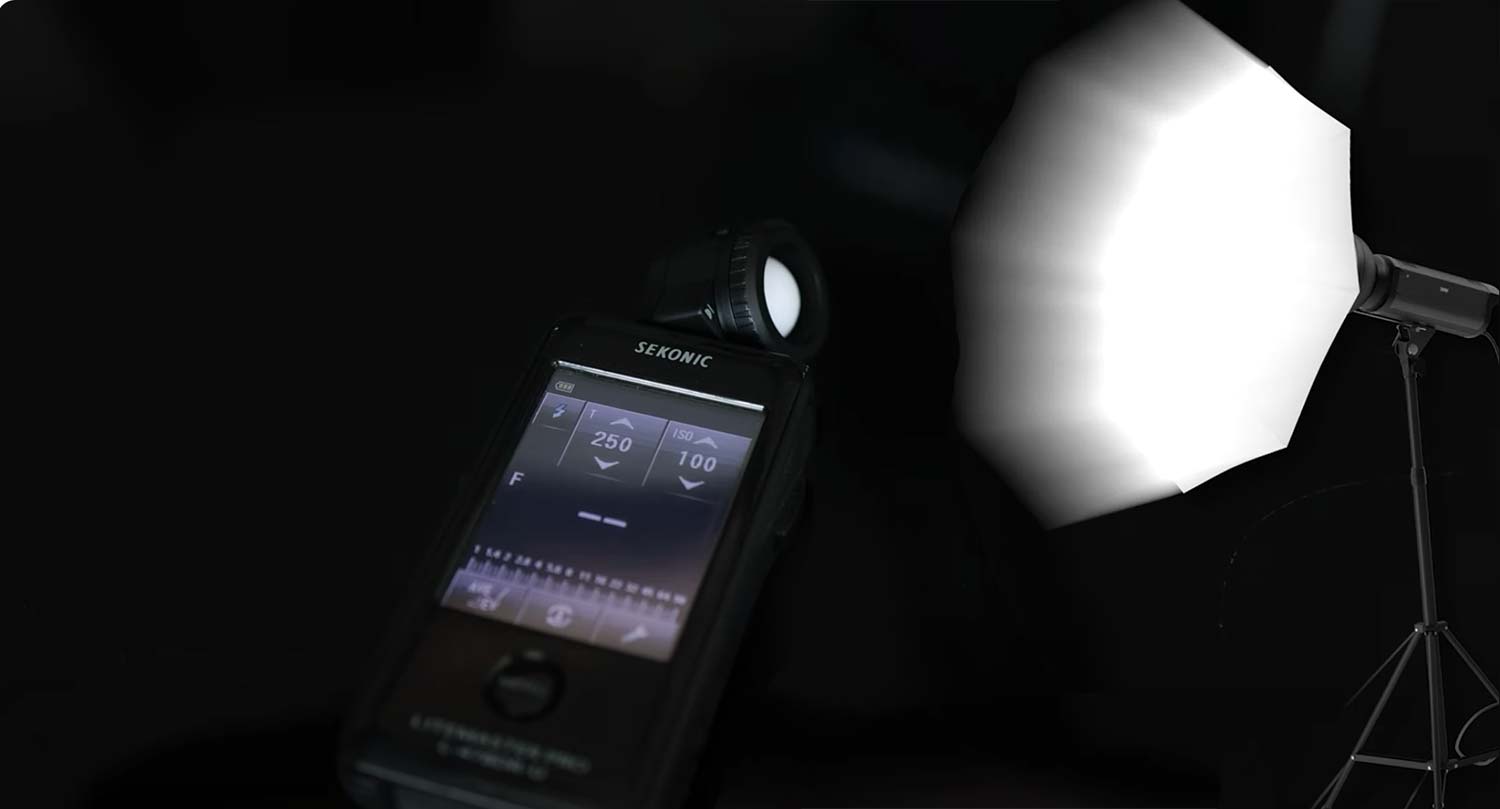
So let me break it down for you. Let me walk you through it. So I’m using, in my studio, a beat up, old Sekonic L’470 DR-U. It’s also meant for cinema. Here’s the first thing you want to know. What mode are we in? See the little lightning bolt? That’s flash. So, we’re basically telling the camera look, we want to measure flash, not natural light. I’m going to do another video on using your light meter outdoors in natural light and how to blend flash and ambient light to get a very nice pleasing shot using flash.
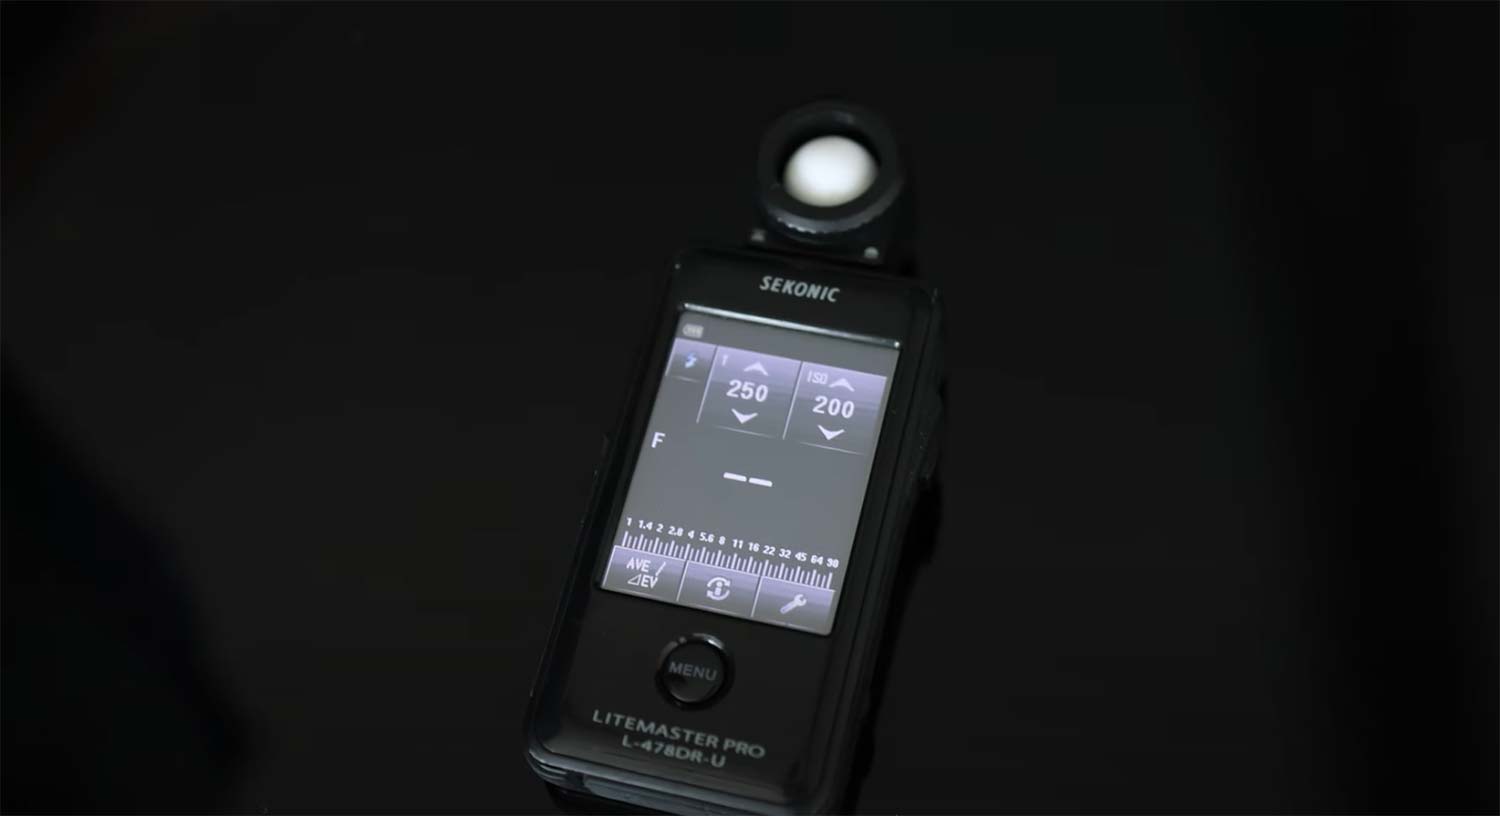
So, we want to set this, whatever light meter you use, I’m going to select that lightning bolt to let it know basically it’s flash. Now you can see the F-Stop, there’s nothing there, because I haven’t triggered it yet. And if I trigger this, it’s not going to read anything because there’s no flash fire, so it’s just not going to read anything. The T there is your shutter speed, when you’re working with flash, more than not you’re going to be in manual mode. I highly encourage you in studio to be in manual mode. So, here’s where you set your ISO, and this is just mirroring what’s on your camera. So if you want to set your ISO to 100 and your shutter speed to 250th of a second or 200th of a second, you’re going to change those two values. From there, you’re going to stand in front of your strobe and trigger this, and I’m going to show you how to do that in a second, and it’s going to give you the F-Stop.
And then what you can do from there is adjust. Now this is one that gets a little tricky, this lumisphere here, should it be up, should it be down? And so real quick on this lumisphere, I usually work with it down, and the reason I’m working with it down is because I want a very direct measurement of the light hitting that. So what I would tend to do is point this directly at the light source and measure it. Whereas if I have the bulb out, I’m now getting more of a, 180 degree measurement of light as well as 360 degrees around that 180, if that makes any sense. So, I don’t want that measurement. I really want pinpoint measurement and how much light is hitting that. So my way of using this is to point that directly at the light source with the lumisphere retracted and work from there.
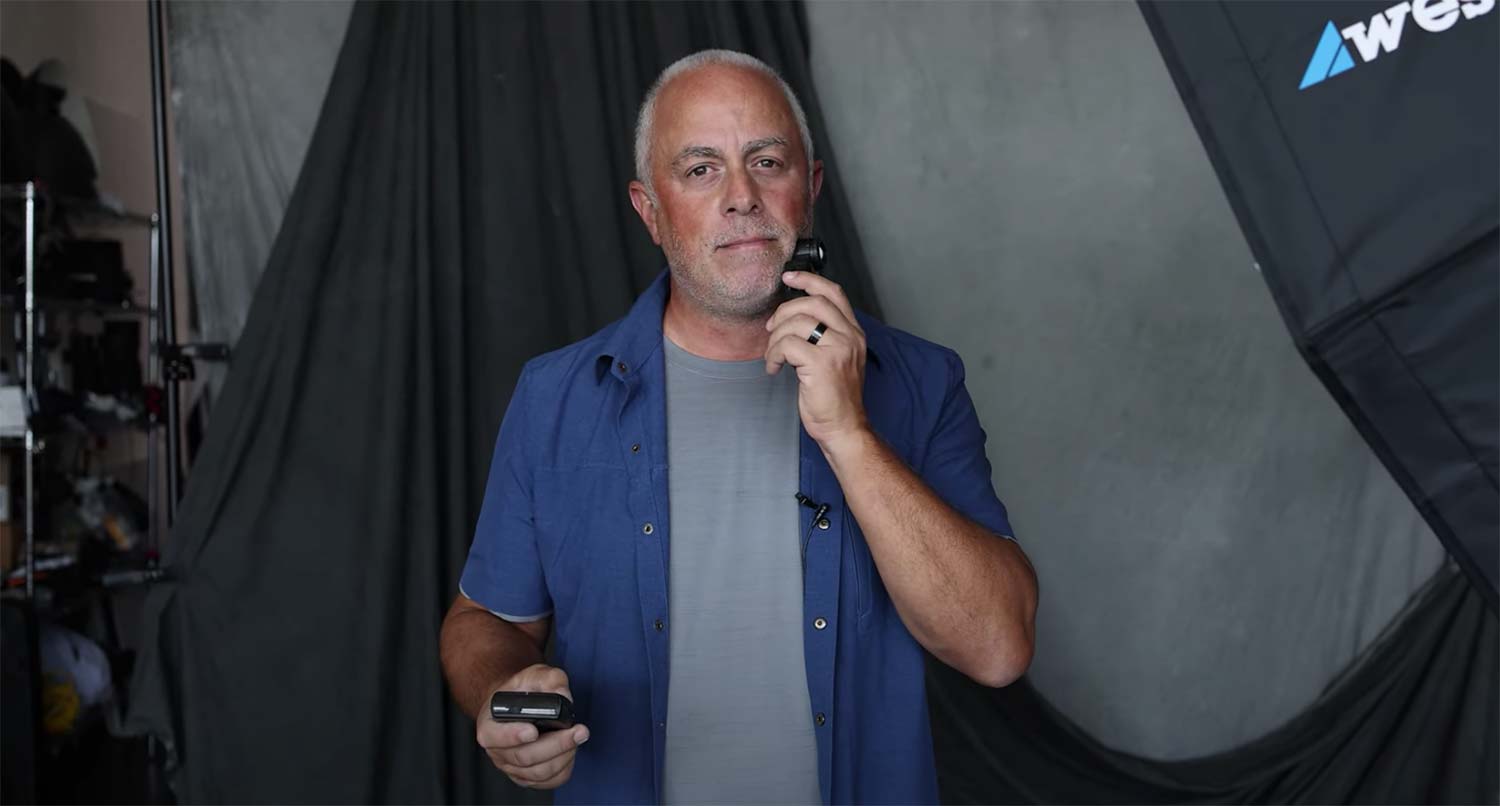
And that is really all there is to it. It is no more difficult than that. So let’s do it in practical application. I’m hoping this makes sense, super, super straightforward. So what I’m going to do here, I’m just going to show you with one light. Now the thing here is, unless you’re using a PocketWizard, which is an old technology, you need your trigger for your light system. It doesn’t matter what you’re using, to basically, I don’t know if you’re seeing that on camera, fire this flash. My power on the flash, let’s just crank it up because it is bright in here somewhat. I’m going to put this at power five. So for this, I’m using the FJ200 and an Octa Box here. Now I’m going to hit test, but at the same time, the first thing I’m going to do, is on the side of the trigger, is hit measure.
Now I’m going to measure it. So if I had a model here and here’s where the light source was, I would point this right there at the light, hit measure and then hit trigger. And what that’s giving me is a meter reading, I don’t know if you can see that, of 4.02. So, if I don’t change anything else, all things being equal, I would now set the F-Stop on my camera to 4.02 and I know I have an exact measurement of light. That’s going to make your post-production 10 times easier. Because now you know, don’t be tricked out by what you see on the back of the camera, it lies 90% of the time. The back of your camera is this backlit, super bright LCD screen that is not accurate. The only way to truly know what your exposure is, whether it’s too high or too low, one is with a light meter, but is to look at the histogram on your camera. That’s a whole other conversation we’ll have at another point.
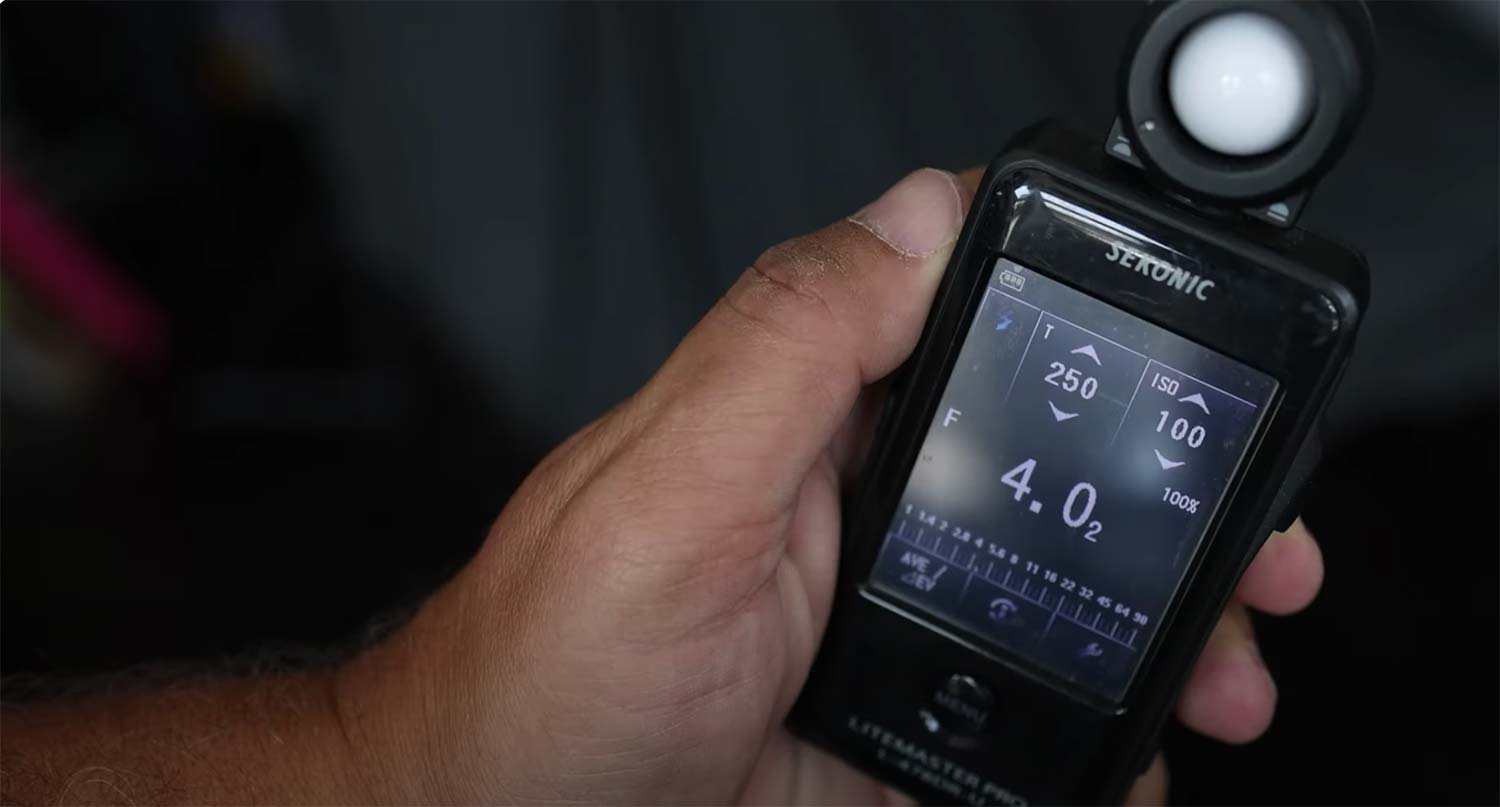
I’m just saying, the LCD screen on the back of your camera, it tells lies. So now let’s just say this is at 4.02. Let’s say I go, “Okay, well for whatever reason, I want to shoot this at 5.6.” So now what I’m going to do is, on my trigger, 4.0 to 5.6 is about one stop of light. So on the trigger, I’m going to move this, it was at a power level of five. I’m going to move this to a power level of six and I was 4.02, so I’m going to go up 9/10ths of a stop. And now I’m going to take another test shot doing the same thing, hit measure on the trigger, point it directly at the light, and now hit test on the trigger. And now I’m at 5.63.
I want to correct myself, I know I just said something that was not correct. I said hit measure on the trigger. Measure on the light meter and then fire the trigger. So let’s do that one more time. This is 5.62. So I’m 2/10ths of a stop too hot. I’m going to move this down to 5.7. Hit measure again, I’m at 5.61. Come down one more 10th of a stop, hit measure again. I’m at 5.61. So, as I drift, I might be off a 10th of a stop. So what I’ll do most of the time, when we’re working with talent or we’re working with head shots, is I’ll put a piece of gaff tape on the floor once the lights are all metered in. And that’s where I’ll be set up so that I know that I’m at 5.6 flat. You guys can see that.
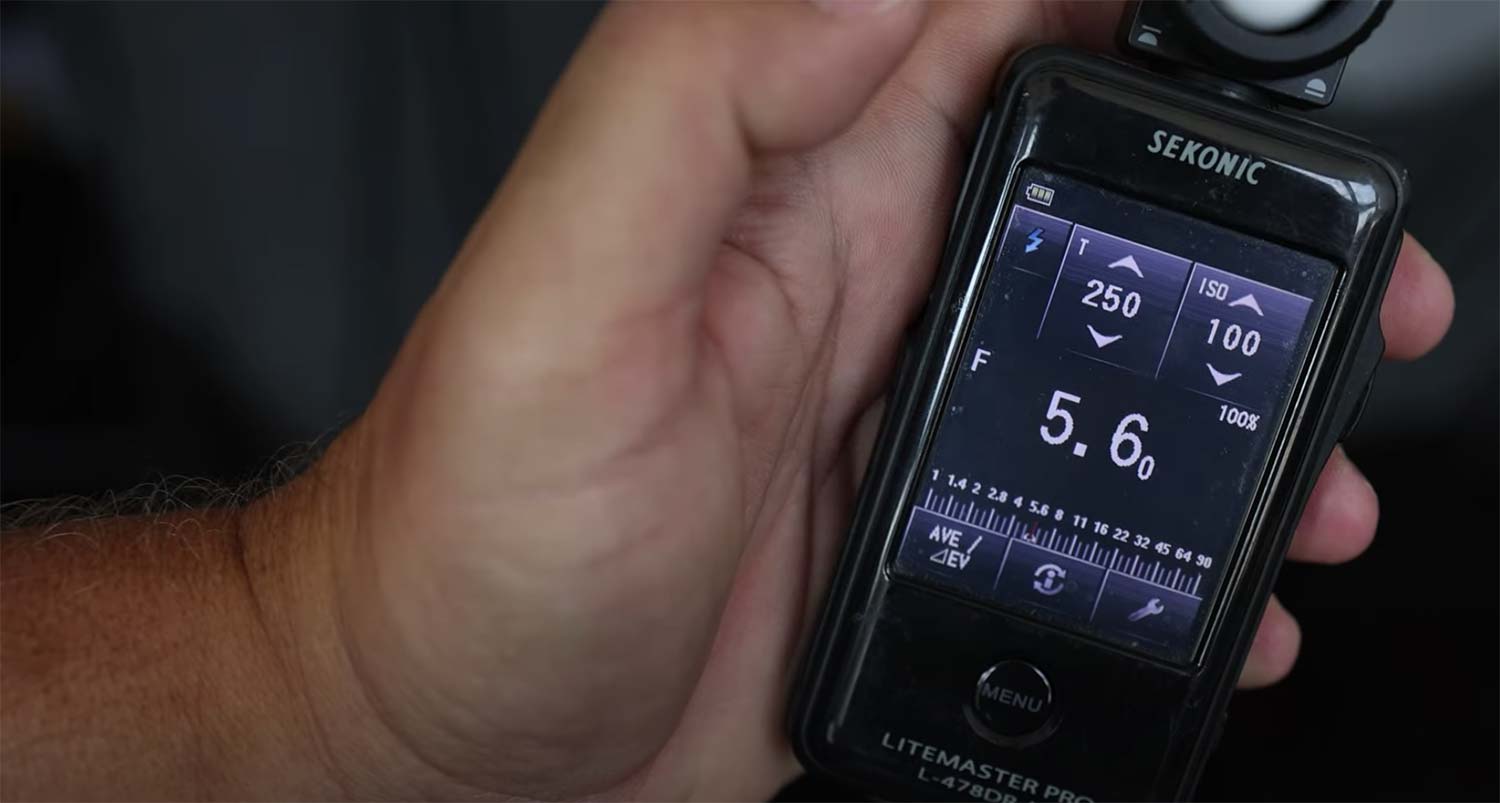
So you can see we’re at 5.6 flat. Now I know that on my camera I can set up the exposure to be 5.6 on the F-Stop. And what did I say we had? Shutter speed of 200th of a second. ISO 100. And now I know every frame I take is going to be perfectly exposed. Now, if I have a multi light setup, I would take my second light here and if this is at 5.6, I’d want this to be one stop difference, and I would be turning this light off and now triggering and measuring this light coming from here at F/4, until I get it at F/4.
I would do the same thing for hair lights, edge lights, background lights. This is how you use a light meter. And come on, let me know in the comments, you guys have been begging for this video. How easy was that to do? So, up your game, master your craft, get your hands on one of these, and it’s time for Sekonic to send me another light meter because this one’s beat to shit. I beat my light meters to shit. Anyway guys, try this out. Let me know in the comments if you use a light meter or don’t use a light meter. And if you don’t give it a try, I bet you you’re going to love it. We’ll see you in the next video.


