How to Use Lighting to Shape Your Style and Stand Out as a Photographer with Sal Cincotta
Lighting is one of those things that can really make a difference in your work and overall portfolio. For beginners, it’s very easy to get trapped into the world of “natural light,” but that is just the beginning. We all start with natural light, but we need to learn how to use light to shape our images—and that will ultimately shape your style. Even if you remain a natural light photographer, that doesn’t change my point. You must learn how to use light to create a look that is uniquely yours. This is how your customers will identify your work.
Photography is something that seems so simple that anyone can do it. However, we all know that mastering this craft takes years of practice and experience. So, the question is, what are you doing to stand out from the beginners? What are you doing to stand out and elevate your business from the pack? Buying a new lens won’t change anything. Buying a new camera won’t change anything. A photographer that understands how to use light and shadow will outperform you using a mobile phone.
Over my career, I have come to realize how important lighting is to my shots. Granted, I can’t stage every moment, nor do I try. When the bride is coming down the aisle, she is coming down the aisle. There is no time for “lighting” other than what is already naturally there. However, there will come a point in the day where it is your time to shine, where you will create those epic images that should adorn your website. This is what you should be doing to stand out. And by the way, I don’t care what kind of light you use, as long as you try to use it in a unique way.
For me, I am a dramatic portrait guy. I love creating something that feels surreal for my couples, but still represents the actual scene. Using off-camera light allows me to accomplish this. Below are several images I have created for my couples that hang proudly in their homes today.
When you are done reading this, I hope I have inspired you to find your style and maximize your potential with it. Use it on your website, at bridal shows, and in your advertising. This will ensure you attract the right clients who love your work and are willing to spend more for it.
Final moments
This was taken moments before the bride walked down the aisle. I didn’t have a lot of time to goof around with lighting or posing. I had about 120 seconds. I had never been in this room before and saw it as I was talking to my bride about walking down the aisle. I knew I had to move quick to take advantage of the scene. Normally, I might opt for a gorgeous silhouette but I felt like that really wouldn’t tell the story. So, I wanted a little pop of light to fill the shadow side. I quickly grabbed the mirror asked her sister to hold it, posed them both and fired it into the ceiling behind me to soften the light. The result is a beautifully lit and edited shot.
A kiss goodnight
This is not a Photoshop composite or trick; this was taken at the reception hall through a frosted window. The lighting on the inside of the room was tied to uplighting at the reception hall. What you can’t see is what’s going on around me. Pure chaos. I’m standing in the middle of the dance floor.
Meanwhile, I’m yelling instruction to my assistant who is relaying it through a door to the couple on the other side. Once the pose was perfected, I focused on the light, but again, this is a real wedding—I had to move quickly.
We used a Profoto A1 with a CTO (color temperature orange) gel to turn the wall orange and give it the perfect color harmony and really allow the couple’s body shapes to be more visible. Had I tried to shoot this with available light, the final shot would have looked nothing like this. In fact, it would have looked amateur at best.
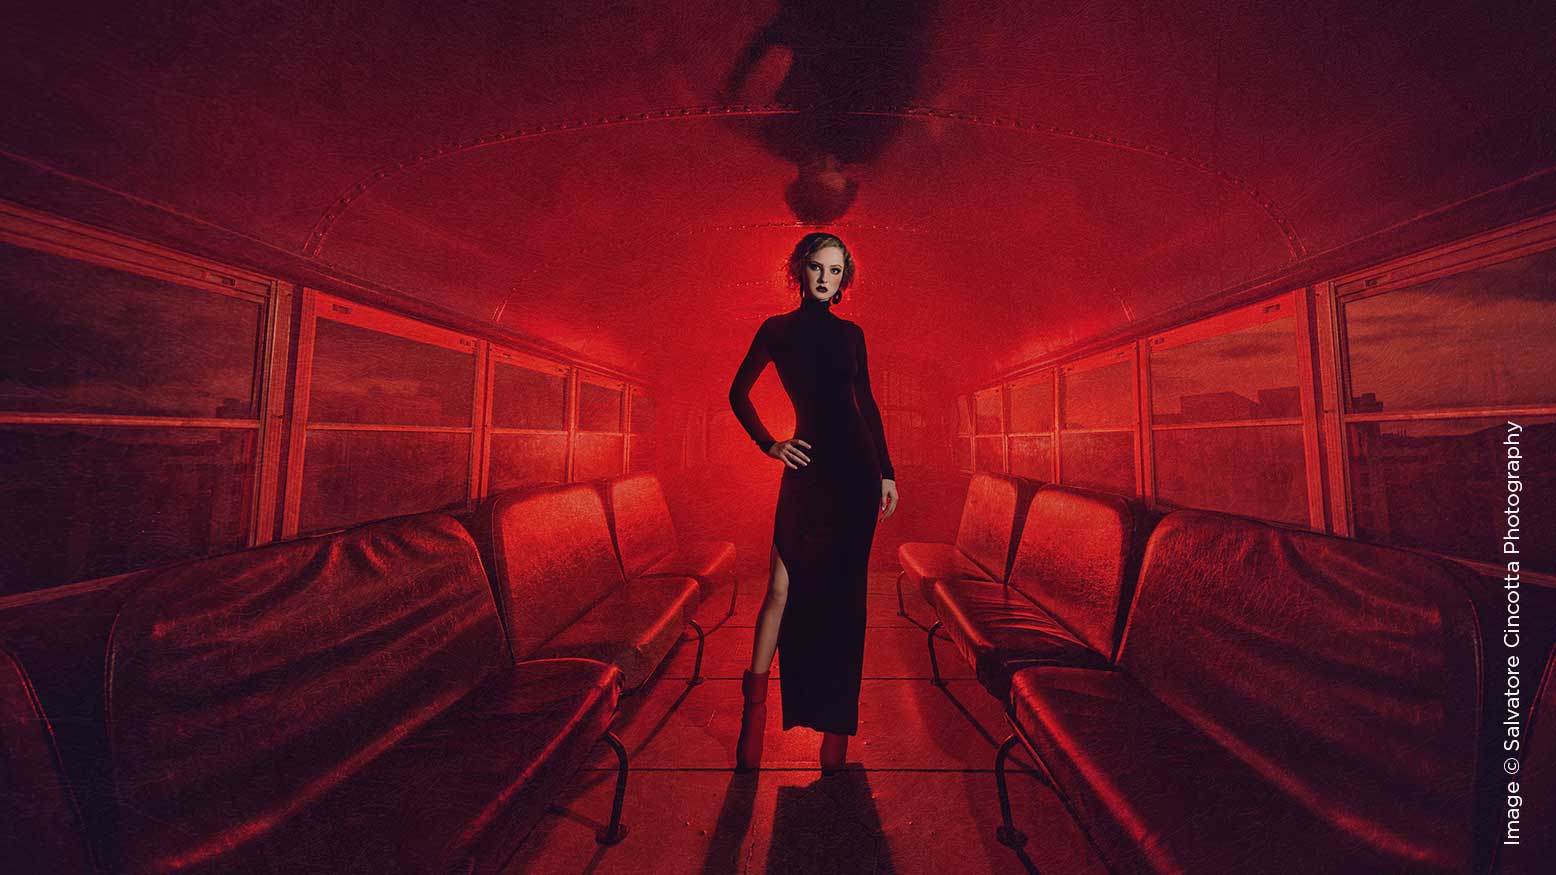
Boss Lady
This is a location in St. Louis that countless photographers have shot in, and guess what? They more or less all look the same. This is an old, ugly school bus with green seats, a blue ceiling and disgusting floor. Here is a perfect example of where we use light to shape our shot and create something truly unique.
I used a B10 with red gel on the back to fill the bus with red light and wash out all the ugly, distracting colors. Then I used another B10 and OCF Beauty Dish to illuminate her face and body. The results are stunning.
And just by turning off the key light, we were able to create another unique image using light and shadows. Again, had I not used light to create this image, the results would have been average at best.
I hope my use of light to create unique images has inspired you to try something new. Push yourself and experiment with light in new and creative ways. I promise you, your work will improve dramatically and your clients will be willing to pay for the uniqueness that is solely yours.