How to Use Natural Light for Modern Senior Portraits with Carlee Secor
Senior portraits are what really kicked off my photography career and made me fall in love with photography. I’ve been in business for four years now and have been using only natural light with all my senior portrait shoots since the beginning! I’ve always been big on using minimal gear knowing that it can still produce great work. I almost always will shoot an entire senior session with just one lens, no reflector and no artificial lighting. I truly believe if you study light and know your gear well, you’ll always be able to nail the end product. So with that being said, I wanted to share a few tips and tricks on how I do it!
Why locations matter
Scouting locations is so important when it comes to getting the exact result you’re looking for. You want to make sure your location has plenty of options for different backgrounds and of course good light! Light is everything in photography, and if you’re going for a specific look, direct light, side light and back light all result in a different “style.” The position the sun will be at the time you’re shooting can completely ruin a shoot. Know your locations, have an idea in your head of what you want the end result to look like, and work with the sun. If you can’t go out and scout locations, they make apps for your phone that will tell you the direction the sun will set. You’ll thank yourself later.
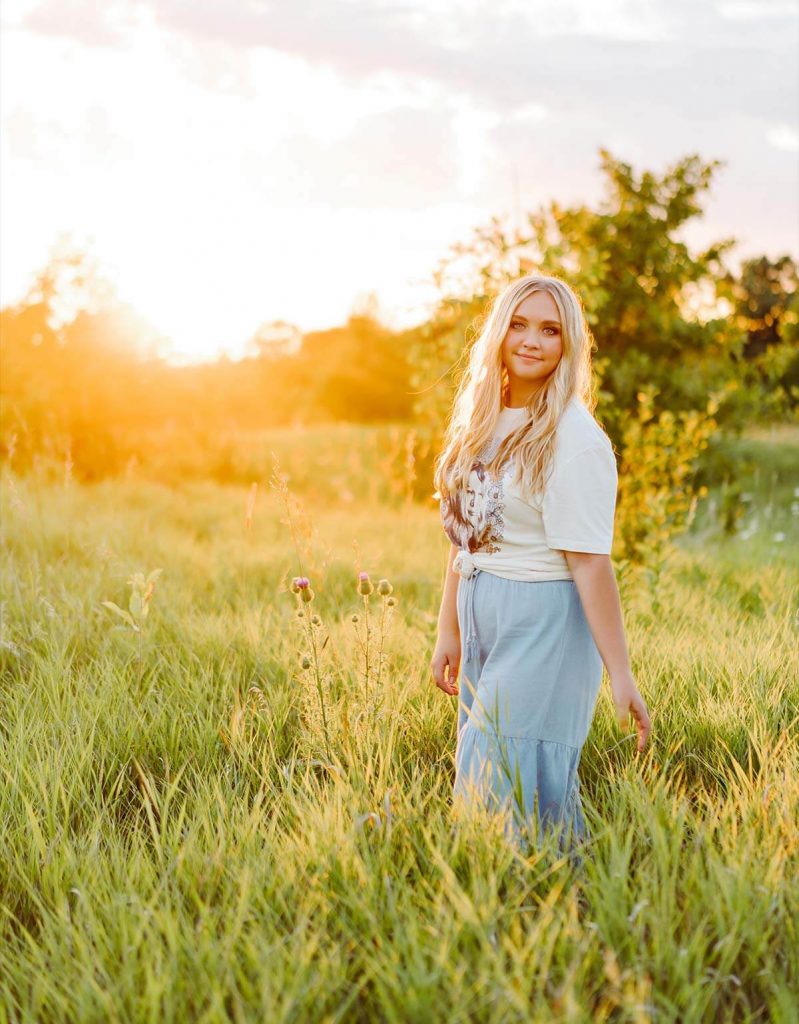
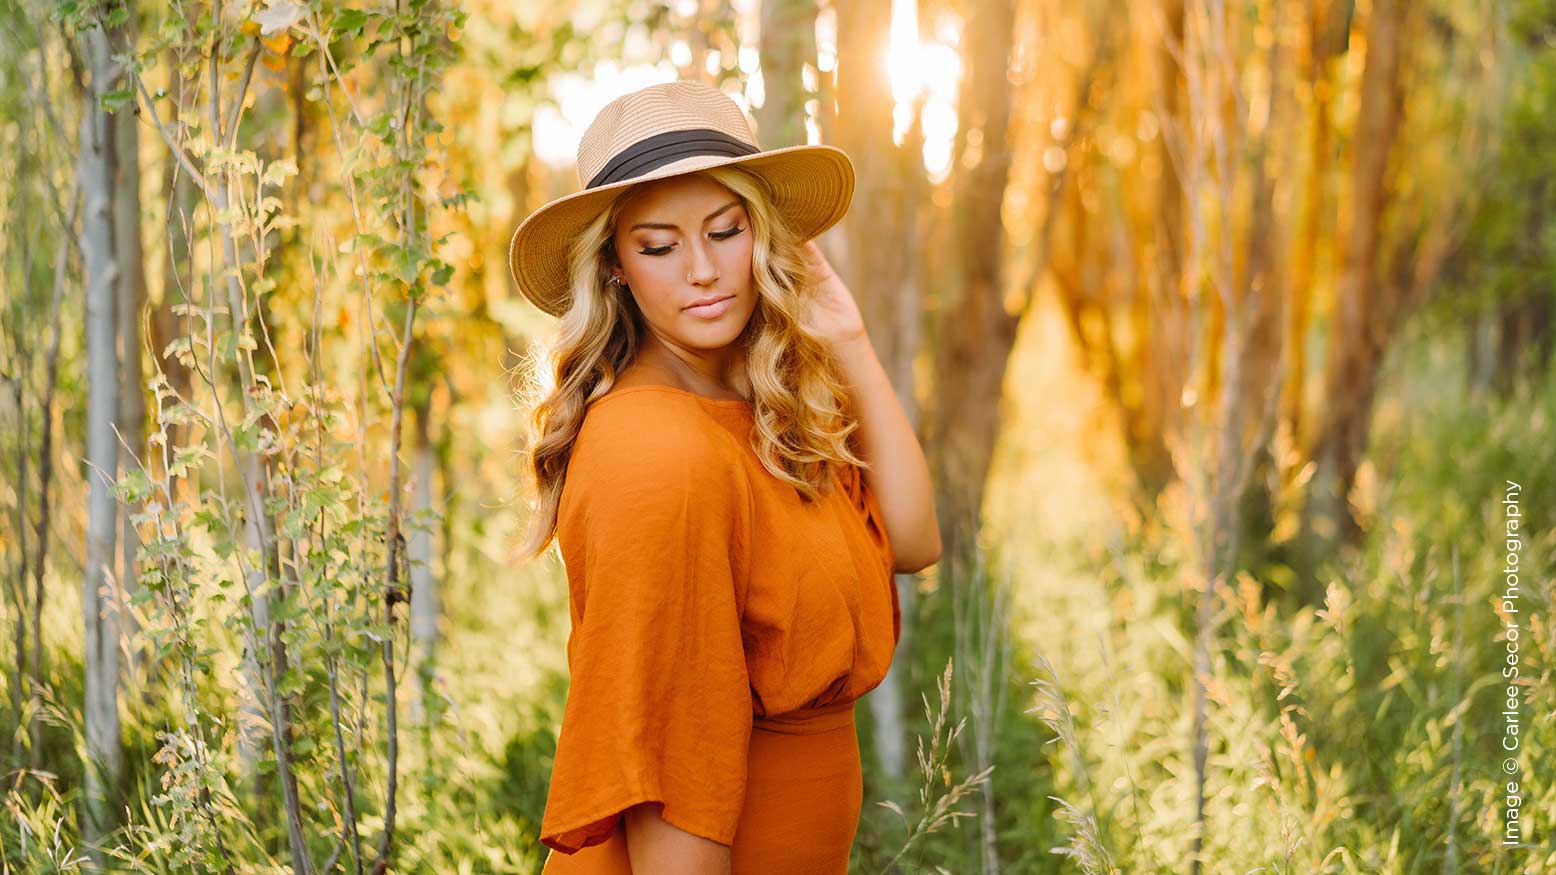
Backlit images and how to perfect them
From the beginning of my career, I decided I loved the look of backlit photos the most. It made for the cleanest, sharpest looking photos every time. No matter what time of day, or even if it’s cloudy, I make sure the sun is behind my subject. Obviously I break this “rule” from time to time (there really are no rules with photography in my opinion). But it’s a style I’ve stayed consistent with and it works best for me. Always focus on the placement of the sun and place your subject’s head directly in front of the sun. This works best during golden hour.
The gear I use
My setup is a 55mm 1.8 Zeiss on the Sony A7III. A true portrait lens is 50mm and anything longer. Almost every photo I take is with this lens. My settings are usually 1/200 shutter speed, 1.8 aperture and 100 ISO during golden hour. Before I switched to Sony I was with Nikon for three years, and even shooting with my Nikon D750 I mostly stuck with a 50mm 1.4 for every portrait session or wedding. Since switching from Nikon I’ve never once regretted my decision. Sony Mirrorless is fast, sharp and so much lighter. This circles back to me only carrying and working with minimal gear. I really believe you produce better work if you know the ins and outs of the gear you consistently use vs. switching it up. Very rarely do I change my lens, and if I do it’s to an 85mm! I don’t use a 35mm for portraits because I feel like it can distort the image. If you are looking for a simple, go-to portrait lens I recommend a 50mm 1.8. They’re cheap and easily the best.
Type of natural light
Knowing what the sun looks like during certain times of day and times of year will help you tremendously. The sun sets in the west and rises in the east, so if you’re photographing at sunset you’ll want an east-facing location and vice versa for sunrise. During different seasons the sunset tends to look different and may move slightly. I only shoot two hours before sunset for this reason, and YES I plan every single shoot around sunset. BUT there are certain times where it’ll be really cloudy and I’ll move a shoot up or reschedule for that reason. A cloudy day vs. a sunny day sunset looks completely different. On a cloudy day you’ll lose your light much quicker. Since backlit images is a style I’ve consistently stuck with, most of my clients request that specific golden hour look in their photos. If it’s extremely overcast, it’s out of my hands. I have no issue moving dates to sunny days to please my clients. It’s so important to communicate to your clients the reality of the weather and how it’ll affect the end product.