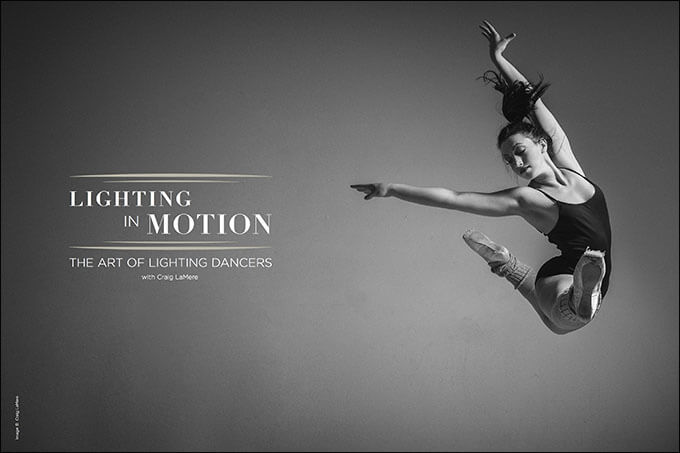
Lighting In Motion: The Art of Lighting Dancers with Craig LaMere
One of the things about photography I love the most are the millions of genres and subjects there are to capture. My interests vary a lot. To get an idea of how varied they are, all you have to do is take a look at my music play list at any given time. You will find Tool, Journey, Metallica, DMX, Frank Sinatra and Pearl Jam all occupying the same space. My shooting interests are just as wide. I love seniors, fashion and portraits as much as I love boudoir, weddings and families. Each genre comes with its own set of challenges.
This month, I look at one genre I can’t get enough of: dance.
Choosing the Best Shooting Options
When I shoot dancers, my first three thoughts are: How are we going to pose the subjects? What is our light source going to be? What mod do I want to use? The way you pose your dancer determines how you conduct the rest of the shoot. Are they going to stand still, or are you going to let them cut a little rug?
Shooting Static Dancers
If you are going to shoot more static poses or if your subject is going to move and pause, you can approach the shoot in more of a portrait mindset. Shooting a portrait session is far easier to control due to limited variances. You pretty much place your subject, pose your subject, meter for the highlight and shoot. The choice of modifier you use for a portrait session is not limited, so you have full control.
Shooting Moving Dancers
If you want to capture your dancers’ movement in studio, that is a whole other ballgame. You have quite a few decisions to make because you have to account for anticipated movement. You don’t know for sure where the light is going to fall on your subject like you do in a portrait session, so you have to guess where your subject is going to be in relation to your light. And because of the movement, you have to be really choosy for your modifier. You have to decide if you want light all over to make the image light and airy, or if you want more directional light to add drama and power to the image. This decision determines the light source you use.
Shooting With Big Mods
If you want light, airy images in studio, the choice of mod is a pretty simple one. Go with a large source like a 4×6 softbox or a 70-inch parabolic with either butterfly or loop light position to get the most coverage. Either setup is foolproof. With butterfly, you bring the light source behind and above you at 45 degrees down. If you have lower ceilings, this setup might be a little flat because you can’t get the light high enough to make your pattern. In this case, bring the light to the right or left, and do a loop light pattern. Loop light gives you the dimension and depth you need.
Shooting for Contrast
If you want to shoot with more contrast with more dramatic lighting, shoot either beauty dish with a grid or a strip with a grid. Keep in mind that when you move to a light source with more contrast, especially with a grid, you have to be mindful of where the light is going to fall with the movement of your dancer. It’s easy to clip or miss them altogether. This is why I recommend using a loop light pattern with the main light source. If you need fill light, use a second light source instead of a reflector or V-flat, since the main light source will not put out enough light because of its distance to the subject.
For fill, I find the best solution is to put a second light with a 4×7 or 3×4 box behind and above you. All I’m trying to do is send a huge wall of light at the subject. I usually meter the fill at a stop and a half lower than the main. That pretty much gives you enough light in the shadows so you can pull any info out that you need.
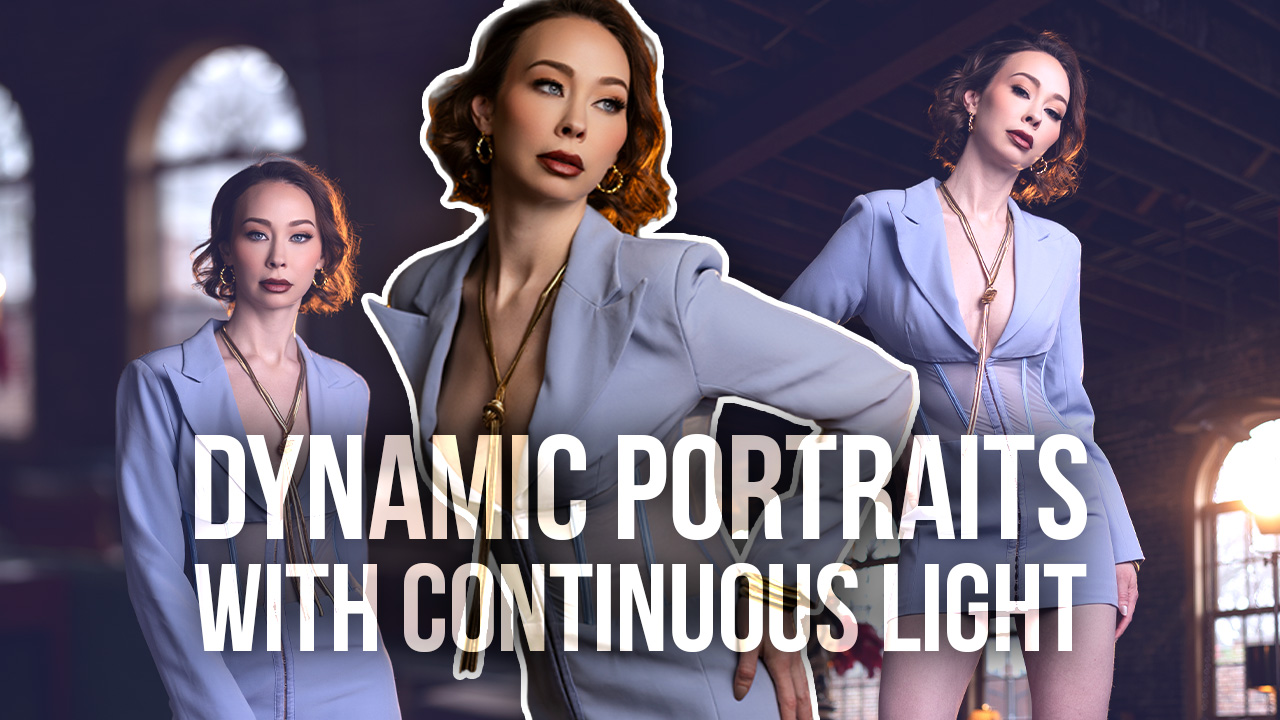
Shooting Constant Lights
Another light source I use to shoot dancers is continuous florescent lights. The thing that is so nice with the constants when shooting moving dancers is that you get what you see. There are no surprises, and you can shoot as fast as your camera can fire, which is a huge plus when shooting dancers.
The downside of shooting constants is, like always, the power issue. That’s huge because of the combination in camera settings you need to make it work. Because of the power of constants, you have to shoot at a higher ISO. I shoot at about 400 to 500 ISO when I’m shooting my constants in a portrait session, but I have to go way higher when using them for dance because, unlike in portraiture, you have to shoot at a higher speed to freeze action. That magic number is 1/500 or higher.
To freeze action without flash outside, you need to be around 1/500 or higher. Because I treat constants exactly the way I shoot natural light, the rules are the same. I have to get my shutter speed to 1/500 or more. To do this, I usually have to push the ISO to 1000 so I can shoot at f2.8–f3.2. When I am shooting dancers like this, I always use my 24–70 2.8G at 24mm–60mm when I’m at f2.8–f3.2. Your images will be in focus and sharp because you don’t have depth-of-field issues like you would if you were shooting at 135mm–200mm at those f-stops.
Shooting with this setup allows you to rapid-fire your camera and give yourself the most opportunities to capture that perfect moment. But if you are a strobe user, there is a better way.
Perfect Timing vs. Rapid Fire
I’ll bet most strobe shooters who are trying to capture movement do it one frame at a time. They set up their lights, tell the client to move or jump, and then try to hit the shutter button at the perfect time. Everyone gets lucky every once in awhile, and sometimes you get the perfect image in the first few attempts. This method takes a little while, which can be hard on your client.
Then one day on YouTube, I saw this strobe flashing like a machine gun on a fashion shoot. I was so sad watching the video because I was thinking I would have to sell all my strobes to get the ones I just saw—I had to be able to do that. I’d usually unload a bunch of heads on eBay and get the new ones, but on second thought, that would have meant a loss of money. I decided to call the manufacturer of the strobes I was using at the time. I told a rep about what I had seen, and asked if my heads would do that. They said it was just a matter of the heads being at a power level where they can recycle as fast as the body can shoot.
With that info in hand, I went to work. Finding the recycle time was just one part of the equation. The other parts that go into the recipe are the f-stop and the ISO and lens combination in relation to the power output of the strobe. At the time, my fastest body would shoot at about 10 frames a second, so the goal was to find the place in the strobe’s power that would allow for that recycle time.
The power setting that would recycle fast enough was about a quarter power on a 600ws head. Most studio shooting is done at ISO 100 and at about 1/160 shutter speed, but because of the low power, your images will be way too dark at any f-stop past f2. The issue with f2 is that the room for error is very small. To fix the aperture issue, we have to shoot at a higher f-stop, which means we have to move the ISO up.
But as you move the ISO up, you start to deal with the noise in your images. It’s not a huge issue if you are shooting on white, but it can be a mess if you are shooting in a dark location. I found that if I move my ISO to 400, I can meter at f3.2–f4. That might seem like a pretty open area, but that is where lens choice and focal length come into play. Shooting a 200mm at f3.2 and shooting a 24mm at f3.2 gives you different results. My Nikon 24–70 2.8G is the perfect fit for this setup. I like the zoom because you can move in and out as you need to. With the wide focal length, you won’t have depth-of-field concerns, and every part of the image you shoot at f3.2 to f4 will be sharp.
If you have never tried this method, try it out for your next dance shoot. A faster body will give you the most opportunities to capture that perfect moment in time that your dancer will love.