Lighting the Rock and Roll Family Portrait with Michael Corsentino
Want more information on this article? Get access to video content and additional supporting images. Launch the July issue of the magazine by logging in or signing up for a free account by clicking here. Shutter Magazine is the industry’s leading professional photography magazine.
The guitarist for a band I shoot promo work for just welcomed a brand-new baby boy into the world with his wife. That offers the perfect opportunity for a family portrait session. Not just any old cookie-cutter family portrait—I want my portraits, family or otherwise, to reflect the individuality of the subjects.
Every person and every family is unique. Could I have gone the tried and true family-on-the-beach-in-khakis-or-in-the-park-on-green-grass route? Certainly. But then it would look like a million other family portraits. It wouldn’t look like them. These guys are rock and roll, so the portrait needed to say that. What I’m getting at here is something I like to call portrait design. Rather than getting stuck following the pack, strike out on your own and produce portraits that tell your subject’s unique story. Think about them more like environmental portraits than family portraits. With environmental portraits, you’re doing your best to incorporate elements that help tell that story, whether it’s the location, the props or the wardrobe.
My original plan was to put Eric’s badass Day-Glo orange muscle car and the family in the middle of the road, and angle the car so that it crossed the double yellow line on the road. I’d stagger the family in a heroic pose, with Eric out front and Dani (his wife) and Asher behind him, and cross-light them with a broad keylight from one side, using the sun as a warm-toned kicker light from the other.
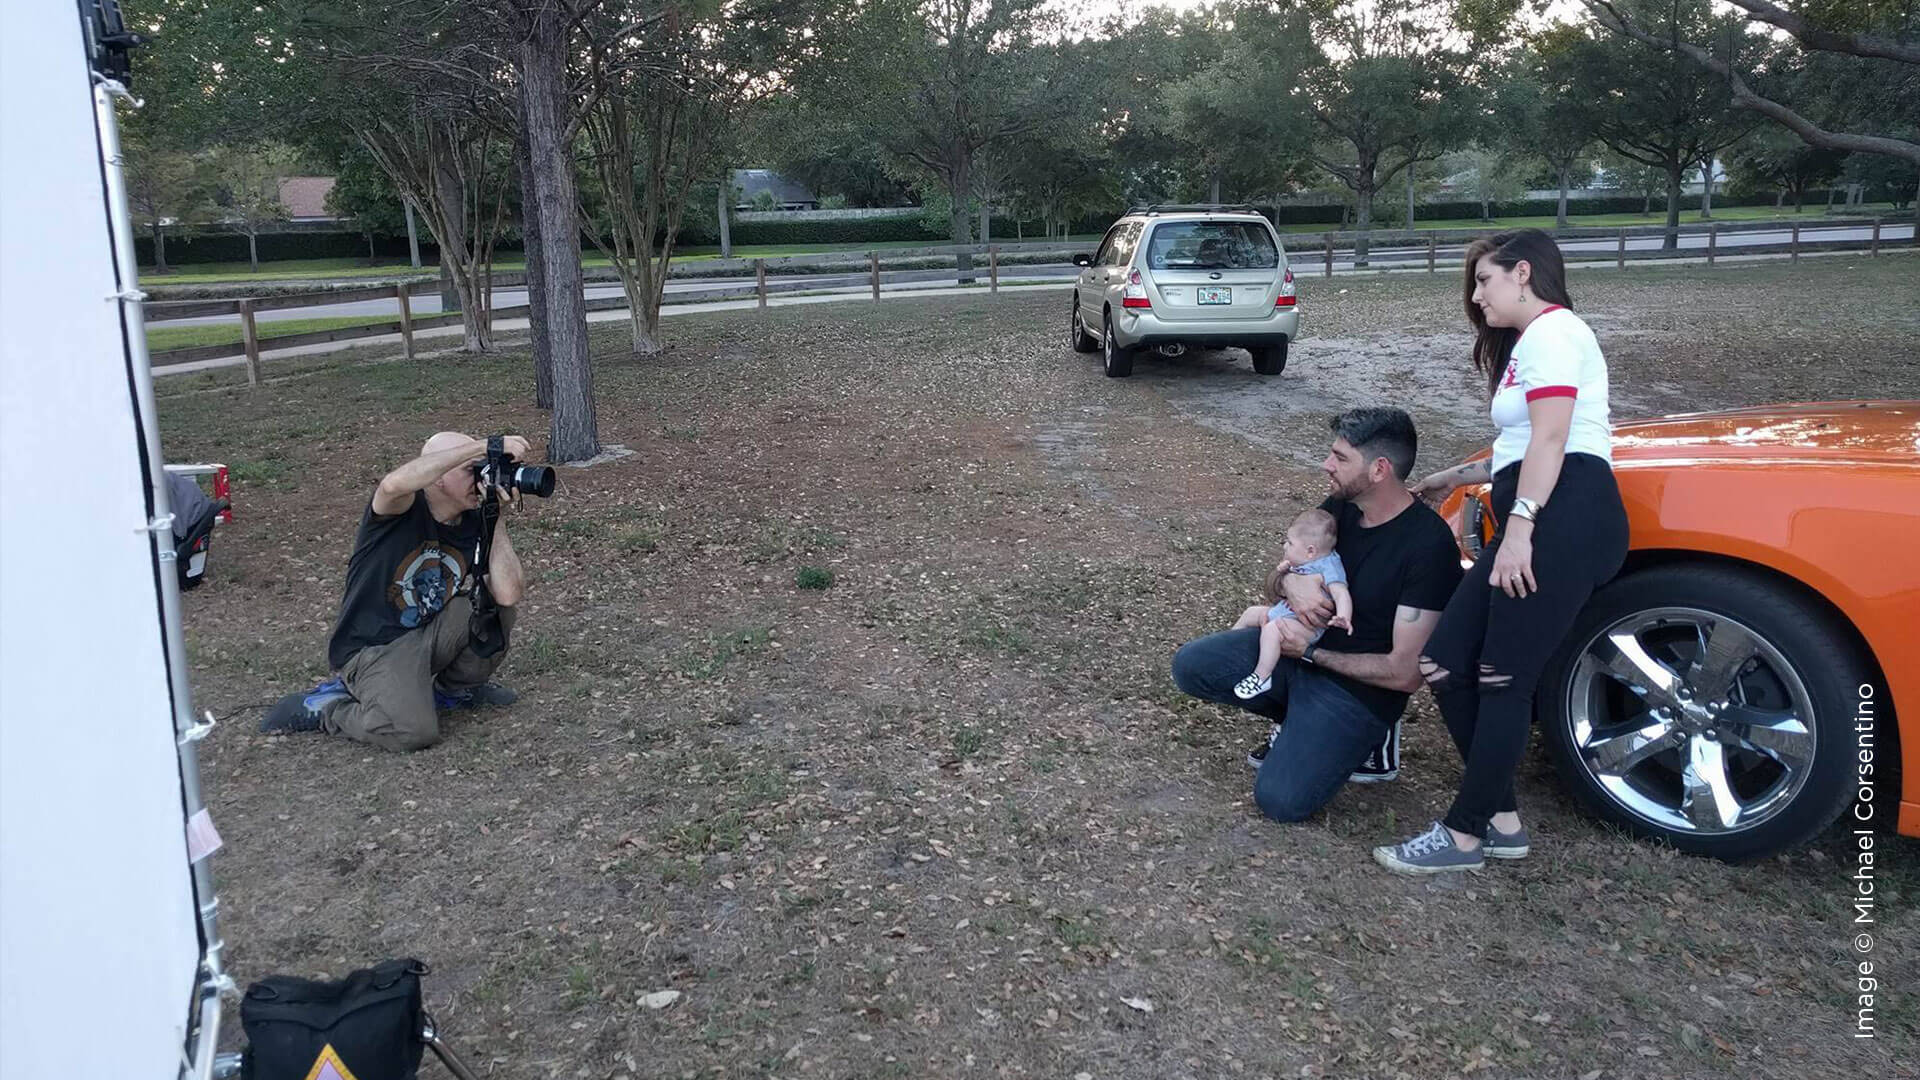
When my assistant and I arrived at the location, it quickly became apparent that none of that was going to work as planned. The yellow stripe on the road was only about 10 feet long, so it wouldn’t create the front-to-back infinity effect I wanted. The road was more highly trafficked at that time of day than expected, which made putting the car and lots of gear in the middle of the road unrealistic. The sun was low in the sky but being blocked by trees, so my accent light was gone, and it felt like it must have been the windiest day on record, which meant the light modifiers I brought were going to be a complete bear to work with.
Luckily, I had four sandbags with me, not nearly enough, and one assistant, again not nearly enough with all that wind. With the family arriving shortly and the clock ticking for setup, I needed a new plan and I needed it quickly. That’s often the case when unexpected environmental and location issues crop up. Having to change it up on the fly happens all the time. It’s something you need to be prepared for. You have to be able to roll with the punches, think on your feet and produce even when you’re thrown a series of curveballs. That’s what being a professional is all about, especially on location.
Luckily, there was an empty parking lot for a park right next to the road. It had a rustic enough look with its dirt floor, canopy of trees and a wooden fence that I could use to create leading lines in the composition. This proved to be a good compromise, one that provided a location that was consistent with my original concept for the portrait and that allowed us to work more relaxed and uninterrupted with plenty of room for gear.
Since I would be lighting a staggered grouping, I wanted to light them all fairy evenly front to back and also highlight Eric’s badass car, the main prop and rock and roll element for the shot. When you’re working with groups and you want even light, the inverse square law is your best friend. This scary-sounding term just means you’ll want a fair bit of distance between your subjects and your light source to achieve even front-to-back illumination. The reason for this is that light energy or fall-off happens much more rapidly as it leaves a strobe than it does the farther away you get from it. In other words, from 1 to 3 feet in front of your strobe, your aperture reading could easily drop two full stops. From 8 to 10 feet away from your strobe, the energy or amount of light remains much more consistent as it travels, giving you a wider margin of space for even lighting. So what you’re doing by working with distance is allowing a group of subjects to evenly share the same amount of light, more or less, from front to back.
To achieve this, I lit the group with an 8×8-foot scrim with two to three strobes fired through it from behind. I did this to create a large wall of light that provided enough coverage to illuminate the group with one source. I knew the light wouldn’t have a ton of contrast since I was using a diffused white source, but I also knew I could always add additional contrast in post. By increasing my shutter speed to underexpose or “knock down” the daylight and my increasing flash power, I’d be able to create the dramatic look I wanted.
Keep in mind when you’re working in ambient and strobe situations that shutter speed controls the amount of ambient light contributed to an exposure, and that aperture (as well as strobe power) controls the amount of flash contributed to an exposure. The light from the setting sun was being blocked by trees and clouds, and was therefore unavailable for use as an accent light. To overcome this, I used an additional strobe in place of the sun. I gelled it with color temperature orange gel (CTO) to help replicate the warm look of the sun’s light. I placed this accent light on the opposite side of the keylight.
I always bring along additional modifiers so that I have options and different looks at my disposal. I had a 20×50 strip box and a large deep silver interior umbrella and a 74-inch octabank. The wind rendered all of them useless. My assistant was having enough trouble managing the 8×8 scrim in the wind, even with four sandbags. That meant using only hard 7-inch reflectors on the strobes instead of the many modifiers I would have preferred. The wind forced us to improvise.
At the end of the day, I was able to create a compelling portrait that Eric and Dani loved. By shooting tethered, they were able to review images throughout the shoot. The key to working with babies is being ready to go when your subjects arrive. While getting as dialed in as possible with your lights, exposure and planned composition is a great practice and my standard operating procedure, when you’re photographing a baby, it’s essential. You have a very limited window of opportunity; once they get cranky and melt down, it’s over.
Capturing one image live where everyone has a perfect expression and their eyes are open can be a challenge, especially with a toddler in the mix. This is one of those fix-it-in-post opportunities. Developing solid compositing skills allows you to mix and match expressions, finding the best ones and combing them into one perfect image.