
Lights & Props in Underwater Portrait Photography with Scott Vo
Photographs are so easy to take. With just a push of a button, you capture a moment. That moment can be natural or something you created from your imagination. Your photographs should tell a story and draw in the viewer. The way gravity behaves underwater can help you create photographs you wouldn’t be able to on the surface. For underwater photography, you can use natural light or bring in strobes. With strobes, you create a mood that conveys a message or theme. Give your subject some interesting props and light to deliver it.
Preparation Favors the Prepared
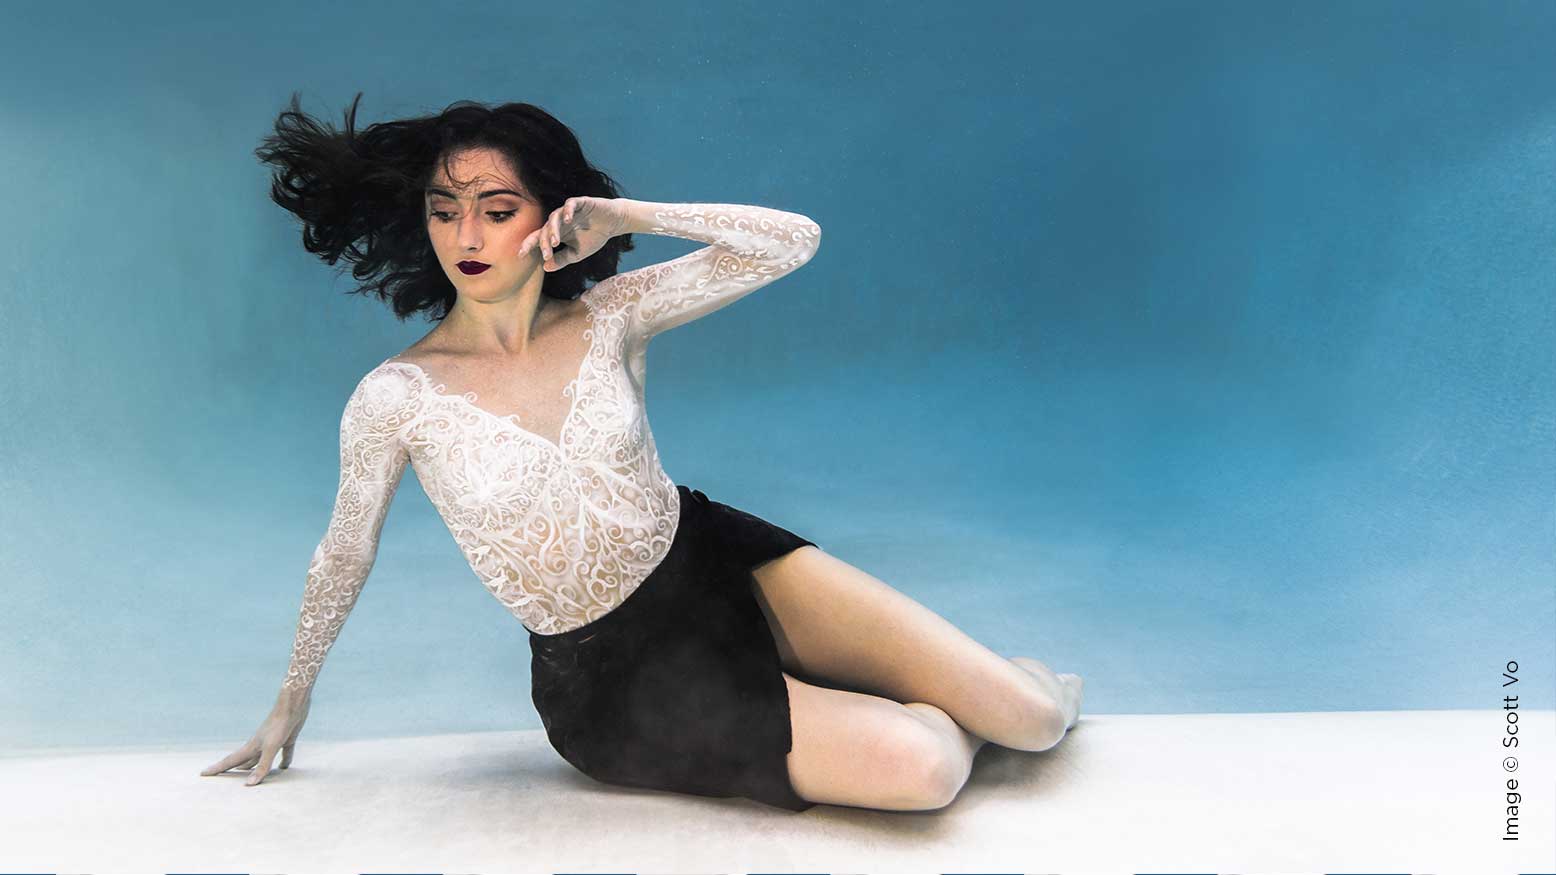
Let’s start with an idea or theme. Underwater photography can be unbelievably magical and graceful, with vast possibilities. Formulate an idea and think about the components that will bring that mental image to fruition.
Sketch your idea on paper. I keep a sketchbook and am always doodling ideas for photos. I come up with ideas by watching synchronized swimmers, ballet dancers and marine life. I study and sketch the movements of the subjects that inspire me. Next to that doodle, I list equipment and props I would need so I don’t forget anything on the day of the shoot. Simple things like extra batteries or towels can be easily overlooked.
Take out that Rolodex and call your favorite makeup artist, set stylist and some friends to help out. The more, the merrier. Talk to your team about the idea, theme or message you want to convey in the photograph. Hear out your team about potential challenges you may face. A different prospective might be helpful. Cue up Wes Anderson’s The Life Aquatic With Steve Zissou while you are planning.
Run Some Experiments
Now that you have formulated a plan, let’s go shopping. Find some unique local artists or a nice boutique. Thrift stores are useful for inexpensive props. After all the clothes and props are purchased, find out what they do in the water.
Testing the props for the theme beforehand saves a ton of time and headaches on set. See if a prop floats or sinks in a bathtub or bucket. Check if it sheds debris in the water or if there’s discoloration. This simple experiment rules out any problems you may face. If the prop floats, add some weights discreetly. If the prop sinks, cut up some pool noodles to conceal in the prop to make it buoyant. If debris comes out in the water, it helps to rinse the item beforehand. Wash the clothes to help reduce color fading or running. This all reduces stress during the shoot.
Lighting Challenges
Let me say this first: Do not use studio strobes near a body of water. Water and electricity do not mix well.
Depending on your camera housing, you can sync your strobes via fiber optic, slave or hardwire cable. If your housing does not have sync capabilities, there are some great waterproof lights that emit constant light or that can be slaved as well. I use Lume Cubes to light our sets and small props. They are powerful, rechargeable and waterproof. They’re great for camera housing that does not have sync ports. They can fit into your props to illuminate your subject.
Think about how you are going to shape the light. You can use white plastic to diffuse or to bounce the light. Free up some hands with light stands you are willing to sink into the water or have next to the water. Those friends you asked to help you are great at holding lights too. Separate the light from the camera with off-camera lighting. Daisy-chain your slaved strobes or extend the sync cable to give you distance from your light source. Shape the light to bring dimension to your subject or diffuse the light to bring an even light throughout your photo. Play with the amount of ambient light. Experiment and use the small waterproof lights to highlight props. Having control of your lights allows you to set the mood and tone of your photograph. Use a friend as a stand-in model as you prelight. (Photo 10)
Deep Breath
Bring your subject into the water so she can get acclimated with the environment. Don’t let her tread water and wear out before you even start. Remember that safety is the priority. Know your subject’s limitations. Have your model shake out the outfit or dress underwater to get rid of air bubbles while you set up. Take your time and experiment with your settings. Water is dense and, depending on the quality of the water, the light might not travel as far. Make adjustments and communicate with your subject how things are moving along.
During this time, get the props ready. Use the knowledge you gained during your experiments and presoak or place the props in the water. Placing props in the water a little early can get rid of air pockets.
Once you are all ready, take your time getting into position. With your whole team on the same page, every person will bring their own expertise to the table. Once everything is in place, you can start photographing. These photographs were taken without scuba equipment. We returned to the surface for air and went back down to continue photographing.
Spread the Message
After everything is dried and everyone is fed, go through the photos and start editing. Think about supporting text to use with your photo. Some photographers might not be interested in adding text to a photograph, and that is perfectly fine. For these examples, we added text to support the theme.
Throughout the year, we have a few themes we work on. This year, we did a summer color series and an environmental awareness series.
The color series was more of an exercise in color theory and styling. We incorporated fun props that complemented the model and didn’t take attention away from the main focus. We shot in digital and 35mm film.
Plastics are all around us, and they end up in landfills and the ocean. For the environmental awareness series, we wanted to bring attention to plastic pollutants and encourage people to reduce plastic waste in their daily lives.
Take a Breather
A concept was sketched out and a list of supplies was created. Thinking about creative ways to light our props was challenging. Experiments were done ahead of time to reduce stress and wasting time on set. All the elements of your photograph will come together with a little luck and preparation. Bring plenty of drinks and snacks. Take breaks between dives. These underwater shoots take time to prepare and execute.
I spend weeks on an idea and hours doing research. I get inspired and get excited to bring this idea in front of the camera. The key is to slow down and do it right. If I rush to formulate and shoot an idea, I may make a mistake. At the end of the day, I might be disappointed because I missed something or came up with a better approach. Take your time and have fun with your imagination—and always play it safe in the water.


