What’s up everyone? My name is Sal Cincotta. Welcome back to another video. It is after 11:00 p.m., and normally we’re all in bed, but tonight we are in our studio because we needed it to be pitch black in the studio to pull this off. Normally we have so much natural light coming in here. We are going to make some creative portraits using long exposure, and part of that is using rear curtain sync. So let me walk you through this. It’s not complicated and the results are absolutely spectacular. So, if you’re looking to add something new and spice up your portraits, this is a really cool way to do it.
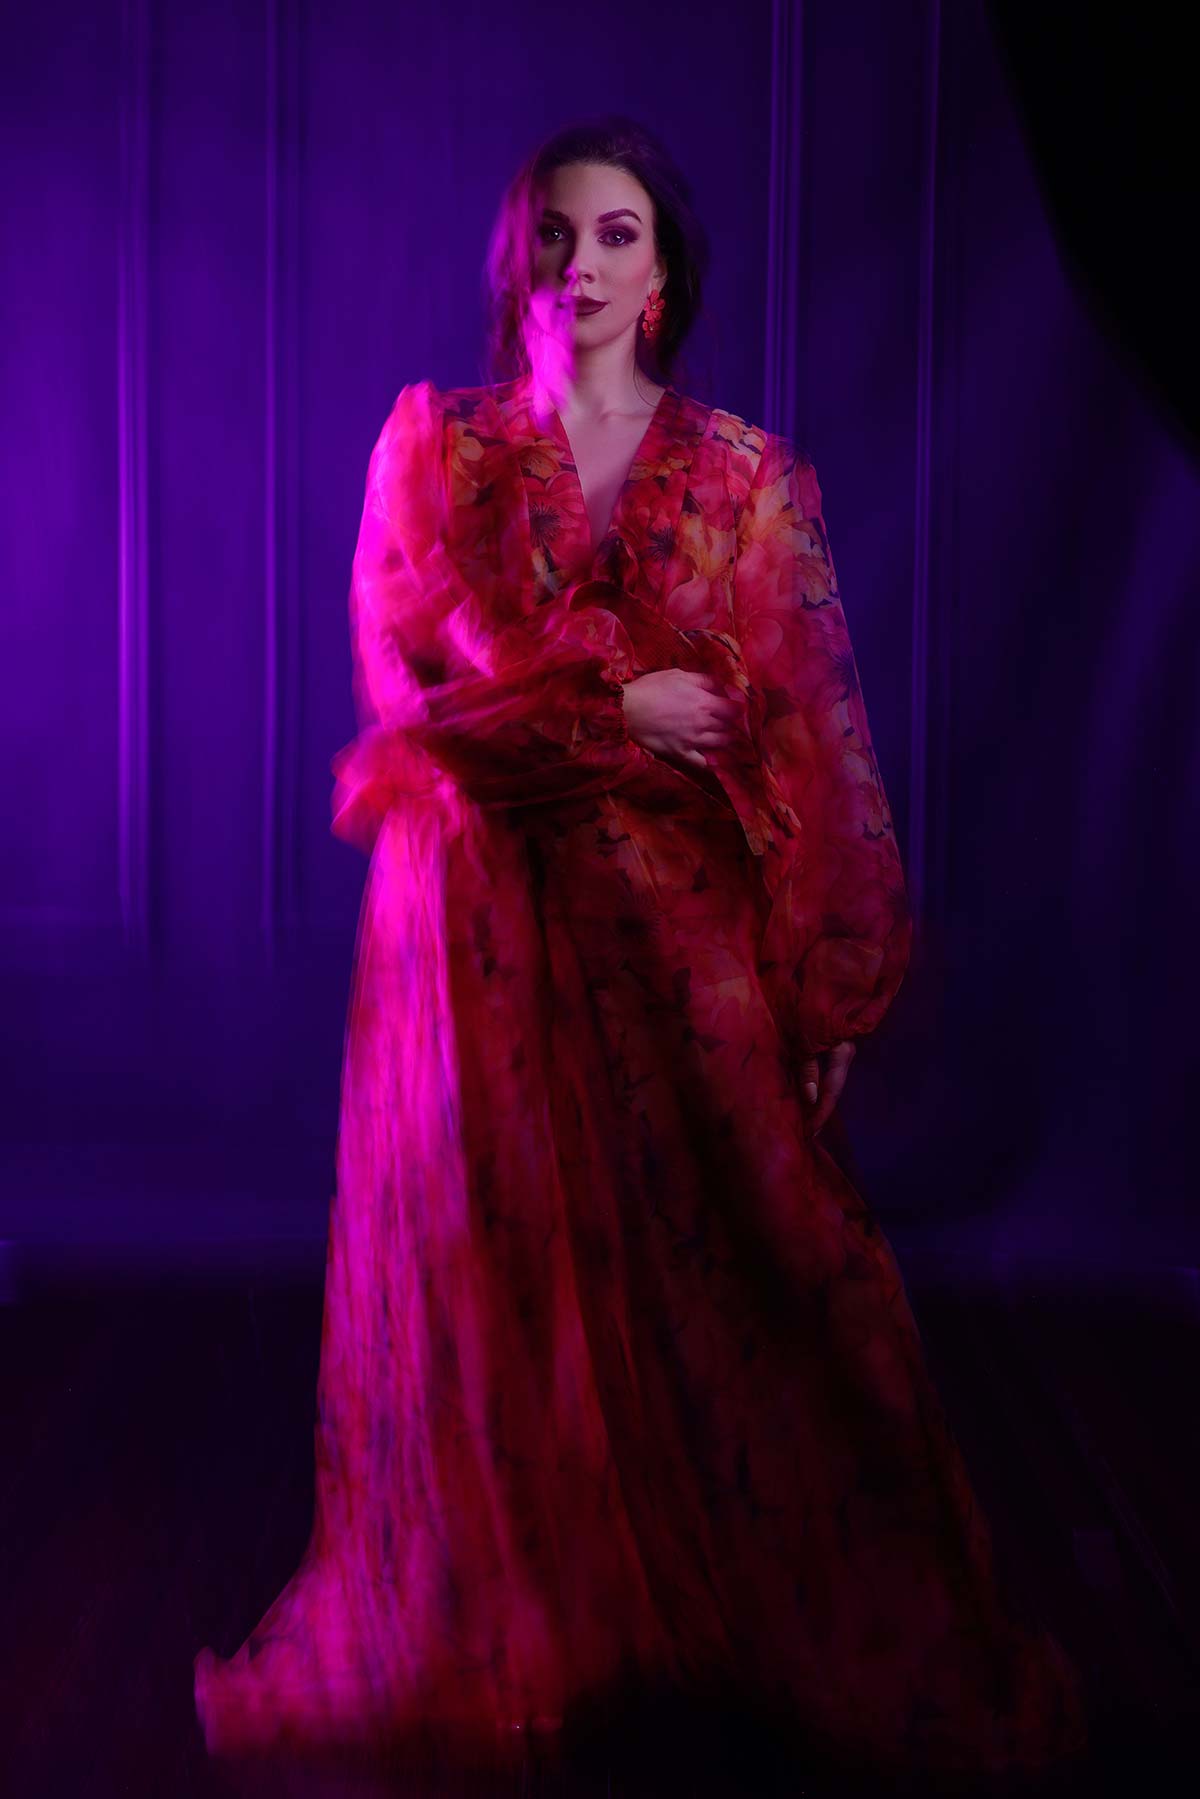
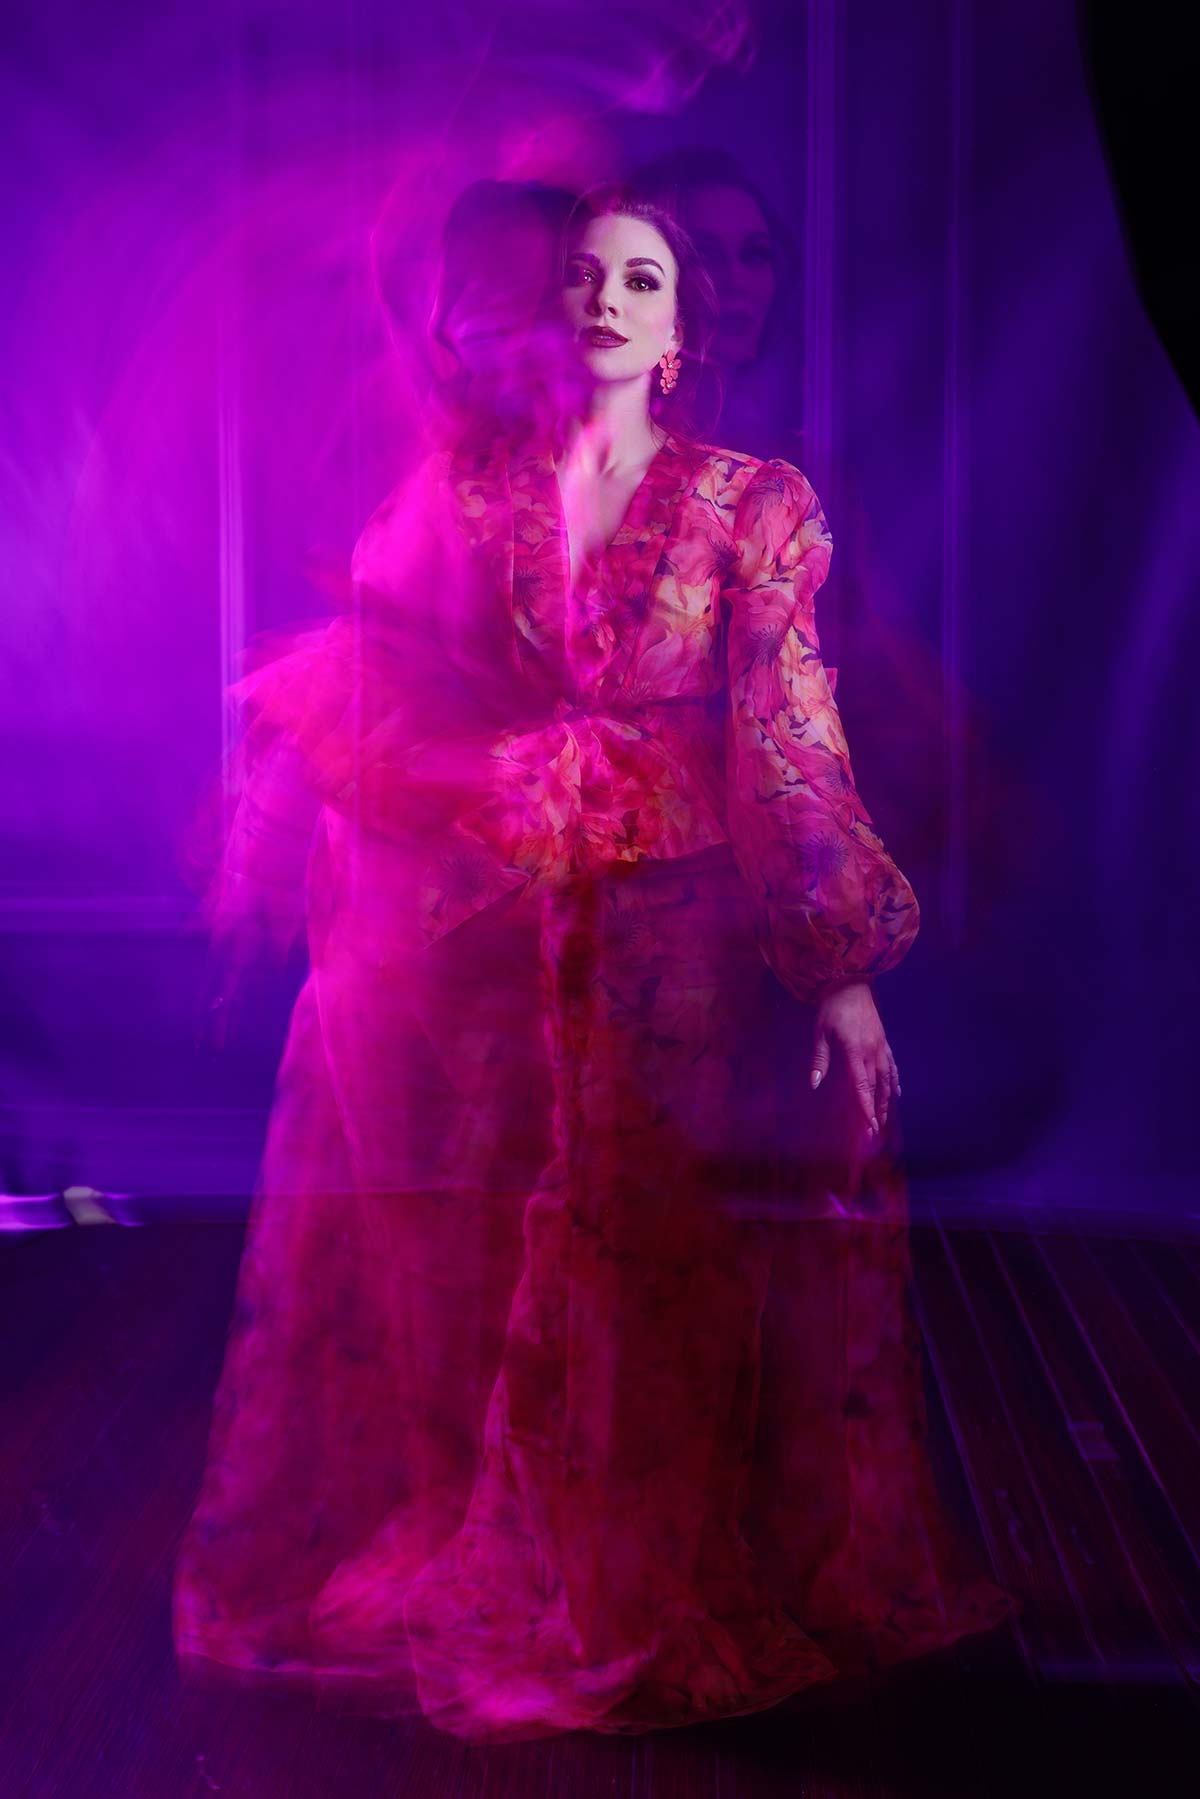
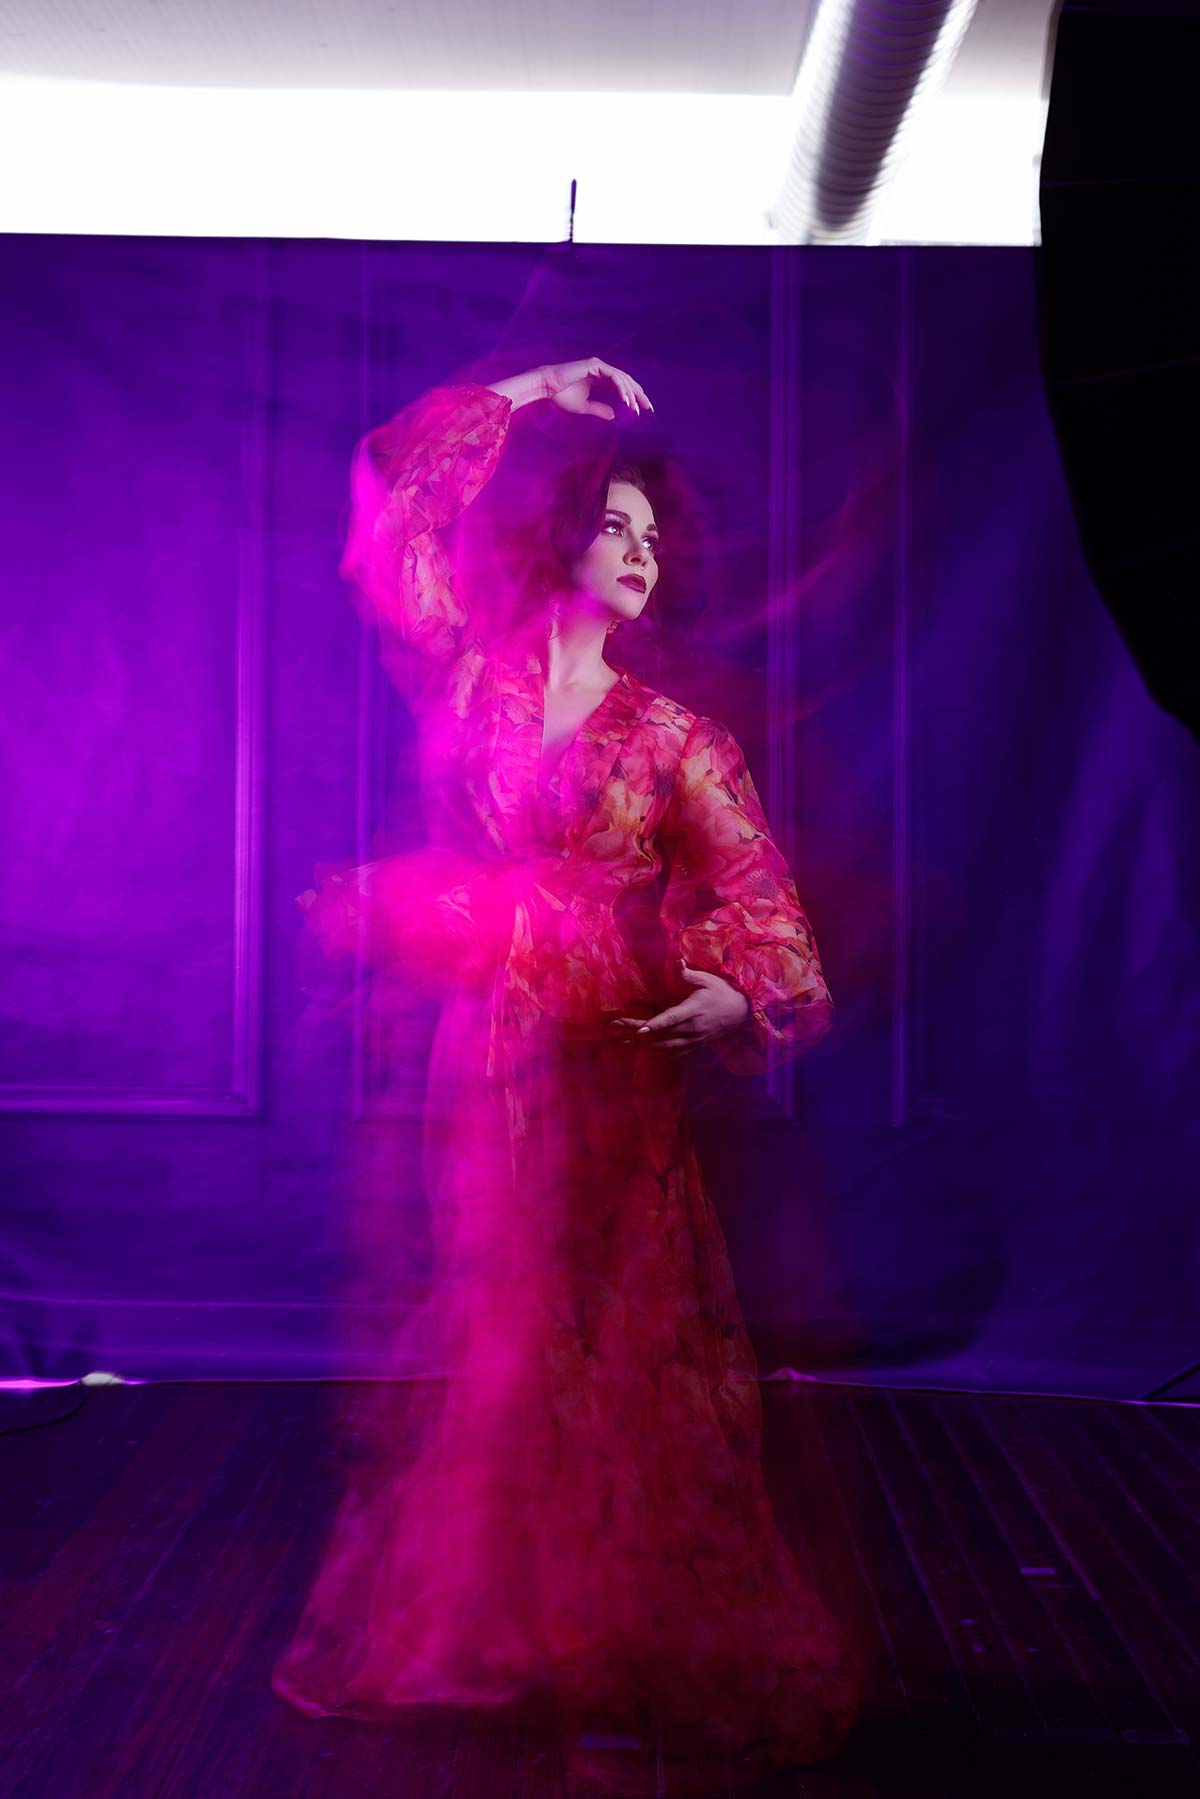
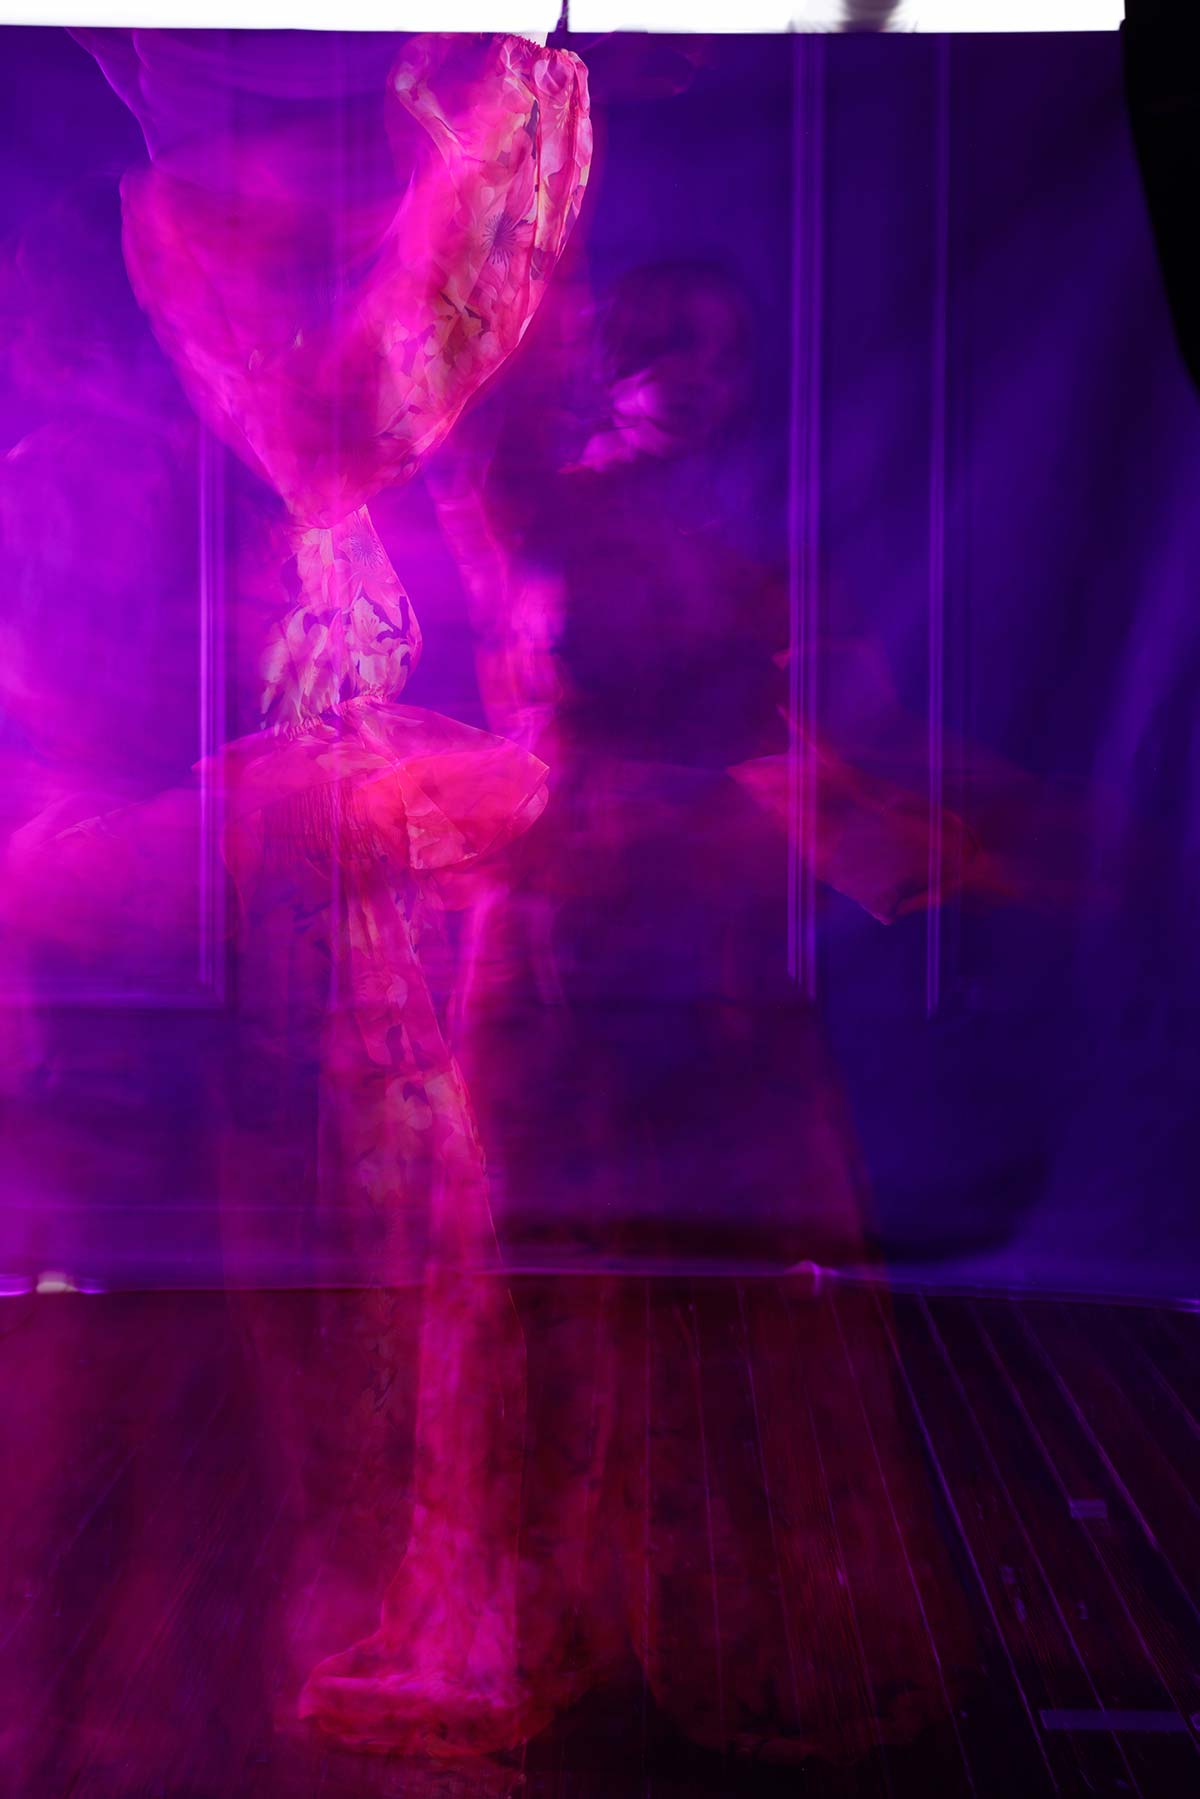
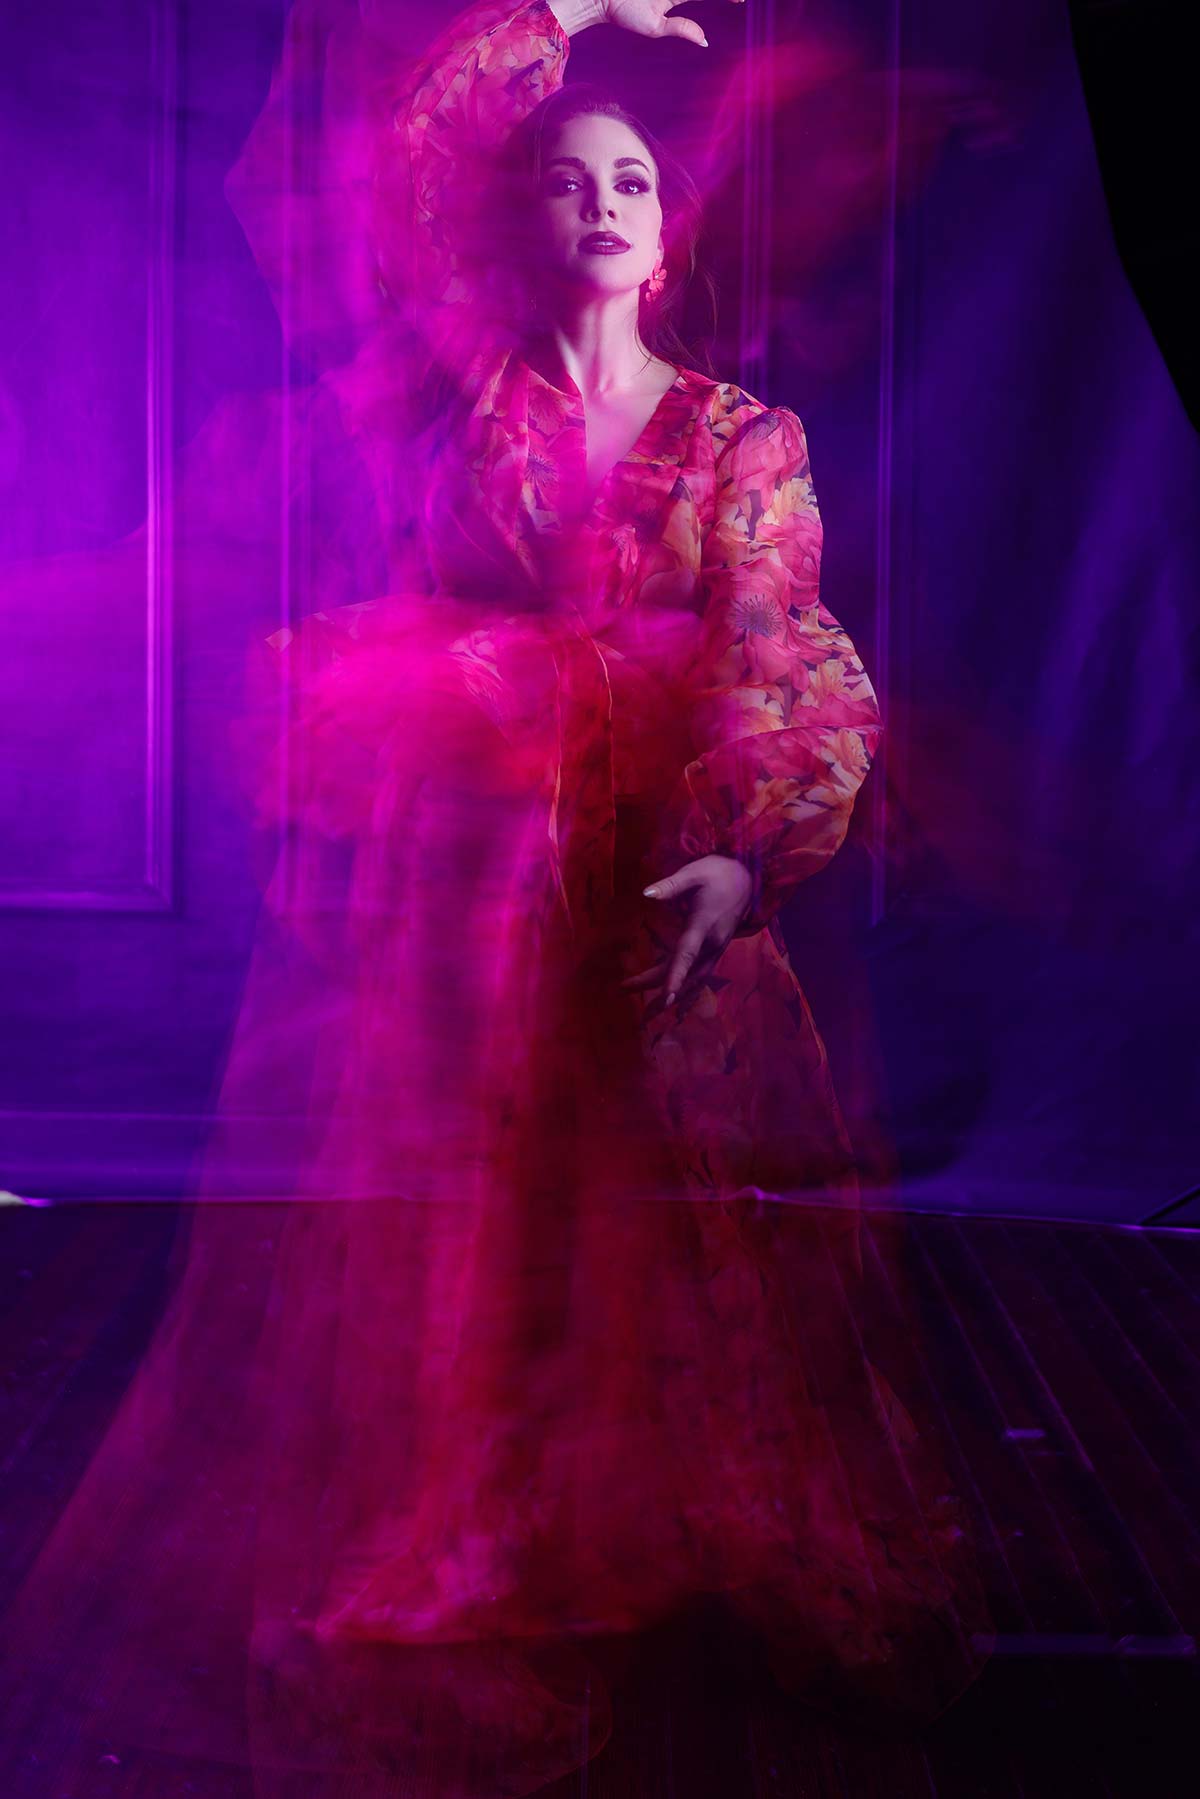
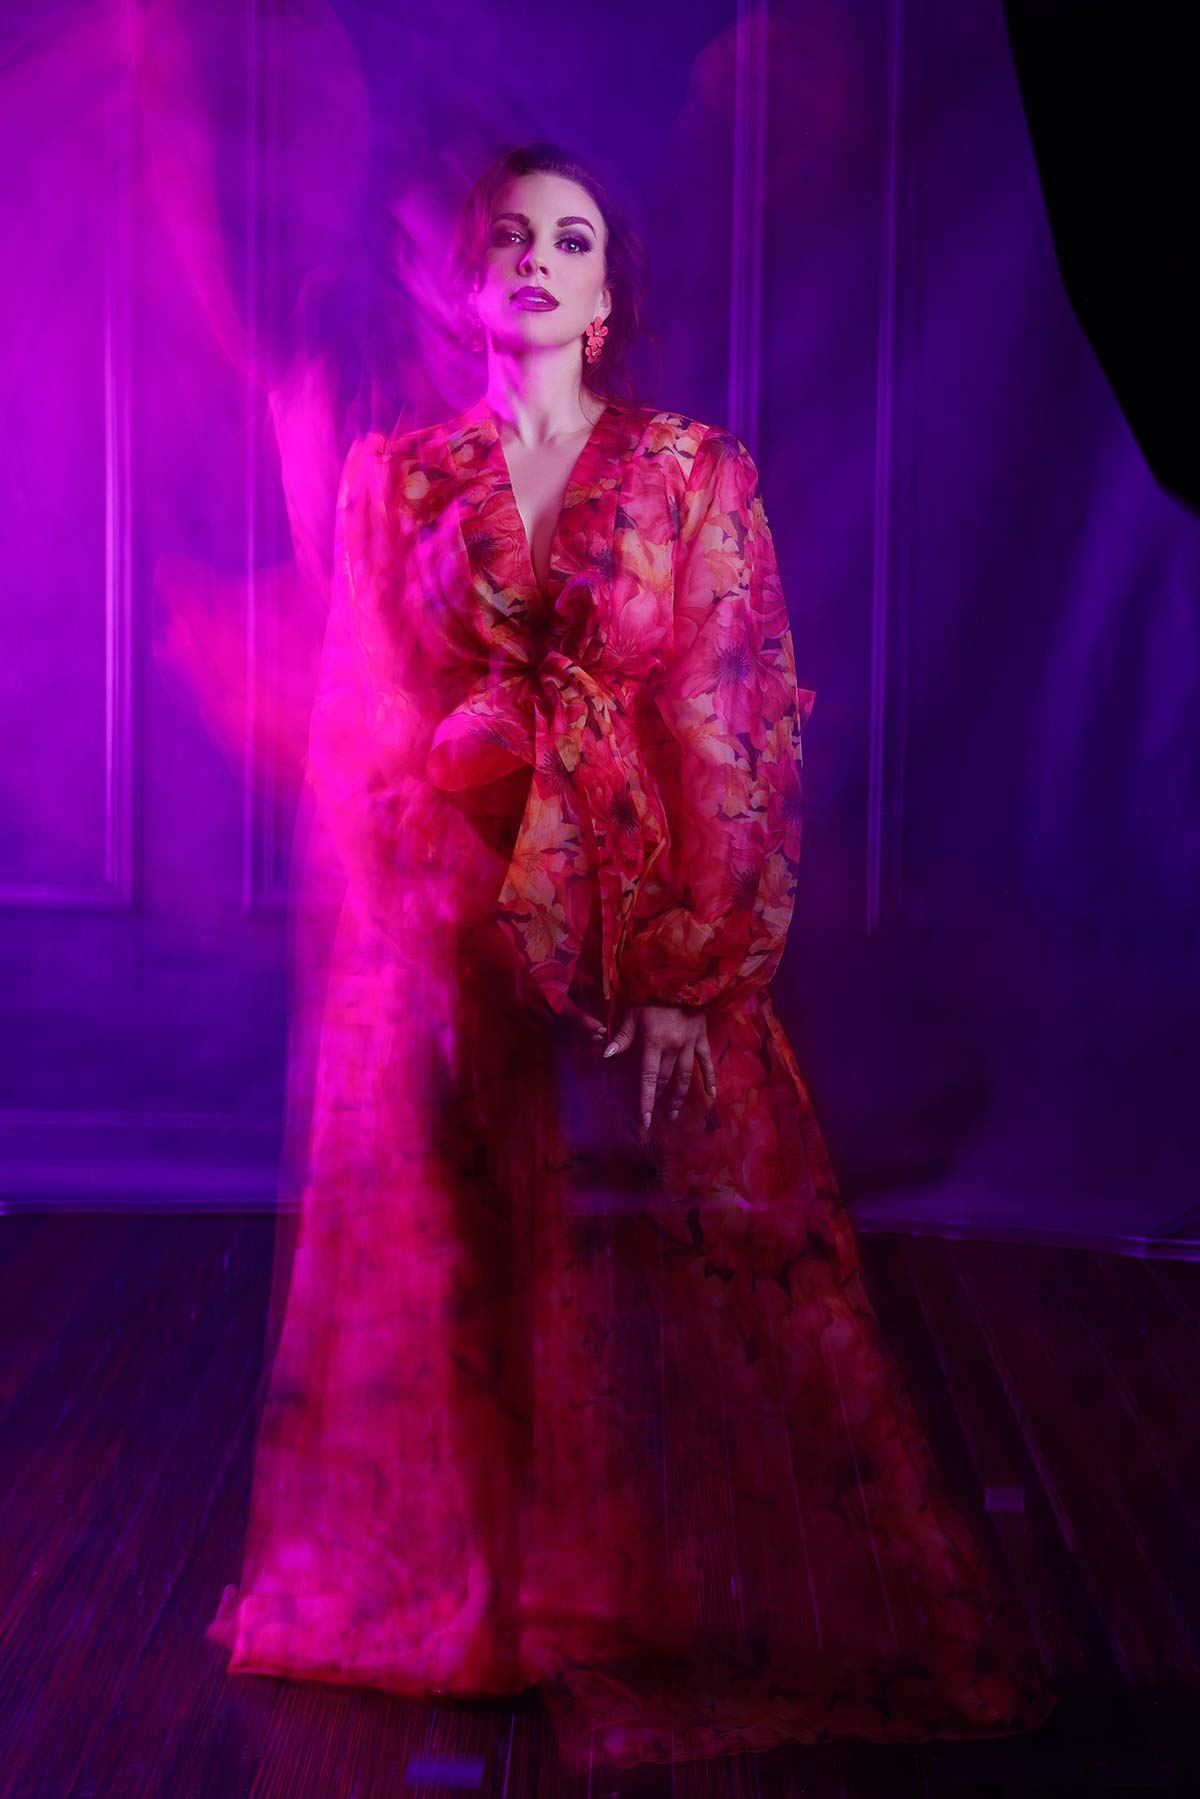
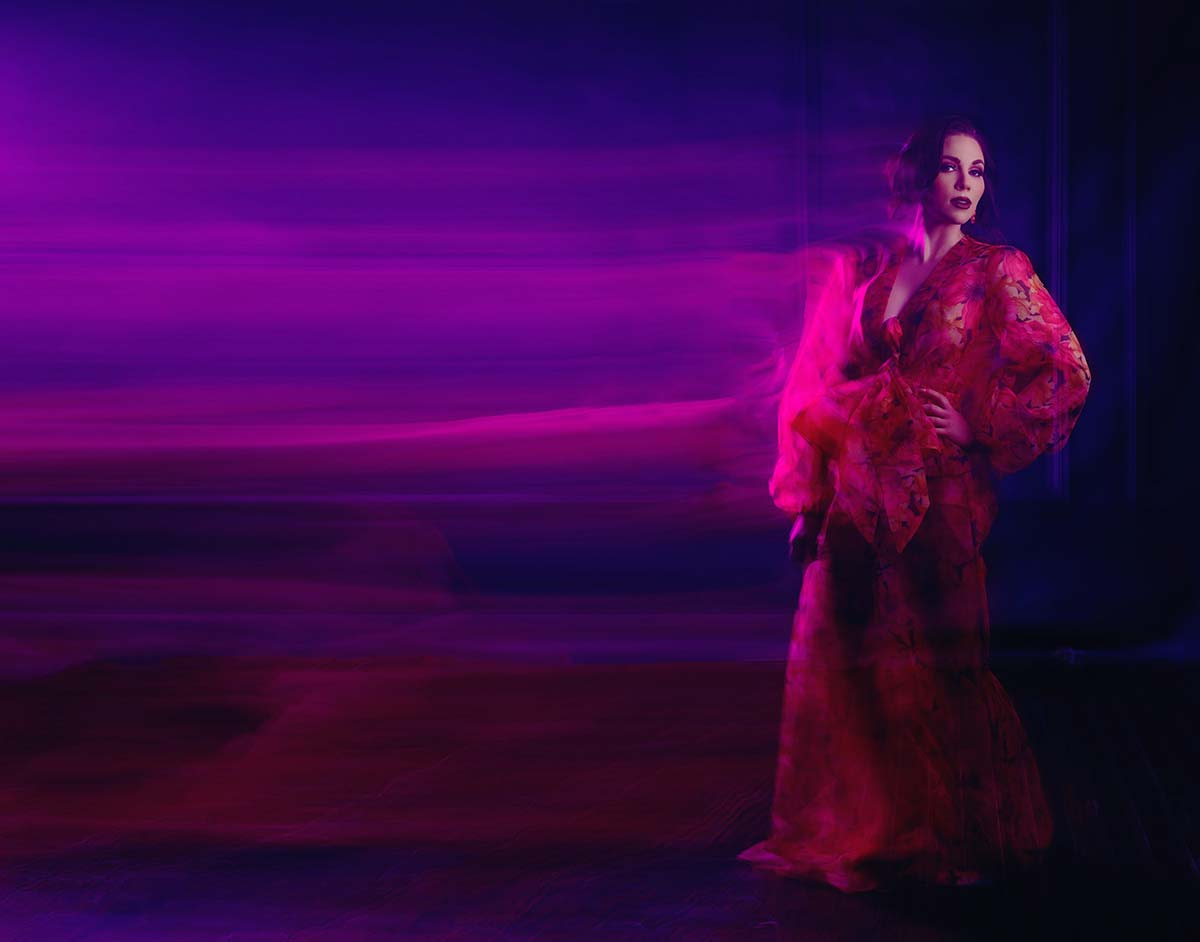
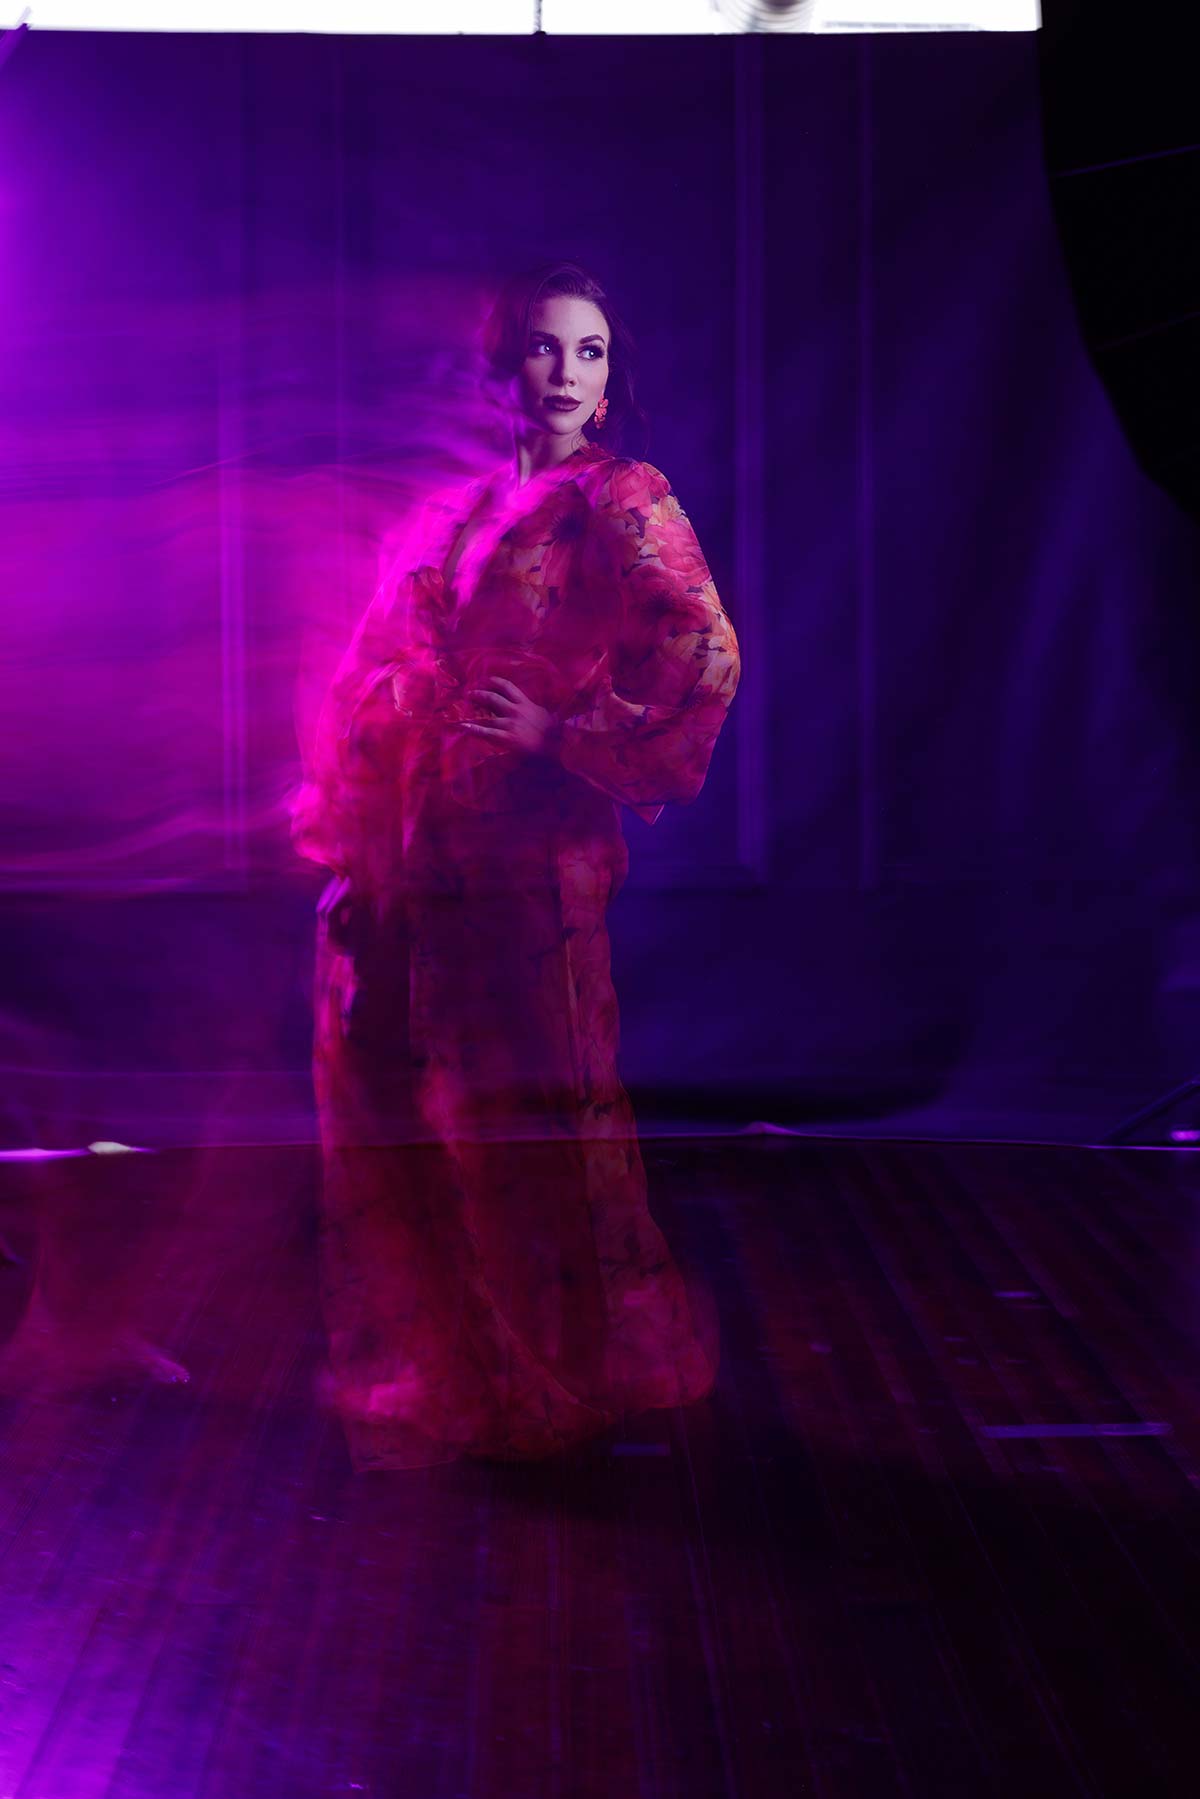
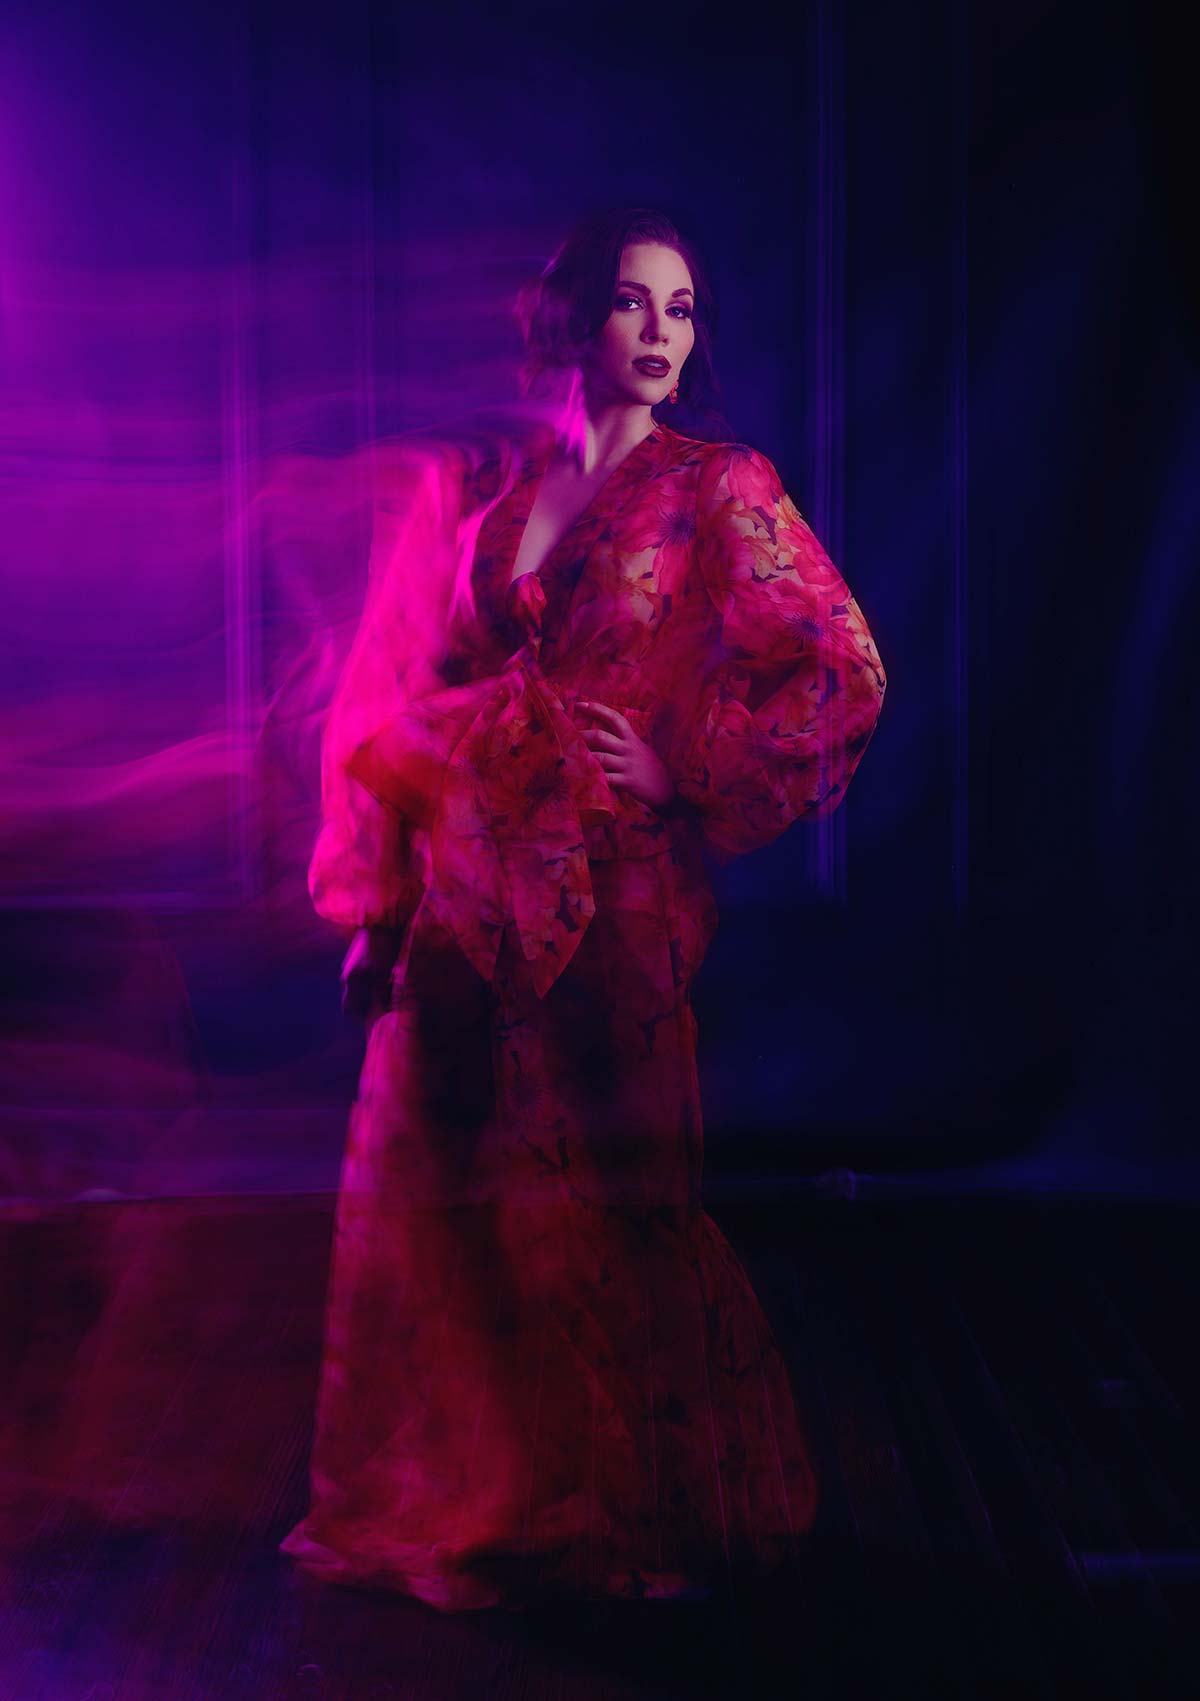
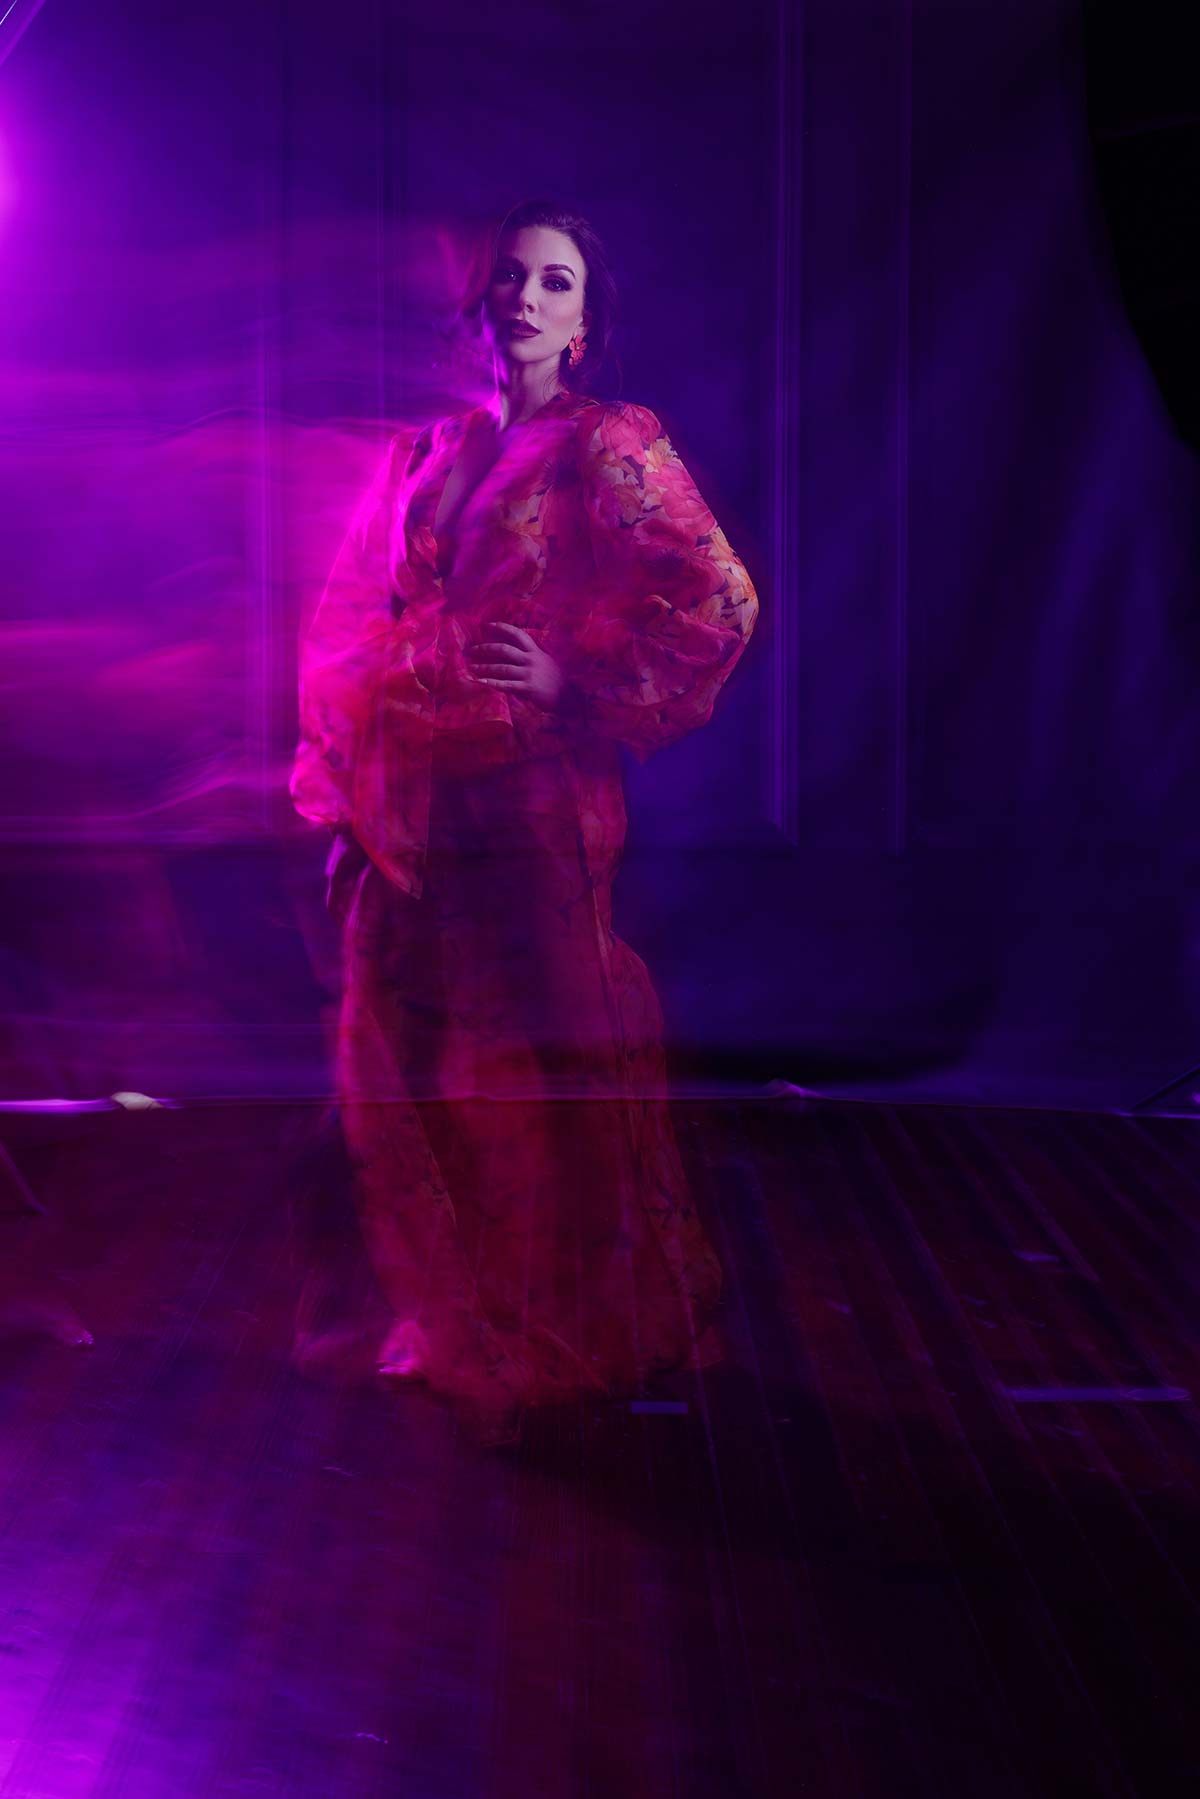
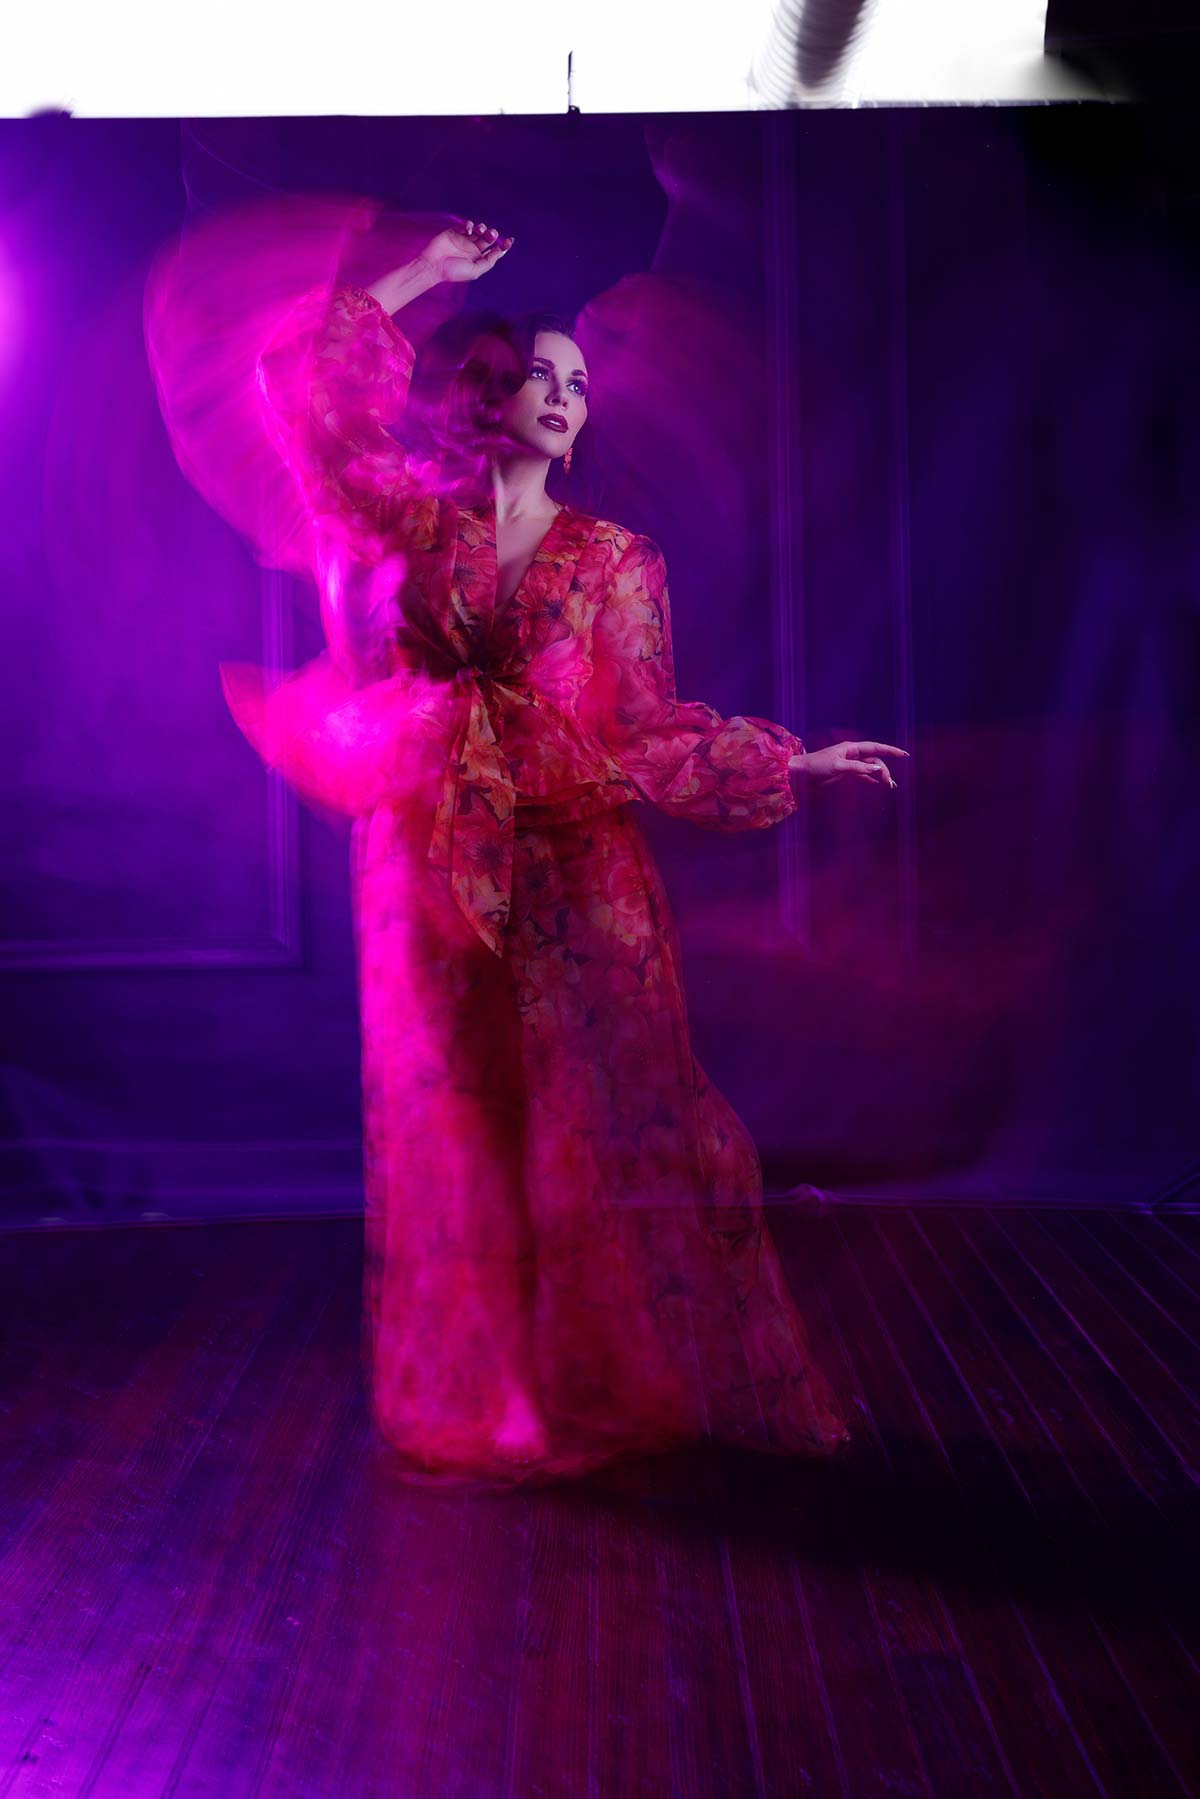
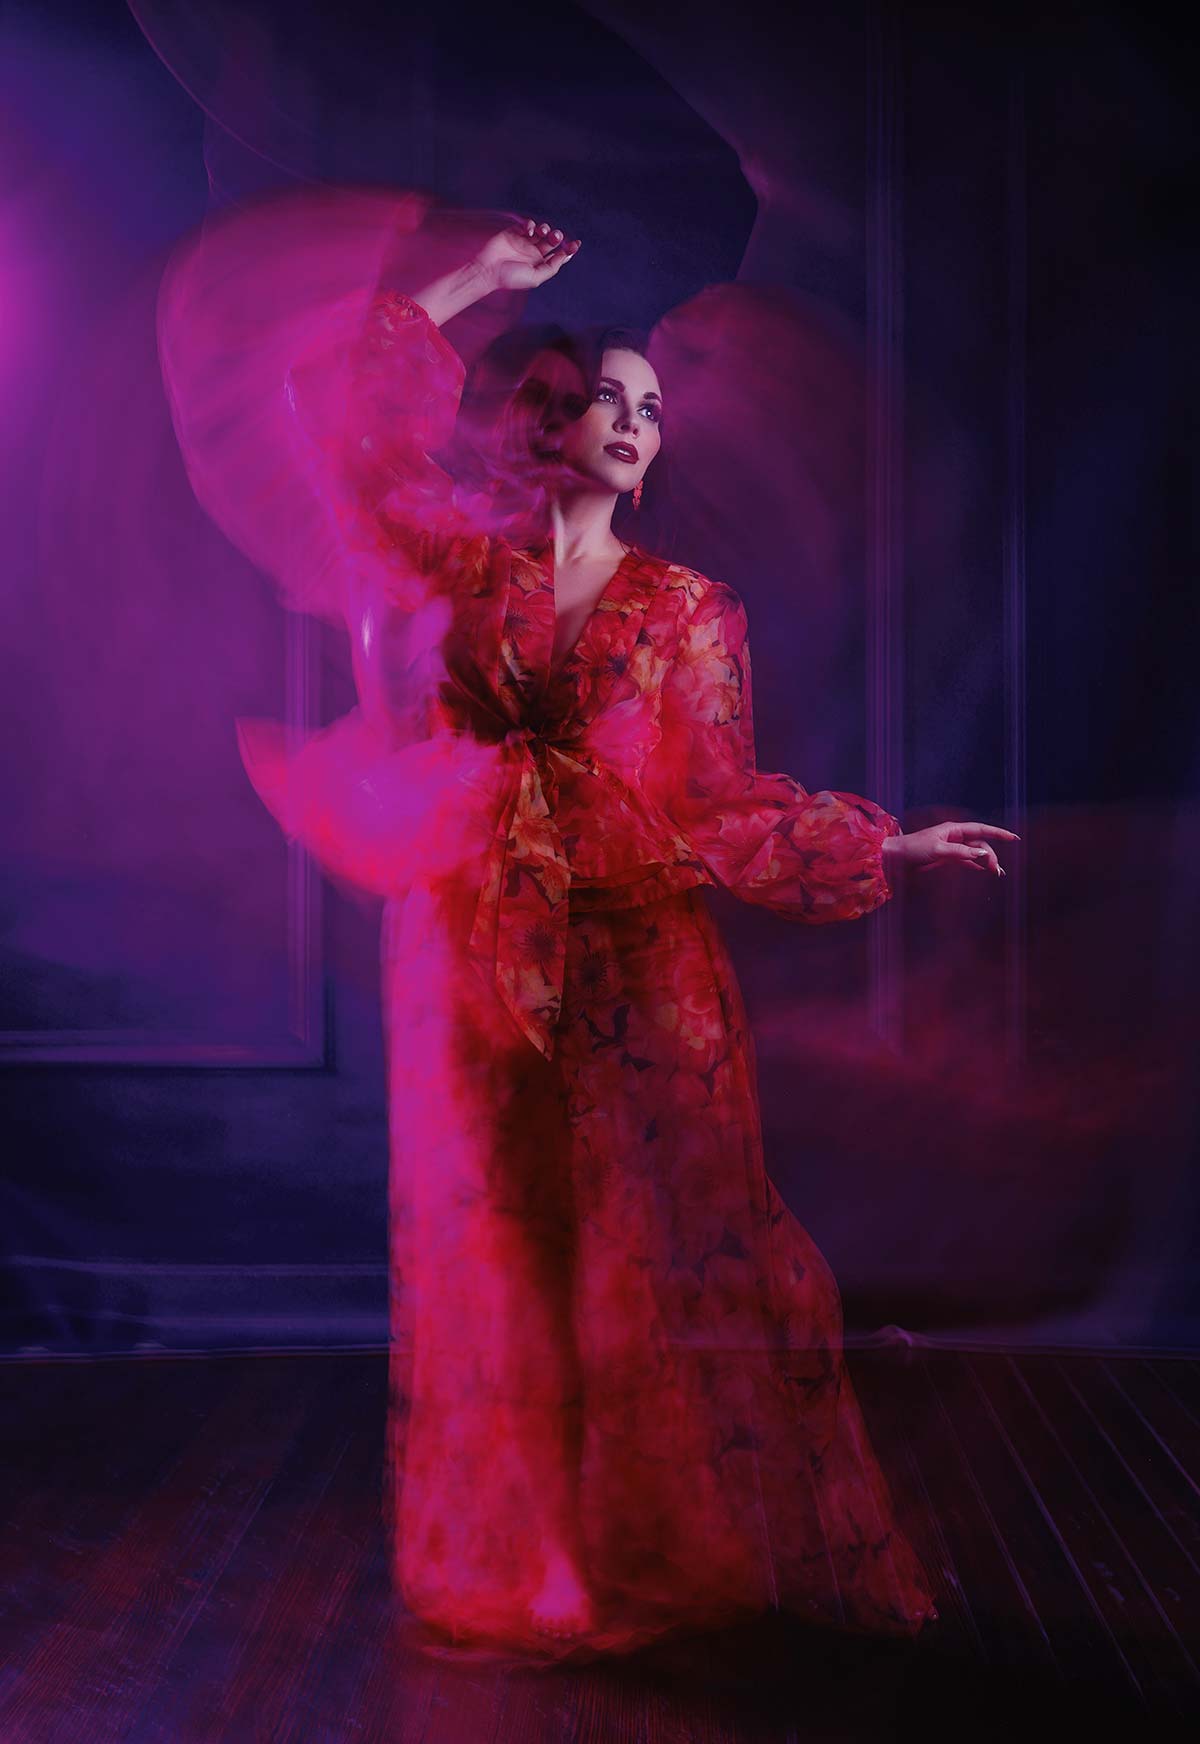
So one of the first things we have to do is set our cameras into manual mode. I typically use one to two seconds for the exposure, which gives someone like Lauren a chance to move around and create some motion. So this is great for sports photography, which is typically where you’ll see it. Senior photographers love doing it with the sports and athletes, but I’d rather put it into a more fashion slant and do something super cool there. So that being said, what we want to do is give Lauren, or whoever your model is, a chance to add motion or action so it helps. She’s got a nice flowy dress here.
So we want to give them time to do something. Two seconds is usually pretty good. Set your camera in manual mode. You’re going to want to get your exposure from your main light source. Here we’re using the FJ200, with the Manny Ortiz Beauty Dish. That’s a perfect, nice size light source, and it’s going to push out nice soft light as well. We’re going to have that pretty close to her. And you’re going to get your power settings right, so you’ve got to get dialed in.
The trick to making this all work is setting your strobe to rear curtain sync. And what does that mean in a nutshell? Photographers get all tripped up on this stuff. All it means is that, instead of the flash firing, the second you press the button or release the shutter, it waits until the shutter closed. So rear curtain sync. It’s not happening when a normal flash would fire, when you click your button. That’s not when it’s happening. It’s happening at the end of that. Why? That gives us two seconds to move all around. When it’s getting ready to close, boom, that fires on the rear curtain and freezes the action. That’s how we’re going to get that.
Now, how do we make it a little bit more interesting? Behind here I have the Nanlite PavoTube II 6C. These are $89. What I love most about them is they’re magnetic, and that’s why they’re on my C-stand here. They’re RGB and they are putting out a ton of light, so we can change the color. We changed it to a pinkish purple. I’ll just go with the flow here and give a nice vibe to the color tone of the whole image.
So you need something to make it interesting. A continuous light makes it super easy, because when you first release your shutter, that’s illuminating all the motion that’s happening. And when you freeze, the strobe is going to kick in with rear curtain sync, okay. So let me start shooting and it’ll all make sense. The other pro-tip, if you will, is we put a piece of gaff tape down here because this is where she is metered in. So for Lauren, she knows she can do whatever she wants, but she’s got to stop, freeze, and come to the camera before the two seconds are up. There’s a little bit of experimentation here that you have to start playing around with, and that’s quite frankly the beauty of these portraits. That’s why I like this. So am I going to do this for every single client? Of course not. What we’re going to do is experiment and if I get one shot that’s killer, that was worth it, right? So you can do all your normal stuff, but if you want to up the ante on your portraits, give this a try. Let’s get to it.