Low-Cost Location Lighting with Michael Corsentino
As much as I love working with strobes on location or in the studio, I realize not everyone owns flash equipment, let alone portable strobes. If you’re just starting out or find yourself without strobes for whatever reason, I don’t want you to think you can’t still rock your location lighting. With a minimal investment, far less than the cost of any strobe equipment, you can arm yourself with the tools necessary to control light on location.
When we talk about location lighting we’re talking about ambient light. More often than not, that’s natural light, otherwise known as the sun! When you’re working with light from the sun without modification to shape and control its intensity, you’re locked into what mother nature decides to provide. This can and will shift from hour to hour and day to day, so being prepared and having a plan for all contingencies is key.
A few tried and true rules of thumb when working with natural light: the sun is least harsh in the morning and afternoon/evening when its position is lower in the sky. This position also makes creating directional light and accent light significantly easier. Midday the sun is typically positioned somewhere close to directly overhead. Here it’s at its most harsh and generally to be avoided if possible. However, that’s not always possible, which is why I decided to make this very situation the focus of this month’s tutorial. The one caveat going in is that you will need a sunny day to successfully carry off these techniques. No sunlight, no illumination, it’s that simple. That said, onward!
Successfully controlling the harsh light from the sun requires two inexpensive tools: a diffusion panel to soften the light and one or more reflectors to bounce light, fill in unwanted shadows, and create accent light. Both of these tools are available in a wide variety of models, build qualities, features, sizes, and price points. The good news is you can pick up basic models of both tools that do the job well for around $100. Not too bad for professional location lighting! Ideally you’ll also want a light-duty stand to use with the reflector and a sandbag or two to keep things stable in the event of windy conditions.
For the shoot featured here I used a Lastolite 3’x3’ diffusion scrim and a Sunbounce Micro Mini reflector with a reversible white and silver fabric panel. I favor these pro-level collapsible tools because they travel well and have rigid internal frames when assembled, which makes them much easier to work with, especially in the wind. That said, Lastolite’s inexpensive line of pop-up diffusers and reflectors are also excellent options. As I mentioned above, both can be had for around $100. You’ll see clearly from the before and after example images I’ve included that these tools are the difference between success or failure in controlling the sun.
With the sun directly overhead, harsh, deep, and unflattering shadows are created. This is why modifying the light is essential when it comes creating a pleasing, balanced, evenly lit portrait light with the sun. In the next 3 easy steps, I’ll show you how to go from horrible midday sunlight to awesome light—all without breaking the bank!
Prepare
Step 1 for me is to arrive early to set up and access the situation by asking the following questions: What are the prevailing lighting conditions? Where is the sun relative to where the subject will be? Where are the shadows falling? What is the quality of light on scene? What tools will I need to use to create the light desired? Naturally, I’ve researched the weather forecast previously and loaded my car with plenty of tools to provide options if conditions change unexpectedly.
Once I’ve decided where I’ll place my subject I take an unmodified set of captures to obtain my starting exposure. This way I’m ready to rock when everyone arrives.
Figure Out Works
Step 2 is placing the subject in scene and confirming the starting exposure. Expect harsh light during this unmodified step. Next, I have an assistant hold a diffusion panel over the subject to cut the sun’s harsh overhead head light and dramatically even out and soften the prevailing light. When it comes to diffusion panels, aka scrims, the bigger the better as it’s easier to control where the open shade it creates begins and ends. You’ll want to pay special attention to this, making sure the scrim is completely covering the subject with no unmodified bright spots or scrim lines on the ground or background. This is key. That said, for 3/4 length and tighter portraits, medium-sized diffusion panels work perfectly.
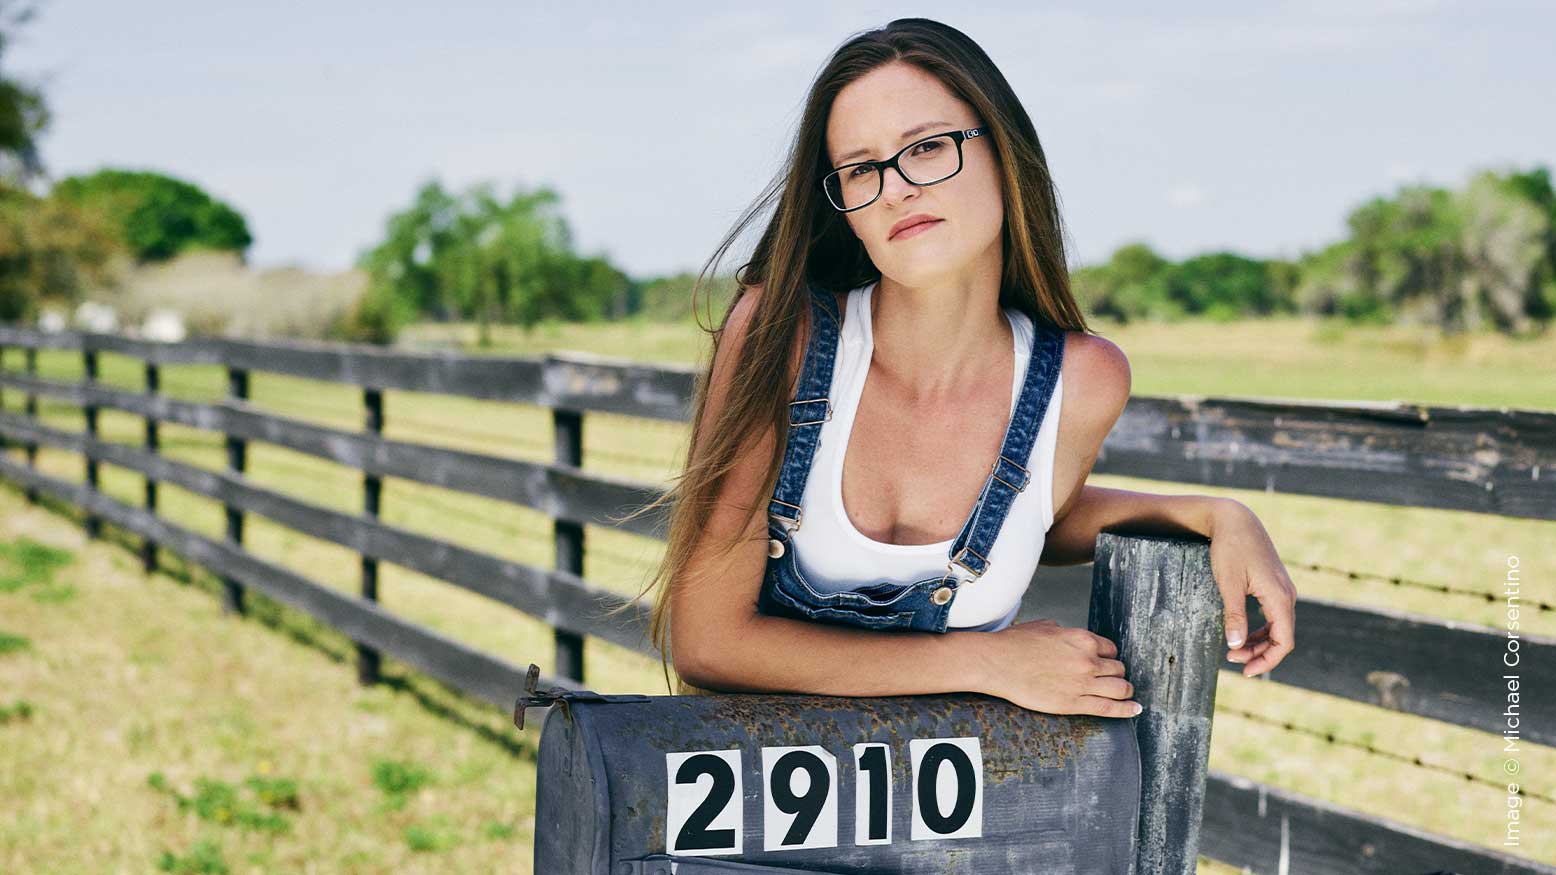
Finished Product
See the addition of a reflector below the diffusion panel, generally under the subject’s waist. This is done to bounce light back toward the subject’s face, opening up shadows created by overhead light in the eye sockets and under the chin. This fill reflector also helps add a catch light to the subject’s eyes, giving them a sense of life and sparkle. Reflectors typically come with some variation of white, silver, and gold fabric to reflect light. I start with white and work from there building intensity as needed. I very rarely use gold as it’s usually much too warm for my taste. The one exception to that rule is African American complexions, which in some cases do better with warmer fill light. I settled on silver fabric for the fill reflector as it provided the right level of illumination and contrast for this series of natural light portraits.
The over-and-under diffusion and reflector arrangement described above is a classic lighting pattern known as Clamshell Lighting. This is a tried and true method for creating flattering lighting on location or in the studio. Use it with natural light, use it with strobes. It’s a keeper with a multitude of uses. Check out the step by step and BTS images for additional insight. See you next month!