
Are you ready to rock out some low key beauty portraits in my studio? These are a lot of fun to create and if you follow along in my step-by-step tutorial video you will be able to create stunning portraits for your clients. Even if you are a beginner, you can add this simple lighting technique to your studio lighting set-up.
Equipment Used:
Camera: Canon EOS R5
Lens: Canon RF28-70
Light: Profoto B10
Team:
Photographer: Sal Cincotta
Model: Lauren Middleton
Hair & Makeup: Brandi Patton, ReFine Beauty
Ready for some low key beauty portraits? Let's get to it.
What’s up everyone? Today I am here with Lauren. We are doing some low key portraits. You’ve seen Lauren in our other videos, her Instagram is @lauren.smiles.
All right, so today we’re going to do some low key portraits. What are low key portraits? Typically, they embody dark shadows. Dark, moody, I like to say dramatic lighting. It’s typically one light source, maybe a reflector, but it can really add some drama to your portraits. And if you go black and white, they look even better. So we’ll see what we can do. We’ve got about three or four different setups for Lauren here. So let me walk you through everything before we get going.
So first up on camera, I’m shooting with a Canon RF 28-70 and Canon R5. On lighting, we’re using a Profoto B10 with a zoom reflector. Let me give you the grid. So on that it is a 20 degree grid. I’m just trying to really, really control that light. I don’t want a whole lot of spill. I want to go dark into the shadows and really control where light’s hitting her.
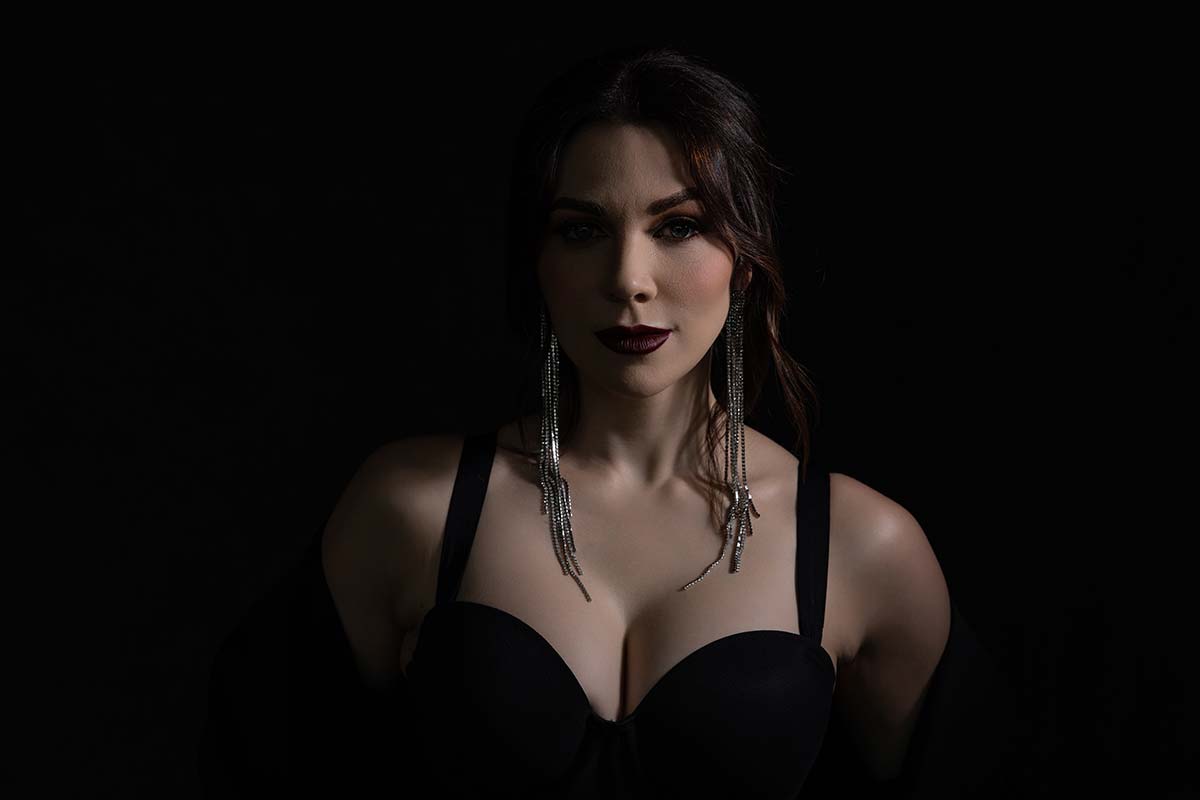
So something else that matters in low key portraits, I believe, is wardrobe. So as you can see, she’s wearing black. Could you do low key portraits with bright vibrant colors? I don’t know, I guess, maybe. That becomes a bit of a challenge, I think. So what you’re looking to do, at least for me, my strategy with low key portraits is to use light and shadows to control where your eye goes. Your eye is always going to go to the brightest part of an image. And so if we remove all the color and all the brightness from everything except skin, that’s where we want our eye to go. And how we move that light and pose Lauren is going to impact that, where we look and what kind of final images we get.
So let’s just start shooting. I’m going to walk you through how to get dialed in with the lighting. As you can see, it’s a really simple one-light setup with a grid. I really do think you need a grid. We have a dark background and dark wardrobe. We’ve got a little top hat here. Then for bonus at the end, we are going to kind of wrap her across her face with this red sheer. So let’s get to it.
Look 1
I’m going to have Lauren stand right here. What I want her to do is just stay here for me while I get the light dialed in. So one of the things I’ve got the grid, I’m firing it right at her. I’m going to have her looking straight at the camera. It’s going to create really hard, split light. It could be a look. I just don’t think, for her, where we’re doing something that’s a little bit more beauty, a little bit more fashion, that I want that look. But that could also be good, right? Juxtaposed. We have a beautiful model and hard, edgy light that you would typically light a male portrait with. Put that on a female subject, and it could look really, really good. Again, juxtaposed.
I just want to get dialed in here. So, the first thing I’m going to do is get my light meter out. I’m in manual mode. Anytime I’m in the studio, I’m in manual mode. ISO is 100 and shutter speed is 200th of a second. I’m getting this right at her cheek. It’s 5.64, so I am going to lower this a little. I want this to just be 5.6 flat. I am a little neurotic with this. I always want to get it as close to perfect as possible. And now we’re at 5.6 flat. So again, just to reiterate this for you guys, I’m in manual mode on camera. I’m at F6, 200th of a second. I have the RF 28-70 F2 on the lens, using the Canon R5.
Okay, I’m just going to take the first test shot here. What you’re going to see is the first portrait. It’s a test shot. Notice how we’re falling into shadows on this particular shot. The shadows and control of the light is not very pleasing at all, right? But the exposure’s right. The highlights are there and we’re falling off into shadows going into camera left. So now my job is to adjust her pose and adjust the direction of that light, and I might even lower the light source. Because, as you’re seeing in that test shot, a lot of the light is hitting her in her upper chest area and it’s just too bright. So I’d rather just bring that light down a little bit. I still want to illuminate her chest, her face, and her neck, but I don’t want it coming straight down at as hard of an angle. So you have to adjust that light source.
Test Shot #1
Settings: f/5.6 @ 1/200, ISO 50
The height matters as well. So let’s lower this on Lauren right about there. I’m going to get one more test shot because now that light is a little bit closer to her. So just to give you guys perspective, just by lowering that light, now the light jumped from 5.6 to 8.0. This is why you should be using a light meter. It’s one full stop, so I’m just going to drop this down one full stop on the trigger. I want to get it as close as I can, and now we have 5.6 flat. All right, now we’re back in business. Let’s make sure this is looking right. So test shot number two. Beautiful. The direction of the shadows is a lot better than that first image, I think. Now this is kind of my starting point and I’m going to move her and direct her into that light.
Test Shot #2
Settings: f/5.6 @ 1/200, ISO 50
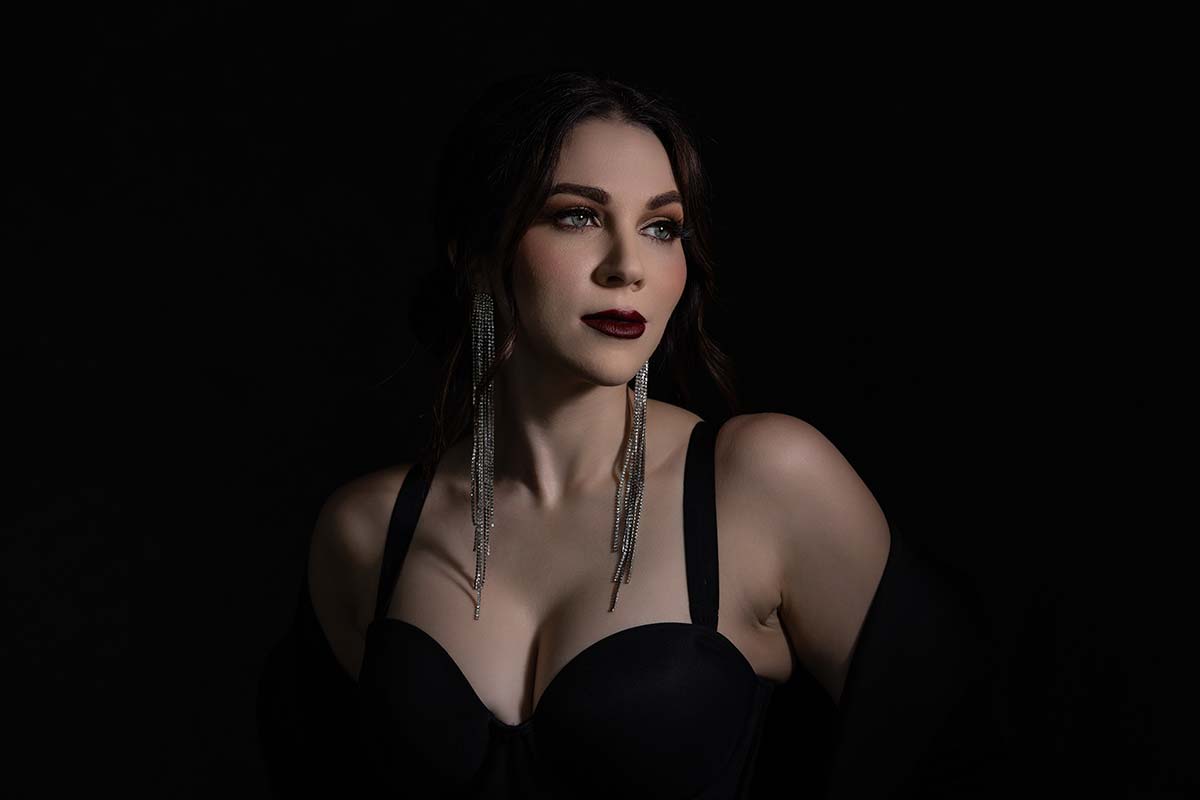
All right, I don’t want Lauren looking directly at that light. I want to keep her chest straight, and then I want her face and eyes over here. Then, with her shoulders, let’s roll this shoulder forward and then go up with it. Gorgeous. Lips together. Soften the expression a little bit. Yep. I love this. I even like her looking down.

Settings: f/5.6 @ 1/200, ISO 100
Settings: f/5.6 @ 1/200, ISO 100
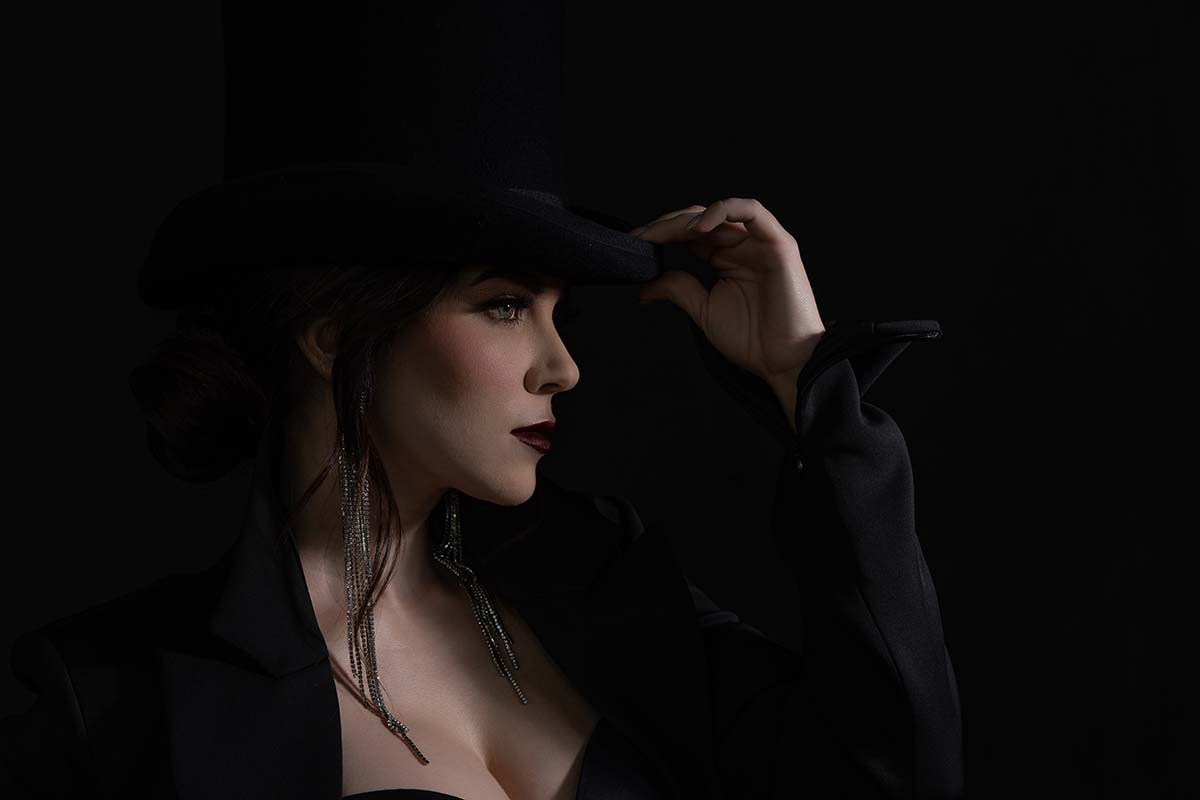
Look 2
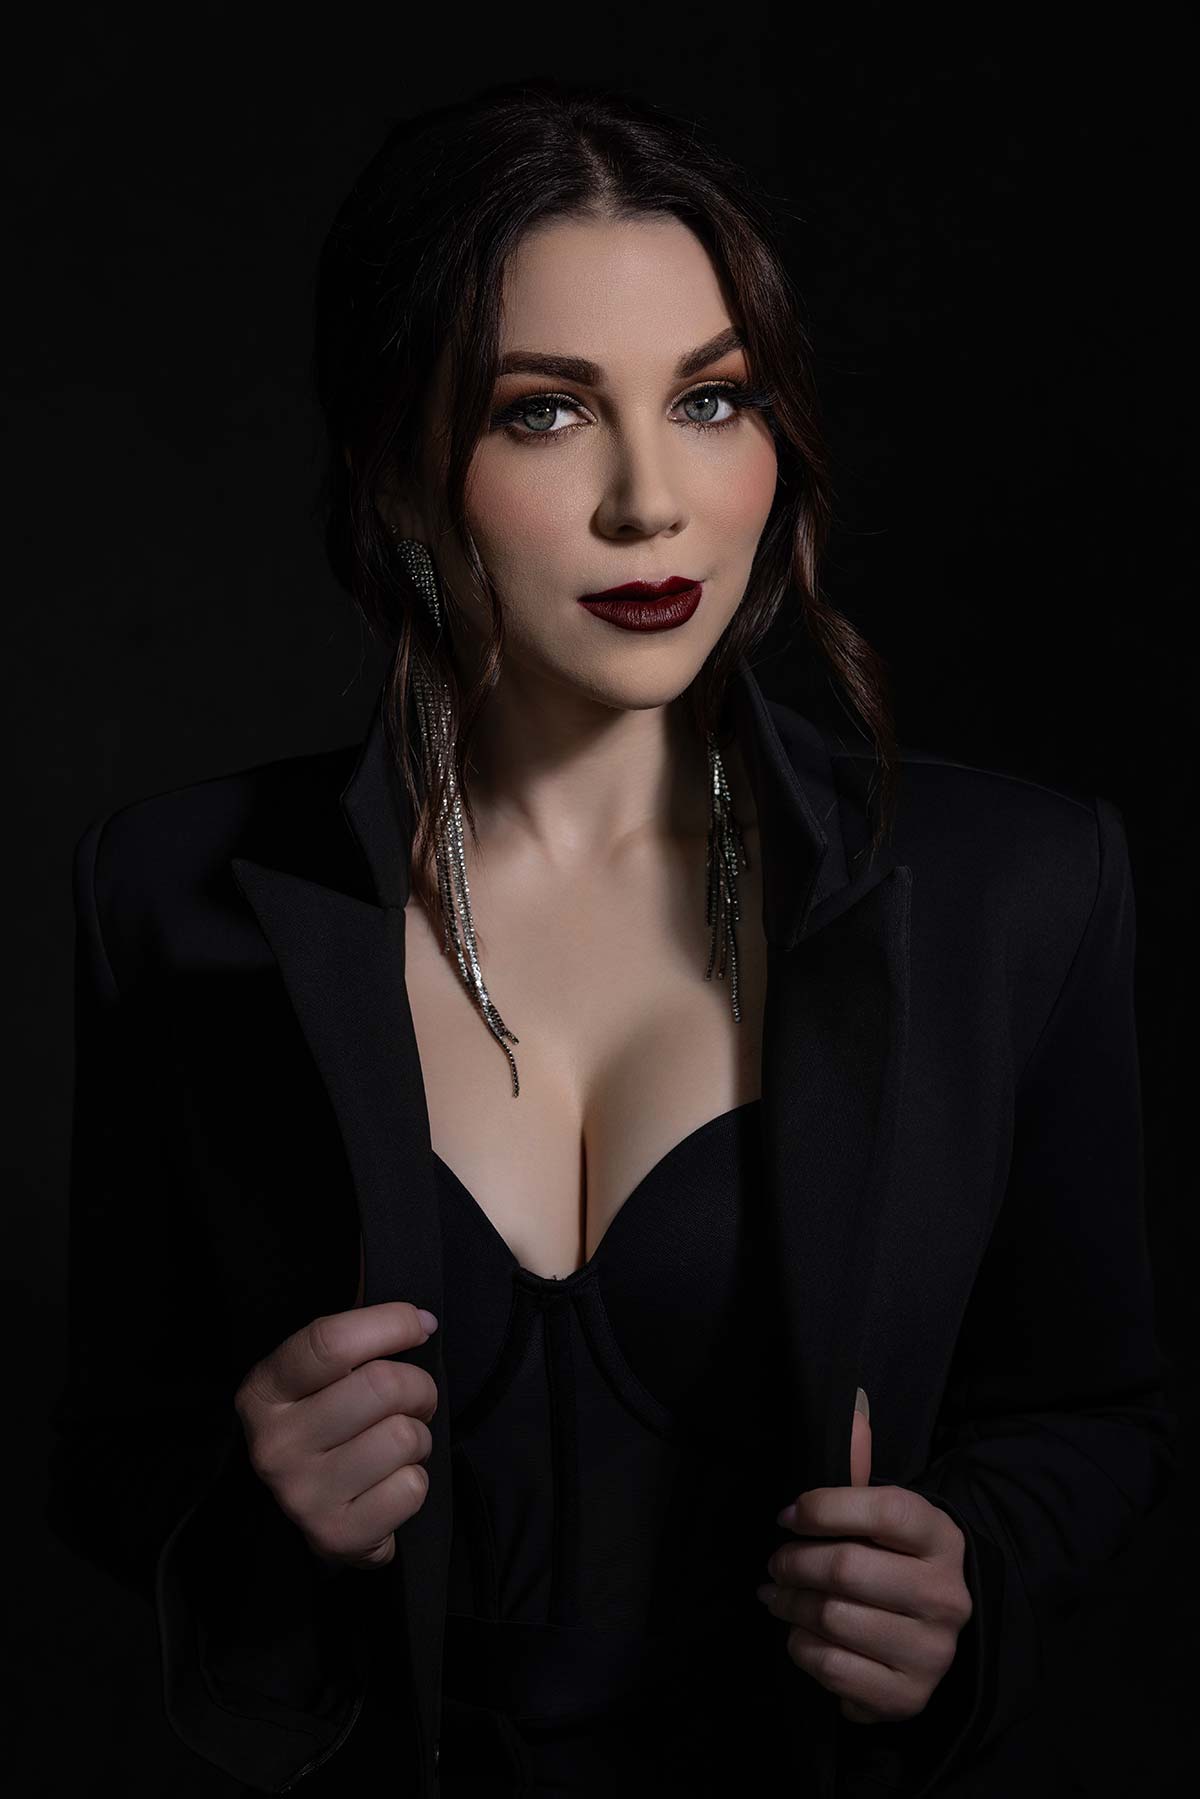
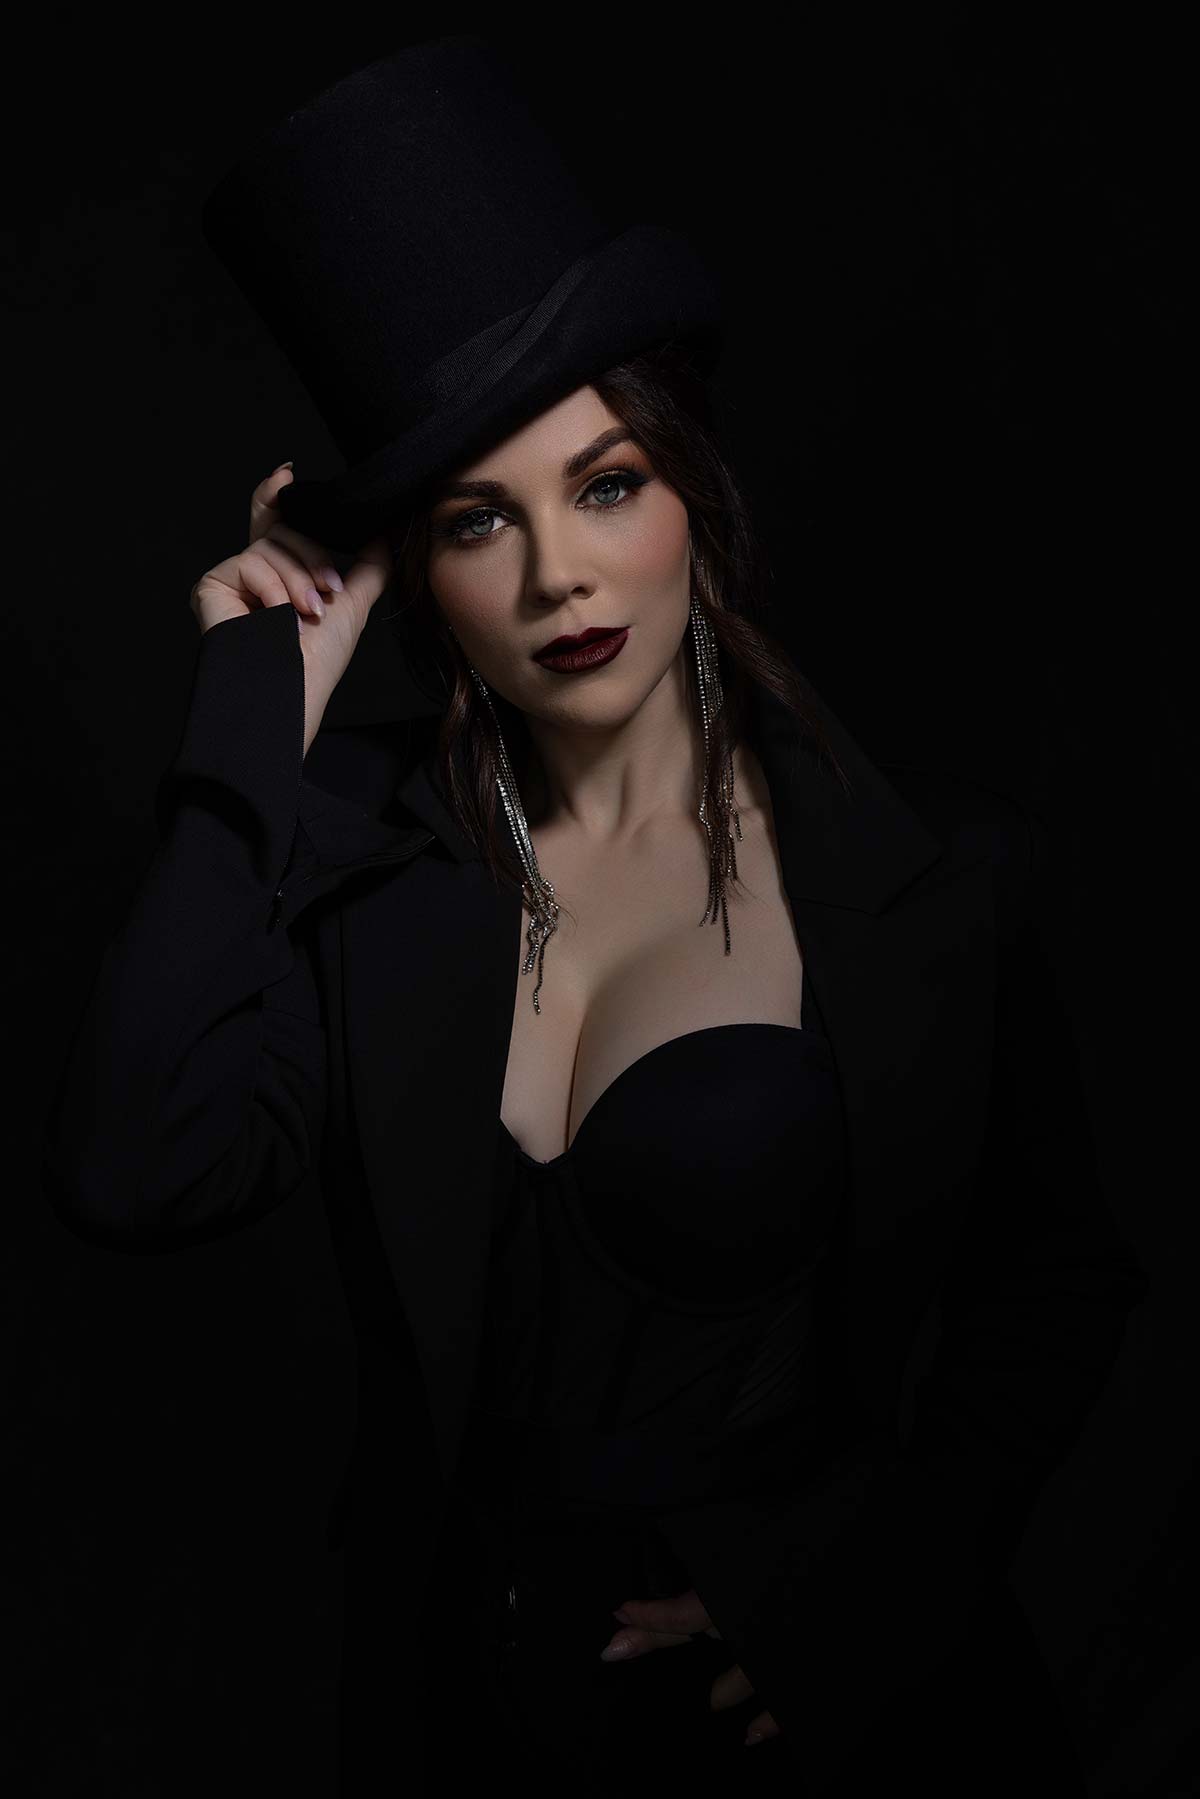
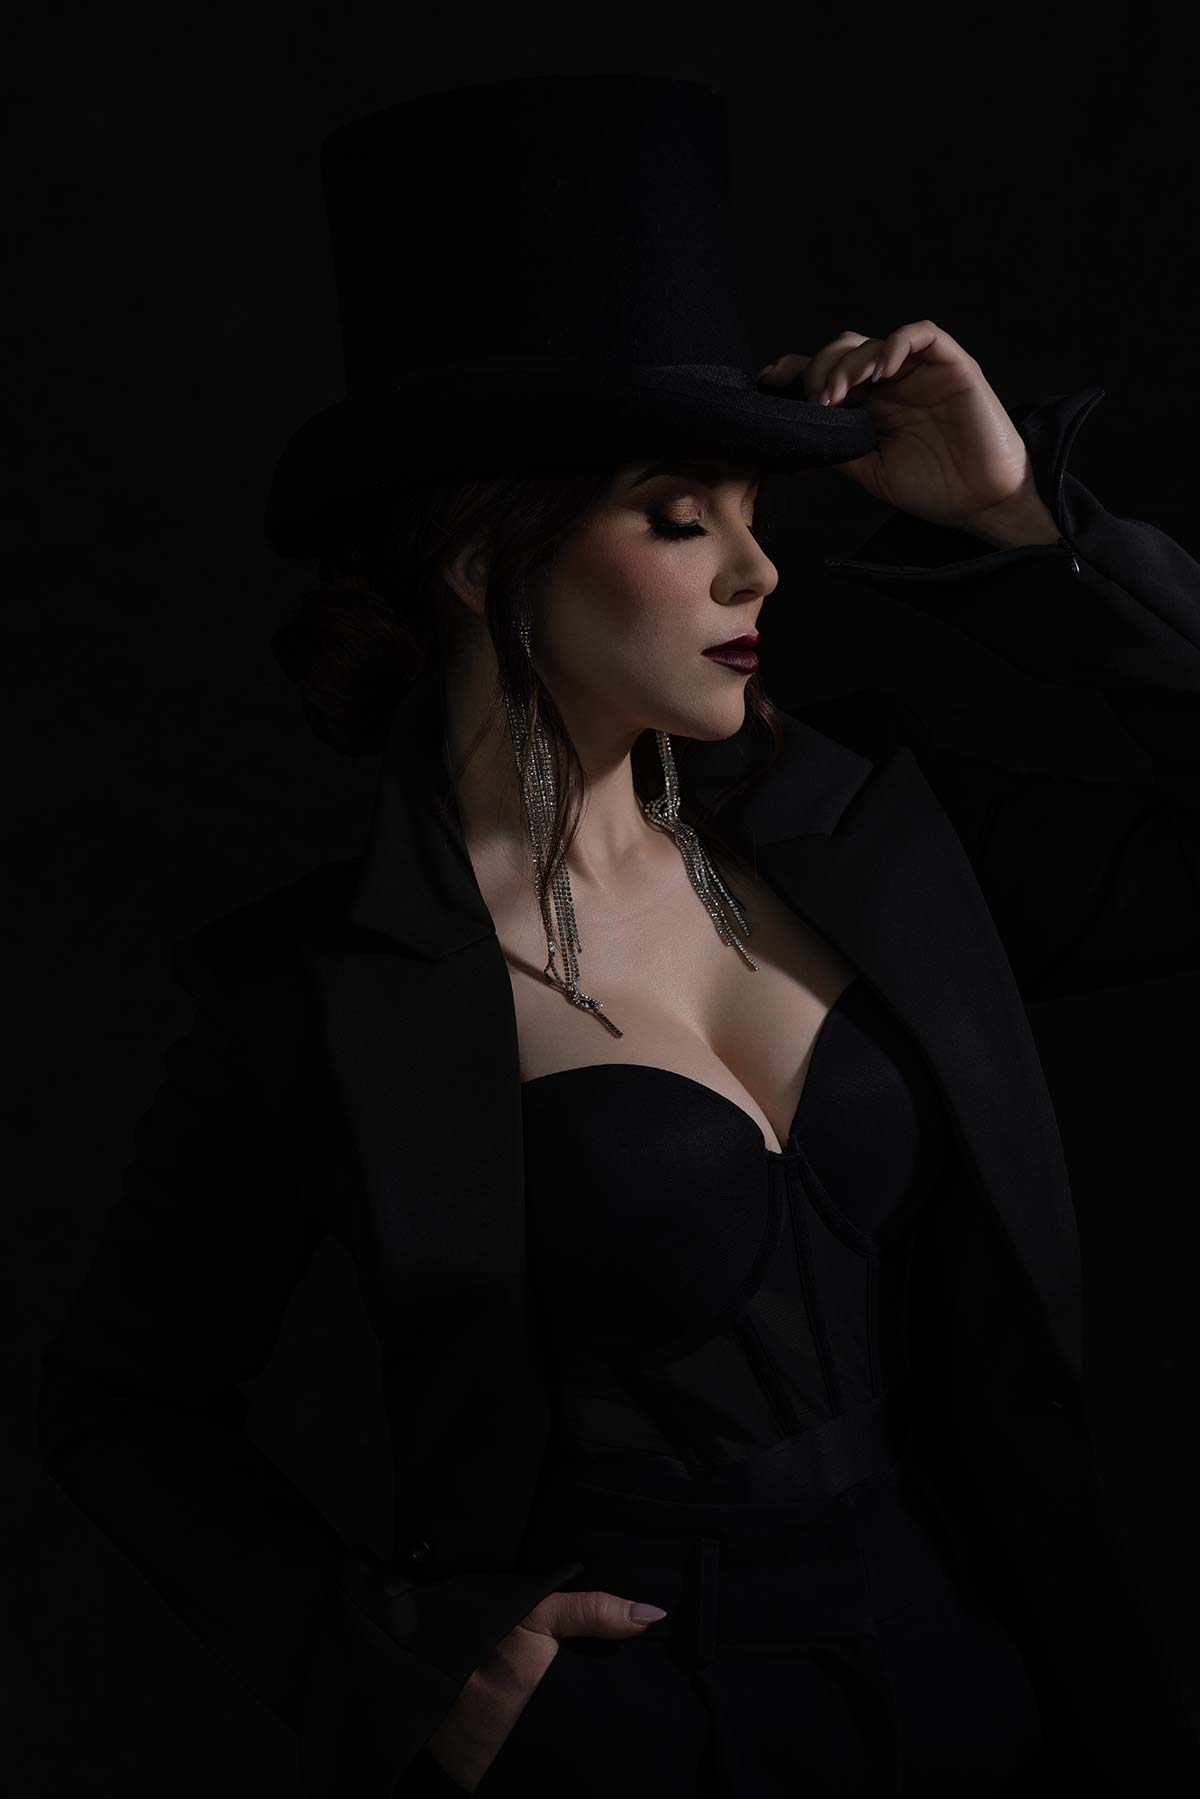
So that’s one particular look we have now with a low key shot. I really, really do like it. Now what I want to do is introduce a hat to this particular shot. Let’s see what the jacket looks like over your shoulders. I love a popped collar. Let’s stagger the hands. Gorgeous.
Settings: f/6.3 @ 1/200, ISO 100
Now how can we do this hat? We’re building to the shot. It’s got to be cockeyed. What if we go there a little bit higher with this light. Yes, I love this. What if that hand comes across? That’s the look I want out of her. Beautiful. Now, what if her hand’s almost like you’re pulling her hair back? I’m really digging those shots.
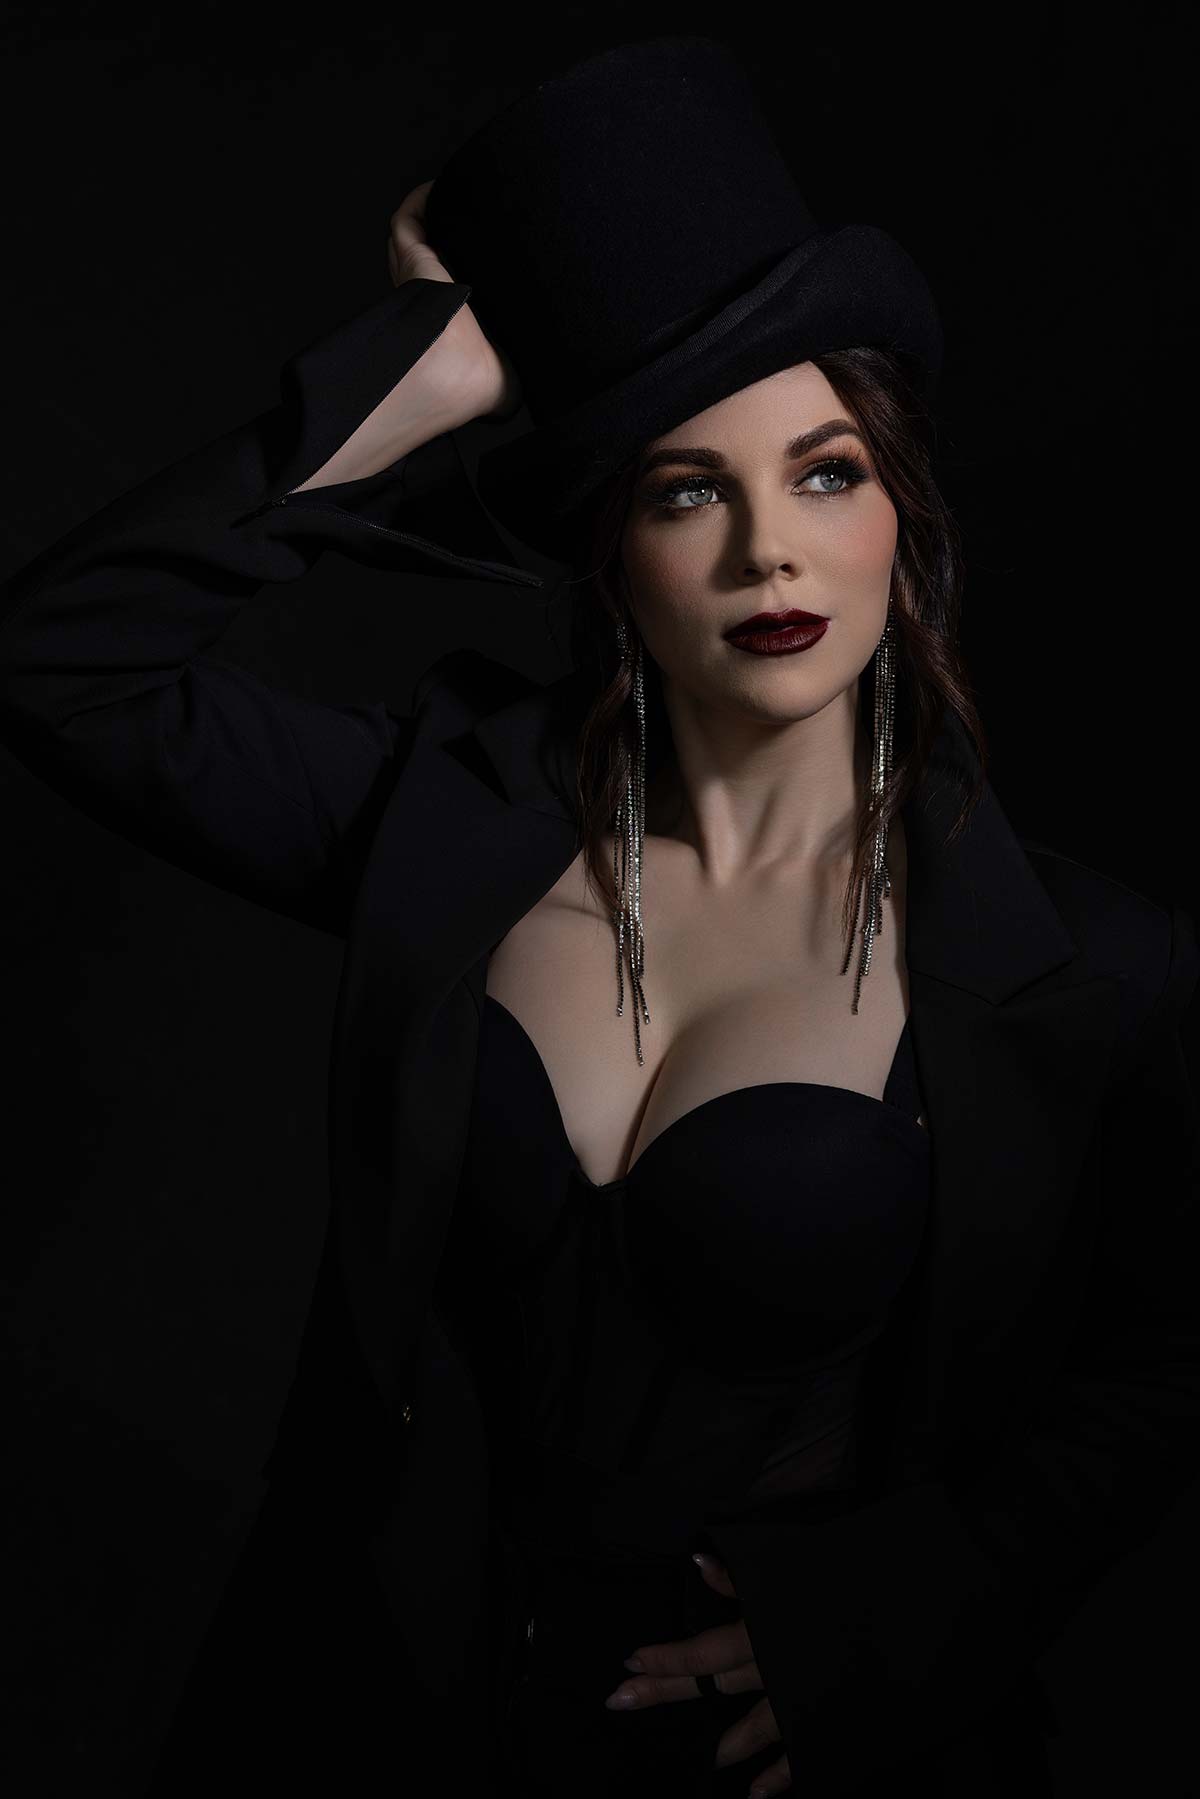
Settings: f/6.3 @ 1/200, ISO 100
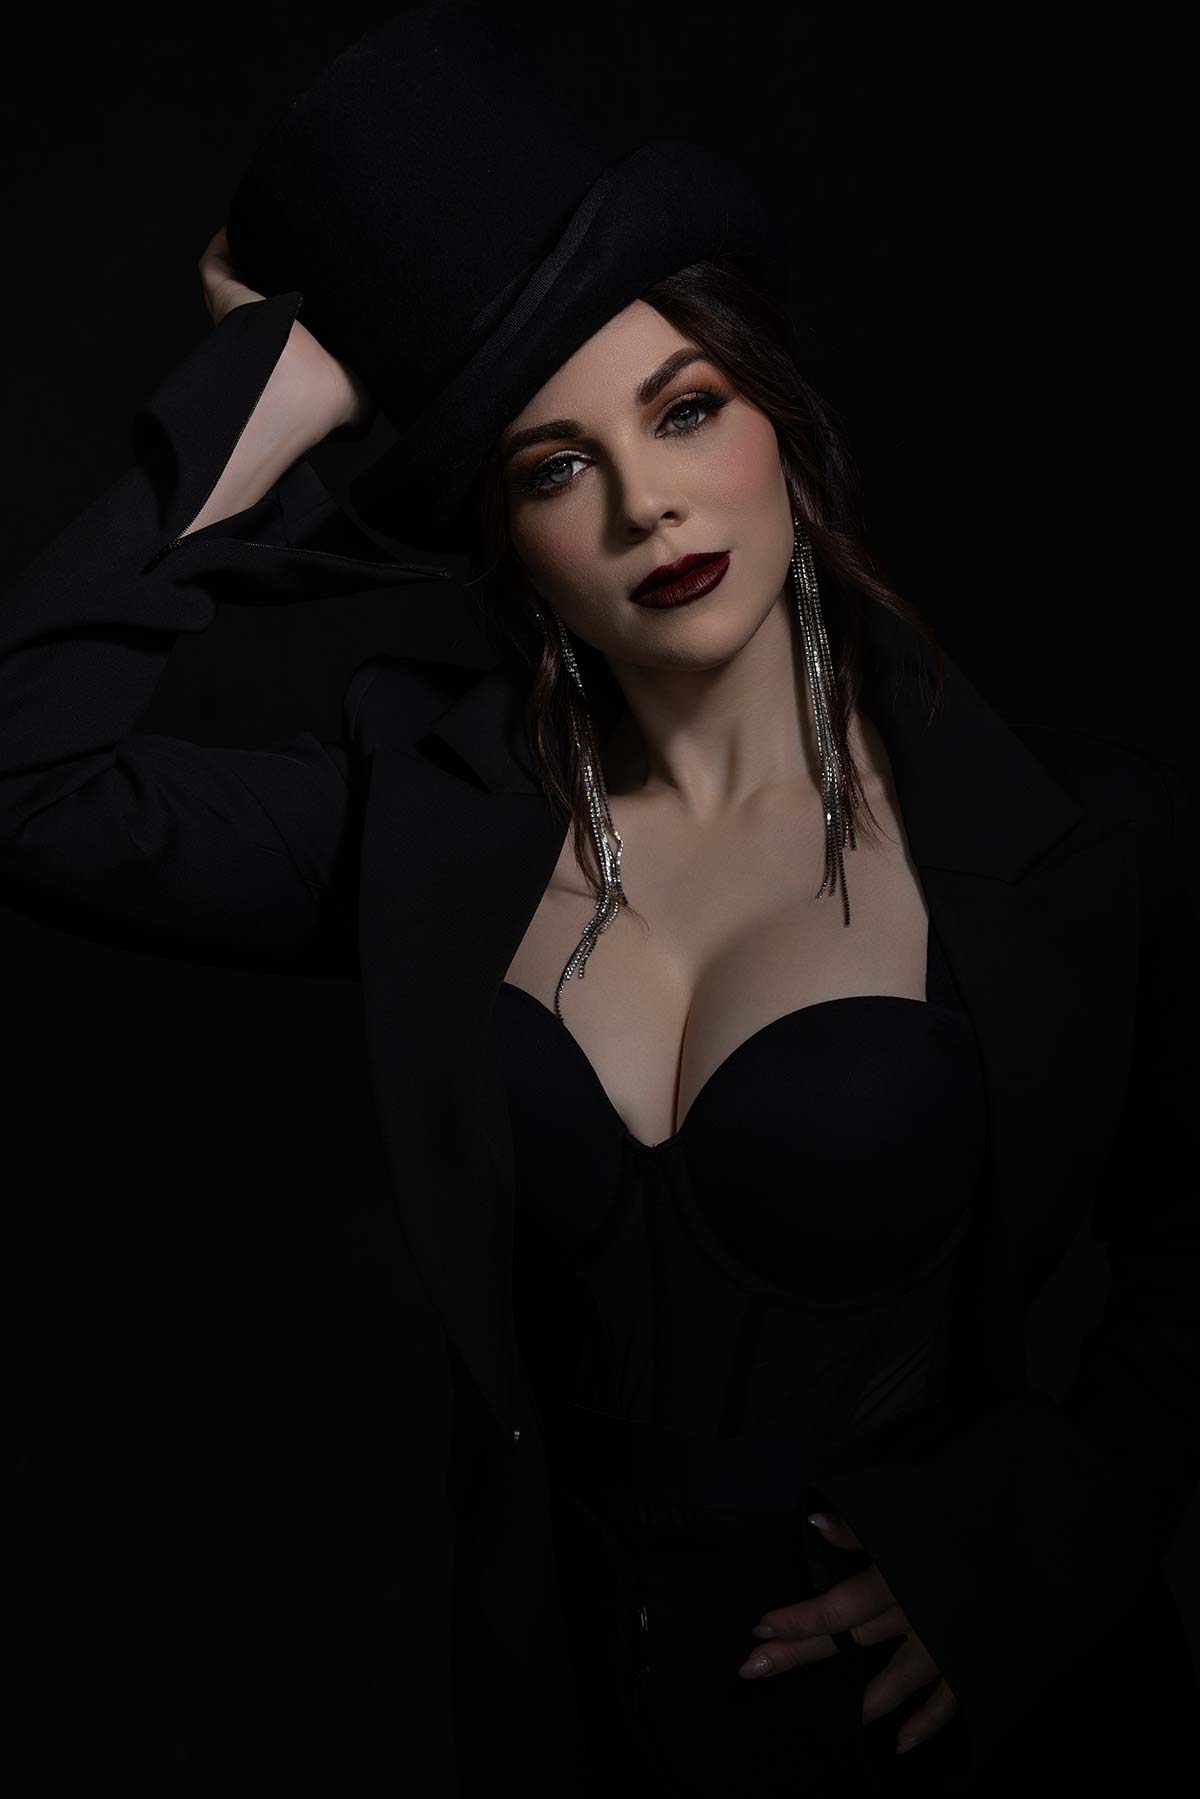
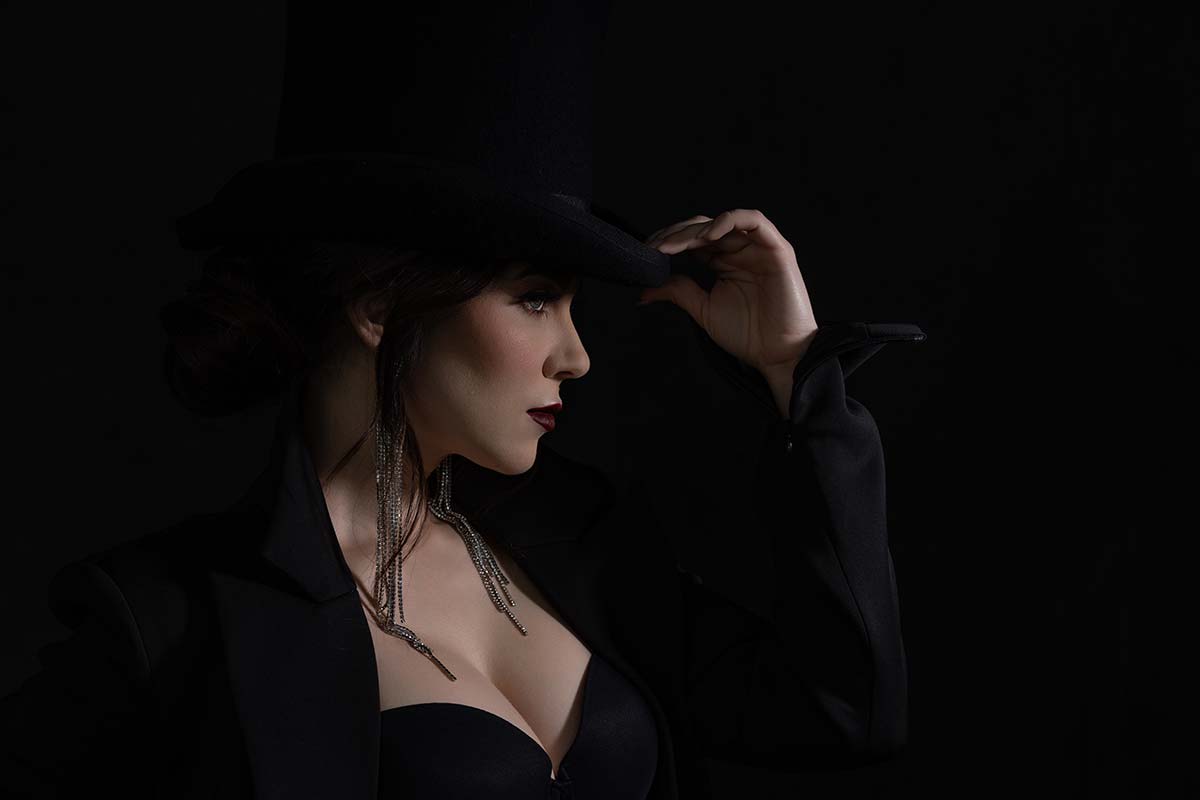
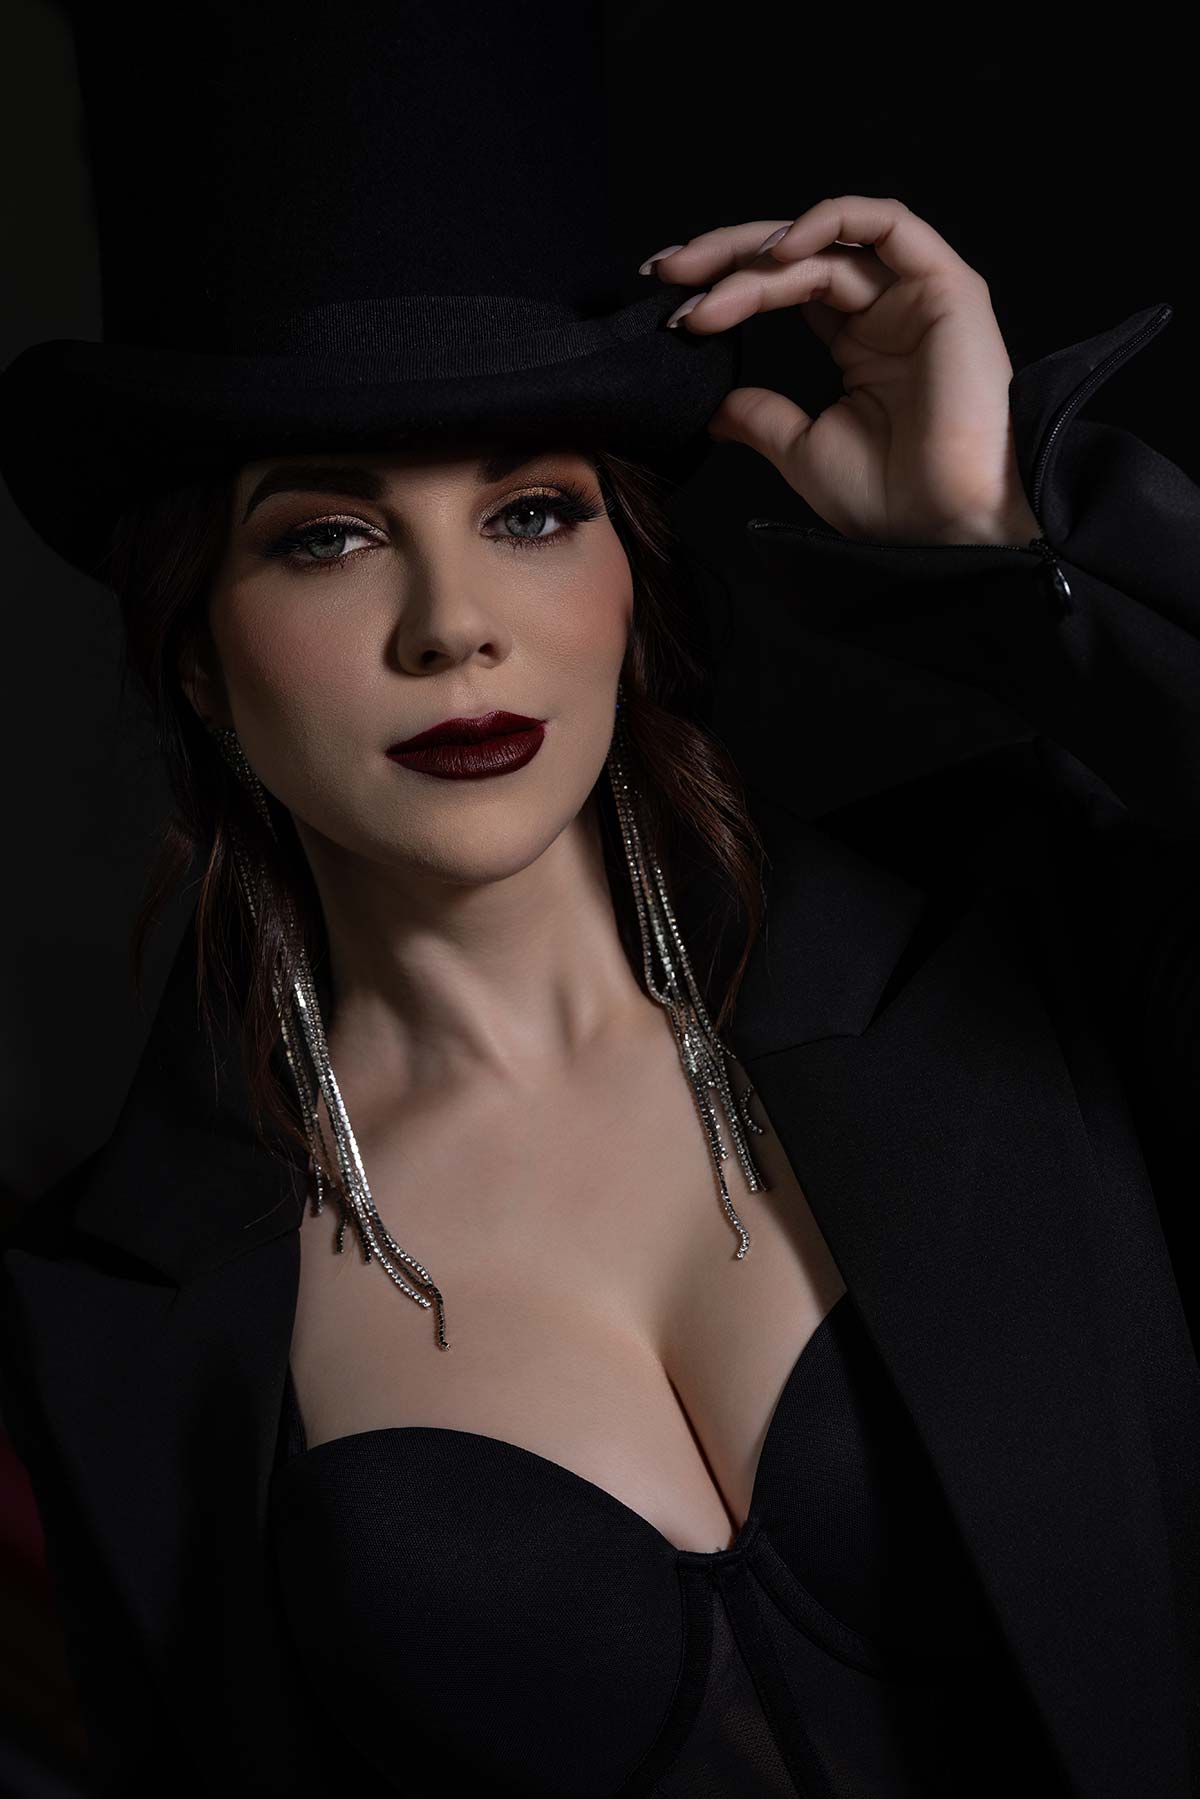
Now what I want to do is shoot more profile. I don’t know if I want the hat or not. I’ll take a test shot and see what it looks like. Lauren’s going to look straight at the light. I want her elongating her chin out and then we may have to go square with the hat.
Settings: f/6.3 @ 1/200, ISO 100
Settings: f/6.3 @ 1/200, ISO 100
Settings: f/6.3 @ 1/200, ISO 100
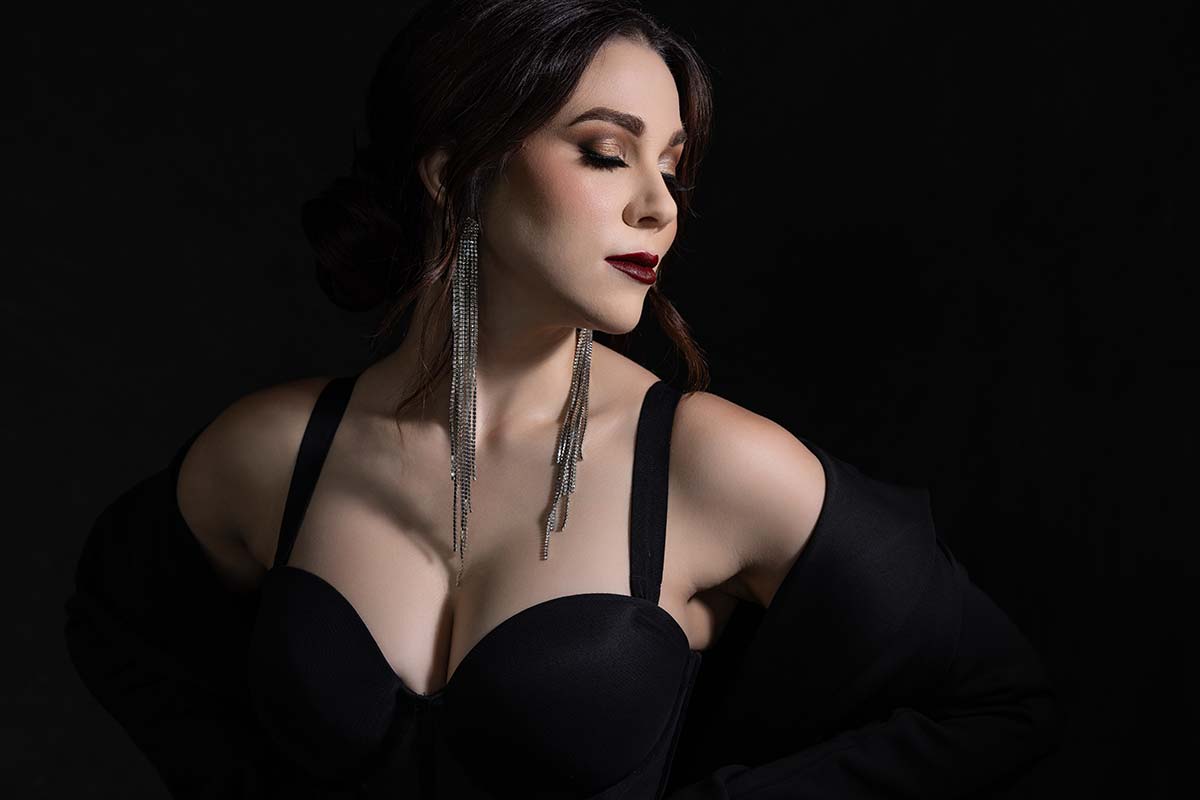
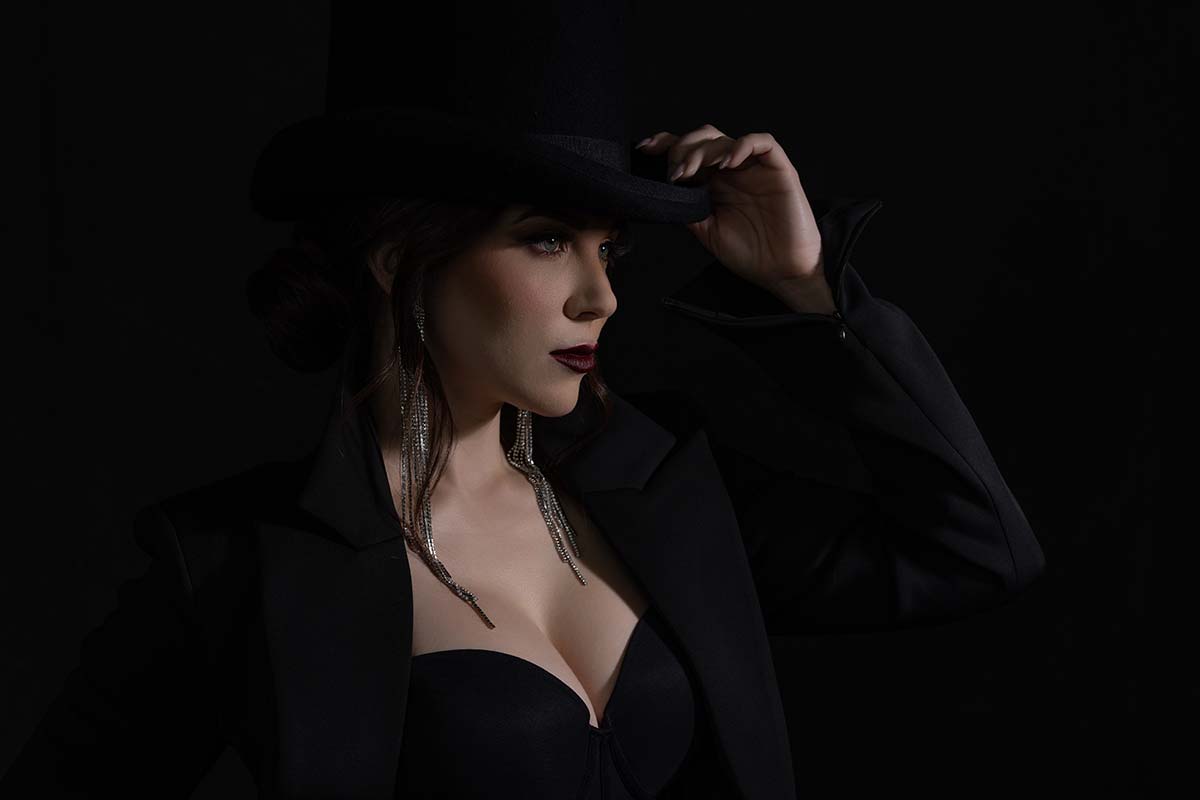
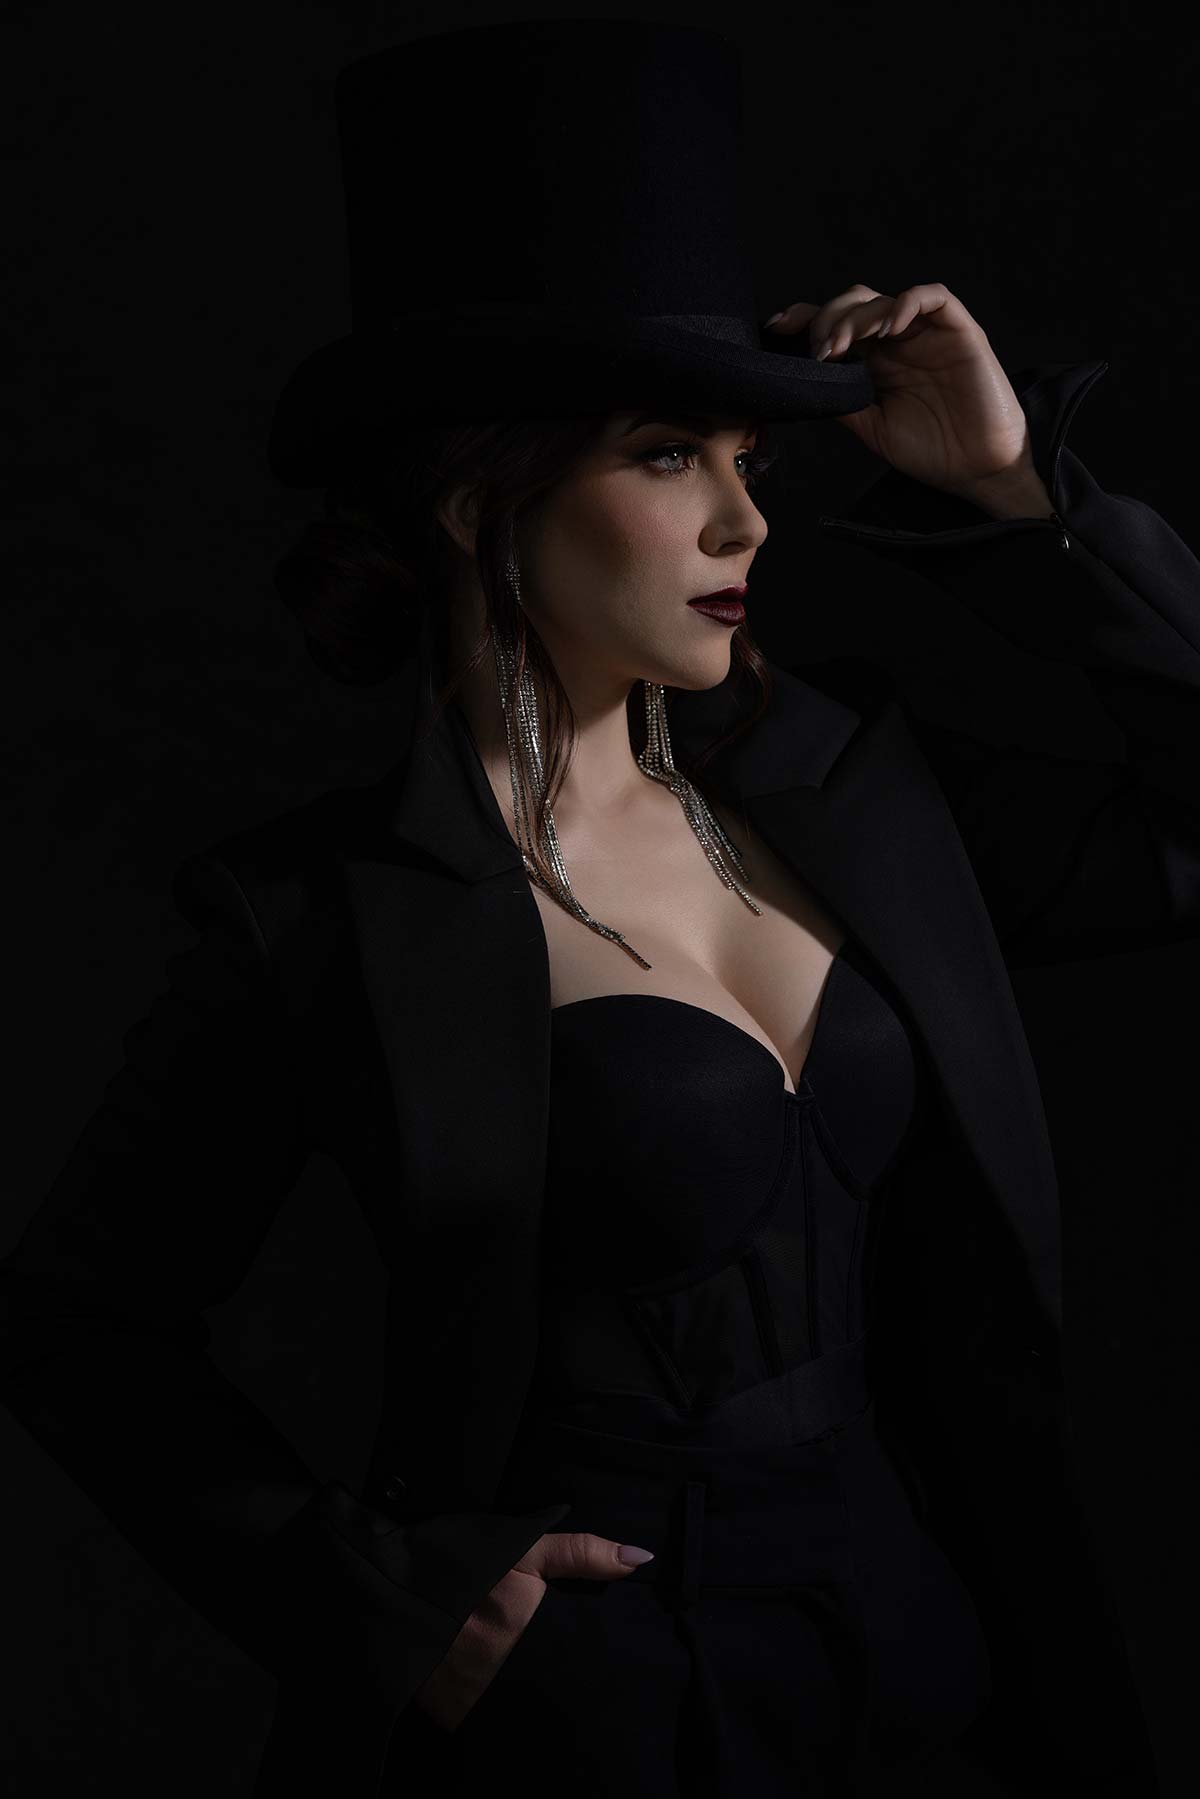
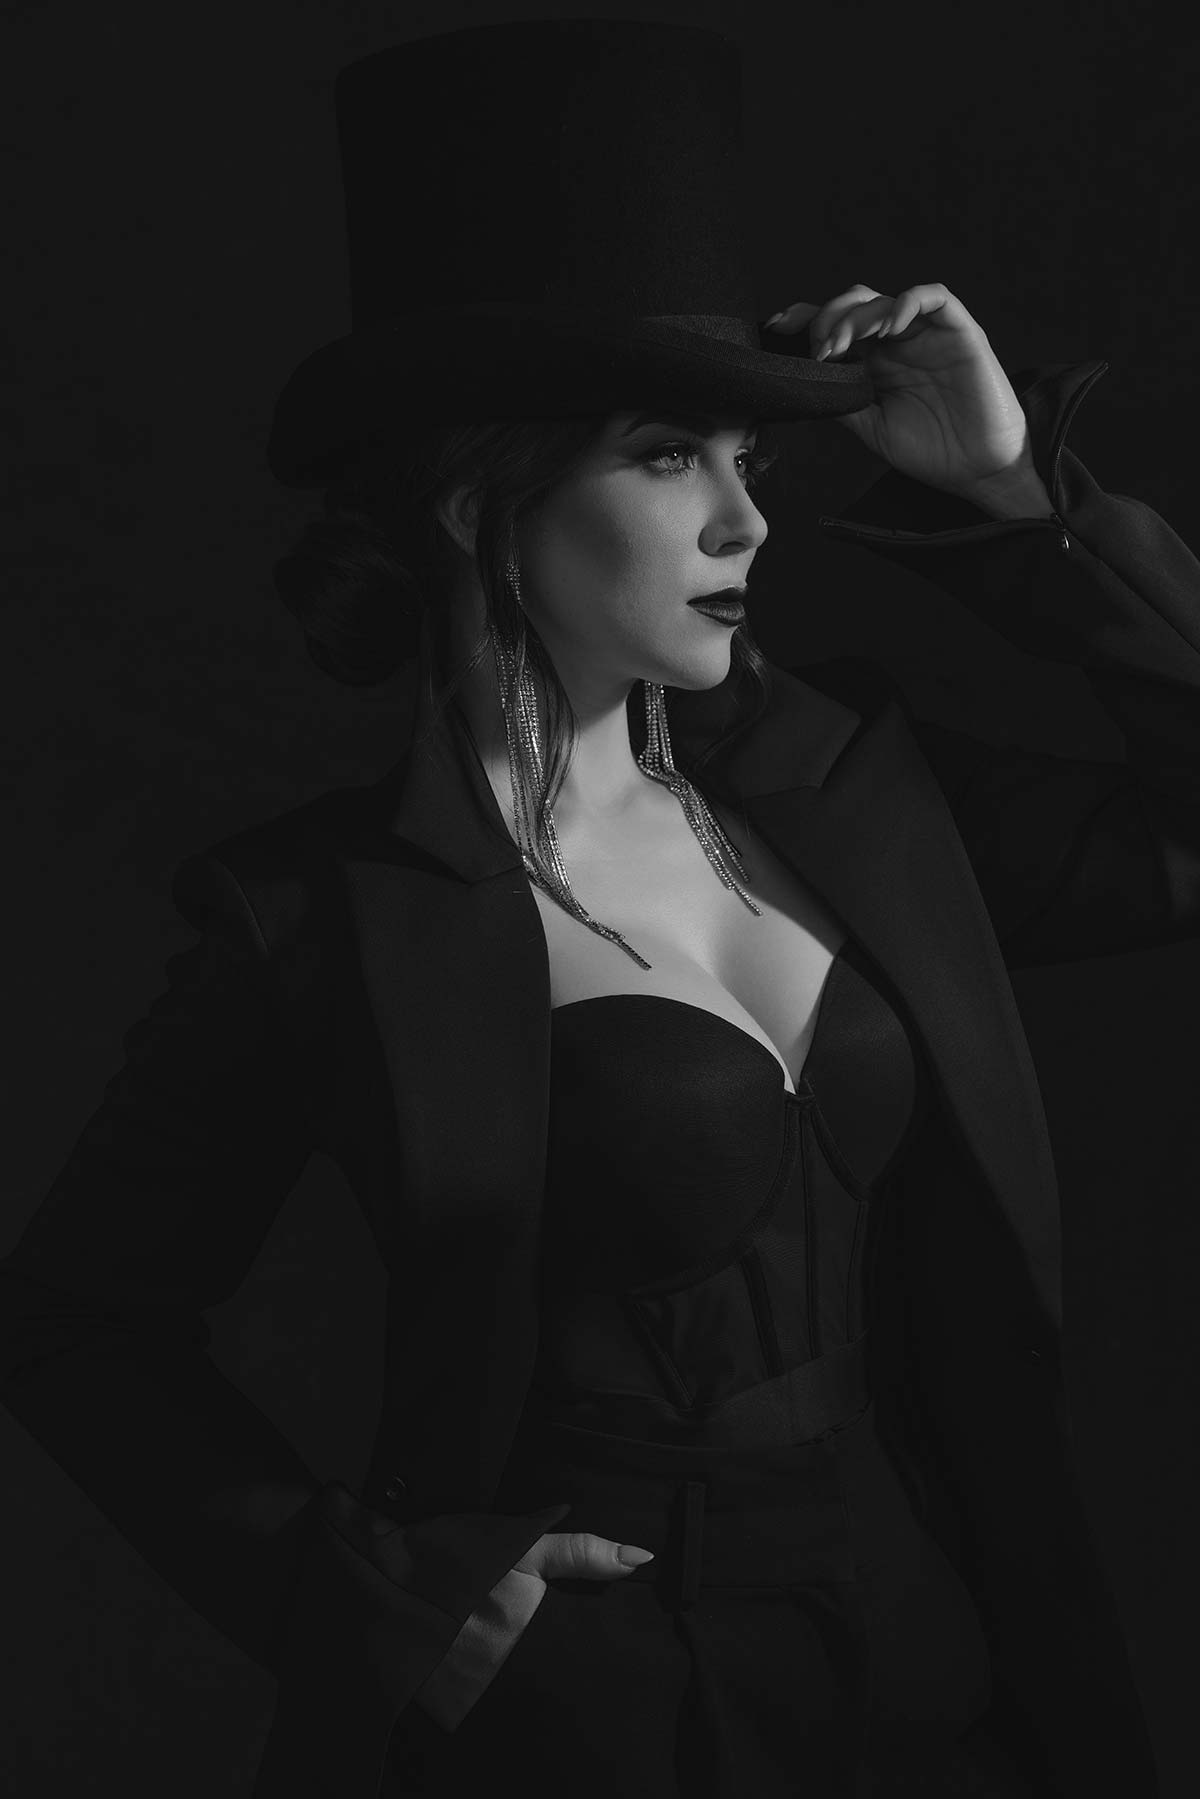
I love the shots I’m getting, but they are going way too much into complete blackness. Not that that’s bad on a low key portrait, but I want to push back a little bit of light. We’re going to use a Profoto reflector here. We’ve got silver. I’m going to use silver versus white because I want something that’s a little bit more specular focused and quite frankly harsher to push back. What you’re going to do is just try and be up here with it. Pose looks great. Yep, I like that.
What we’re doing a little bit here, and we’re getting away with it, is a little bit of short light on her. So I’ve got that light, and it’s cheating a little bit and it’s giving her a nice shape on her face. Now that is filling that shadow just a little bit. I love this.
Settings: f/6.3 @ 1/200, ISO 100
Settings: f/6.3 @ 1/200, ISO 100
Settings: f/6.3 @ 1/200, ISO 100
Settings: f/6.3 @ 1/200, ISO 100
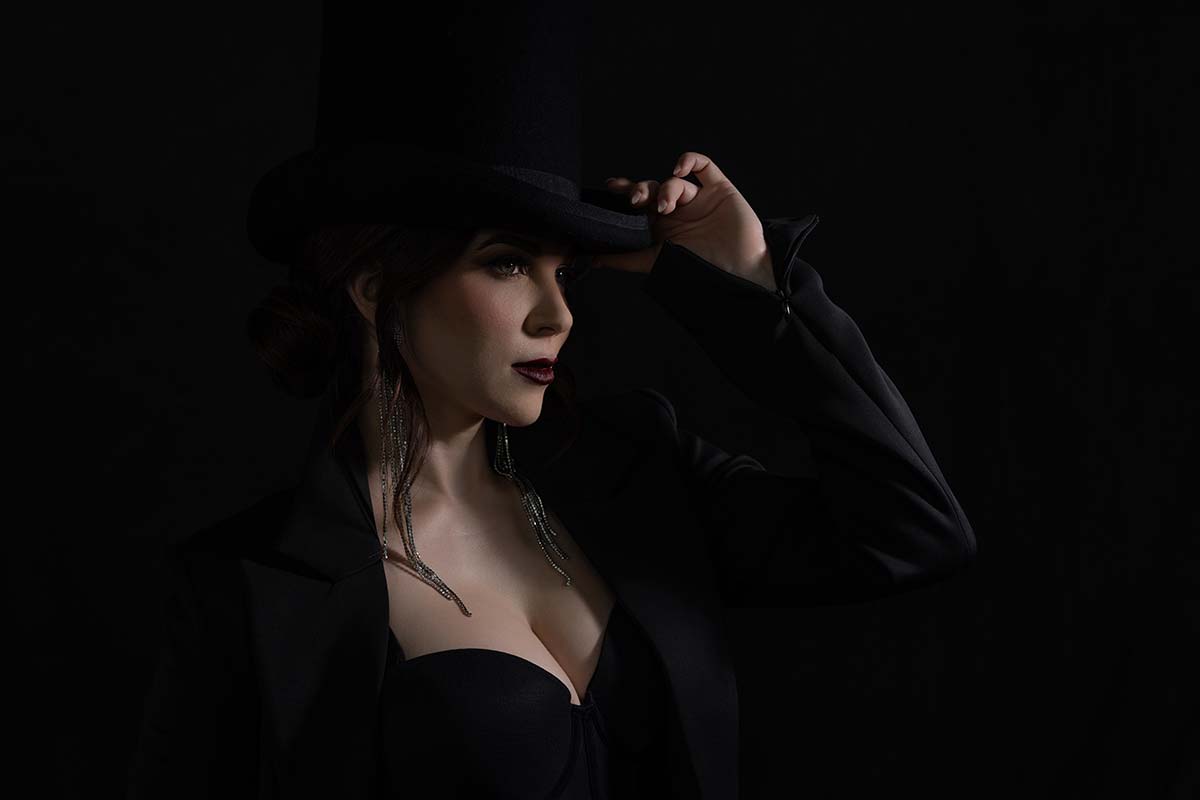
Settings: f/6.3 @ 1/200, ISO 100
Look 3
Now, we’re going to a different look with this red fabric. It’s super creative and I have no idea what it’s going to look like. I kind of just want motion. I think I want it kind of on her face. I want her eyes closed, looking up, and then I think I want somebody behind just kind of trying to give this fabric some motion and fall off.
So again, this is the way I like to work. You guys should do it as well. Once you get the shot you want in the can, so to speak, I think it’s really important to experiment. This may completely suck, at which point I would like to think we’d cut it from the video, but my wife will make sure it’s in the video. Let’s have some fun with it, all right?
So here’s what I’m thinking for this. The lighting is just a little bit higher. We’ve got this red chiffon that we rolled up to create a blindfold. We have just directional light. And what I want Lauren doing is just kind of looking back in that and she’ll be blindfolded with it. It’s just something that’s a little bit more fine art. Like I said, once you know you got the image you want, this is where you just have a little bit of fun and experiment. So let’s get going on this.
We’re going to have Lauren’s belly button arching to her right, and she’s going to step back with her left foot. In this hand, let’s give her some fabric. With the other hand, let’s come up over her chest right there. Flare that elbow and let that hand relax. Beautiful, Lauren. Let me get a test shot before anybody starts throwing anything. There we go.

Settings: f/6.3 @ 1/200, ISO 100
All right. So hopefully, guys, you’ve enjoyed this video. Subscribe to our channel. For those of you who do follow my YouTube channel, we’ll see you in the next video. Hopefully you enjoyed this one. Let us know down in the comments which one was your favorite. We’ll see you in the next one.


