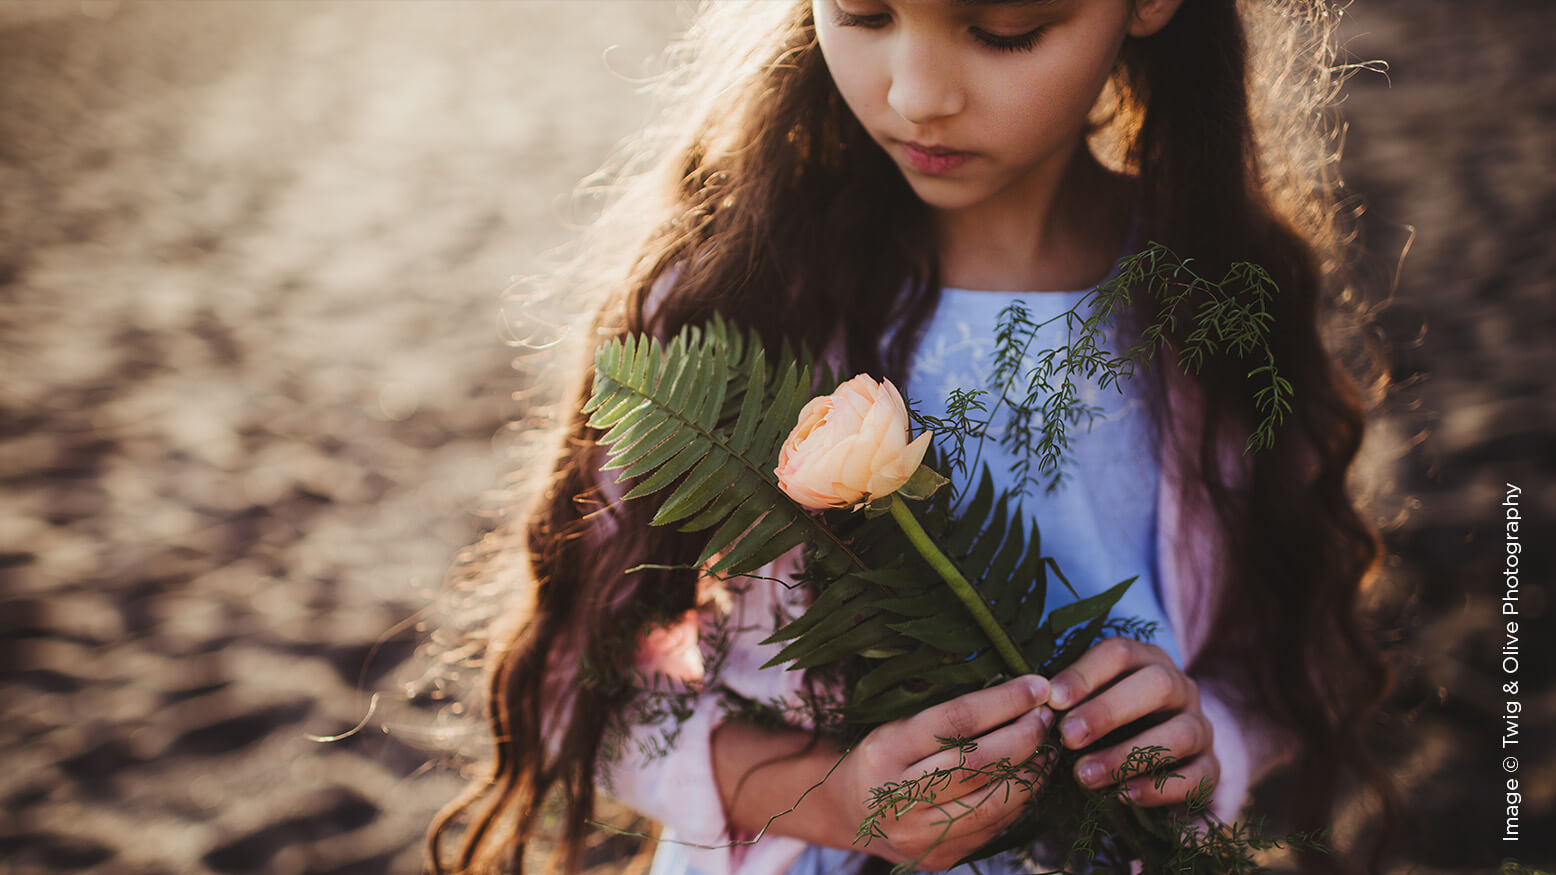
Mastering Natural Light Photography with Twig & Olive Photography
Want more information on this article? Get access to video content and additional supporting images. Launch the August 2017 issue of the magazine by logging in or signing up for a free account. Shutter Magazine is the industry’s leading professional photography magazine.
In this issue, you’re reading exceptional advice on shaping light with strobes, softboxes and speedlights. But what if you’re limited to available light? There are unique challenges. What you gain in reduced gear, setup and purchases, you lose in flexibility. Yet there’s a distinctive beauty in using only the sun. With care, it can produce timeless imagery.
Using Natural Light Outside
Natural light photography is at the mercy of the intensity of the sun. Harsher light is generally to be avoided. Take into account the following.
- Midday light, when the sun is directly overhead, creates unforgiving shadows and squinting in subjects. Even retreating to dense trees can create unflattering dappled light that is impossible to correct in editing. While some photographers can embrace the bold look of full sun (and absolutely rock it), it doesn’t create an ethereal, dreamy look.
- While it’s generally best to avoid midday light, sometimes it’s unavoidable, like at a wedding. In these situations, shade from buildings will be your best solution. In a pinch, use a large scrim to block the sunlight directly over your subject.
- Evening light is idyllic and coveted among natural light photographers. It does require compromises, however. Golden hour—the last hour before sunset—can occur late in the evening, which, for family portraits, can happen after bedtimes. You’ll need the trust of your clients to adjust sleep schedules as needed. Clients will trust you if your golden hour portraits are part of your brand. They’ll put off beddy-bye to capture the gold.
- One problem natural light photographers run into with evening light is how to properly angle shots. It’s generally desirable to backlight subjects, but shooting straight into the sun can create haze and loss-of-subject issues. To counter this, place the sun slightly to the left or right of the subject, about 10 degrees.
- Your lens choice can have a profound impact on the whimsical characteristics of your shot, desirable or otherwise. Wide-angle lenses, such as a 35mm, can allow for more sun streaks, ghosts and flares (which may or may not be part of your brand), while a more compressed lens, like the 85mm or 70–200mm (and especially coated versions), avoid these but suffer from more hazing.
- Once the sun sets, you no longer have the powerful direct source of light, and all benefits of rim lighting are gone once civil twilight begins. Turn your subject around and have them face where the sun was. Faces will be lit but not overexposed.
- Cloudy days lack grandiosity for sun-drenched pictures, while suffering none of the aforementioned limitations. You can typically count on shooting most any time of the day (though civil twilight will likely be unavailable) because the clouds act like a giant softbox for the sky. Some photographers have built brands just by shooting subjects on overcast days, yielding breathtakingly moody images.
- Not all clouds are created equal. With thinner clouds such as cirrostratus or altocumulus, you are better served by shooting as you would during civil twilight to avoid poorly illuminated faces. Heavier clouds, such as nimbostratus and cumulonimbus, can be trickier to work with not just because of impending rain, but because they can darken the landscape so much that shadows become unrenderable. Carefully observe eyes and other darker areas on your subject before shuttering.
The topography of your location also has a large impact on how and when you can shoot.
- The tilt of the Earth relative to the plane of our solar system gives rise to our seasons and creates great variance in the intensities of light, depending on where you are. Equatorially areas between the Tropics of Cancer and Capricorn have intense directional light year-round. In the Southern United States, the effects are similar, resulting in light that can be too bright to photograph in all but the last hour of the day. In contrast, as you head farther from the Equator, the sun is lower on the horizon, allowing a bit more forgiveness for late afternoon and evening photography. This is especially useful as you start approaching the Arctic and Antarctic Circles, where sunsets become unreasonably late for some clients. This softer light can confidently be used at earlier times in the day.
- Natural light takes on the qualities of the surfaces it reflects off. Forested areas can help block intense directional light, but areas with green undergrowth should be avoided so you don’t create green color casts on your subjects. Beaches provide no respite from intense light, and the surface of the water intensifies the problem by reflecting even more. The warmth of sunset is magnified as it passes over the water, and can be best captured during this window and again during civil twilight. Deserts are similar, offering a narrow window of time for the best light.
Using Natural Light in a Studio
It’s possible to shoot natural light in a studio setting if you have the right windows. All the directionality and geopositioning of shooting outdoors is rendered moot. You need to figure out how to get light to where you need it. With directional window light, the inverse square law plays a role. Reflectors should be a part of any natural light setup.
- Use studio lighting to shape light, be it directional or uniform. Using light from one window creates falloff on your subject the farther away they are from the source. While Rembrandt lighting may be desired for your brand, you can also even out the light by placing a reflector opposite the window.
- Large windows are preferred for this studio setup. If you have too much light coming through, use one or more shear curtains to diffuse the light on bright days. If sun streaks start creeping into your studio, add a large scrim to your window to block them.
- One challenge facing naturally lit studios are dark and cloudy days. You don’t have to cancel shoots on days of reduced available light. Set up a reflector outside your window and bounce in additional light.
Thoughts on Gear
While natural light photographers tend not to carry an arsenal of lighting solutions, gearing choices are crucial to the success of your shoot.
- The biggest challenge for cameras is to be able to resolve the extremes of light and shadows, and some cameras perform significantly better than others. Both highlights and shadows can be too extreme for a camera to capture in a single shot, something referred to as its dynamic range. Some solutions have been to bracket different exposures and merge the images in post—a time-consuming process. Another solution is to select a camera with a large dynamic range and simply adjust the highlights and shadows in post. While this may flatten the tonal curve initially, it’s easily compensated for and can create beautiful images in one shot. Remember that more details are typically preserved in shadows than blown-out highlights, so it’s best to photograph one to two stops underexposed.
- Some photographers use reflectors to bounce light back onto their subjects. Larger ones can be cumbersome in the field unless you have an assistant. A handheld silver reflector often does the trick.
It’s an oversimplification to suggest that using only available light is a simpler and less technical solution to shaping light artificially. Mastering the sun to illuminate your subjects and produce intense, beautiful images takes great care—and some compromise.