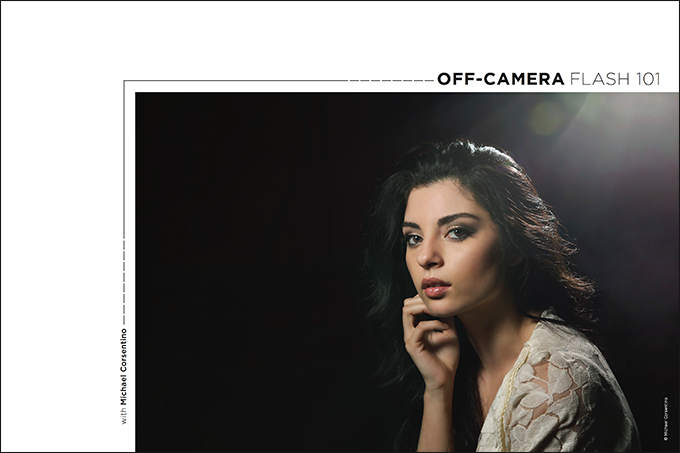
Off-Camera Flash Basics
Many of the ShutterFest faithful have been telling me loud and clear that they need help with the basics of off-camera lighting. I’ve spent years cultivating studio and location skills ranging from simple one-light setups to complex multiple-light, large-crew productions, so I often assume everyone understands the basics. Clearly this isn’t the case. This month, let’s dig into the foundations and some basic techniques.
At its core, lighting is really simple. We’ve all heard people describe themselves as available-light shooters. There’s nothing wrong with that. I’m the first to admit that you can’t beat Mother Nature. But it’s important to remember that speedlights and strobes are available lights—ones that you can control, giving you much more freedom than natural light. With natural light alone, you’re basically held hostage.
With good off-camera lighting, the goal is to create the light you want rather than the light you’re given. When natural light just won’t do, you need the tools, techniques and vocabulary to use artificial lights.
Don’t overcomplicate it. Off-camera lighting operates according to three basic principles: quantity, quality and direction of light. Let’s look at each.
Quantity
How much light do you want? Speedlights and strobes allow you to control the amount of light they contribute to an exposure. Think of it like the volume control on your stereo. Speedlights work in TTL (covered later) and manual. The majority of strobes operate in manual mode (also covered later), although several recently released strobes include TTL as well. I’ll cover how to control the output of each of these sources.
Quality
This is where modifiers or the lack thereof come into play. Each modifier creates a different quality of light, from soft to hard. Shoot-through/bounce-back umbrellas, grids, octabanks, beauty dishes and softboxes each create a different quality of light. Experimenting with each will help you develop a vocabulary and allow you to make informed decisions about when and where to use them. Soft light has gradual transitions from highlight to shadow, while hard light has rapid transitions with much crisper, harder definitions between shadows and highlights. When you diffuse the light, you soften it. When you don’t, you get a harder, more contrasted quality of light. They can work great individually or even mixed. The addition of diffusion fabrics and the color of modifiers add various subtleties. Silver delivers a more specular (contrasty) light, while white provides a softer light. For example, if I use a bare flash, I get a more focused hard light source than that same light with a shoot-through umbrella attached. This creates a broad, diffused light source.
Direction
The flexibility to precisely control the amount and direction of shadows introduced by your lights, based on their position, is one of the big advantages of off-camera lighting. If you want minimal shadows, place your main light in front of and above your subject at the 12 o’clock position at an approximately 45-degree angle down toward your subject. The farther you move your light left or right of your subject, the more shadow that’s introduced. (Refer back to last year’s “Circle of Light” feature for more on this.)
Getting the flash off your camera
To do this, you’ll need a way to communicate with your remote flashes. This is done with a device known as a trigger. There are dumb triggers that simply communicate on/off signals and smarter triggers that send TTL info. On speedlights, there are two methods of communication, depending on the brand of flash you’re using: infrared sensor and radio frequency. These allow TTL and manual power setting information to be communicated between your camera and any remote flashes. I use and recommend radio-based systems for both speedlights and strobes due to their rock-solid reliability and range. That’s going to be the Canon 600EX-RT and ST-E3 transmitter, or the PocketWizard FlexTT5 for Nikon shooters. Each allows both TTL and manual operation. Extra-long TTL cables are also an option, providing the same communication in a much less expensive wired one-light solution. For strobes, I use PocketWizard Plus III radio triggers, Profoto Air and Air TTL triggers, and Elinchrom’s Skyport.
When to use TTL
TTL, or “through the lens” metering, does the heavy lifting for you, communicating subject-to-light distance, exposure calculations and other info between the camera and remote flashes. It’s available on speedlights and select strobes in conjunction with their compatible triggers. TTL is great in fast-moving situations where subject-to-light source distances are changing on the fly. TTL gives you a good ballpark exposure. Then it’s up to you to make the lighting your own using +/– exposure compensation values and shutter speed settings, both set on the camera. As I’ve explained in previous articles, flash exposure compensation controls the amount of flash contributed to the exposure, shutter speed controls the amount of ambient light contributed to the exposure and aperture brings both the amount of flash and ambient up or down.
When to use manual
For some reason, just the mention of manual flash sends people running for the door. But it couldn’t be simpler. Remember, it’s just quantity of light. Turn it down for less light, turn it up for more light. That’s about as complicated as it gets. Manual is best in situations where distances between your lights and subject aren’t changing. Keep in mind that you can mix and match TTL and manual.
Let’s say you wanted to use two lights to illuminate a wall or backdrop behind your subject, and another flash to light a subject that’s moving. I’d set the two background lights to manual mode, dialing in the output I wanted. The wall is static, so manual is perfect. For my subject, TTL would be a good fit, allowing me to easily move around and maintain a solid exposure. Strobes and speedlights treat manual power settings a bit differently, but they’re both dead simple. Speedlights use manual power settings from full power, or 1/1 all the way down to 1/128 power, while strobe power output operates based on settings from full stops and below in 1/10 stop increments.
That’s off-camera flash in a nutshell. The best advice I can give you is to just jump in. Start simply with one light, try manual, try TTL, experiment with different modifiers, and you’ll get the hang of it.