One-Light Wonder: Making the Most With What You Have with Karen Bagley
One of the most common questions asked of professional photographers is, “What was your lighting setup?” I am sure we all have heard that question or wondered it ourselves when looking at an image. It’s a genuine and very important question.
As photographers in today’s world, we have so many options. We have strobes, natural light, constant light, reflectors. We have differing modifiers like octaboxes, softboxes, beauty dishes, strip boxes, umbrellas, gels and so on. There are lighting setups with five, six, seven, eight or more lights. The subject of lighting is endless. With so many possibilities, it can be overwhelming.
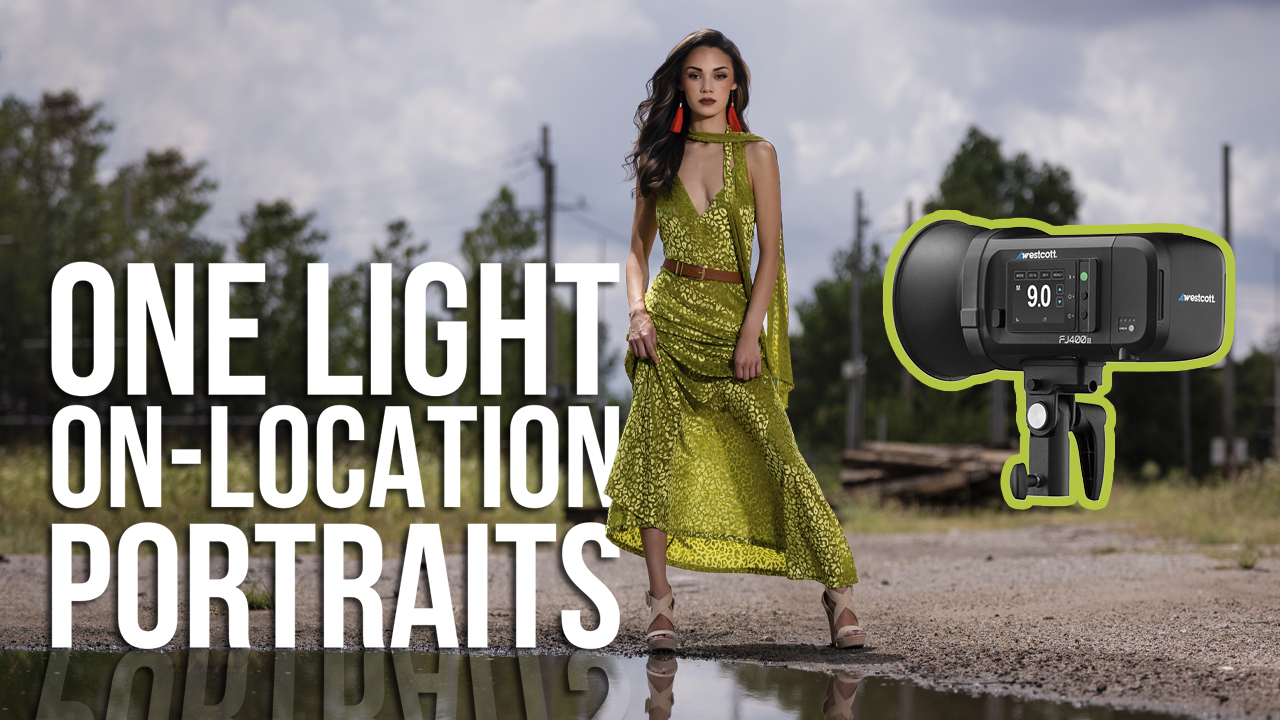
In my own personal business, I actually only use one light the majority of the time, both indoor and out. Yep, that’s right. ONE LIGHT! How does that work? Well, let’s break it down so we have a better understanding of our light source regardless of where it comes from, helping us know what we need to do when working with one light.
Let’s briefly go back to basics. You have and will continue to hear me say, “Become the best and master what you have right now, and imagine what you will be capable of with better (or more) gear later.” This can apply to all gear, but for this article let’s apply it to lighting. What would you do with one light if that is all you have access to? How do you become a “one light wonder”?
To start and have our mindset right, let’s talk about the basic rules we can use to our advantage when using one light.
1. The larger the light source the softer the light will be
What is soft light? Soft light gives the feeling of wrapping your subject almost entirely in a blanket of light, if you will. The main thing you notice is the soft edges of the shadows. The transition from light to dark is very smooth and easy. On the opposite end of the spectrum, the smaller the light source the harder the light will be. Hard light has very defining edges to the shadows and the transition from light to dark is very direct.
Think of it like this: you would say the sun is a huge light source, right? But because it is so far away from where we are, that source is really much smaller. That’s why trying to photograph outside in the middle of the day will provide challenges by means of harsh, hard shadows. But if we photograph on an overcast day or a cloudy day, that hard light spreads out, or diffuses, like a softbox in the sky, leading to a much softer light source that’s easier on the eyes. This is why when I want soft light during a session, I use a large modifier, 3 to 5 feet in diameter to be exact.
2. The distance of the light plays a huge part
It’s the inverse square law. I already know what you are thinking… Inverse square law? Too much math for me! While there is a lot of math to this equation, it can be understood in simple terms. To put it easily, the closer the light source is to the subject, the quicker the light will fall off the subject.
This would be a good time for an in-home experiment. Try this by using a standard beauty dish and any subject (even if the object is not living, like a can of Coke). Photograph someone or something on a white background, placing your subject 5 feet or so away from your background with your beauty dish about 2 feet from your subject. Notice your background is probably not very white at all, but most likely gray. That is because the light fell very quickly off your subject, not lighting much more than what is right in front of the light. Now, try moving that same light source back 3 feet or so from your subject (keeping your subject in the same place), and bump up the power of your light source so you can keep the same f-stop on your camera. The light should fall slower (or continue lighting just past your subject) this time and lead to a whiter background. This means you can get very creative with just one backdrop, depending on where your subject and light source is.
3. The angle from where your light source is placed can give you various looks
Not to get too technical, but to name a few, you have split light, which is where your light source is angled almost completely to the side of your subject, giving you a very edgy look. Then you have Rembrandt lighting, where your main light source is around 45 degrees to either side of your subject and about 2 feet above eye level. Rembrandt leaves that famous “triangle” under the eye that we all know about. Then you have Paramount lighting, where your one light source is directly in front of your subject, leaving a very even and filling light on your subject. This type of lighting is known more for the typical beauty shot because the light is very flattering.
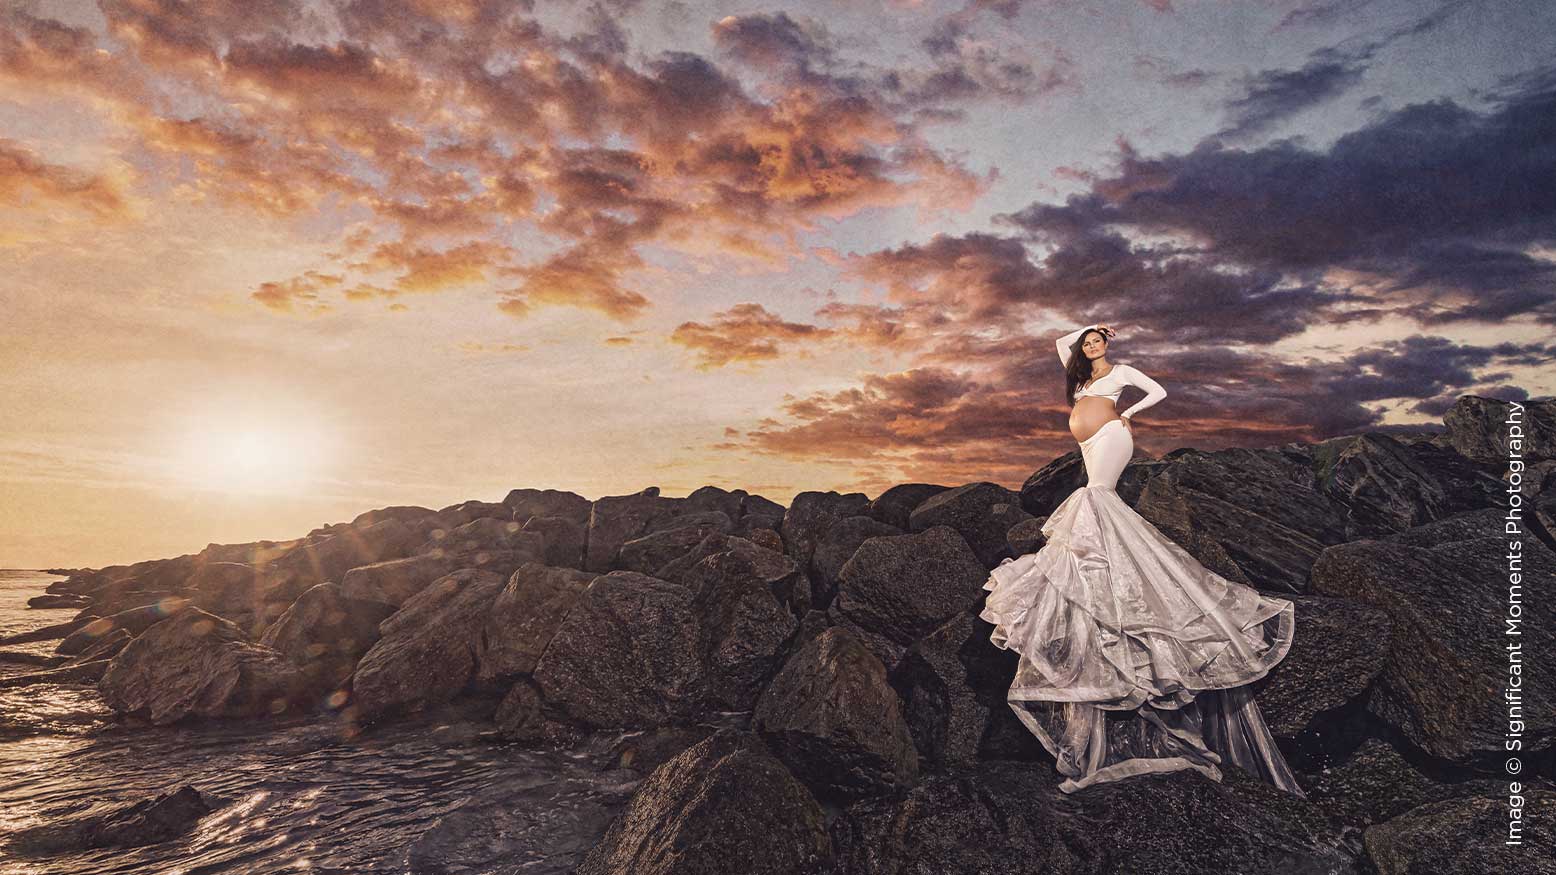
4. Use one light to overpower the sun when outside
It is near impossible to perfectly light your subject and get a gorgeous vibrant sky without a light source to combat the sun’s strong light. I do not have the ability to only shoot at “the golden hour” of the day. I shoot in full sun all the time, and without my light I would be unable to produce professional portraits because the shadows would be so bad. Depending on the type of day we are shooting on, sometimes I use a modifier, sometimes I do not. For example, I had a sunrise session in Miami. The sky had not one single cloud in the sky and that light was harsh. So, off my modifier went, and BAM! My subject and the sky were perfectly lit.
All of these laws and tips can be much deeper and more complicated than this, but now that you understand them in a more simplified way you can go out and rock your sessions! If we get the basic ideas, we can use it to our advantage and master using only one light. The goal as a professional photographer is to be able to understand any light source you have and know how to use it to create exactly what you want.
As creatives, we tend to overcomplicate when it isn’t necessary. Especially when it comes to our gear, and even when it comes to our lighting. More important than the amount of gear you have is understanding how to use it and being knowledgeable of all its capabilities. This does not mean you should only ever use just one light. Using more than one light can be amazing! Again though, you do not have to have more than one light to produce a true work of art. Always keep in mind my motto: “Become the best with what you have. Master it. Then imagine what you will do when you are able to use more gear.” Here’s to you becoming a one light wonder!