
Outdoor Photography with Blair Phillips
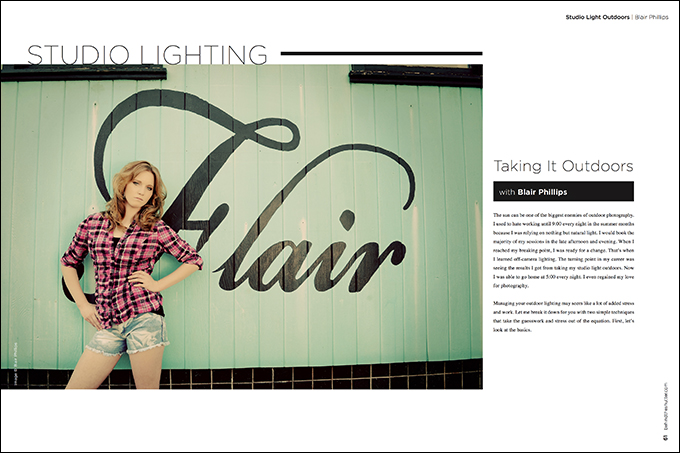
The sun can be one of the biggest enemies of outdoor photography. I used to hate working until 9:00 every night in the summer months because I was relying on nothing but natural light. I would book the majority of my sessions in the late afternoon and evening. When I reached my breaking point, I was ready for a change. That’s when I learned off-camera lighting. The turning point in my career was seeing the results I got from taking my studio light outdoors. Now I was able to go home at 5:00 every night. I even regained my love for photography.
Managing your outdoor lighting may seem like a lot of added stress and work. Let me break it down for you with two simple techniques that take the guesswork and stress out of the equation. First, let’s look at the basics.
Time of day
Early in the morning and later in the evening are the best times to shoot outdoors in natural light. But when you use studio light outdoors, you can shoot any time of day and manipulate your scene into several different looks. One little light can change your world forever. We now photograph our sessions beginning at 8:00 in the morning, and the last one at 3:00 in the afternoon. I can go out in the middle of the day in the blaring sun and create beautiful images straight from camera. In years past, I always had to find some shade to work in.
Equipment
This subject will always be ripe for debate. I can only give my opinion based on what I have tried and am currently using. I started with one Nikon flash unit. I quickly realized that one flash was no match for the sun in the middle of the day. I was using that flash at full power trying to overpower the sun. It nearly melted from repeated full-power flashes. I didn’t really like the harsh look I got from it, preferring the look I got from softboxes in the studio.
My light of choice is an AlienBees 800 or 1600. One of these lights equals four or more times the power of a single flash unit. I use AlienBees’s portable power system to operate the light out in the field. The bigger the softbox, the softer the light, so my best results come from the Westcott rapid box. This is a large softbox that opens and closes like an umbrella. I also use an AlienBees CyberSync trigger transmitter to make my lights fire. This equipment is absolutely bulletproof, and I have used this setup for several years with no shortage of abuse.
When I began using outdoor lighting, I quickly became frustrated having to carry everything. The most frustrating and embarrassing thing was trying to keep my light from blowing over. I developed and manufactured a cart that makes outdoor lighting extremely portable and so easy. My light cart has large pneumatic wheels that allow you to simply roll your light, softbox, triggering device and even your camera bag anywhere you want to go. This way, all of your lenses are right there with you. No more relying on everyone to carry all of your gear for you. This gives me freedom and motivation to explore new locations. Shooting outdoors has become so much fun again. Nothing shows a lack of professionalism like asking your clients to help carry your gear from location to location. This setup helps validate your pricing and prove why you are worth it.
My methods
Starting out with additive outdoor lighting can be a little intimidating. It only gets easier. There are essentially two ways I tackle it.
Method #1
One technique I use is when I’m shooting into a darker background. With this method, I expose for the shot as if I am relying on natural light. I turn my light on and turn the power down really low. All that I am looking for is to add a really nice fill flash into the eyes. This method allows you to shoot at very shallow apertures. The main objective for using additive outdoor lighting in this way is to first achieve proper exposure on your subject’s face without the lighting firing on it. Once you have good exposure on the skin, simply turn your light on, adjust the power to its lowest output and then take a shot with the light hitting your subject. This typically supplies just enough light to brighten the eyes. It avoids dark eye sockets and helps bring the eyes to life.
Method #2
The second method is to overpower the sun. Use your camera’s built-in meter to determine proper exposure for the sky. This will darken down the overall exposure of your image. Now you need to add a large amount of lighting back on your subject to achieve proper exposure on her. Turn your light output to nearly full power while using it on your subject. If the amount of lighting on her is too bright, simply turn down the light output. If she is too dark, turn up the output. The main objective of this method is to darken a really bright sky while maintaining proper exposure on your subject. This method also brightens the eyes and eye sockets.
Unleash the creative animal inside of you and get your lighting outdoors so you can own your life again. If you have been using off-camera lighting for a long time, it may be time to completely change the way you do things. This could be as simple as changing your modifier, placing your main light outside your comfort zone or adding a second light to the mix. Whatever the missing link is, no one can help you find it but you.
So grab an extra light, get that thing outside and make some magic happen.


