Rethinking OCF: Off-Camera Fill with David Beckham
There are so many reasons for not using off-camera fill.
- I hate bold shadows and harsh lighting.
- It’s too complicated.
- I love dreamy bokeh and I can’t get that from OCF.
- I don’t want to drag all that equipment around.
- TTL, HSS, OCF, WTF?
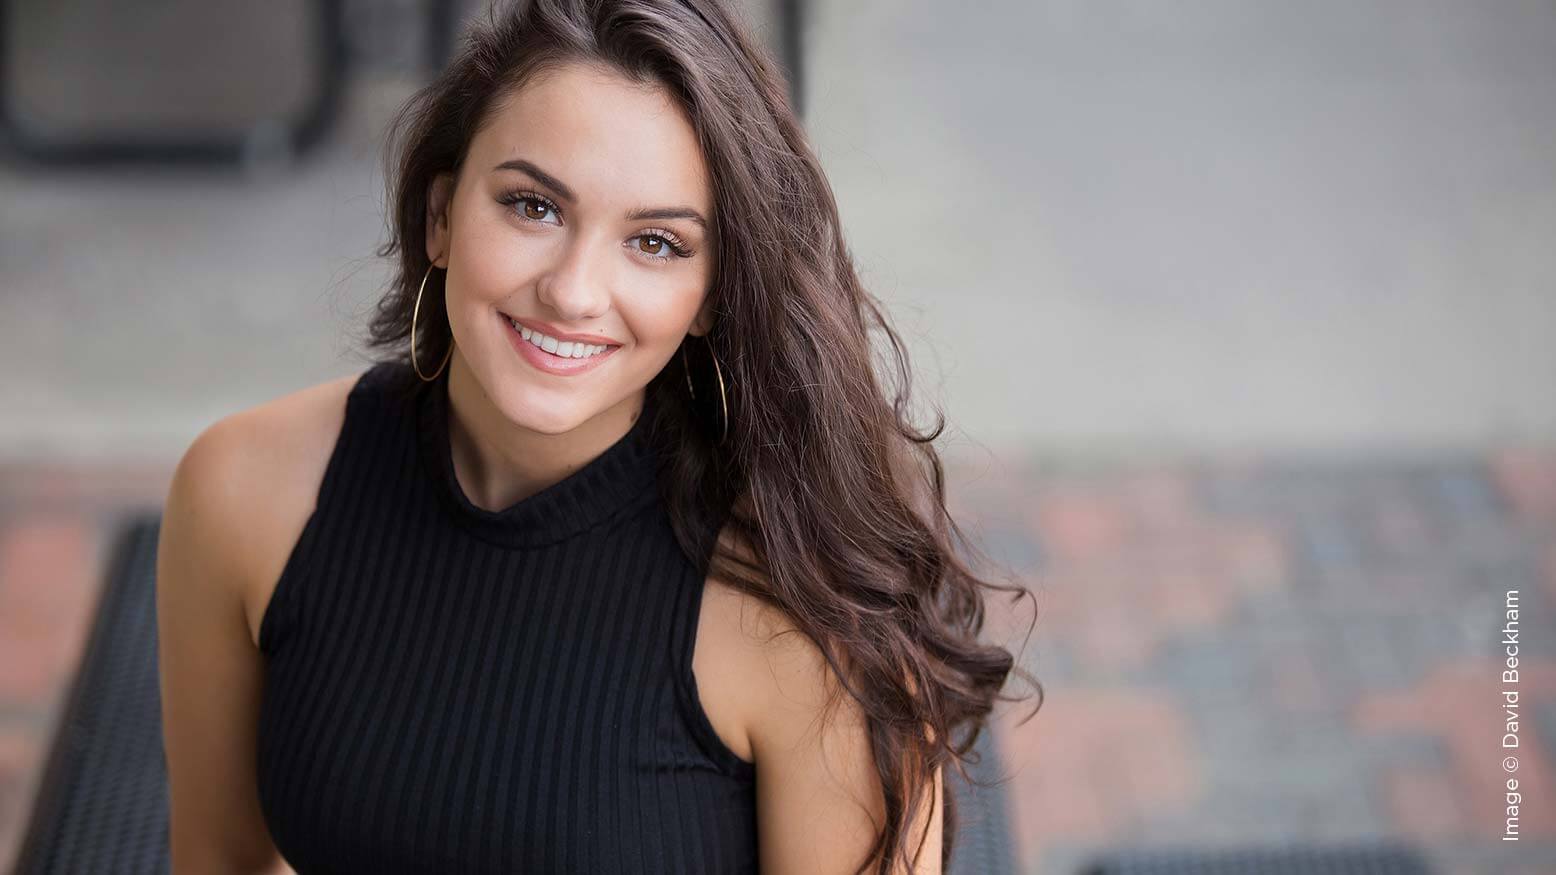
The photo above used an AlienBees AB400 with a beauty dish for fill. The light source was camera right about 6 feet away from their faces. It was set above them and pointed down at a 30-degree angle. I use off-camera flash for 90 percent of the seniors I photograph outside. In this article, I look at off-camera flash from a different perspective. Think fill flash, or off-camera fill. I’ll cover 11 OCF setups. First, let’s look at the lighting I use.
My go-to modifier is either the AB400 or the XPLOR 600, both with a beauty dish. There are two big reasons why.
- The bulb extends into the beauty dish, which spreads the light through the whole modifier and gives you the most even light across your subject. A speedlight won’t be able to do that no matter what kind of modifier you have. It gives you kind of a spotlight, throwing the light in a 50- to 90-degree cone that doesn’t properly fill the modifier.
- The low-end power on these two units is what we are looking for. The lower the power, the better. We want to add a kiss of light to brighten the subject enough to get crisp, clear images. Paul C. Buff makes a triple-layer diffuser sock that stretches over the beauty dish. Sometimes I use two of these to diffuse and reduce the power. The XPLOR’s low-end light isn’t as low as that of the AB400, but it has the advantage of high-speed sync (HSS), which gives you an alternative way to control that low-end flash.
Bold sun and blues skies are impossible to shoot without some kind of light. Jessie has her back to the sun and the flash unit is 6 feet away from her. I had to remove the stand from the photo in post-processing. The light was set at full power, but because the light is so close and I’m using the triple-thick diffuser, the shadows are soft and accentuate the curves of her face and arms, and bring depth to her dress.
Cloudy days are my favorite days to shoot. Full sun wipes out half the places you can work. A cloudy day means I can use fill flash to make dreary days look bright and sunny, like in the shot of Maddie hanging from the handrail on the bridge. The light was 8 feet away. In the close-up of Katie, you can see how near the light was to her, no more than 5 feet away. This gives us the soft shadows and catchlights—perfect light. Even though it was a hazy day, the sun was behind her, and the ambient light created subtle rim light on her beautiful hair.
Shooting in shadows. This shot of Rylie in the flowers is one of her favorites. The sun was setting behind the trees, camera right. As the area you are shooting gets darker, it might seem that you would want to increase the power of the flash. But think like you have no flash at all. Increase your ISO to get the ambients to the level you want and add the touch of fill to eliminate the shadows on her face and body. You can see in the pullback how close the OCF is to her and that the light head is above her face and opposite the sun. The backlight from the sun creates a soft glow and rim light on her hair, shoulder and back.
Sun as backlight. Using direct sun as backlight gives you crazy, dark shadows on the subject’s face. In the close-up of Tiffany, the sun was very low behind her. Set the OCF to a lower angle to her face but still above her eyes. I used high-speed sync. With a 1/500-of-a-second shutter, we can control that kiss of flash needed to light her face and still keep the soft DOF. One added advantage of shooting that fast is less opportunity for camera shake while tripping the shutter.
OCF as backlight. I love shooting in “tunnels”—the spaces between walls or rows of trees that have great ambient light at both ends. Sara was standing just inside the shadows, and the natural light on her face was perfect. But setting up the OCF behind her with a touch of light gave her hair a natural glow and added a rim light to her arms and body.
The invention of HSS has opened up a whole new world for portrait photography. Photographing someone in a gorgeous winter location has always been difficult. The hard part is trying to keep the light on her face correct and still not lose the details in the snow. HSS is the answer. In this shot, we get everything: great bokeh, wonderful light on Maddy and clarity in the snow around her. The 1/1000 shutter speed worked great at f/2.0. As always, keep the light as close to the subject as you can get, even if it means removing the flash unit in post-processing.
The close-up of Ryley in the snow shows all the details of her face and eyes. You can see the catchlight from the beauty dish but the intricate details of her iris are visible as well. I achieved that wide-open depth of field with the help of the compression I get by zooming my lens.
Using OCF inside with the ambient light from the windows and the room lighting completes this wonderful look. This photo of Emi was done as a promotional shot for a boutique. One light with a softbox was all it took to prevent skeleton eyes and other unflattering face shadows. We started at ISO 400 because the room was so shadowy. The flash was set at minimum power so we could blur the background at f/2.8.
This close-up of Sydney is a perfect example of a kiss of light. The light was above her at a 30-degree angle, camera left. The shadows are soft and bring out the contours of her face. The details in her eyes are highlighted and crystal clear. When setting up photographs like this, it is important to keep the backs of the subject’s hands turned and not perpendicular to the flash so that the light on them doesn’t create a distraction. I had Sydney turn her wrists so the back of her hands faced downward.
Bokeh and soft depth-of-field are important in senior photography. Other than a couple minor blemishes, this image of Grace is straight out of camera (SOOC). I set the XPLOR 600 at 1/256 power, which is all that was needed to get perfect light and great bokeh.
We can keep shooting after golden hour. Start by increasing your ISO so you can maintain the desired background lighting. Add a touch of fill with a properly located OCF, and you can get a dramatic image like this one of Megan dancing.
Here are the most important things to remember:
- Keep the flash power as low as possible.
- Keep the light as close to the subject as you can for soft shadows.
- Position the light source 15 to 45 degrees above the subject’s face.
- Layer your diffusers.
- Raise your ISO first as you start losing ambient light.
I’ve covered every reason for not shooting with OCF except one: I had to drag my light to every location. But saving time in editing and getting perfect lighting in every condition makes it worth it.