
Strobe Is Available Light with Michael Corsentino
It always makes me smile when photographers tell me they’re “available light” shooters. The first thing I do is grab the nearest strobe, hold it over my head in a Statue of Liberty pose and ask, “Do you see this strobe? Guess what? It’s an available light.” If photography is just your hobby and available-light shooting is what you’re comfortable with, that’s perfectly fine. But if you’re aspiring to be a pro, you’re doing yourself and your clients a disservice by not learning how to use flash.
Photography is all about light and the interplay it creates between shadows and highlights. Whether you’re in the studio or on location, strobes put you in the driver’s seat for quality of light and the shadows and highlights that result. Even if you’re a hobbyist without strobes, you’re missing out on a wide range of creative choices and options. Any way you look at it, flash benefits every photographer.
To the uninitiated, strobes can be intimidating. Knowing where to start can be confusing. I’ve met many photographers who don’t consider themselves technically inclined, so they stay away from flash. This fear keeps people away from using strobe more than anything else. The good news is these fears are completely unfounded and using strobes is actually very simple. What if I told you I could give you the flexibility to shoot anywhere you want, any time of the day you want, and create any type of lighting you want regardless of the prevailing ambient light conditions? That’s what strobes afford us: maximum flexibility and creativity.
Without strobes, you’re at the mercy of ambient light conditions. That means if the sun is bright and harsh, your images will be bright and harsh. If it’s overcast, your images will be flat and lack contrast. If the sun is setting, the sky may look gorgeous but your subject will be underexposed. Even if the ambient light is cooperating, providing great illumination, that’s where it begins and ends. The only option you have is to work with the light Mother Nature is providing at that moment.
What if that’s not the quality of light you want? What if the lighting changes suddenly? With strobe, you create the lighting you want rather than the light you’re given. Get excited rather than intimidated by the creative options possible with strobe. Treat flash just like you treat your camera—they’re both just tools. Learn how to use them, when to use them, when to turn them on and when to turn them off. You’ll be glad you did.
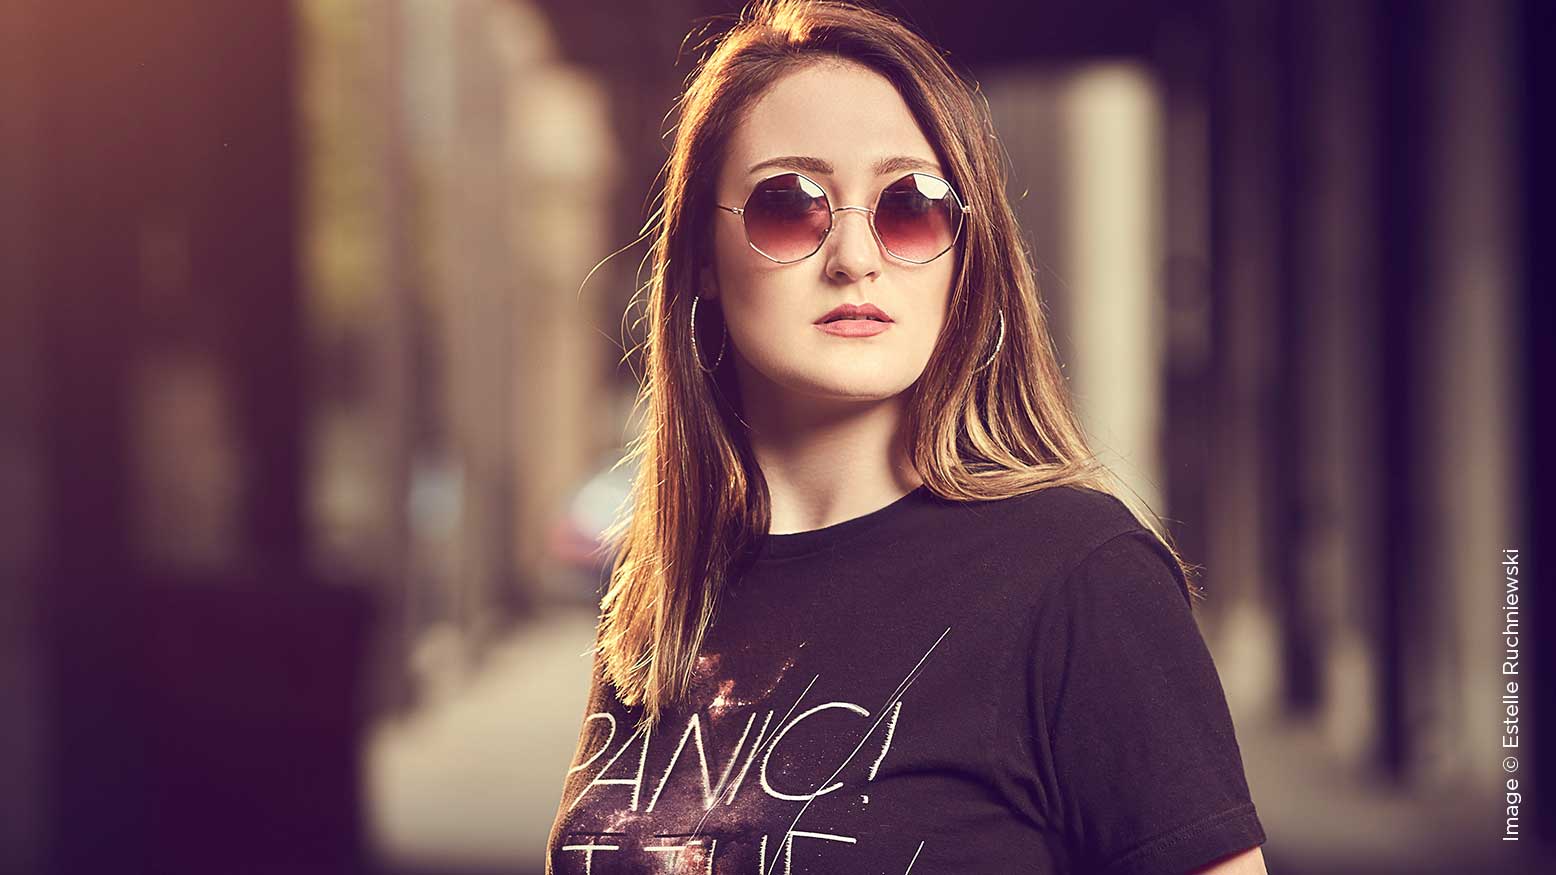
One of the best ways I know to get available-light shooters excited about strobe is to show them firsthand what’s possible with a before and after flash shootout. I’ll have them shoot ambient only at first, and then turn on one or more strobes to show them what a difference flash can make.
The before and after flash images you’re seeing here are from a recent workshop I did in Cedar Rapids, Iowa. I’ve included these images rather than my own to demonstrate that anyone, even people with little to no experience with strobe, can produce awesome images with flash. At a minimum, all you need is one light and a desire to learn and push beyond your comfort zone. I love seeing people’s reactions when they see what they can do with strobes. As you can see from these before and after pictures, strobes open up a world of possibilities. Strobe also gives your images a polished and professional look that can go a long way toward differentiating you in your market.
The effects you can get with strobes run the gamut from a simple kiss of fill light on your subject’s face to completely overpowering the sun and creating a super dark, moody look. The only limit is your creativity. Strobes allow you to underexpose the ambient light (using shutter speed) while using flash to properly expose your foreground subject. Think environmental portraits. Add high-speed sync into the mix, and the latitude for your ambient and flash exposures becomes even greater.
With this method, you can shoot with wide apertures and flash at the same time, perfect for location portraits. Strobes give you control over the amount and quality of illumination. You control the contrast, degree of illumination, the amount of shadow created, whether those shadows are soft or crisp, where the light falls, how much of it illuminates your subject (using grids) and whether you want light on the background (via distance or another strobe).
Using two strobes opens up even more possibilities. Put one strobe in front of your subjects as a keylight and another behind them as an accent light. This is a classic lighting pattern known as cross light. It couldn’t be simpler and it works like a charm to create sophisticated, layered and dimensional lighting.
It’s easy to replicate the warm glow of the afternoon sun even when it’s nowhere in sight. All you need is a strobe and a sheet of color temperature orange gel (CTO). I use this technique on an accent light placed behind subjects on location to create a warm setting-sun look.
The fun with strobes, gels and ambient light doesn’t stop there. Another favorite trick I love to show strobe newbies is how to turn ambient light into a cool blue tone while keeping their subject in perfect white balance. This cool modern look is easily accomplished by switching your camera’s white balance setting to tungsten. Then, all the ambient light in the scene shifts to blue.
To bring your subject back into proper white balance, all you need to do is add a sheet of full-cut color temperature orange gel (CTO) in front of the strobe you’re using as your keylight. CTO gel perfectly matches the tungsten color balance being used and brings whatever it illuminates back into the proper white balance. You end up with a steely-blue ambient background and a subject illuminated by light with the correct color balance for tungsten—an awesome effect.
The before and after images in this article are just the beginning of what’s possible. I hope that seeing them gets you as excited about strobes as I am. One or more strobes, a desire to learn and explore, and a guiding hand (me) is all you need to take your photography to the next level with flash.
If this article has you fired up, I encourage you to get out there and swing for the fences. Dig through my previous columns in Shutter Magazine and check out my companion videos on Behind the Shutter’s YouTube channel. Everything you need is there.


