Stylizing Your High-School Senior Portraits

Ready to elevate your senior portrait photography? In this step-by-step photography tutorial we talk about lighting, posing, hair and makeup and wardrobe stylizing tips for your high school senior portrait photography.

Equipment Used:

Team:

Photographer: Sal Cincotta 
Model: Peyton
Hair & Makeup: Brandi Patton, ReFine Beauty

What’s up everyone? Today we’re going to talk about stylizing your senior portraits. My name is Sal Cincotta. I’m a wedding and senior portrait photographer based in O’Fallon, Illinois. And today I want to talk to you about how we stylize our senior portraits, really to elevate them above all our competitors. And look, make no mistake, I love my fellow photographer, but you have to learn how to stand out from the crowd. And this is one of those things that we do in working with our seniors where we can elevate our work, elevate the experience, elevate our portfolio, and so it’s a lot of elevation. While I may click the button and make the image, at the end of the day, there’s a team of people who help me bring stuff like this together. So I want to introduce you to them.

Hair & Makeup

First up is going to be Brandi. She is my hair and makeup artist. She does all our high school seniors. When you’re working with our seniors, what’s the process? How do you get them to the point where they feel comfortable, maybe they say they don’t like to wear a lot of makeup. What’s our process for that?

I let them know that on camera it always looks better if we have a little bit more, our facial features can kind of blur out and things like that in professional photography. So more blush, more structured brow contour, pop of a lip, all of those things will make you look better on camera.

And I think that is so important for you guys to work with a hair and makeup artist. We’ve been working together for years, so she knows what I’m looking for. But I want to tell you this, when we started working together, it was so important that when she was done with hair and makeup, I’d take a test shot and show you, here’s what it’s looking like on camera. Because that’s the only way you’re going to develop a rapport with any hair and makeup artists that you’re working with. To that point, talk to them a little bit about how we build a look versus just coming out of the gate hot.

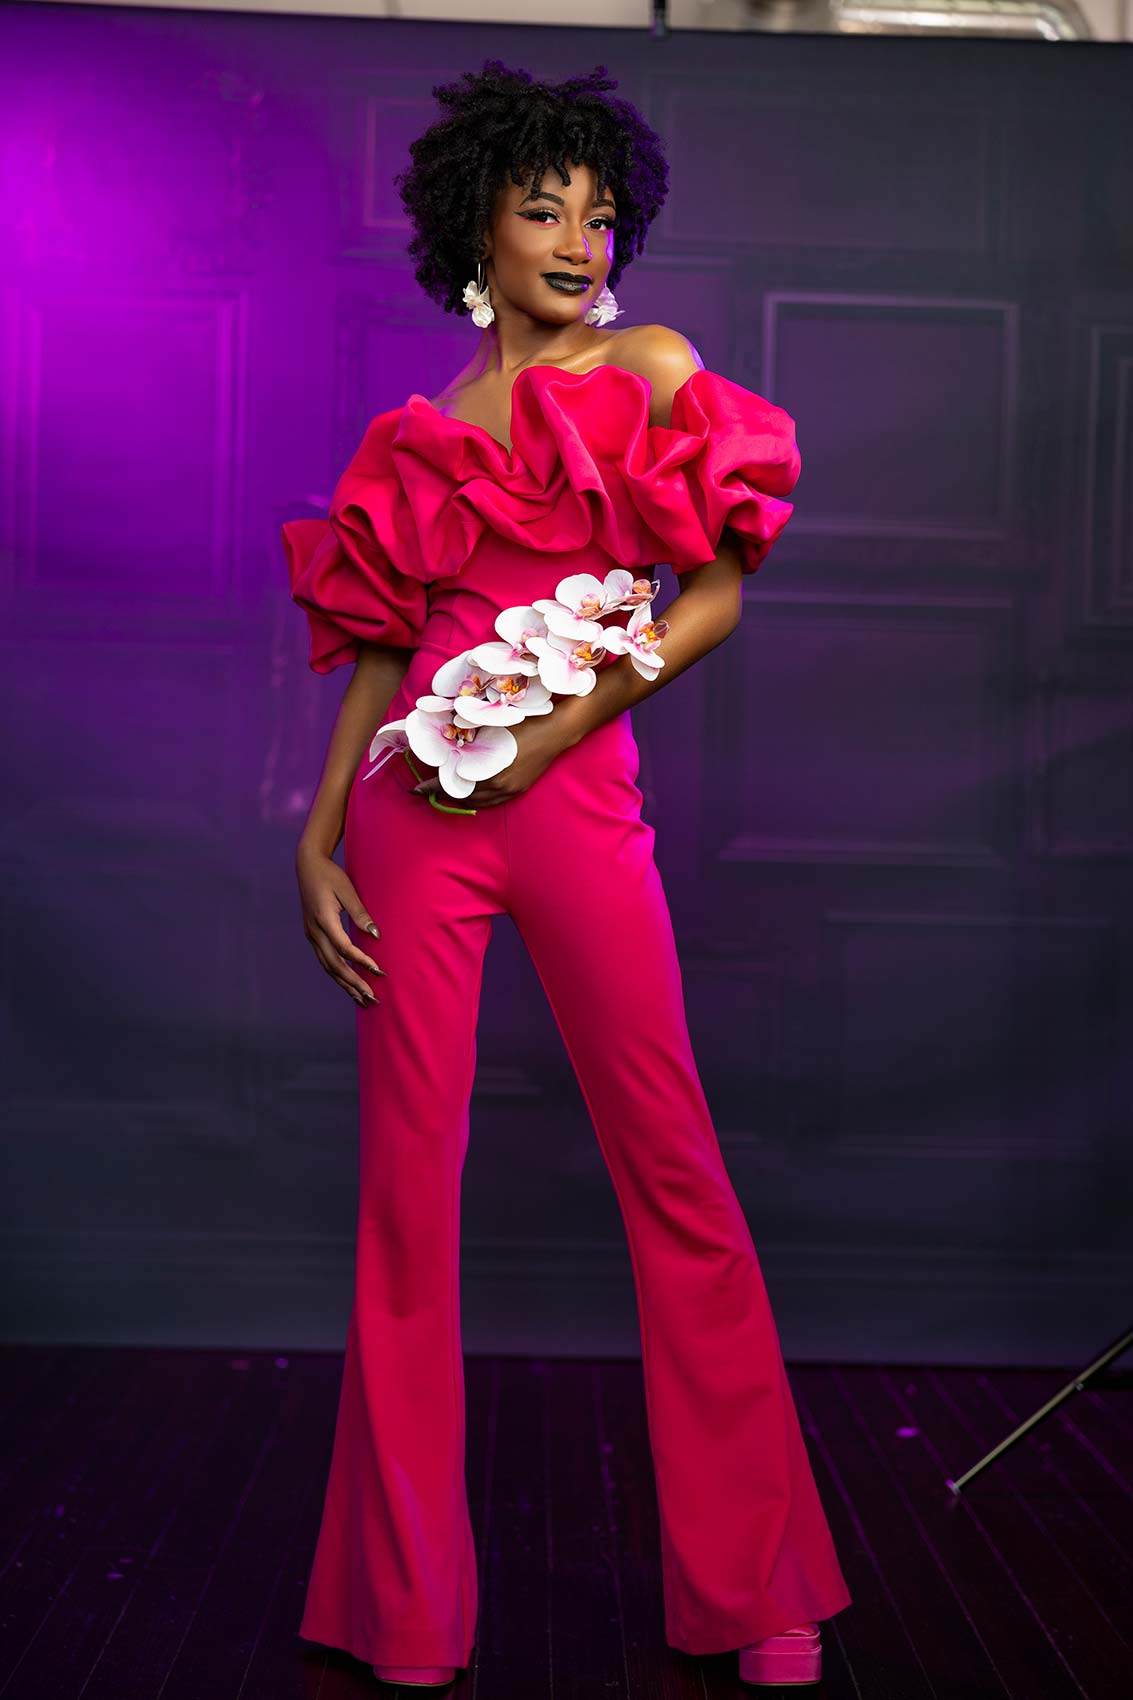
We always think about what outfits we have that we’re going to be using. We start with something that we can start soft and elevate the look through the different wardrobe changes to create what we need to without having to remove the entire look, and that nothing meshes or becomes muddy or looks weird.

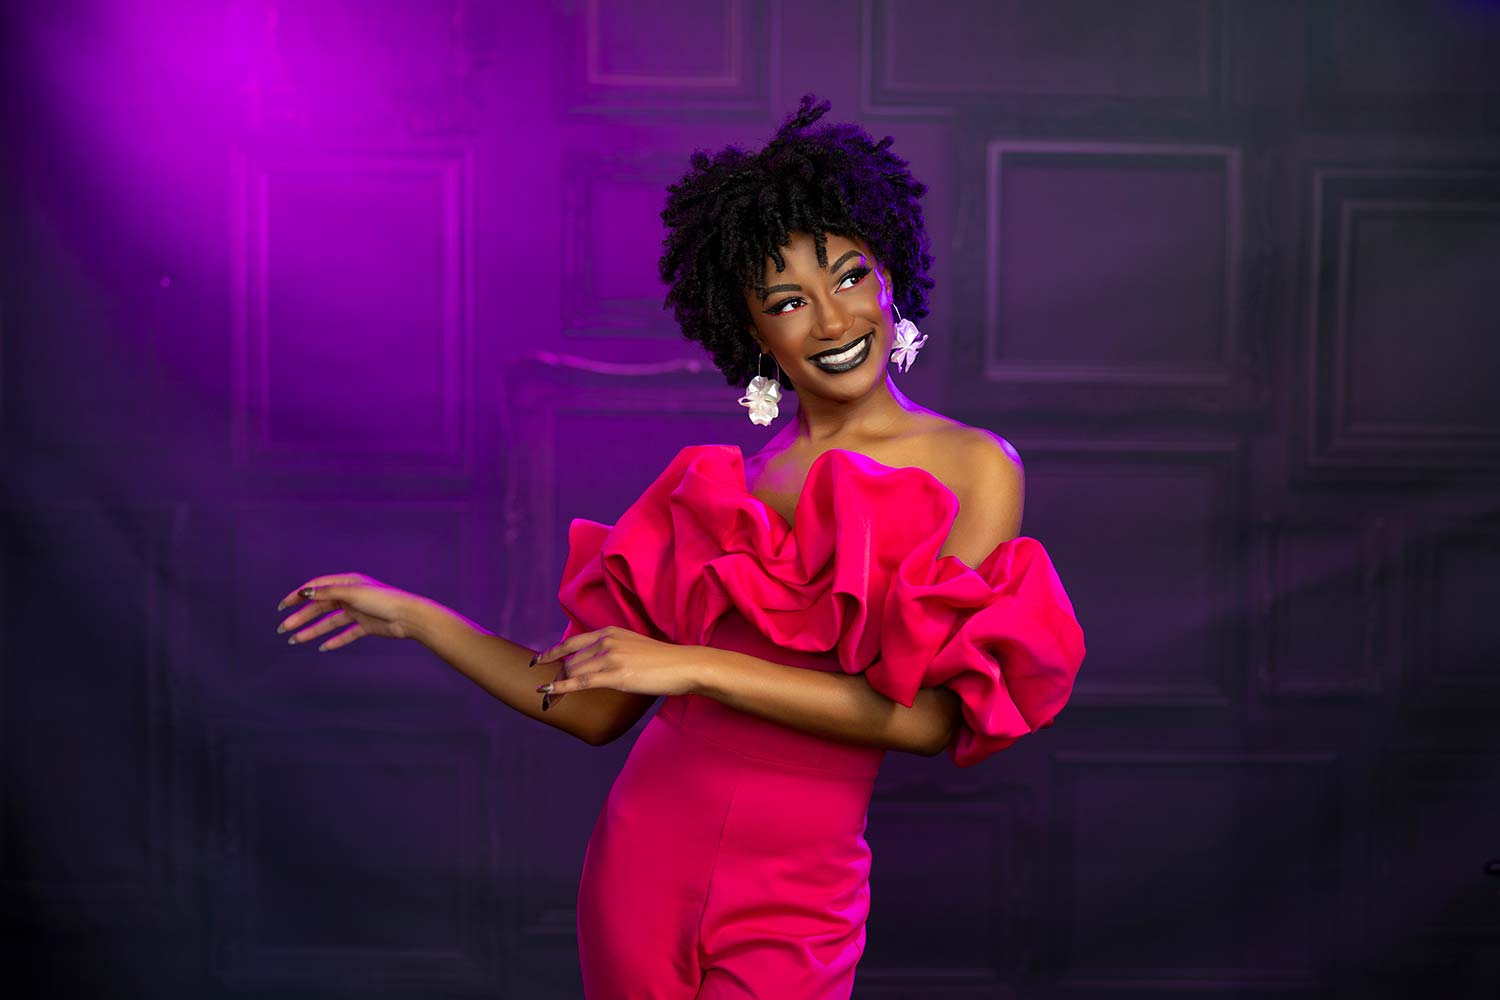
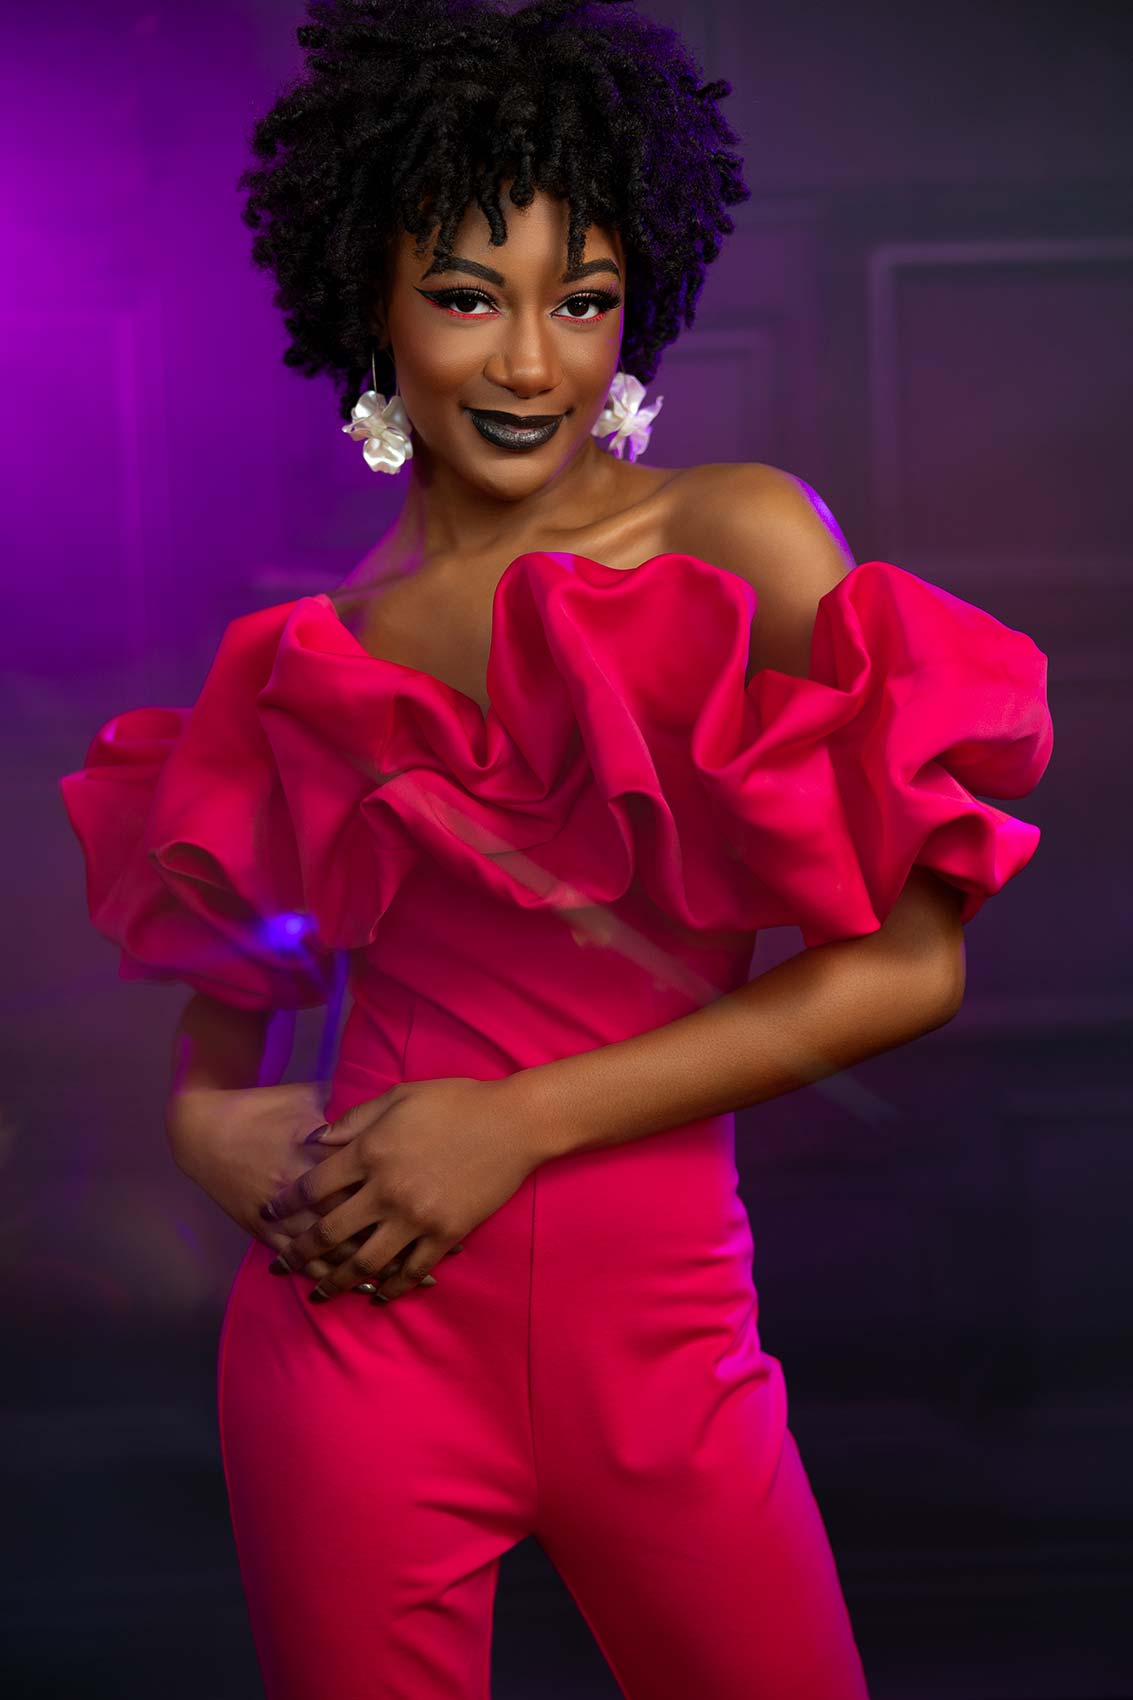
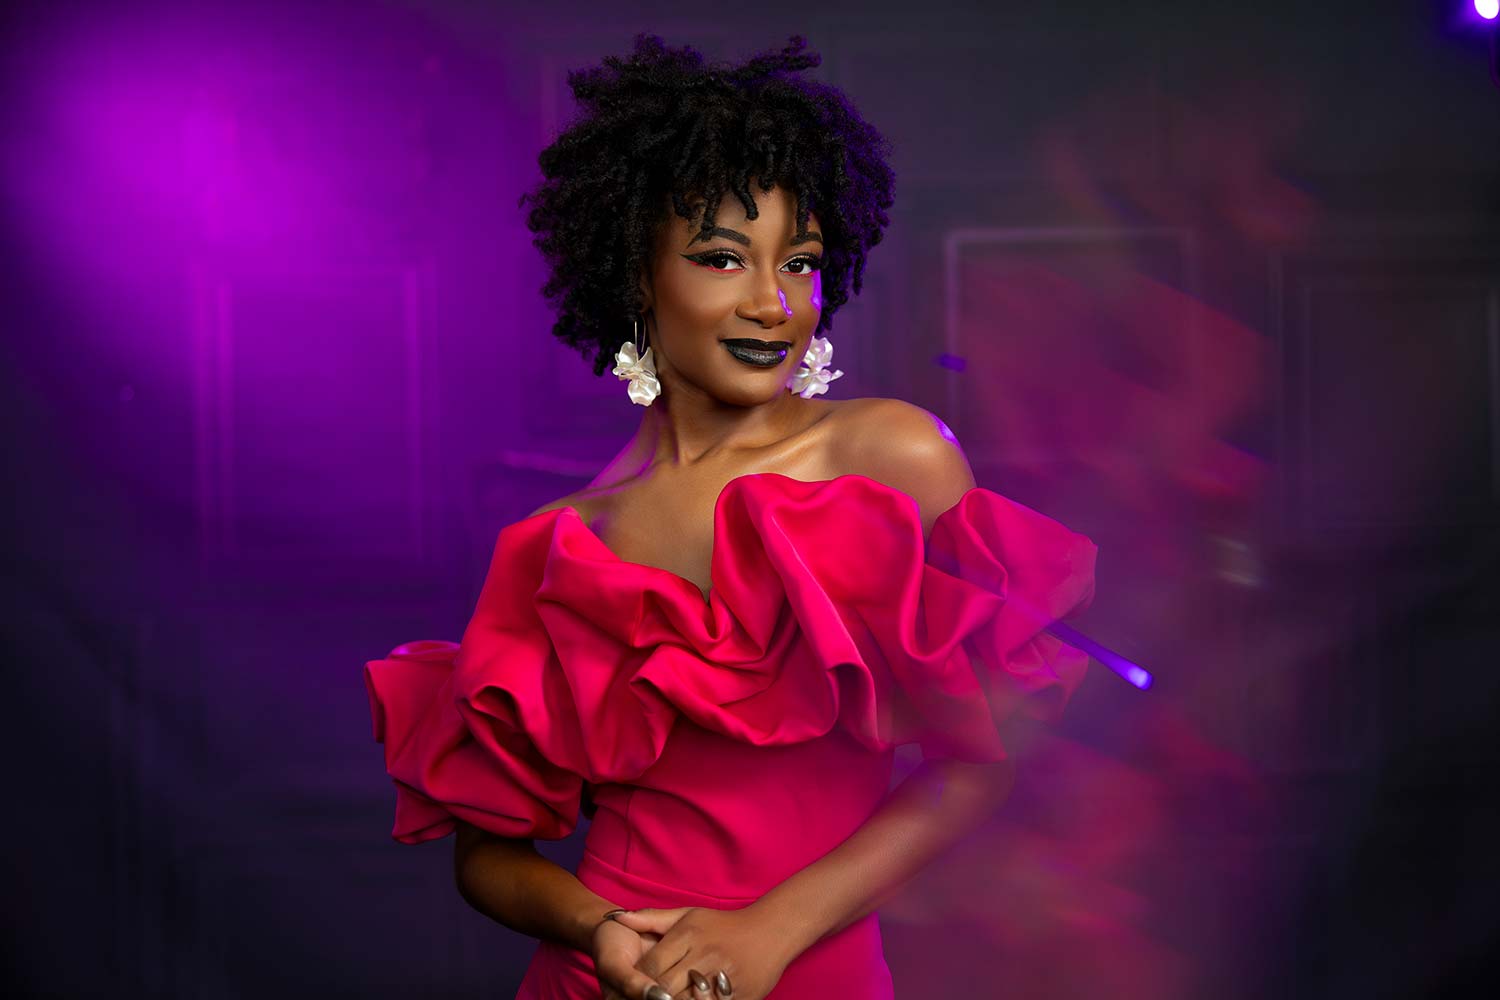
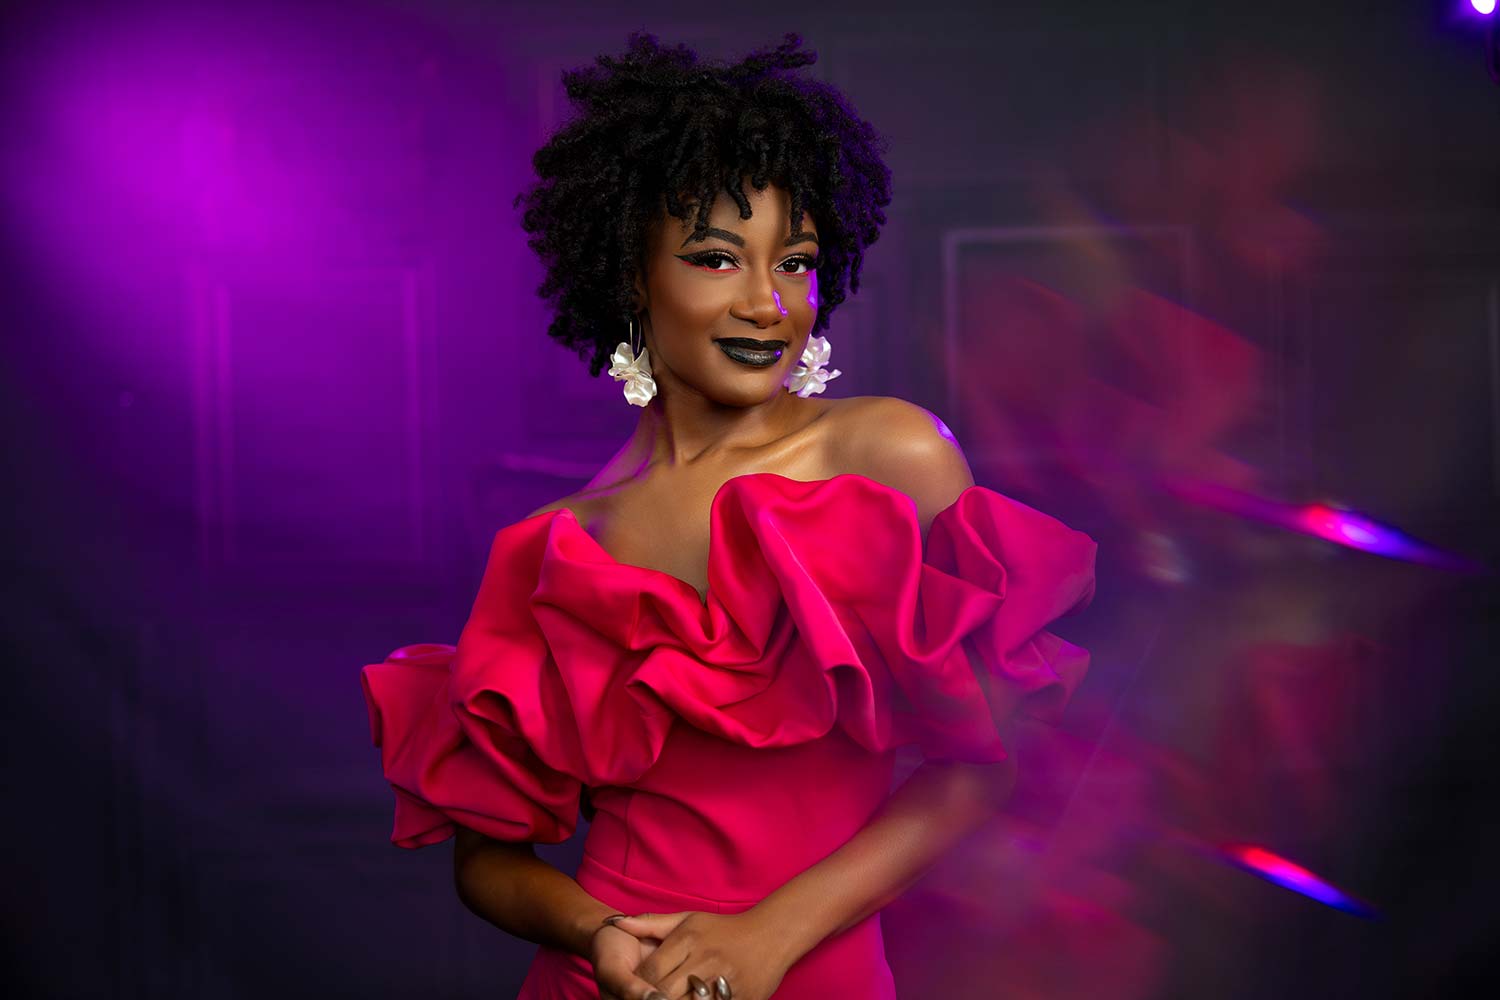
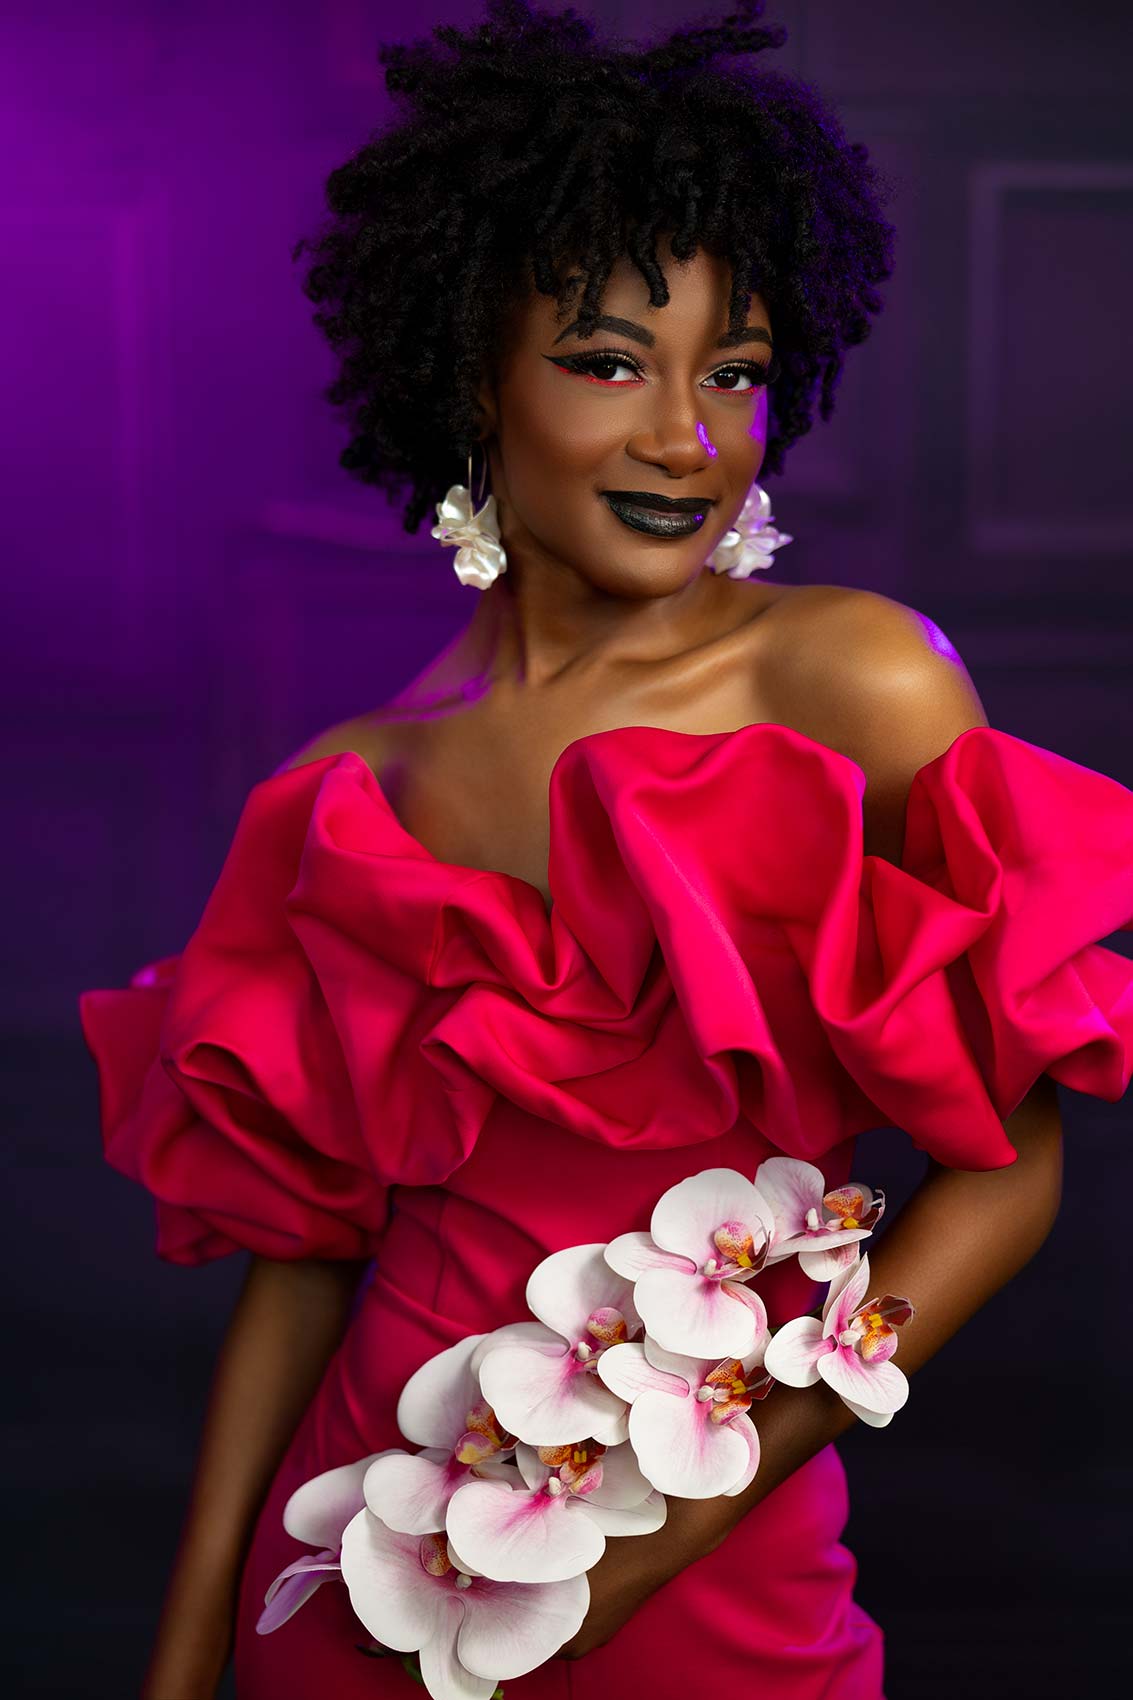
Yeah, we got to build on that look. All right. So for Peyton, obviously this wasn’t her first look. It’s a final look that we built up to, right? It’s a lot. And my thought process always is, if they don’t like it, I’m okay because I’ve gotten four or five other outfits before we got to this. So what did we do with Peyton here?

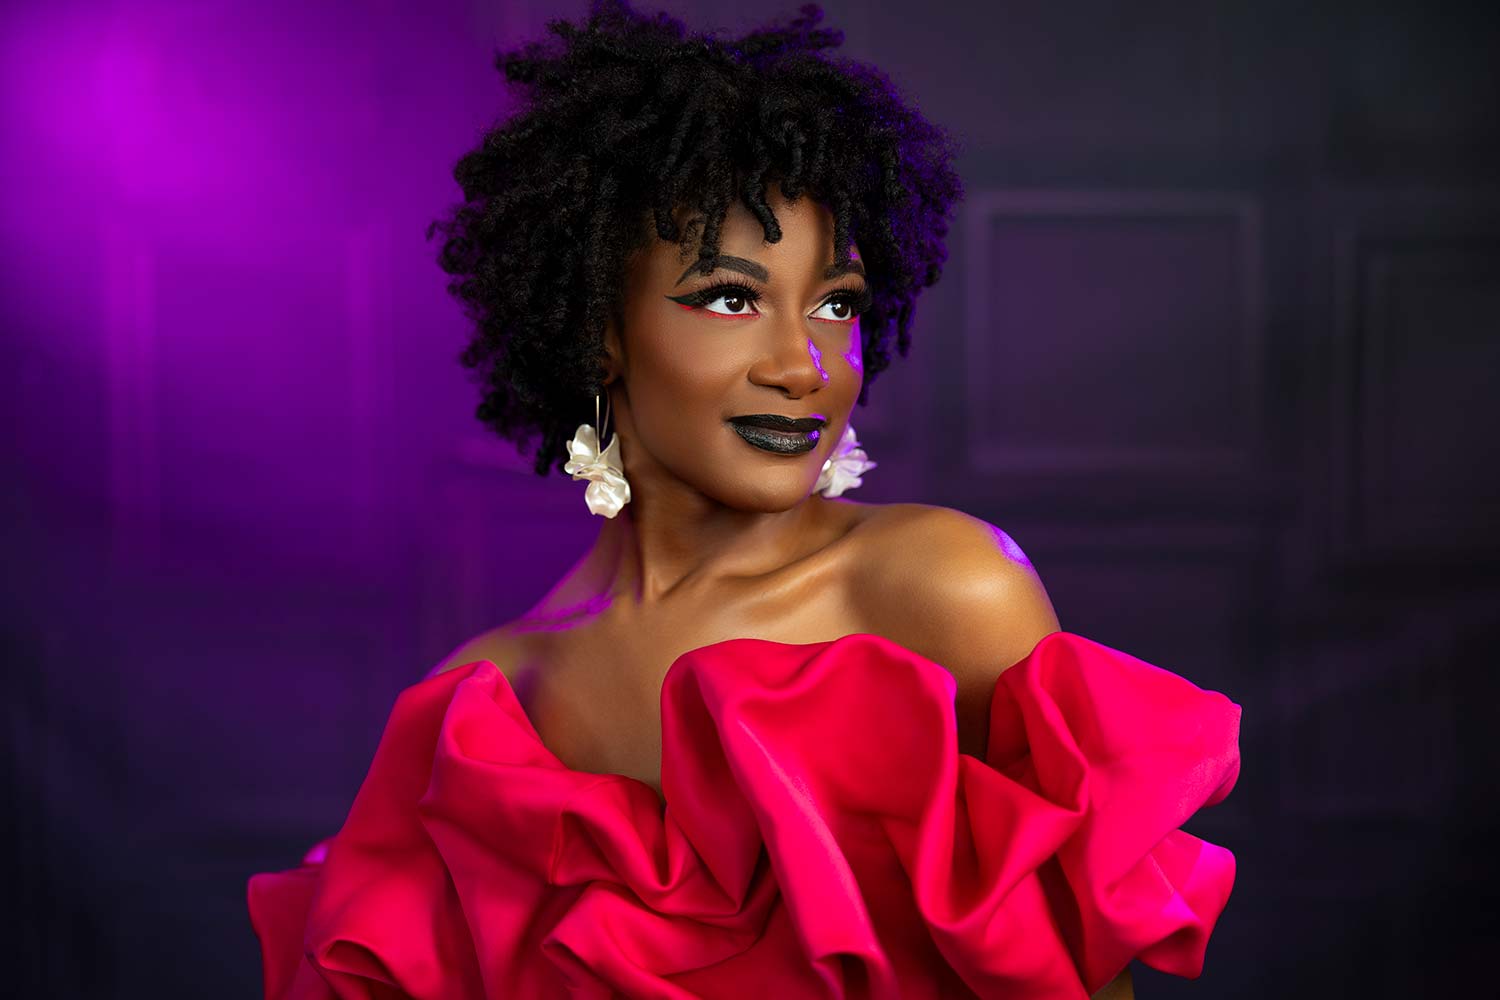
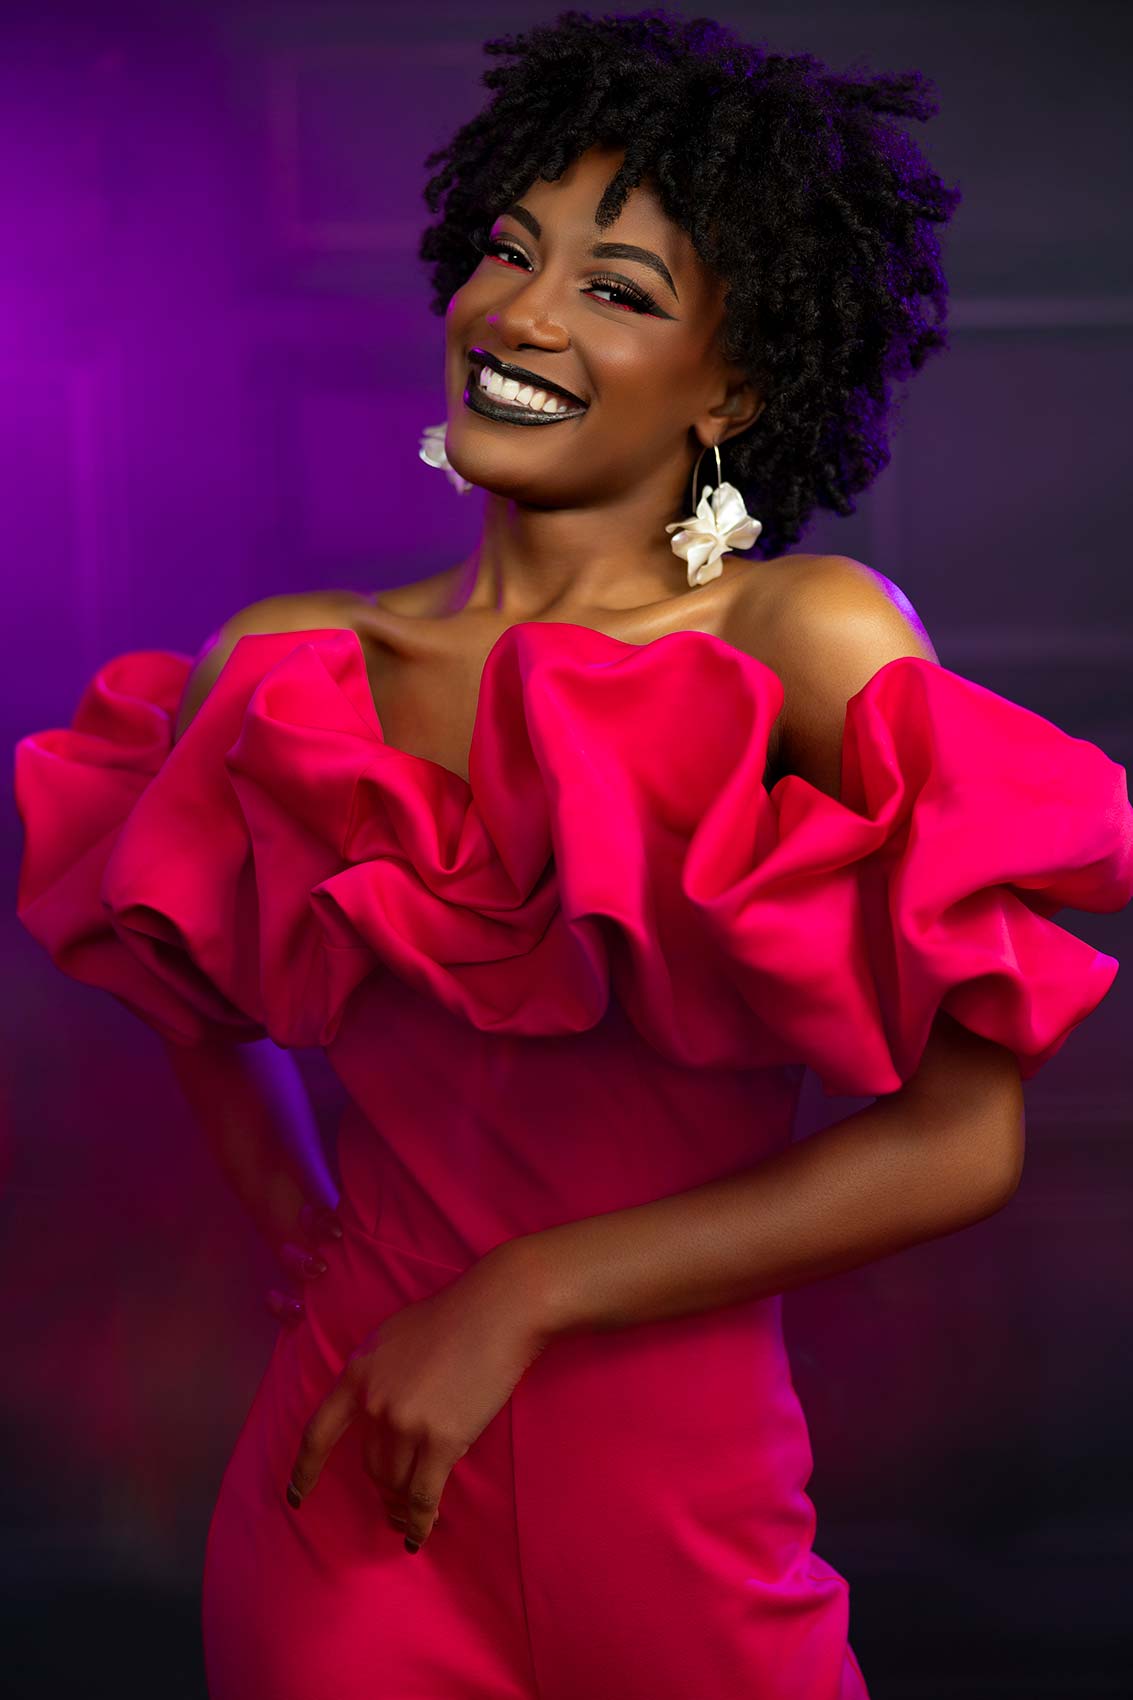
I wanted to create something with that pop of pink, which the obvious choice was to do a liner on her lower lash line and wing it out a little bit. It looked beautiful the way it was, but Alyssa wanted a little bit more. She said, can we add green? Which threw me for a second, but I’m used to this with you guys. So I shook it off and I was like, what can I do that’s not going to be the typical thing? And I decided to start with the graphic liner, with using a shadow of an olive green mixed in with a little bit of teal to make the green really pop and show that it is green on her eyes. And then I was like, you know what? I’m going to go ahead and just put this shadow on the gloss I already have on her lips and see what that looks like. And I started out as a liner and then I filled it in and I kind of loved what we finished with.

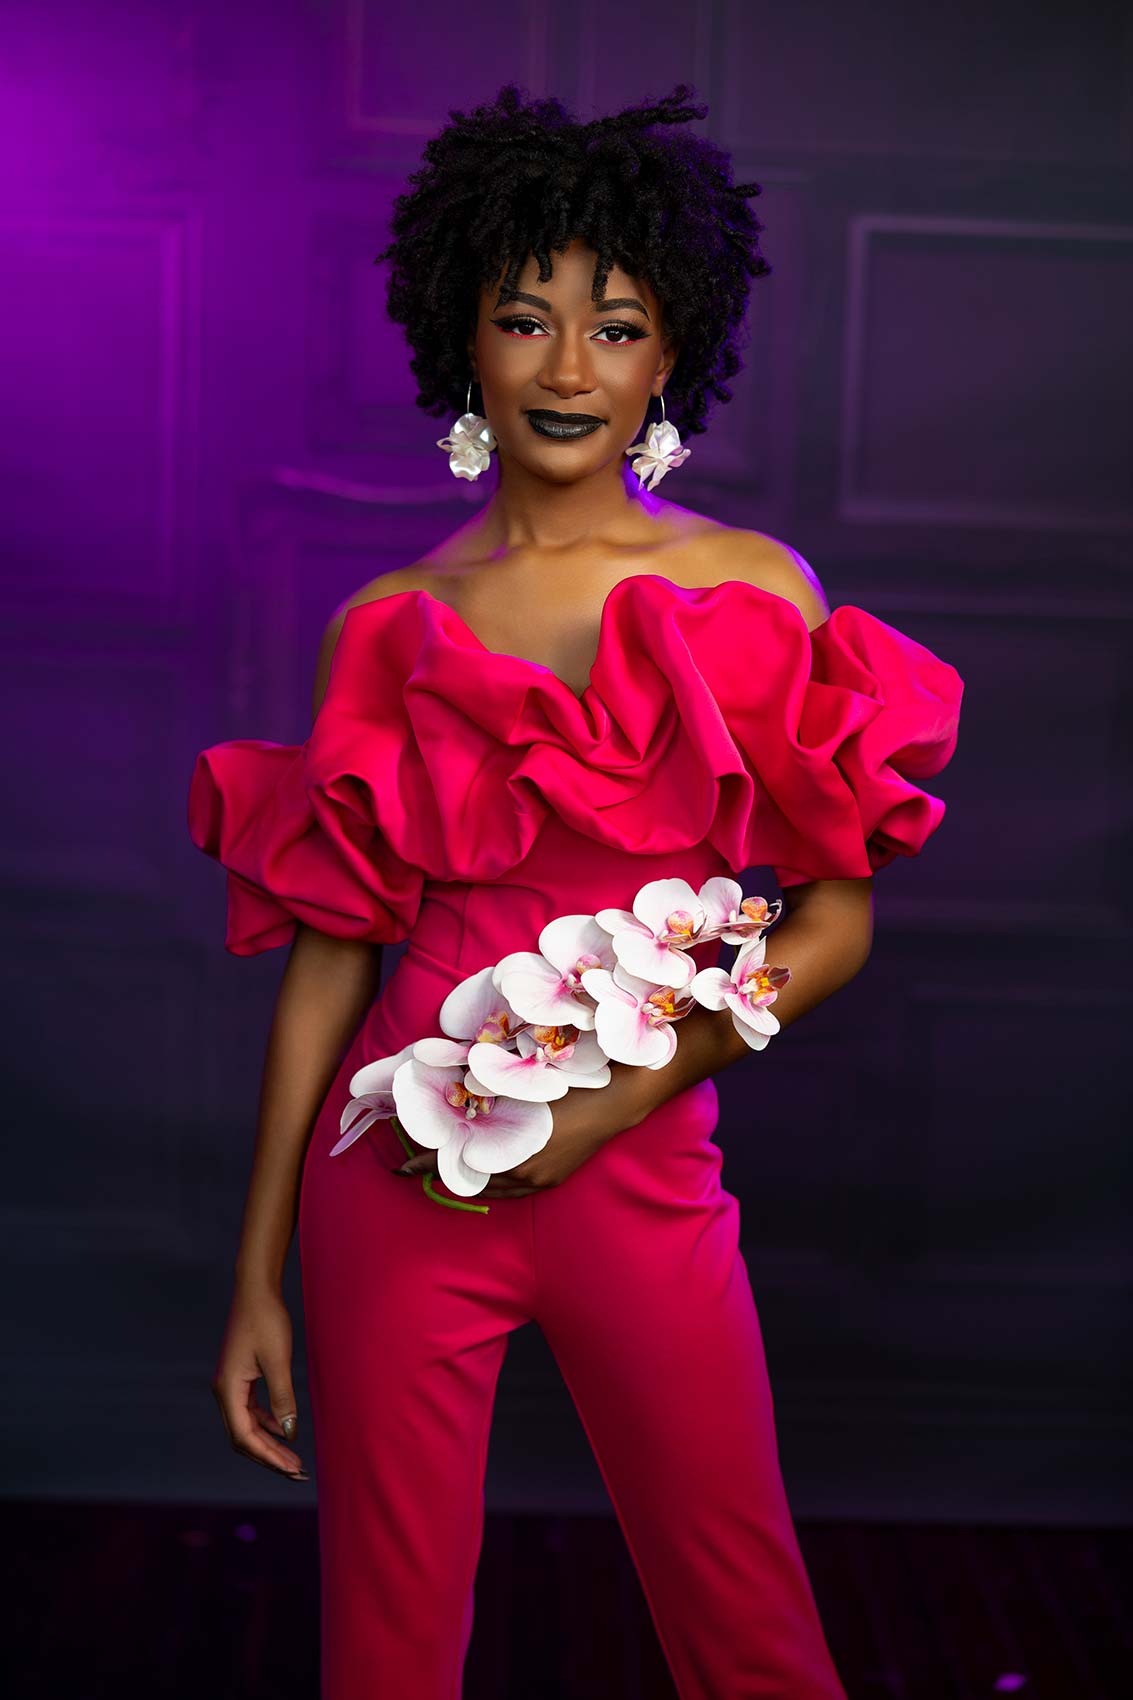
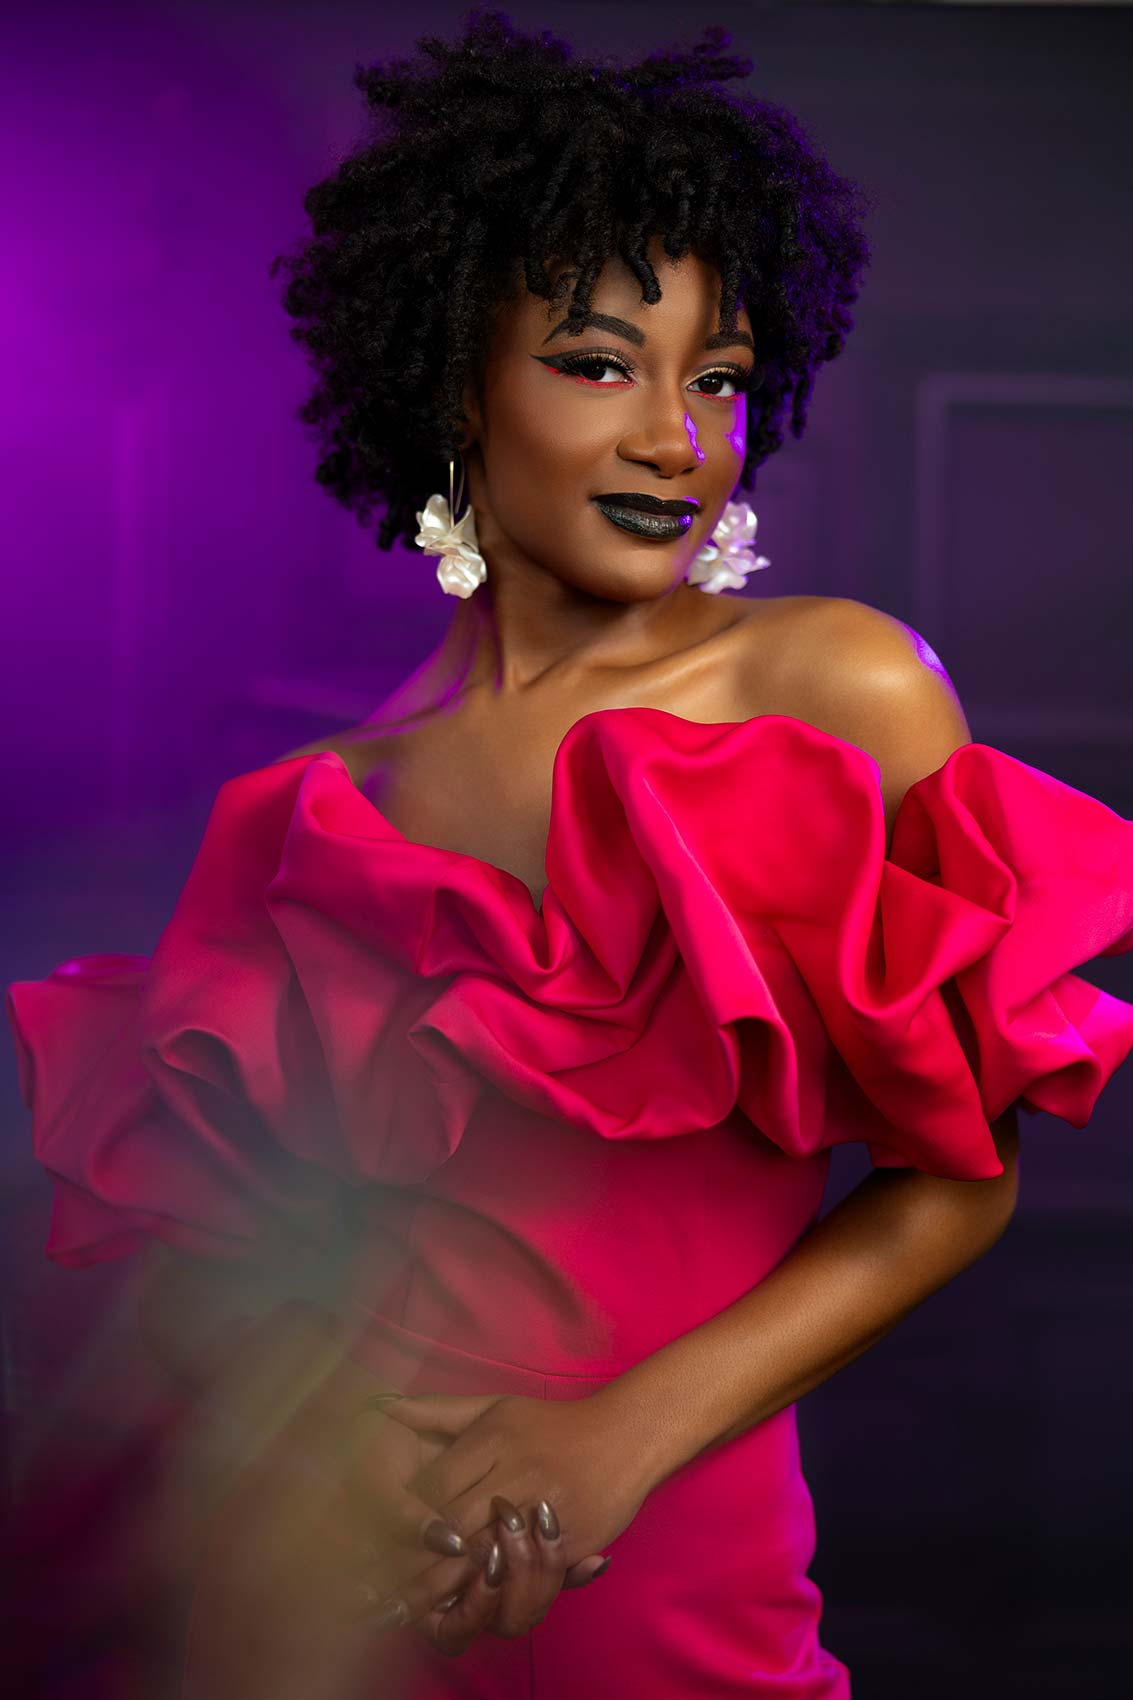
And ultimately, that’s what matters is the kids. Do the kids love it? Mom, dad may not like it. That’s okay. You’re not shooting the entire set with heavy makeup like this. It’s something you’re building to for that kind of ta-da. And for us, with our seniors, we want them to walk away having an experience of a lifetime. My philosophy has always been this is the best set of images you’re going to have prior to your wedding day.

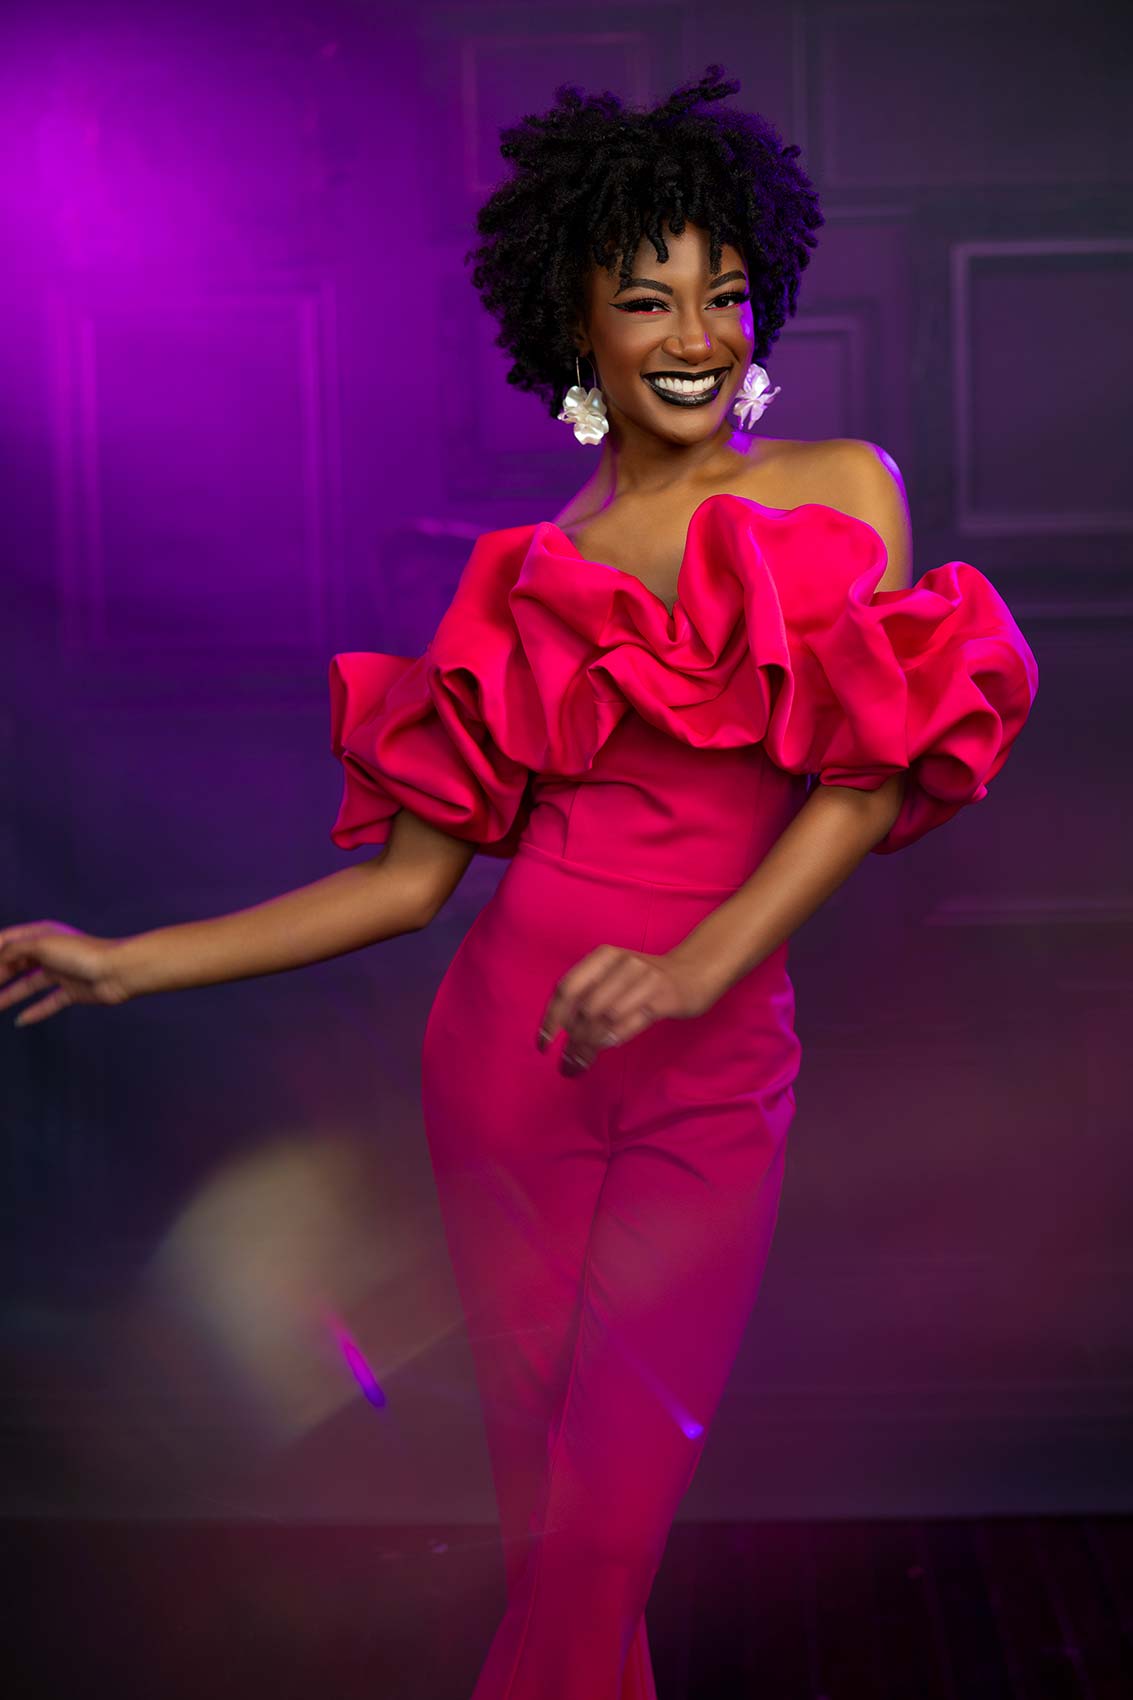
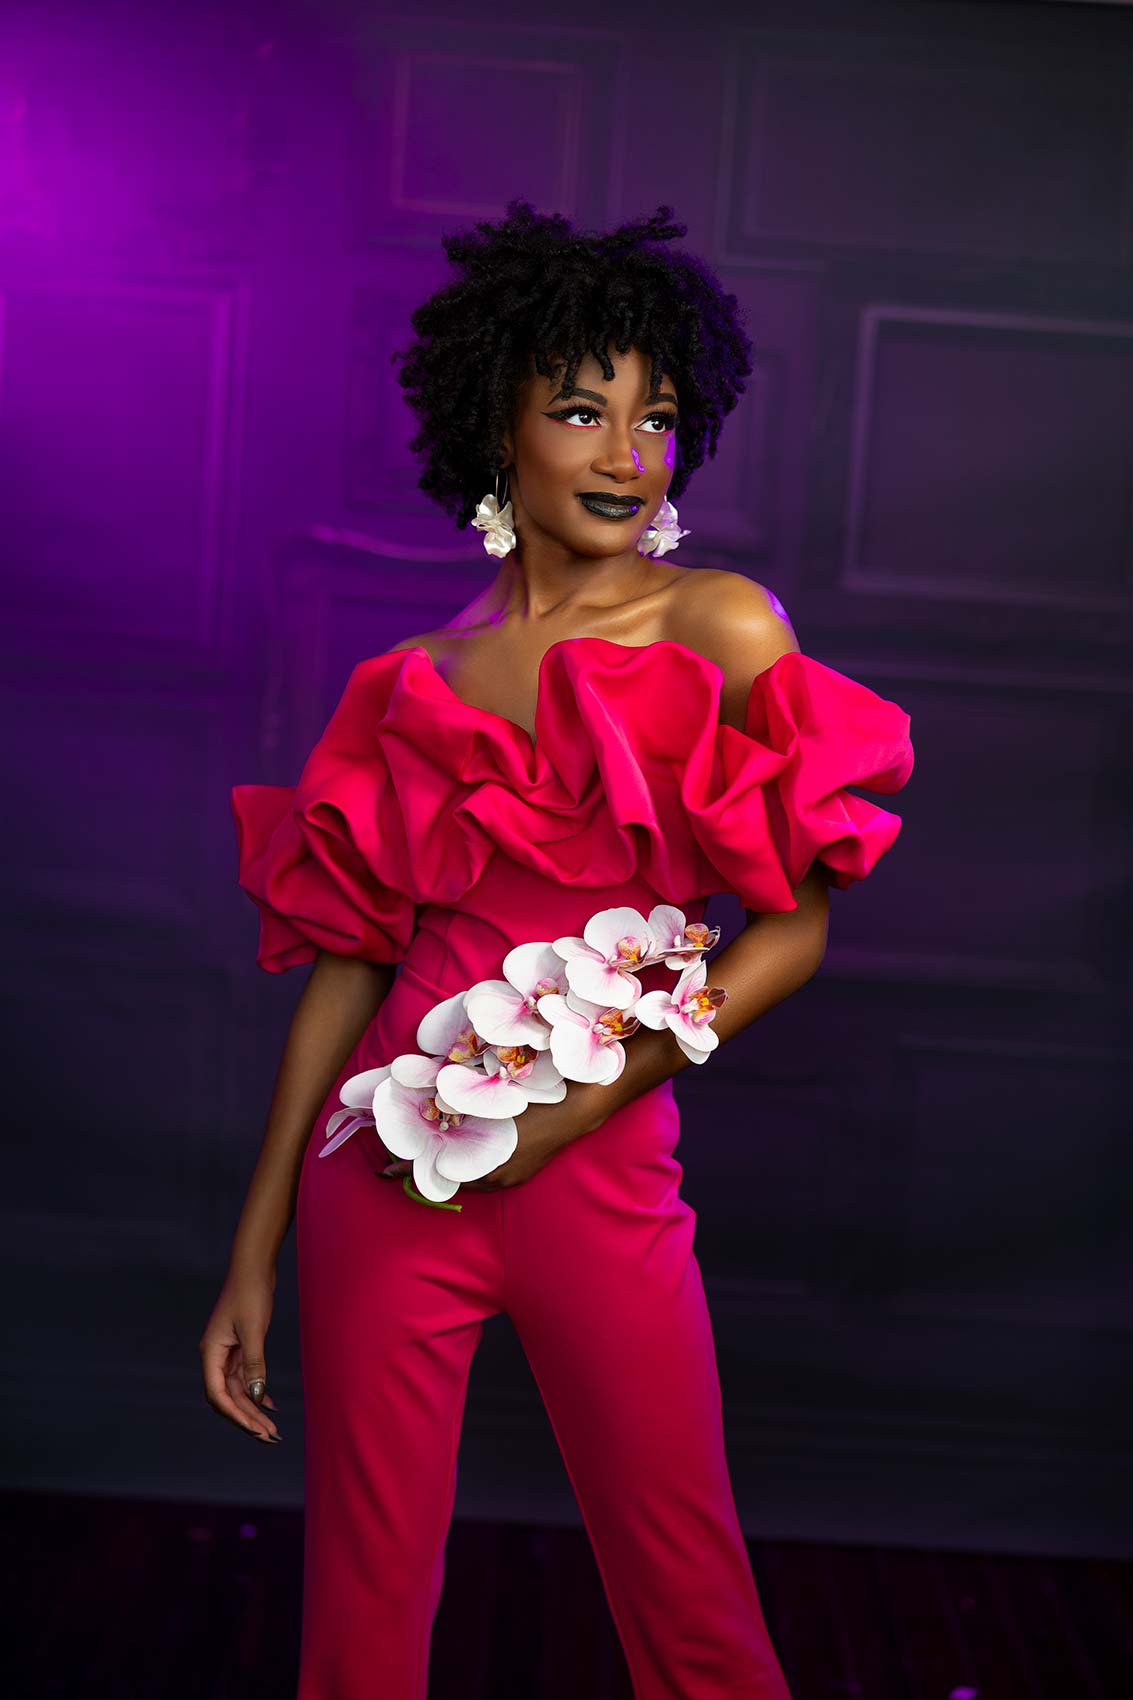
So we want to make sure that we’re giving them this incredible look that they would never have ordinarily. Peyton doesn’t have this outfit. This is something, we’ll have Alyssa talk about this, she doesn’t have this outfit. She would probably never wear her makeup like this normally. Now who knows? Maybe this becomes the normal look.

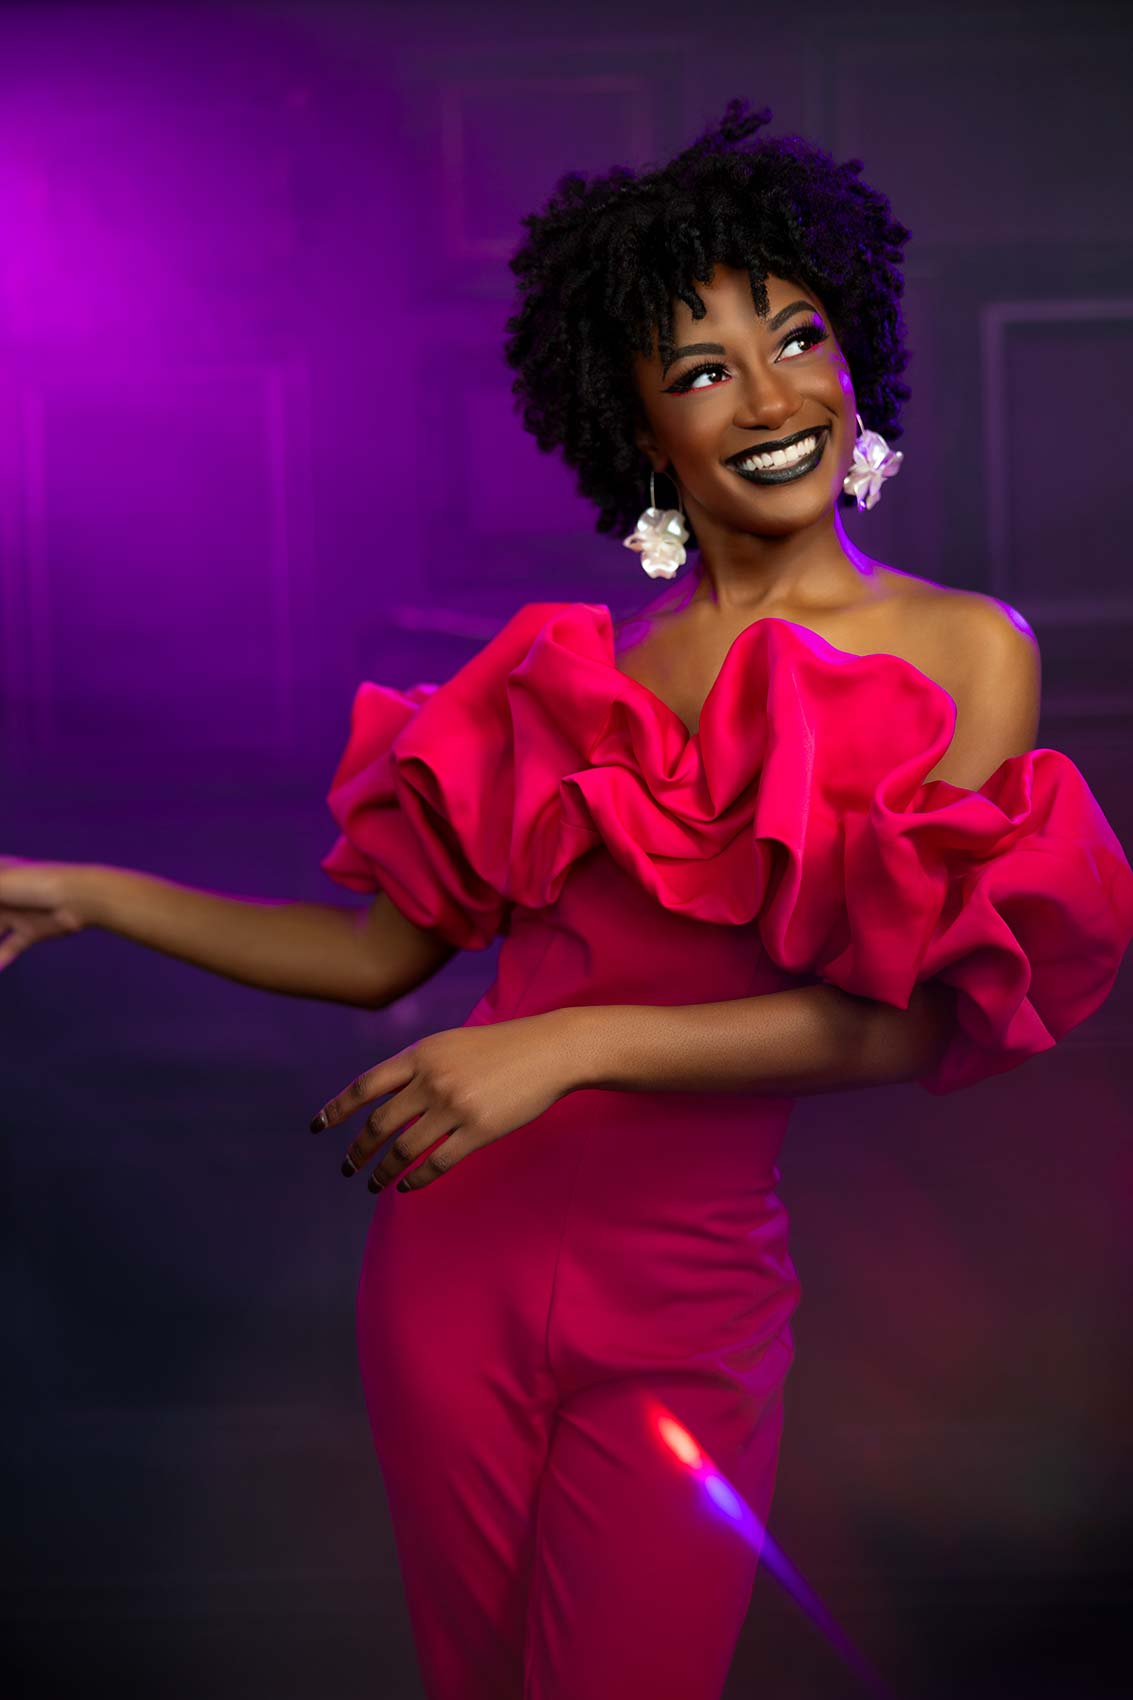
This also gives them an alter ego type of feel, which is awesome for that final look because they’ve had time to warm up to the camera and do their thing. And then they can be like, okay, this is my alter ego look. I’m feeling myself and really give it to the camera. And a lot of times this is the look that we like the most. The images end up being the best ones of the entire shoot.

Settings: f/2 @ 1/160, ISO 200

Wardrobe & Prop Tips

All right, I want to bring Alyssa on to talk about the outfit. Now I’ve got Alyssa with me, my wife, the person who really makes all the magic happen. Talk to us a little bit about Peyton’s outfit.

This one specifically, if we were on location, I feel like you have all these elements of being outdoor that kind of stylize your shoot and you can get away with doing more subdued colors. Where in studio, I wanted something that pops, something that she’s really going to pop off the background and something with colors that we can use gels and make it more interesting because anybody can take a picture natural light with a bland kind of outfit.

This is how you get that elevated look. It’s with your colors, your jewelry, the props. The props make all the difference. When it comes to props, the average senior is not just randomly holding flowers. But that little something adds a big difference in the images. Because otherwise, what is she doing with her hands?

The outfit is from Fashion Nova. They just had buy one get one 50% off sale. When you see those, you take advantage of those, because you can stock up on your wardrobe and you never know. This one was actually bought specifically for her. The earrings are from Brandi Patton’s stash. The flowers are from Amazon. You can go to Hobby Lobby and just stock up on a bunch of fake flowers. And this one I cut so that it’s easier to just hold in your hand. These stems are usually down to here. The shoes are from Akira.

Settings: f/2 @ 1/125, ISO 200
Settings: f/2 @ 1/100, ISO 200
Settings: f/2 @ 1/125, ISO 200

Backdrop & Lighting Setup

Now it’s my turn. So by the time it gets to me now I want to create my magic. So this just emphasizes how important it’s for the team to work together to bring this final image altogether. It’s never just you as the photographer. Background, that is from Intuition Backgrounds. It’s a new wall line that they have launched. Lighting, we are using Nanlite Forza 60c. C is for color. So all of these lights can go both RGB and go daylight tungsten. And so obviously we’re using daylight bounce on the main light. But then of course we want to bring the style together and we’re throwing a purple-ish pinkish color on the background and then creating an edge light on her.

Now I will tell you, normally when it comes to an edge light, I would put it opposite the key light. This side, it felt a little too heavy on this side, so I put through to the opposite side so we had some mix of light. But other than that, let’s get to it.

Now I will tell you, normally when it comes to an edge light, I would put it opposite the key light. This side, it felt a little too heavy on this side, so I put through to the opposite side so we had some mix of light. But other than that, let’s get to it.

Final Images

Settings: f/2 @ 1/125, ISO 200
Settings: f/2 @ 1/160, ISO 200
Settings: f/2 @ 1/125, ISO 200
Settings: f/2 @ 1/160, ISO 200
Settings: f/2 @ 1/125, ISO 200
Settings: f/2 @ 1/100, ISO 200

All right everybody, that is a wrap. I promise you invest some of the time on the pre-shoot side of things and you’ll get some killer shots for your clients. Hopefully you love them. We’ll see you in the next video.

Leave a Reply

Want more content like this?

Check out our recent posts

yt thumbnail portrait lighting and understanding rembrandt lighting

Understanding Rembrandt Lighting

Ever wondered how to nail that classic, beautiful lighting in portraits? Look no further! In this video, we’re diving deep into the wonderful world of Rembrandt lighting for your in studio portrait photography – it’s like painting with light!

Watch as we break down portrait lighting and understanding Rembrandt lighting in the simplest way possible. No fancy jargon here, just pure, easy-to-understand tips and tricks. We’ll show you how to create those gorgeous shadows and highlights that make your portraits pop!

Whether you’re a newbie or a seasoned pro, there’s something for everyone. We’ll walk you through the history, the basics, and even some cool practical demonstrations. Get ready to take your portrait game to the next level!

Read More »
new westcott fusion by salvatore cincotta thumbnail

New Westcott Fusion by Salvatore Cincotta

The new Westcott Fusion by Sal Cincotta is something I’ve been working on with Westcott for a couple of years now. It’s an incredible product that will give you more lighting possibilities than you could imagine.

Check out this on location shoot and how we use the product. More videos coming.

Read More »