The Best Settings for Night Photography with Jennifer Wu
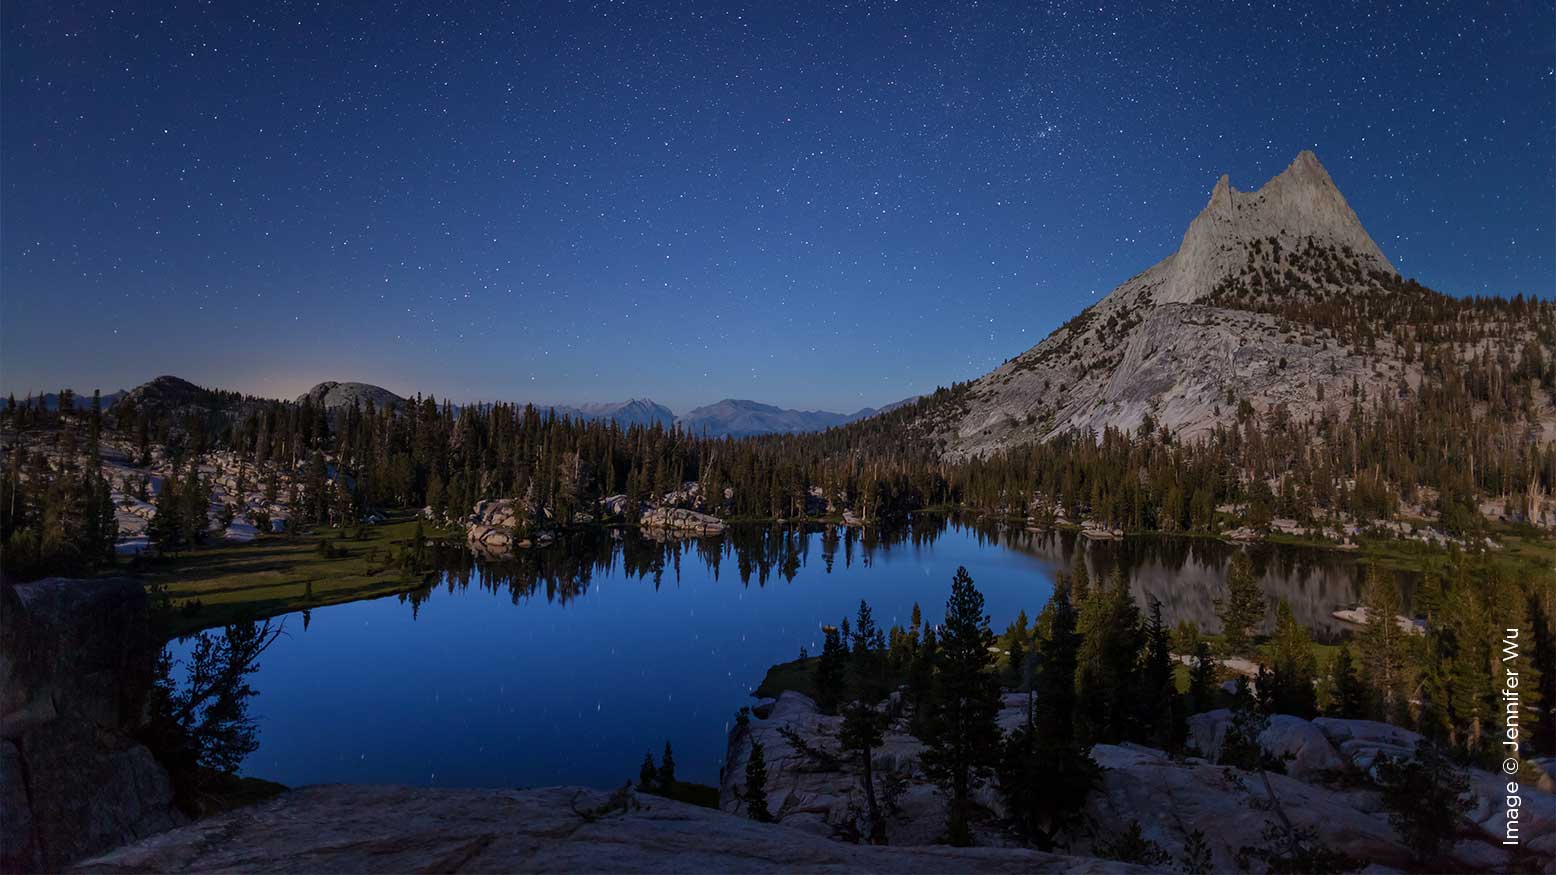
There is something so beautiful about the Milky Way. It looks like a white band of light to our eyes, but the camera picks up more stars that are not visible with our naked eye—plus it picks up the gasses as well. This creates amazing images!
Look for dark sky areas and avoid cities for star photography—national and state parks are a good place for that. Many of the images in this article are shot in national parks.
To locate the Milky Way and see the best settings for the night sky for your locations and dates, use apps like PhotoPills (photopills.com), Star Walk 2 (vitotechnology.com/star-walk.html), or the free planetarium software Stellarium for desktop (stellarium.org).
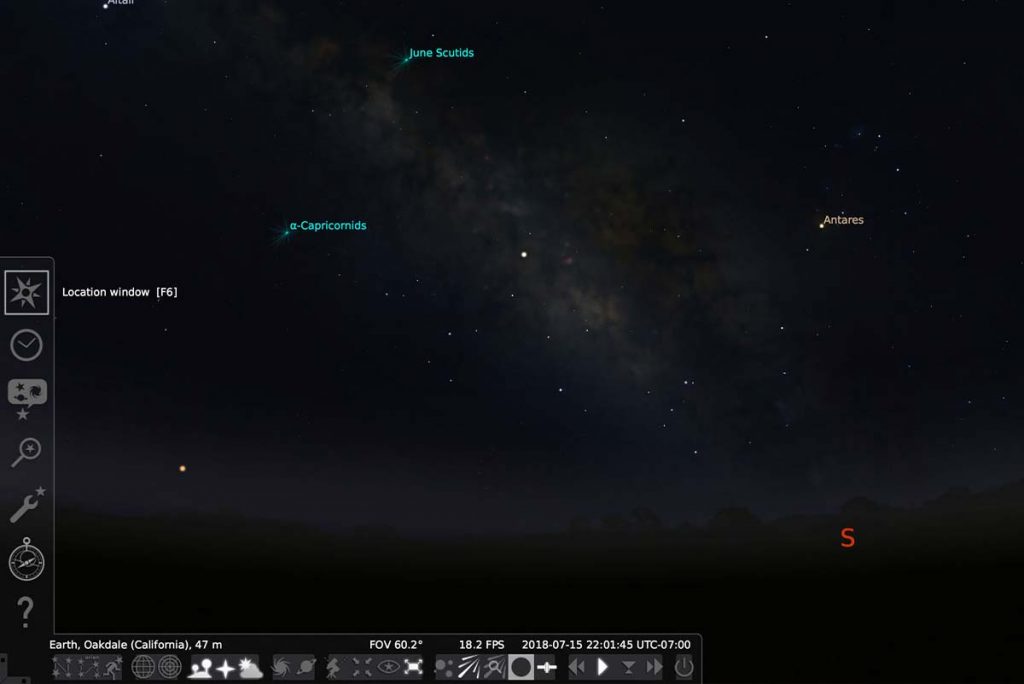
To use the Stellarium software, enter the location, date, and time windows on the left-hand side. Press H for the help menu. You can see the position of the Milky Way in the sky and where it will be located, such as to the South moving to the Southwest through the night as shown here in mid-July in California.
Photographing the Milky Way
When creating my first Milky Way images in 2007, I made several mistakes and I hope to short-cut your errors so you get amazing night photography results. The following information is what I learned by trial and error. It is OK if you prefer a different exposure, f/stop or color temperature. Please experiment to your liking.
What Shutter Speed is Good to Use?
Set the shutter speed for the maximum shutter speed you can use with your wide-angle lens choice to keep the stars as points of light. The checklist below has my recommendations on shutter speeds for various lens focal lengths to minimize most of the movement of the stars. Review your image on the LCD screen with a loupe and if you see oblong shapes or trails, use a faster shutter speed until you see circles instead of lines.