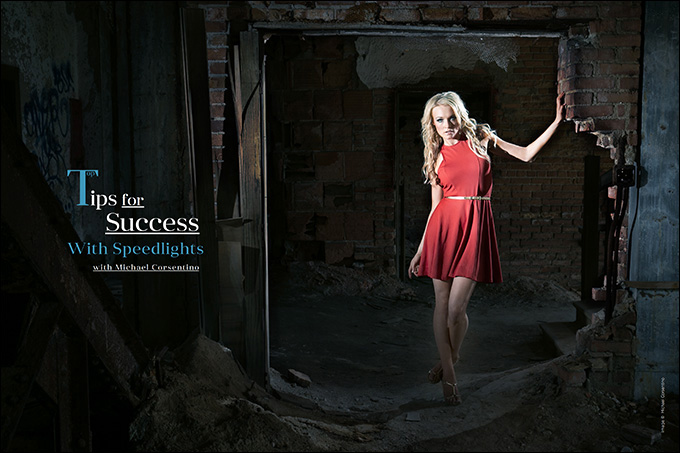
Top Tips for Success With Speedlights with Michael Corsentino
Take It Off
Achieving above-average results with handheld flash or larger strobes starts with getting them off your camera—otherwise known as OCF. I can’t stress this enough. It’s all about direction and distance. With your flash in the camera’s hot shoe, you’re locked into flat, one-dimensional lighting. This is because when it’s fired, the beam of light from your speedlight travels along exactly the same axis as the camera’s lens, mirror and sensor.
In other words, there’s zero direction to the light. It’s just flat, boring and typically results in a black tunnel behind whatever you’re illuminating. I know you’ve experienced this, and it’s not ideal. It may be what’s called for during events, but in 99.9 percent of portrait situations, flash on camera is verboten. With your light off the camera, you have the flexibility not only to use a wide range of modifiers, which are impossible to use on camera, but even more importantly, you have the flexibility to control the amount of shadow introduced and the hardness/softness of the light based on its distance from your subject.
These are all significant factors that are simply out of your control with flash on camera.
No Sleeping on the Job
Nobody likes a slacker, especially when it comes to remote speedlights. Most handheld flashes have a built-in power-saving feature that temporarily puts them to sleep during periods of inactivity. On camera, this is no problem—a simple half-press of the camera’s shutter release button sends a signal to the hot shoe, which wakes up the flash, and you’re off to the races.
But things work very differently when your speedlight is used off the camera. In this situation, there is no wakeup signal communicated from the camera to the speedlight. Because of this, it’s likely that your speedlight will suddenly and inexplicably just stop working. This gotcha can cause heart-pounding, head-scratching moments when you don’t know what’s happening or how to fix it. It’s especially annoying when your speedlight is buried deep inside a softbox.
Making sure this never happens (again) is easy. You’ll find the enable/disable auto sleep feature in the custom function settings of your flash. To avoid this nightmare, simply disable the auto sleep function, and everything will be smooth as silk. Keep in mind that you will consume more energy with auto sleep disabled, so have extra batteries on hand.
Living Large
For surefire works-every-time lighting, bigger is definitely better. A 7′ octa bank makes up for a multitude of sins and is pretty much foolpoof set-it-and-forget-it lighting. If you’re looking for a sure thing with a lot of soft, broad coverage at a reasonable price point, the Photoflex 7′ OctoDome with two to four speedlights inside it is just the ticket. I used that very setup for the family portrait in this article. You won’t be overpowering the sun with that many speedlights, but for those times when a sweet, supersoft kiss of light is called for, this setup works perfectly.
Always Carry an Umbrella
Having a smaller, more portable, all-purpose modifier in your bag of tricks is equally important. That’s where the Westcott 43″ White Satin Collapsible Umbrella With Removable Black Cover comes in. This go-to tool works for a multitude of general-purpose needs. It’s super compact, and it folds down to an impressive 14.5 inches, making it the ideal companion for backpacks and camera bags.
Convertible umbrellas deliver incredible value because they do multiple things. They can be used as bounce-backs, with silver or white interior fabric, or as shoot-throughs when a softer, more diffused look is called for. If you’re currently building out your tools and in the market for your first light modifier, a convertible umbrella should be your first stop. Umbrellas provide broad coverage, producing light that goes everywhere. In the right circumstances, that’s fine. You won’t get the defined edge or control you get with other modifiers, but you just can’t beat the utility, weight and portability of a convertible umbrella.
Who Is Zooming Whom?
On camera, your speedlight automatically matches the focal length of your lens. Off camera, you can manually dial in your desired zoom amount for your flash. For portraits, that’s typically going to be a 200% zoom setting for my speedlights. Why? Zooming the flash reduces its coverage, producing a tighter beam of light and creating a natural fall-off. This is perfect for portraits, and beats relying on software-based vignettes in post every time. Keep in mind that different modifiers call for different zoom percentages. Two hundred percent is for use with bare flash. If I’m using an umbrella, I choose a much wider zoom number.
Let’s Communicate
I’ve covered triggers in detail in other articles, so I’ll keep this brief. For reliable communication between your camera and off-camera speedlights, you need to know only one word: radio. Radio-based triggers provide the most reliable form of communication, far eclipsing and sidestepping the shortcomings of older optical technology. There are no line-of-sight requirements. Which means the transmitter and receiver don’t need to have an unobstructed view of each another. This is extremely useful because it gives you the freedom to place your lights anywhere you want. Radio systems also have far greater ranges than their optical counterparts.
My go-to TTL speedlight triggers are the Canon ST-E3-RT used in combination with 600EX-RT Speedlites, and the PocketWizard FlexTT5 system for Nikon and legacy model Canon Speedlites.
A Leg to Stand On
For big lights, I’m all about big stands. They’re the right tool for the job. Speedlights, on the other hand, are so light and portable that they afford us the opportunity to lighten our load in the stand department as well.
Remember, using stands on location can be a tricky business fraught with municipal regulations and the potential for legal exposure in the event of an accident. Once you put a light stand down, you may need a permit to be completely legal and free from worry about being shut down midshoot by the police. Check local requirements.
Have two to three great stands and a set of extension poles as a backup for those times when stands are a no go. I recommend the following two products: Manfrotto’s Nanopole Stand MS0490A and Lastolite’s Non-Rotating Extending Handle (29″ to 91″) LS2453. The Nanopole is shorter when fully extended, but in a pinch can be used as both a light stand or an extension due to its removable base. Don’t forget sandbags. I know they’re a total pain in the butt, but they’ll save your butt, no buts about it.
Bridging the Gap
Just as important as good light stands and extension poles are the brackets used to bridge the gap between the two. It’s easy to underestimate the important role brackets play in the success or failure of speedlight technique. Look for brackets that provide maximum articulation, allow for one to four speedlights and provide rock-solid stability. The following are brackets I’m never without: Manfrotto Snap Tilthead With Shoe Mount MLH1HS; Lovegrove Flash Bracket; Lovegrove Gemini Twin Speedlight Bracket; and the Lastolite Quad Bracket LL LS2535.
Don’t skip on brackets. You’ll end up missing essential features that are well worth the minimal extra expense.
Gel It
Gels could easily fill an entire article. Gels rock. Mounted in front of your speedlight, they can be used correctively and creatively. The ways I typically use gels is to bring back the warmth that’s missing on overcast days or to warm up the lighting falling on my subject’s hair from an off-camera accent light. For this, I reach for a gel called a “CTO,” or color temperature orange. These gels range in strength of 1/4, 1/2 and full density. Two standouts are the ExpoImaging system and the Lastolite Strobo Direct to Flashgun Mount Pro Kit LL LS2616. Accessories include grids, flags and more.
The Mod Squad
In addition to a convertible umbrella and the large octa mentioned above, slowly adding a range of portable modifiers to your kit will open up a world of creative possibilities on location. In my speedlight kit, you’ll find softboxes, octas, diffusion panels, reflectors and a beauty dish—each collapsible and highly portable. On top of that, I have grids and gels.
Here’s all the nitty-gritty geekery in my bag:
- Lastolite Ezybox Hot Shoe Softbox Kit, 24″ x 24″, LL LS2462
- Lastolite Fabric Grid for 24″ Ezybox Hotshoe, LL LS2962
- Lastolite Ezybox II Medium Octa 31.5″ Softbox, LL LS2720
- Lastolite Fabric Grid for Ezybox II Octa Softbox, LL LS2953
- Chimera Octa 2 Collapsible Beauty Dish, 24″, 6010
Build your collection slowly, getting to know each modifier inside and out, before moving on to the next. One supereasy, lightweight and inexpensive way to begin modifying your speedlight is by firing it through a popup diffusion panel like the Lastolite TriFlip 8-in-1 Grip Reflector Kit (30″).
Studio on the Go
The small footprint and portability of speedlights, lightweight stands and collapsible high-quality softboxes and beauty dishes have turned the idea of the mobile, on-the-go studio into a reality. Collapsible backgrounds complete this picture, folding down to about a third of their fully extended size and easily fitting into the back of your car, leaving plenty of room to spare. Two of my favorites are the Lastolite Collapsible Reversible Background (5′ x 6′, white/mid-gray) LL LB56GW and the Lastolite Collapsible Reversible Background (5′ x 6′, white/mid-gray) LL LB56GB. I’m a monochrome guy. These are just the tip of the iceberg of the background styles available.
Gang It Up
The more speedlights you have, the more light you’ll have at your disposal. This becomes especially useful when you need to overpower the sun or work in high-speed sync mode, covered next. Outside of those obvious applications, ganging up multiple strobes into one unified group or light source allows quicker recycle times, demands less from each speedlight and increases battery life. Smoke ’em if you got ’em.
Go Beyond
My final tip is to start using high-speed sync. It’s awesome. Learn how it works, learn its shortcomings and learn how to work around them. Refer back to my article on HSS. High-speed sync allows you to use speedlights at shutter speeds faster than your camera’s maximum sync speed. This is a very powerful feature because it allows you to use flash and wide apertures in ambient light situations.
If it’s dramatic, foreboding, moody skies you’re looking for, HSS is for you. The downside is that HSS dramatically reduces the output of your speedlights. If there ever was a time for multiple speedlights, HSS is it.


