
This is no ordinary editing tool for photographers, this is without a doubt, a more advanced tool for skin retouching, body shaping, background swaps and more.
Are you ready to turbocharge your editing with artificial intelligence? Let's get to it.
Today we’re going to check out a new AI tool called Evoto. Maybe you’ve heard of it, maybe you haven’t. This is a tool that is not meant for the beginner, not for the novice. This is really focused on retouching. It’s not going to replace Lightroom, it’s not going to replace Photoshop, but it is one of those tools that I am quickly learning that you’re going to have in your toolbox, that will enhance and quicken your retouching efforts.
Look, the average retouch for me and my team is between an hour to two hours. That’s skin, beauty, eye enhancement, removing distractions from the background, etc. I started playing around with Evoto, and I was done in under five minutes.
And I know this sounds too good to be true. You’re thinking to yourselves, “No way,” but this tool is absolutely incredible. I’m going to show you some of the before and after images in this video using my images. I will also highlight some of the pitfalls of the tool on where you’re going to have to fill the gap, so to speak. So like I said when I opened up, this is not a tool that’s going to replace Lightroom by any stretch of the imagination, but it is a tool that will quickly allow you to apply batch retouching on your images, something that no other tool that I’m aware of can do. This is more than just removing blemishes and enhancing eyes. This is about applying beauty retouching and background swaps, I mean, all sorts of things, across a batch of images, saving you hours upon hours of time.
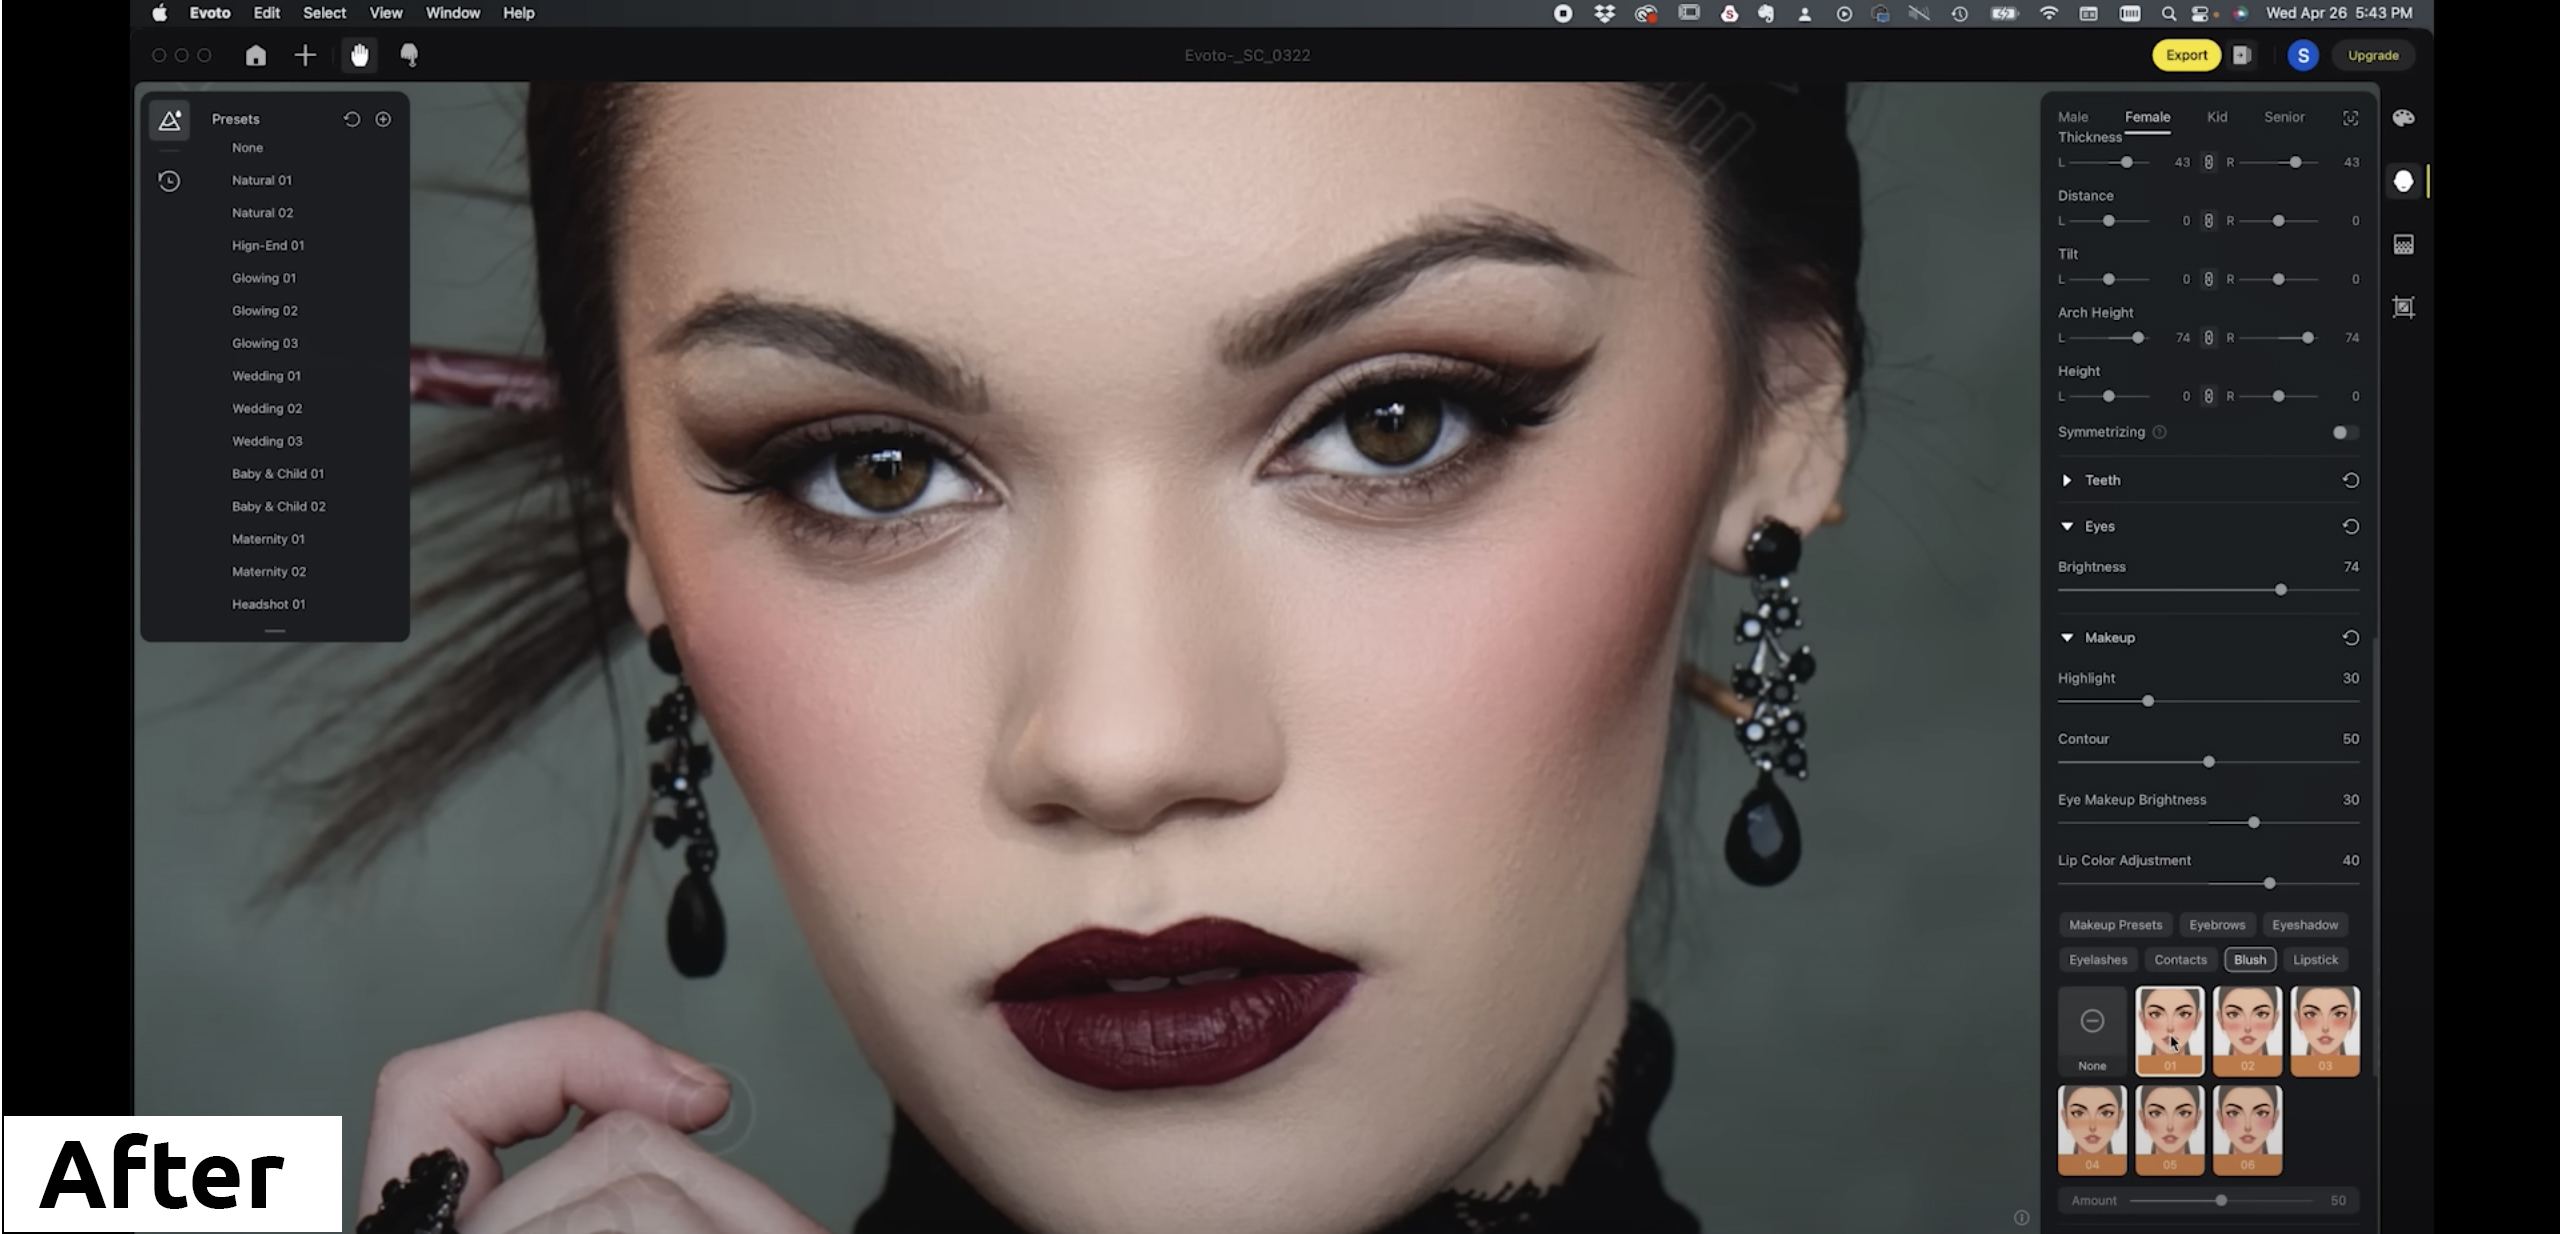
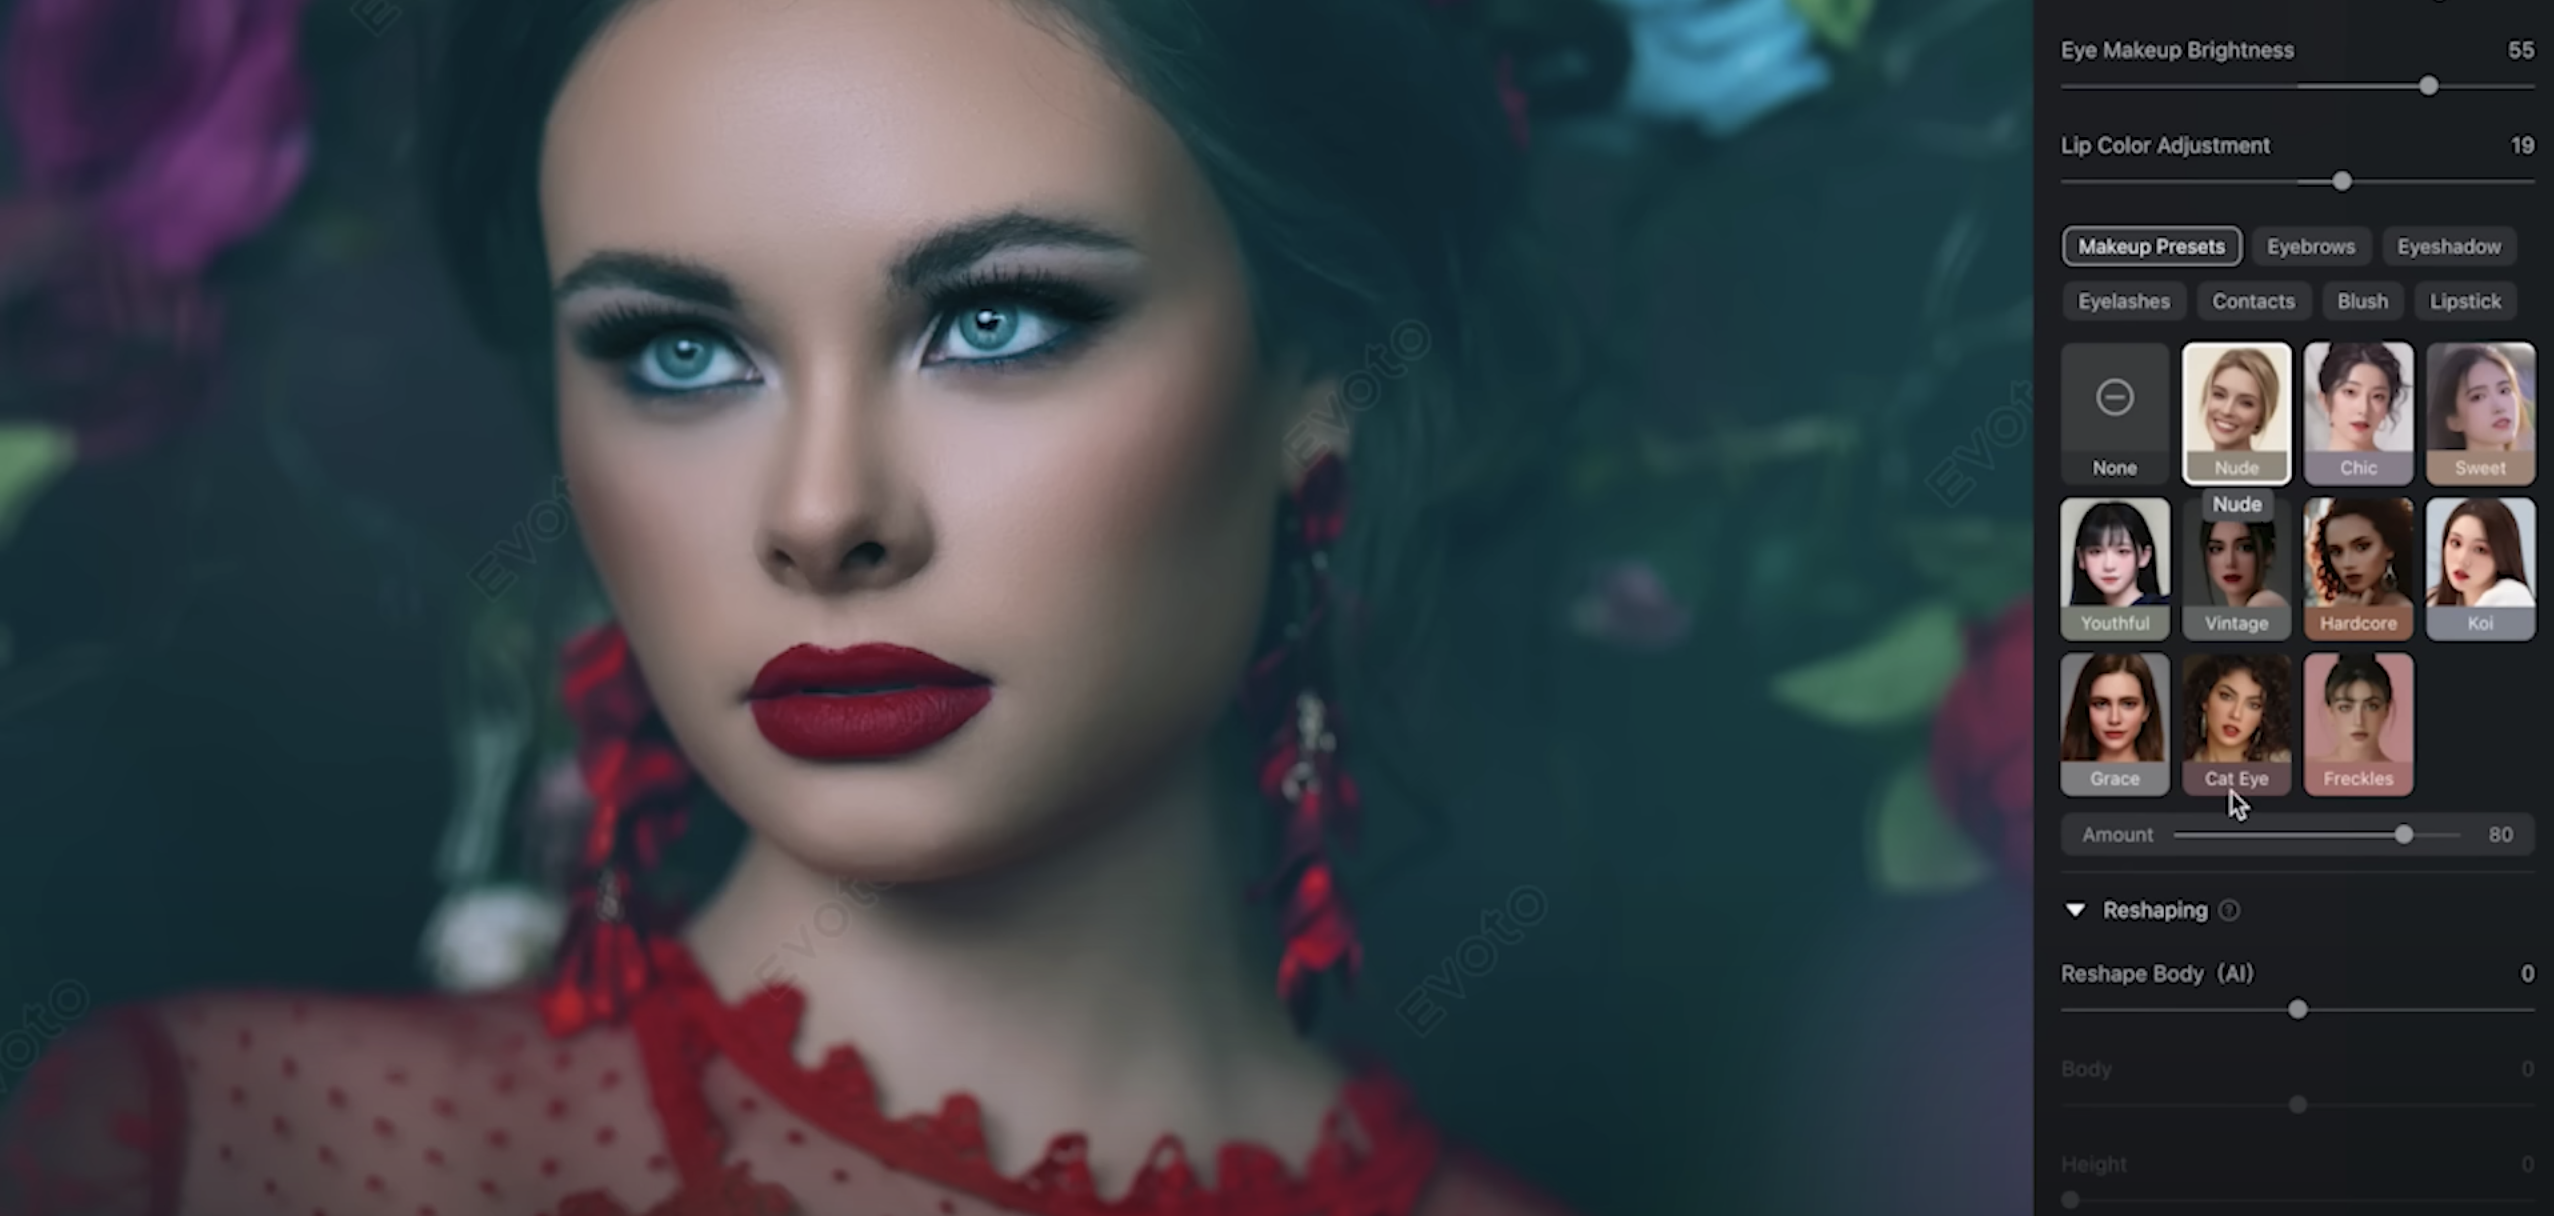
Makeup Presets: Reshaping the eyebrows & adding blush
On the Evoto website, you can see they’re really geared towards retouching, and I’m going to show you some of these features in the video demo, but beyond the basics of color adjustments, what you’re going to end up getting is the ability to sync those edits, presets to get started with, and then background adjustments, advanced color editing, and portrait retouching on steroids. I’ve never seen anything like this, so I’m just excited.
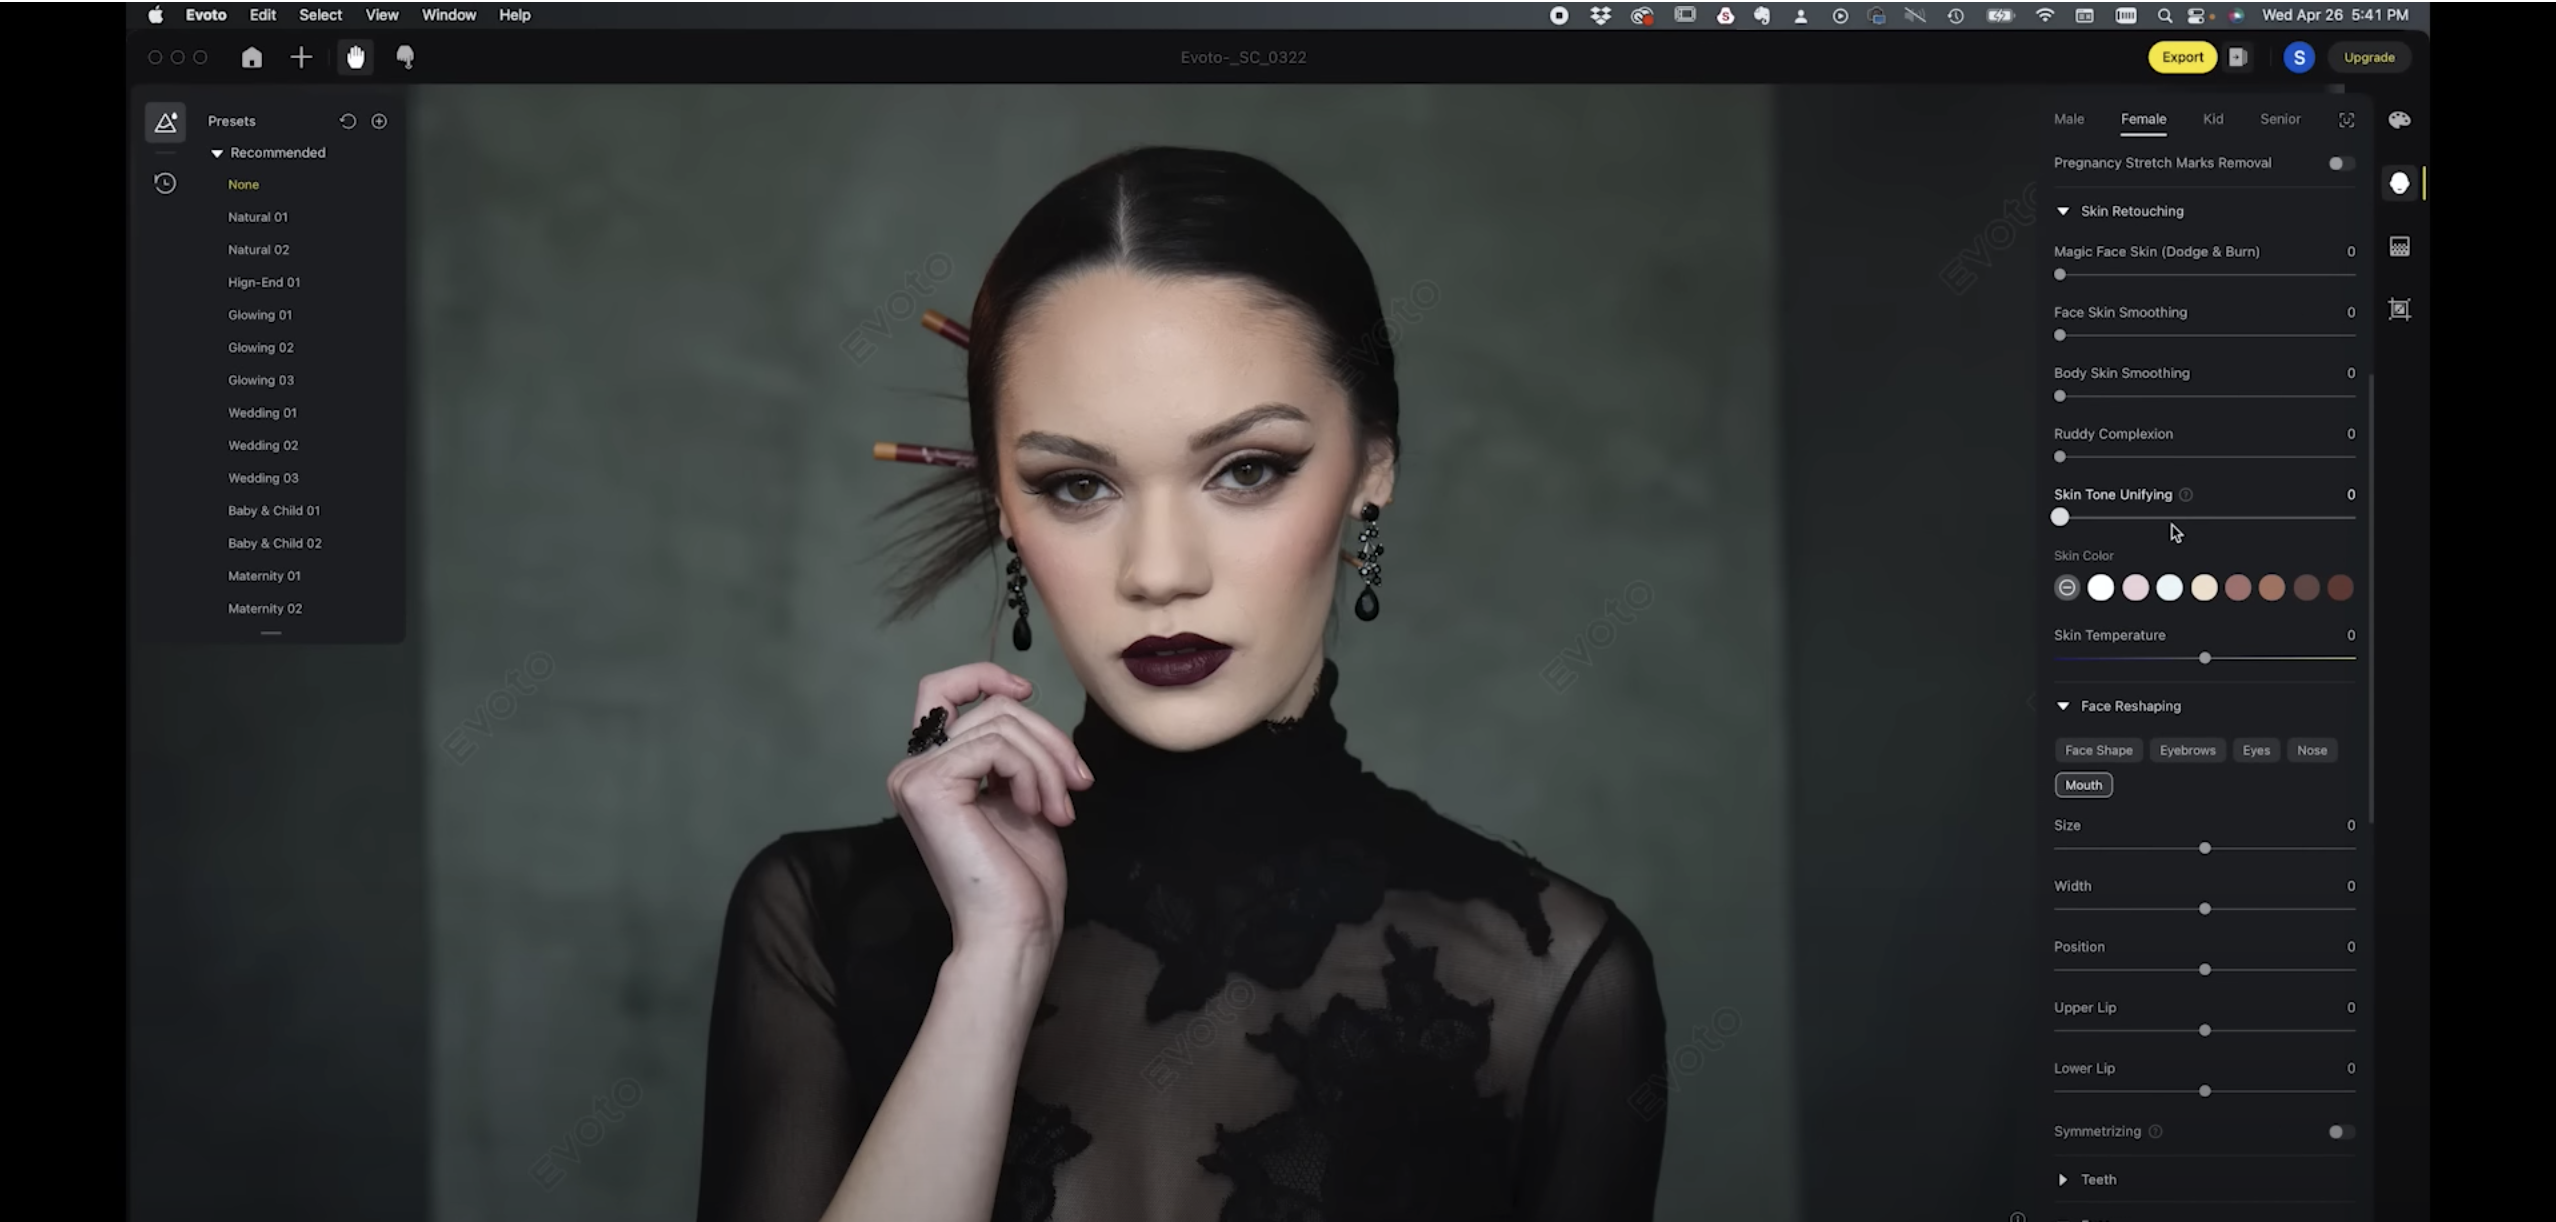
You can click on face to find the face, and so that’s the AI part of this, right? Because the hardest part is recognizing where the face, and hair, and hands, and body, and hips, and legs. That’s where the AI is coming into play here, so that when you’re making these adjustments, not only is it making the adjustment to that body part, it’s making sure that the other pieces around that body part still look good.
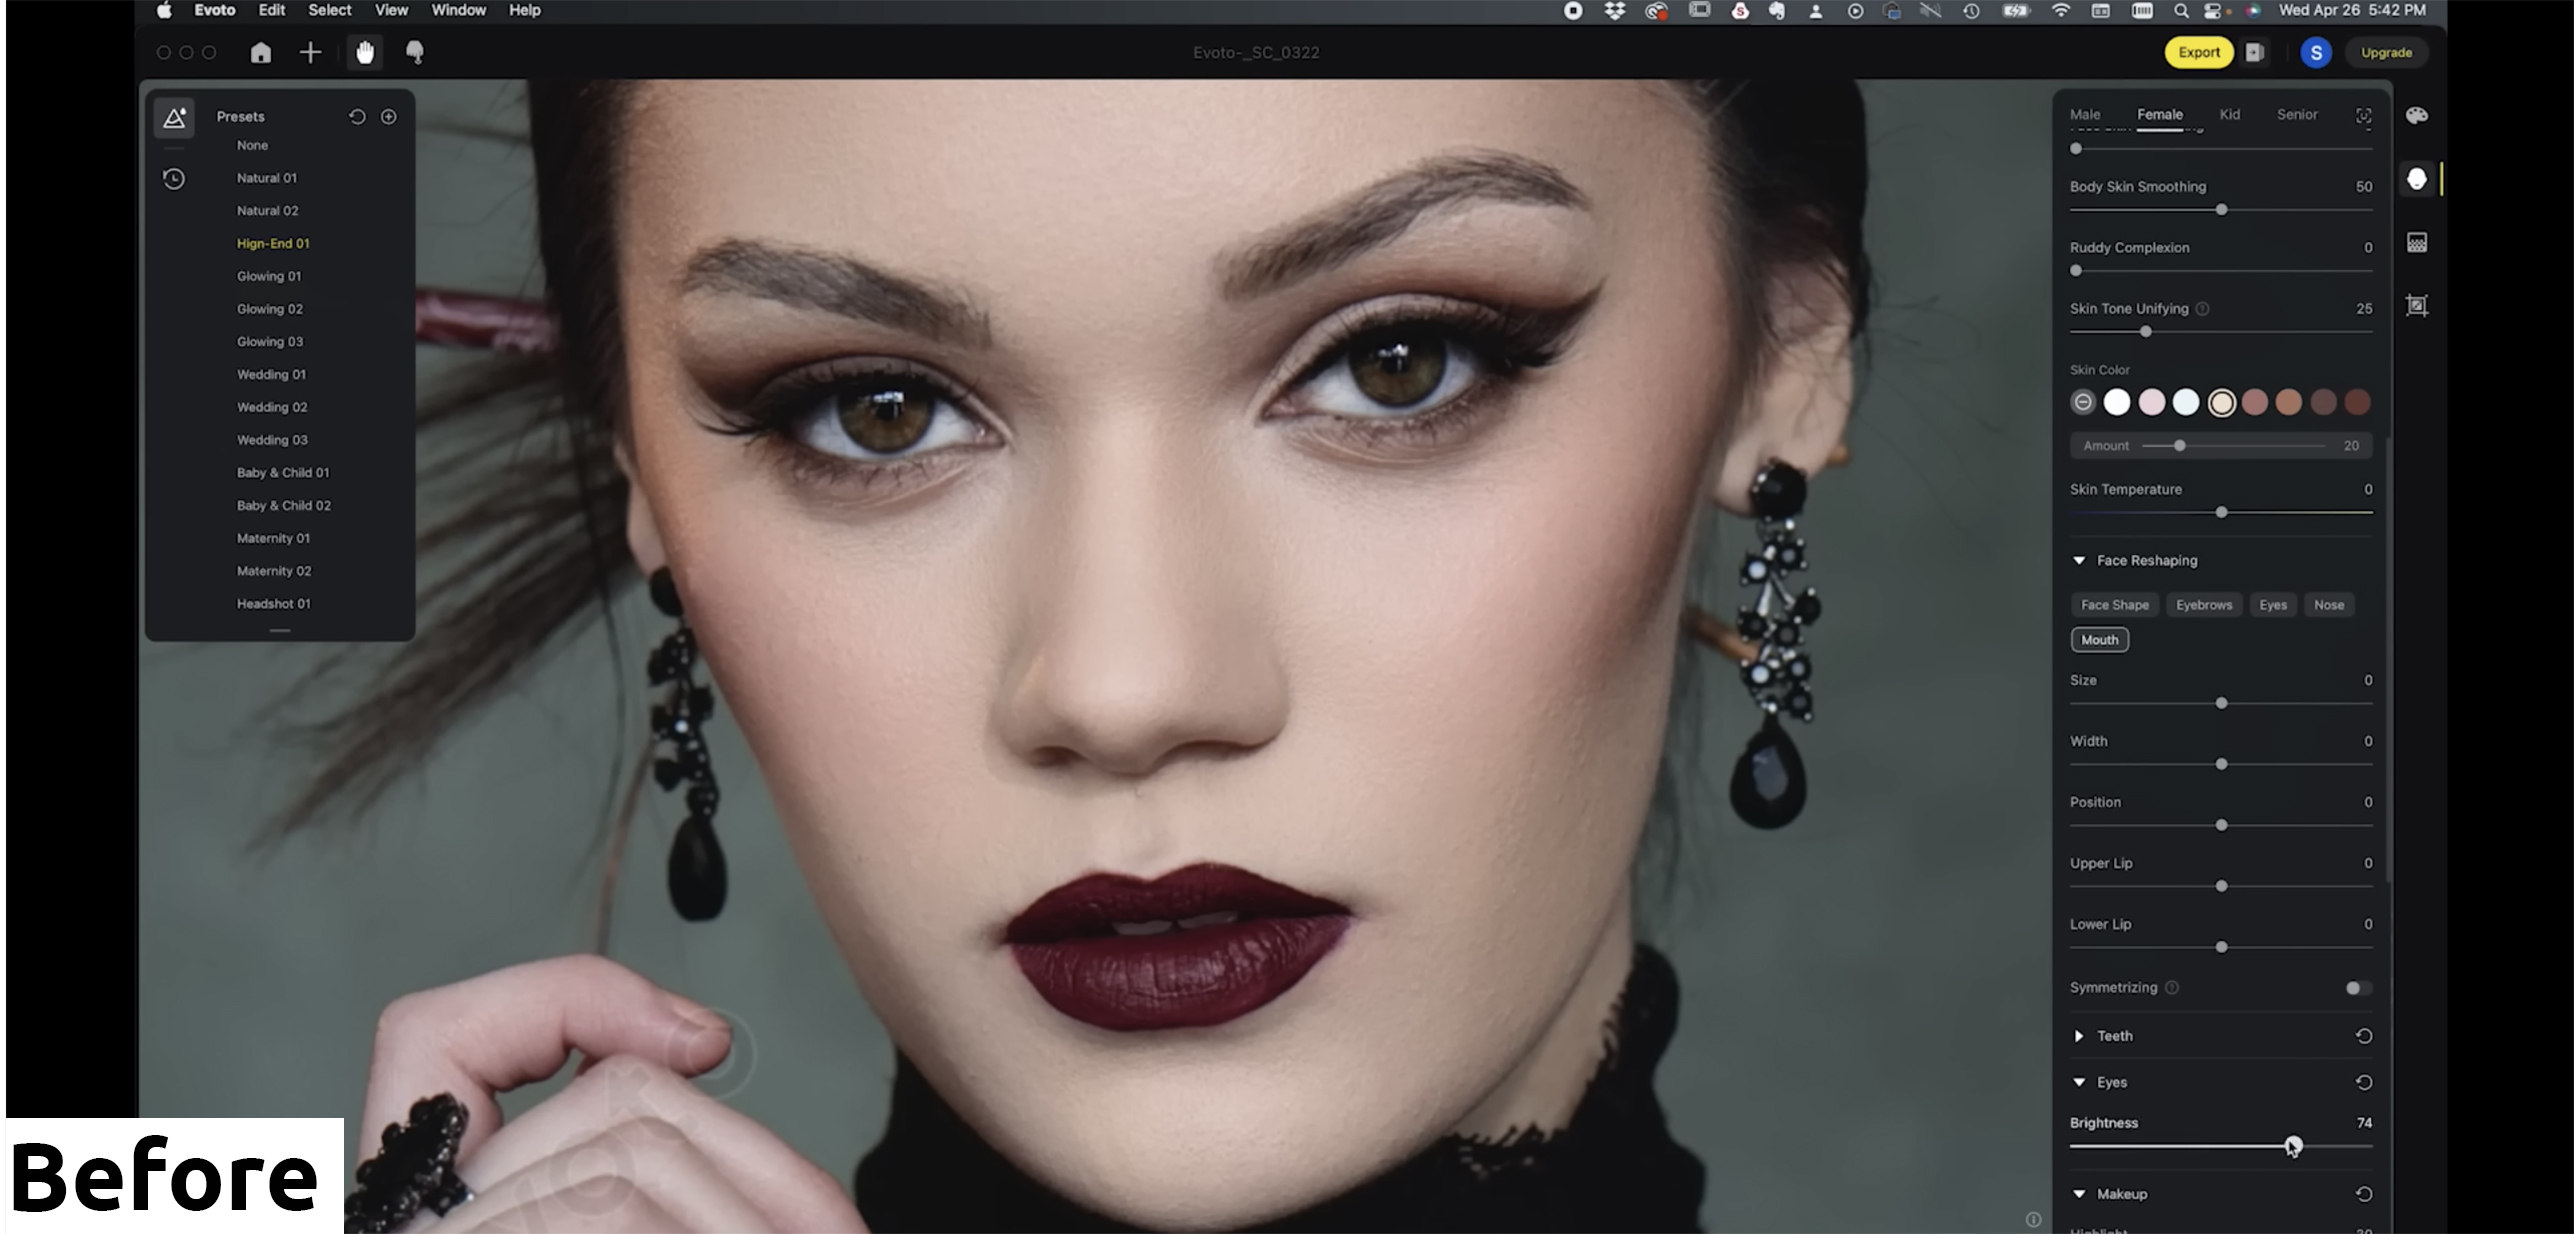
Evoto also has a whole bunch of presets available. One of my favorites is this “high end”. Single click on that, AI kicks in, and you can see it’s just a very subtle edit. So if we look at the before and after, right? It enhances her eyes a little bit, brightens her face a little bit. It’s pretty clean and simple. Now imagine being able to batch this across all images. That’s powerful if you are working on a job where everyone has to look the same.
Now, maybe it’s just not clicking for you yet. So check out something like this.

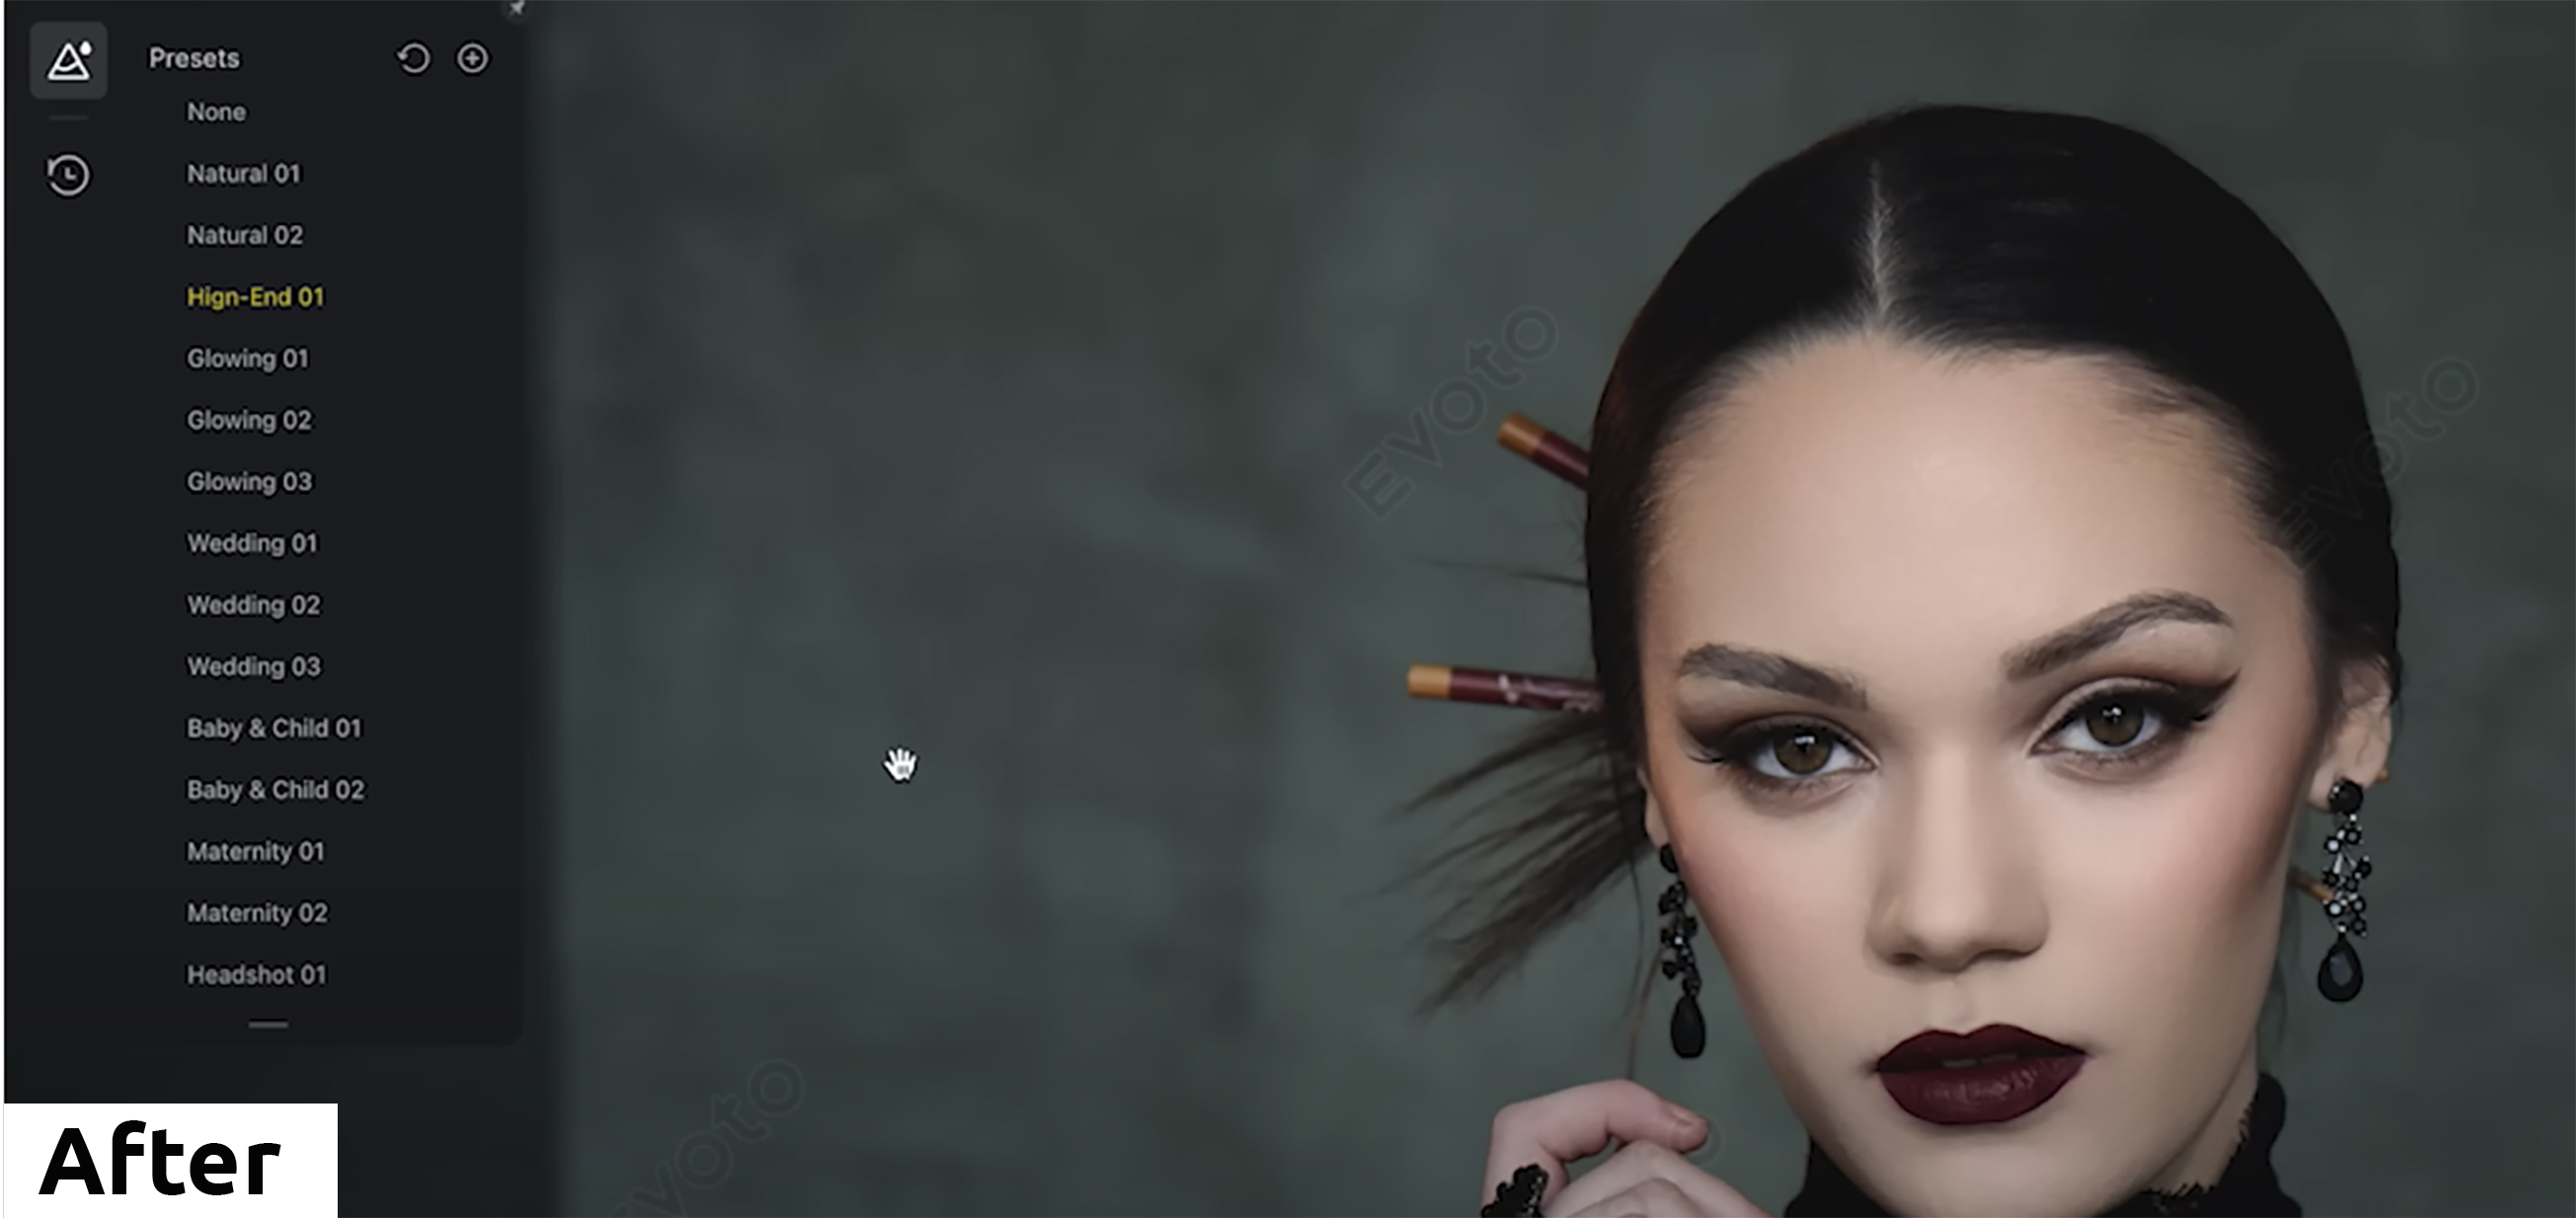
High End Preset
These are pieces you have in Photoshop, right? If you want to go in and make her eyes bigger, lips bigger, it’s pretty rudimentary at this point compared to what Evoto is doing. And so as I come in here, I can make her eyes a little bit brighter, but I can also adjust her lips. Now, mind you, that’s also possible in Photoshop to adjust her lips, but what’s happening in Photoshop is there’s no way to sync across all those images, right? Now you’re saving it as another layer, so you have to go into that tool. Here, we can actually sync this across all images. I think that’s pretty powerful.
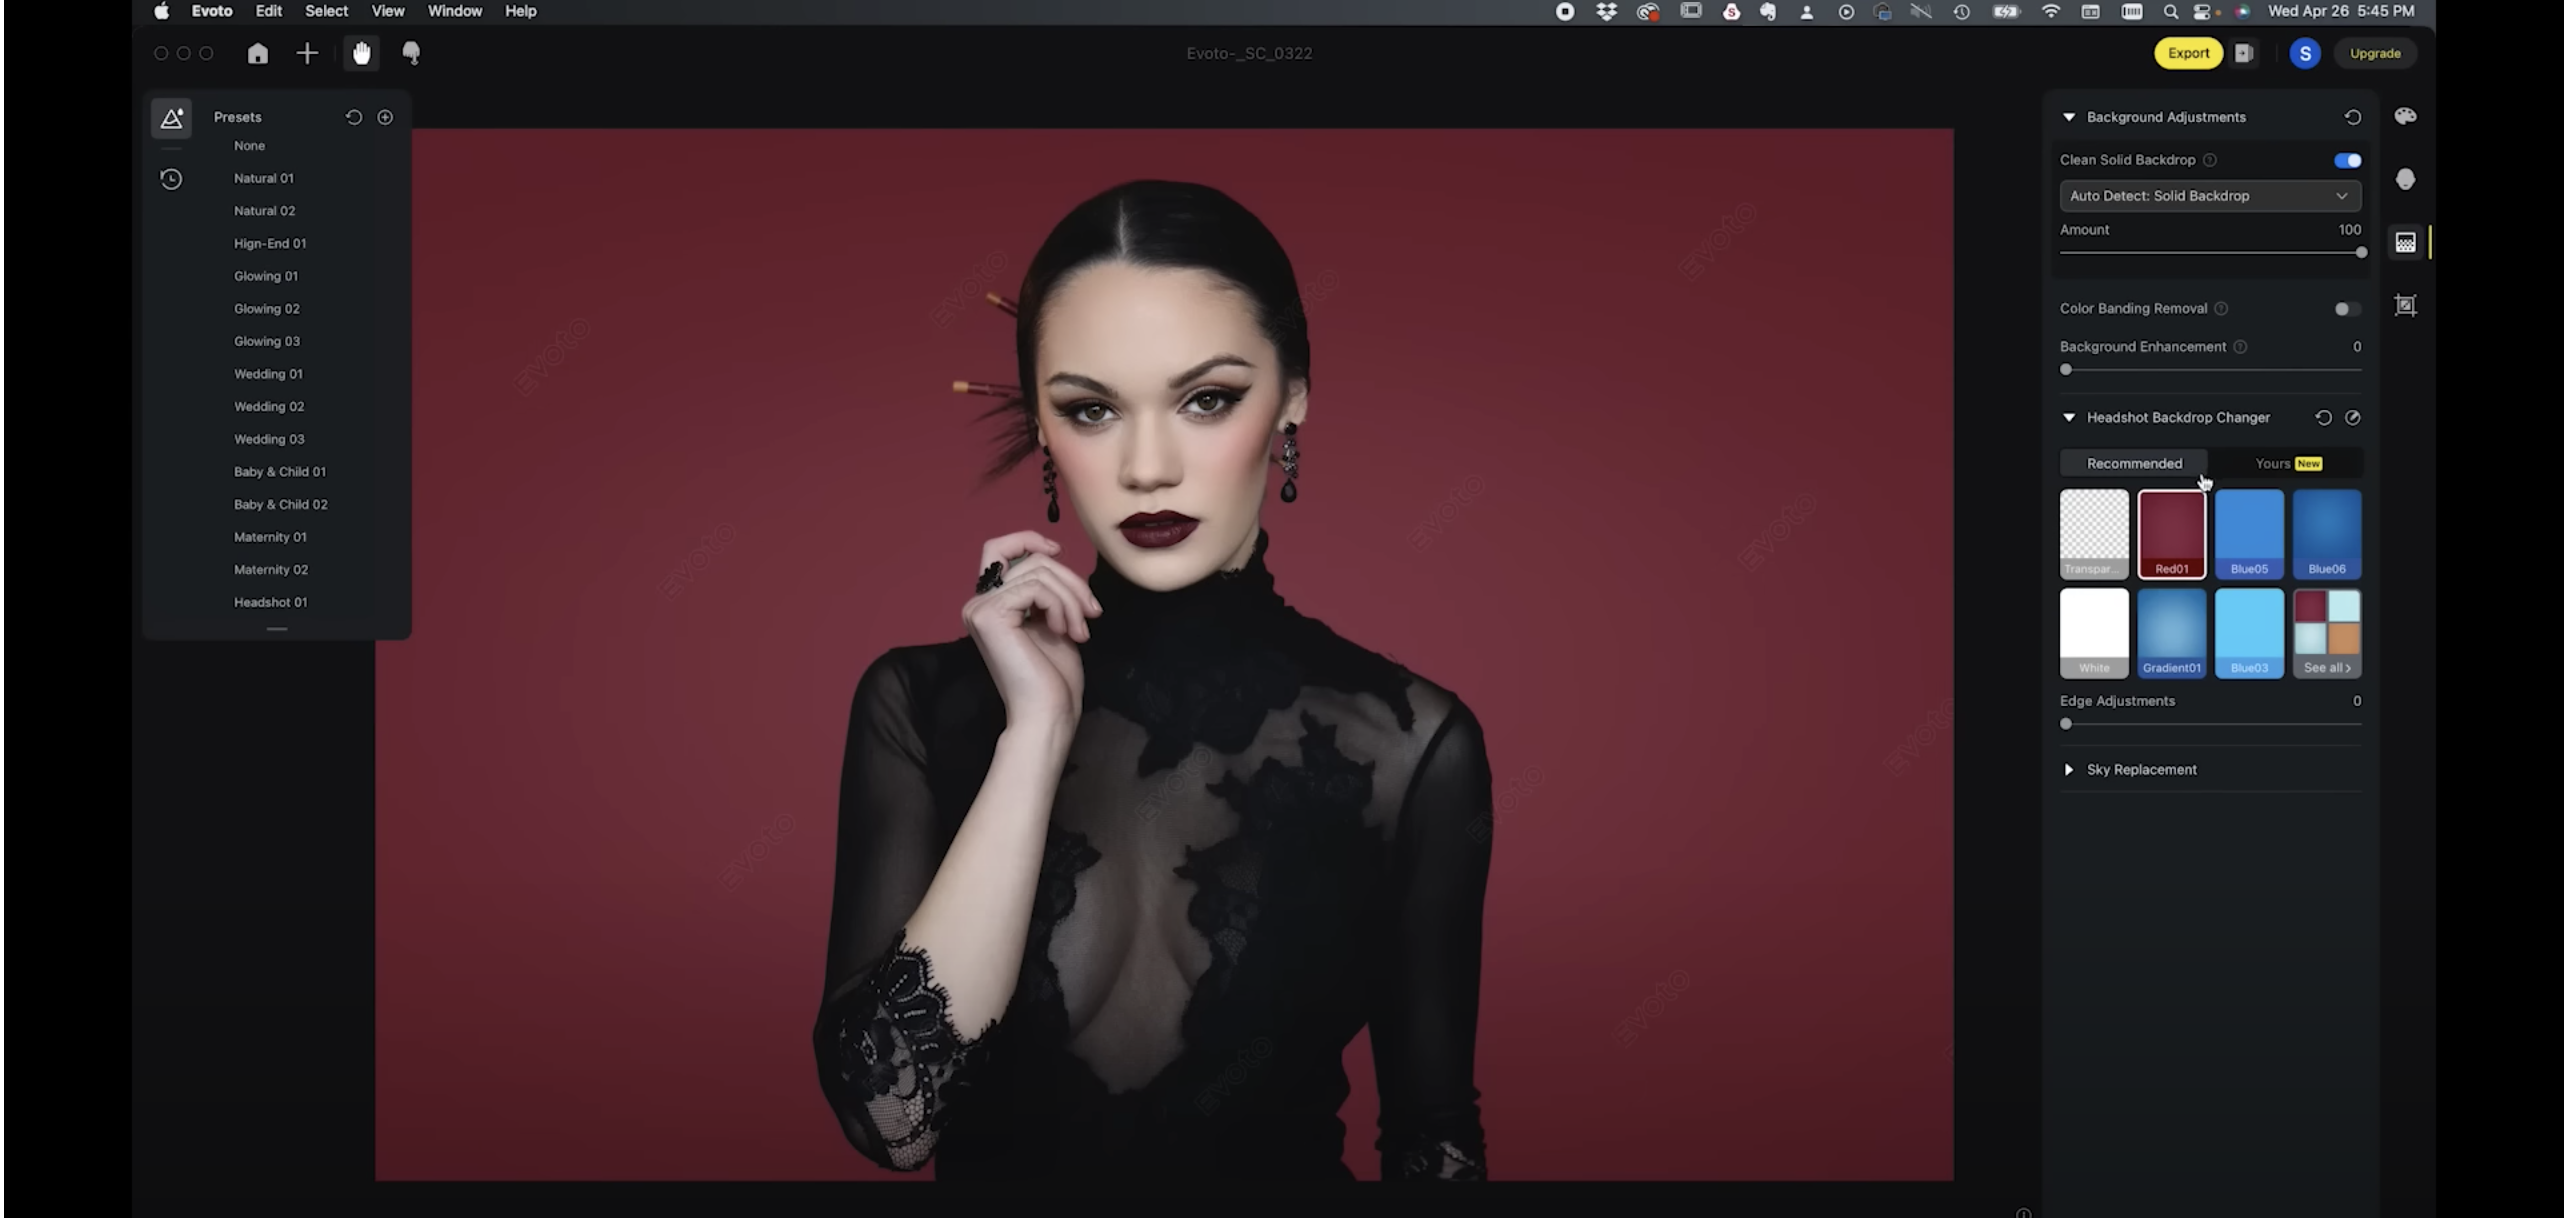
One of the other powerful features of this tool is especially beneficial if you’re a headshot photographer. I don’t want to sit here and edit each individual image. I just want to go through this, and be done, and sync all those settings. Your lighting is the same, right? Blemish removal is the same. Skin softening is the same. This is so incredibly powerful with minimal effort to be able to do this and create something that’s truly unique. Now, not only that, but we can also adjust edge so you have some control over the masking there. You can just put your subject on a white background, a transparent background, etc.
Now, this is also something that’s very important. How many times have you taken a shot in studio, but you need this on something else where it’s transparent? Now we’re doing it very, very quickly. You also have the ability here to add your own backgrounds. So if you wanted to pop this onto another background, you could do that.
Now, this is where things get interesting. You can also do dodging and burning on the face. We can do face skin smoothing, body skin smoothing, kind of smooth out the skin, so the toning matches, right? So what ends up happening sometimes, and it’s not intentional, you’ll do a job, and they’ll have face makeup, but then the chest is a different color, and it doesn’t quite match up. This is kind of an interesting filter here, or dial if you will, where you can actually body skin smooth and get things kind of matching, or skin tone unifying and get that matching a little bit better.
Now we get into face shape. We can make the subject’s face wider. We can start messing with her cheekbones, and some of this stuff, it’s up to you. This is your image, your job, your client. You’ve got to figure out what’s right or not right. Let’s look at her mouth, do we want to make her upper lip a little bit bigger? Bottom lip? That’s all the rage right now, give them little pouty lip, make her mouth a little bit wider, right? That’s up to you. Overall size we can increase.
Now here’s where I would spend a lot of time editing for doing retouching work is just dodging and burning. It’s trying to do this, and it starts shaping the way the face looks. Of course, women do contouring with their makeup, but sometimes we have to enhance that in post-production. That’s why I’m saying this is a more advanced tool. You have to understand this stuff. And so here, this is going to give me the ability to do some of that contouring in this tool. We can make lip color a little more vibrant, but now they’ve got makeup presets, which just blows my mind. My subject’s makeup was professionally done, but we can enhance that. Evoto makeup presets made her eyes pop, and that’s through some dodging and burning where it’s making the eyes just pop off the page.
Now, the cool part about this is once you get a look you want, you can save this as a preset, and you can apply it across the board to all your images. That’s amazing. They also have for full body portraits, the ability to shape the body.
The full body image is straight out of camera. Exposure is a off on this. So now what I’m going to do is raise exposure. Now, ideally, sure, I’d love to be doing this in Lightroom and round trip between Lightroom and Evoto to use it for the beauty retouching. I don’t know if in a future version they plan on doing that or providing that integration, but it sure would be nice from a workflow perspective, because now when I’m done with this, I have to export this.
Pricing is by credit. So it’s going to cost you per image, but at its highest, it’s about 7 cents per image, 6.9 cents per image. They’ll give you five credits free, so you just go click in the link in the description and sign up to get started. Download it. It’s free. I’m working on a free trial, and you can get five credits free to get started to see what it’ll look like, but each image, the more credits you buy, the less it is. Look, you’re doing a job—a wedding, a headshot job, etc. What’s your time worth? This is an easy way for you to save money and quickly provide some impressive results, so keep that in mind that you will have to export out of here to your format to have this image, but let’s keep working this.
What I really want to show you is the impact you can now have with the body shaping, and this is again one of those things where it’s season to taste. It’s up to you. You just need to know what the tool can do, and this is a powerful tool.
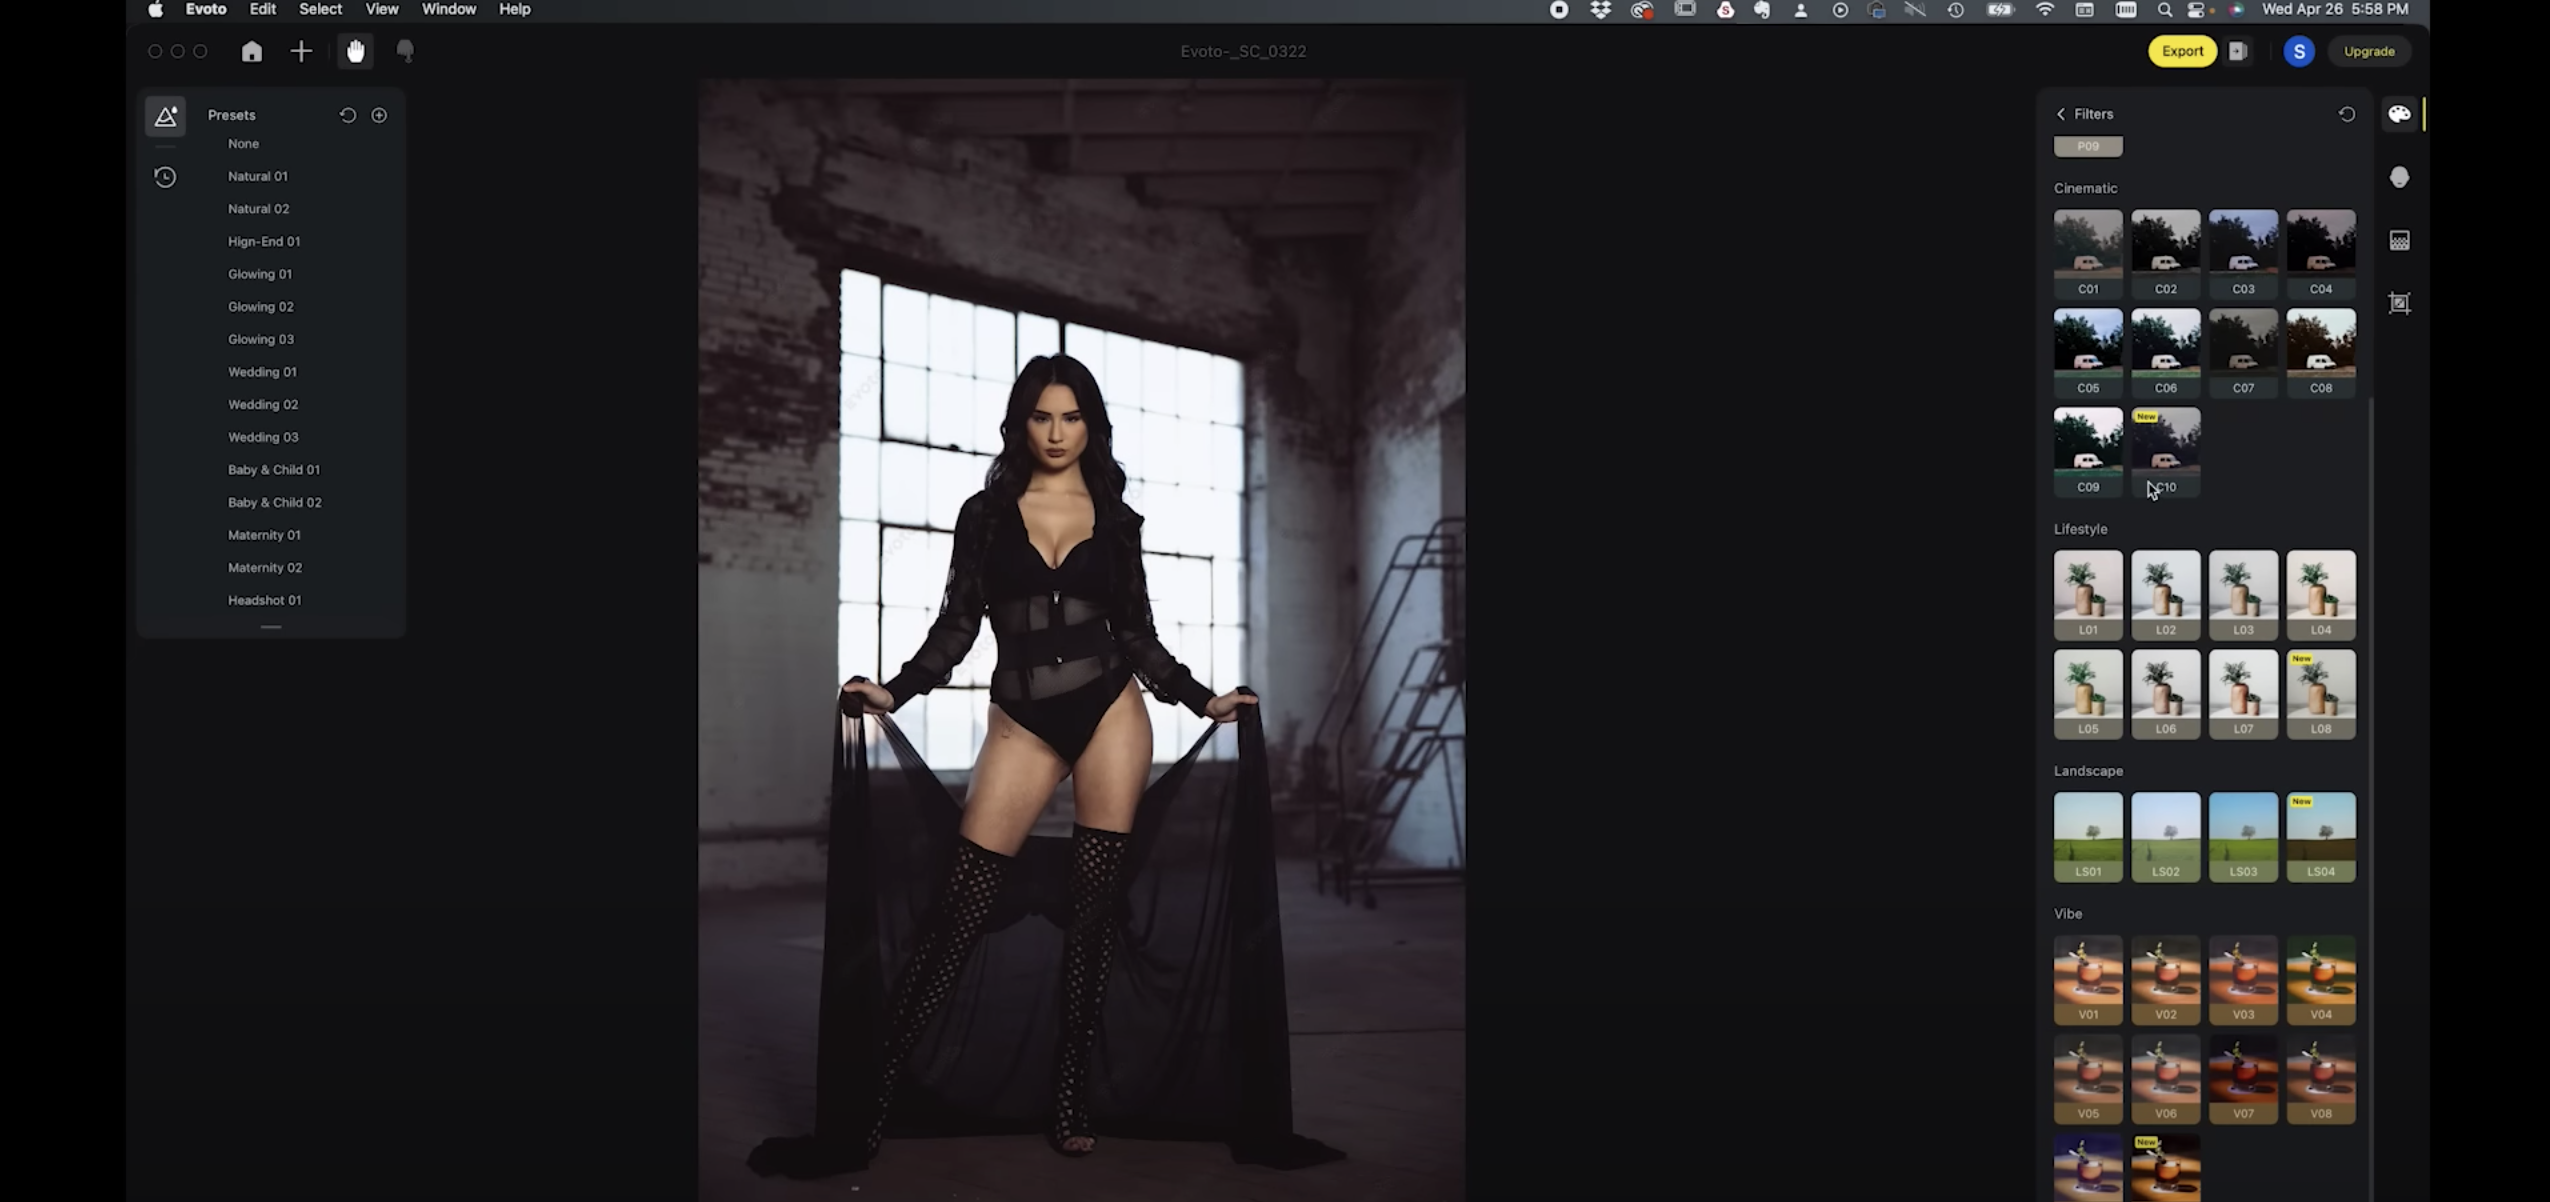
The reason I chose this image is because there’s a lot of things going on. She’s standing in front of a window with crisscross patterns, and if you’ve ever seen really bad Instagram models who are clearly body shaping, you start seeing brick that is being warped, right? It’s kind of funny, and it’s just really bad looking. Well, this handles all those background distractions, including this kind of mesh cape really quite well.
So, what are some of the things we can do? I thought this was pretty cool. Well, you can enlarge their breasts, pull in their waist. We can widen her hips. Slim legs. We can make legs longer. You can control the overall body shape, make her super skinny or super curvy. And so much more.
Boudoir photographers, this is incredible for you guys, especially in the way you work. This is an absolute must-have tool for you, for those of you doing same-day reveals.
From a retoucher’s perspective, this is going to save a lot of time, and I’m sure you can come up in your head with a plethora of scenarios that you can use a tool like this. It’s pennies on the dollar, and it’s going to save you hours upon hours of time. Two thumbs up to Evoto. This is an incredible tool. There are some things I’d like to see better integration with Lightroom, and maybe those presets not wiping out all the things that you’ve already done here for the image, but other than that, this is an absolutely incredible tool that should be in your toolbox. Check it out, I think you’re going to love it.


