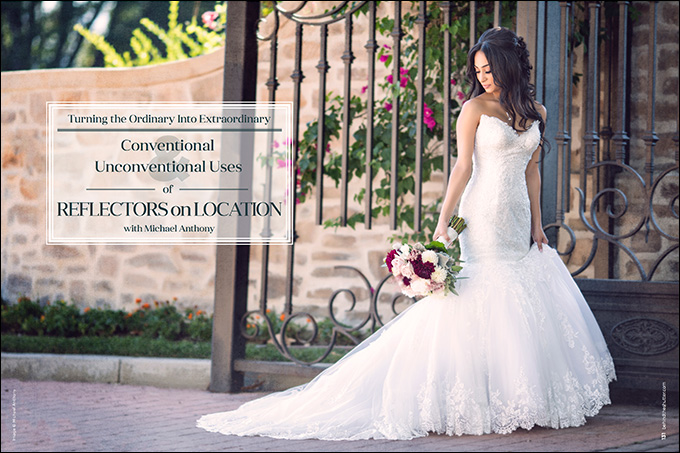
Turning the Ordinary Into Extraordinary: Conventional and Unconventional Uses of Reflectors on Location with Michael Anthony
A 5-in-1 reflector is probably one of the first lighting tools most of us purchase. It remains my most used lighting tool on portrait shoots because of its versatility, portability and ability to make beautiful images. Expensive equipment often means better images, but that doesn’t hold for reflectors.
To get the best use out of this tool, we need to step outside the box and use it in ways that are not always conventional. As with most things in photography, technique matters more than gear.
Many photographers avoid them because of the need for an assistant to operate the reflector on location. The best money you will spend is in a good assistant to help you with lighting. With an extra set of hands and a reflector, you can create beautiful images that your clients will love.
Bouncing Light to Create Directionality
The most common way to use a reflector is to bounce light directly at your subject. I have never been a fan of using open shade as a form of lighting. In open shade, the light has no direction. Now, a general rule in photography is that your subject should be at least as bright as the brightest part of the image (in my work, I want to make the subject the brightest part of the photo). Therefore, I am always looking for dark backgrounds to place my subject in front of. Take a look at this set of images using open shade versus a reflector.
When we photograph brides or grooms on the first floor of a building, there is rarely good light that comes into the room. This is the perfect time to send your assistant (or second shooter) outside with a reflector to put some light back into the room. In this image, my assistant Tiffany was outside of the bride’s room reflecting light back in through the window. Just be careful not to spill too much light back onto the wall.
When positioning the reflector, find some light to bounce from high to low, like we do with strobes. It looks more natural because the sun lights us from high to low. I see photographers using the reflector down low, and reflecting light back up onto the subject. This can create shadows between the cheekbones and eyes; it generally emphasizes age, and is not flattering to your subject. The exception to this rule is when you use your reflector as fill light, which we will talk about later in this article.
Angle in = Angle Out
How you position your reflector with the sun can make all the difference in the light. When using the silver, gold or white side of a reflector, you are creating a “specular reflection” of light.
Remember that the angle of incidence (hitting the reflector) will equal the angle of reflection (bouncing off the reflector). Often we have to put light on a subject at an angle that is off center from the camera. Therefore, it’s important to remember that in order to get the best light, you have to pick the position of your light source carefully to give yourself the best light power for your scene. For instance, if you want soft light on your subject, we all know that we need to have our light source (reflector) close to the subject. If the reflector is too close, and is being lit directly by the sun, then the contrast between your subject and background may be too much. Instead, find light diffused through trees, or bouncing off a bright surface such as a wall.
Using the Diffuser in your Reflector
When light passes through a semitransparent source such as diffusion material found in the translucent part of your reflector, it creates a softer, broader form of light. This is my favorite way to use a reflector. It is essentially like bringing a window with you wherever you go.
There is a technique for doing this just right. First, I find a background that is in shade, ensuring that my subject is the brightest part of the image. Next, I place my subject in direct sunlight and make sure that the composition with the shaded background makes sense. I place the diffuser above the subject, and move it around to shape the light exactly how I want it. This is sometimes trial and error, but ultimately I am trying to create a triangle of light on my subject’s face. By turning the subject’s body away from the light and the face back into it, I ensure that the light will shape the subject in the most flattering way possible. When done right, this technique almost always provides perfect lighting on your subject. Try using a diffuser through a window that has direct sunlight coming through for a very nice effect.
Using the Sun to Create a Perfect Two-Light Setup
One really gorgeous way to use a reflector is to use it to fill in the shadows on a backlit subject. Backlighting is a very popular technique among photographers who prefer natural light. A reflector offers the perfect way to take normal backlit photographs and turn them into beautiful portraits by sandwiching your subject between the backlit sun and the specular reflection from your reflector.
The trick to doing this is to make sure that your sun is diffused by something—tree branches work great. This way, flare won’t enter your lens. Use you lens hood to help reduce flair even further and keep your image as clean as possible.
You can use your reflector to light your subject the same way that you would with studio lighting. Decide on the type of light that will best serve the mood of your image. If you have a second set of hands, experiment with two reflectors. I prefer to keep my light falling onto my subject at a 45-degree angle in most circumstances.
Using Your Reflector as Fill Light
A reflector can be used to fill in shadows in your subject’s eyes or to reduce contrast in a scene. I use a reflector directly underneath my subject’s face for a close portrait to bring some light into the eyes. This gives the face a glowing appearance. You can do this by placing your subject in shade and then using the natural light coming from the sky with the silver side of the reflector. With the reflector this close to your subject, use the white side if needed to reduce contrast if your incident light source is bright. This is the same method used by many studio photographers. It will give you gorgeous results when used outdoors.
Another way to use your reflector is to fill light coming from the direct sun. If you turn your subject’s body away from the sun, and the face back into it, you get a hard shadow around the jawline. Use your reflector to put some sunlight back on your subject, and you will get that three-dimensional glow that can only come from a well-placed reflector.
Use Your Reflector to Remove Light
The fifth way to use your reflector is to use the black side to remove light. If you have a scene that is full of light, the black side can actually give shape to your light by removing it from a scene. You can use the reflector to either block light, or to reduce specular reflection that occurs from either a strobe or from naturally occurring sources. I use this in the studio to create moody, dramatic portraits. In these images, see how using the black side of the reflector can help you create shadow in an image.
Use Your Reflector as a Flash Modifier
So you drive 45 minutes to your shoot, unpack your trunk and realize you left your umbrellas and softboxes at home. Bummer, right? Wrong: You have your reflector. Use it as a makeshift umbrella. When I am packing light, I use the translucent insert in my reflector to modify a speedlight. Keep in mind that your light will spill just about everywhere, so do this with plenty of space so the light doesn’t bounce all over the room.
Another way to use your reflector as a flash modifier is to use the white side to bounce light back from your strobe. It creates a beautiful, soft light. This works best outdoors.
Find Natural Reflectors
Most of our work is done using natural light. We do use a lot of off-camera flash, but the thing we look for most is large sources of light, usually buildings, to use as reflectors. We do around 200 photo shoots a year, and I prefer to stack as many shoots into the same day for time efficiency as possible. Therefore, we are likely not going to be able to shoot at the golden hour all the time. I pick locations that are more urban because there are more buildings to use as reflectors. This is the best type of natural light you can find, because the light source is often much larger than your subjects, creating a beautiful, soft light. For even more gorgeous light, find light reflecting off of a building, and place your subject into a darker environment, such as under an overpass or inside a tunnel. Experiment with buildings that are warmer-toned to get golden tones on your subject’s skin.
This is an alley in an area close to our studio. The large white building inside the red box makes the perfect reflector. By placing the bride close to the building, we get a gorgeous, glowing light on her.
Reflectors are an essential part of photography. You can find a use for them on every shoot. Once you learn to incorporate them into your work, you will find that the reflector is one of the most versatile tools in your camera bag.

