
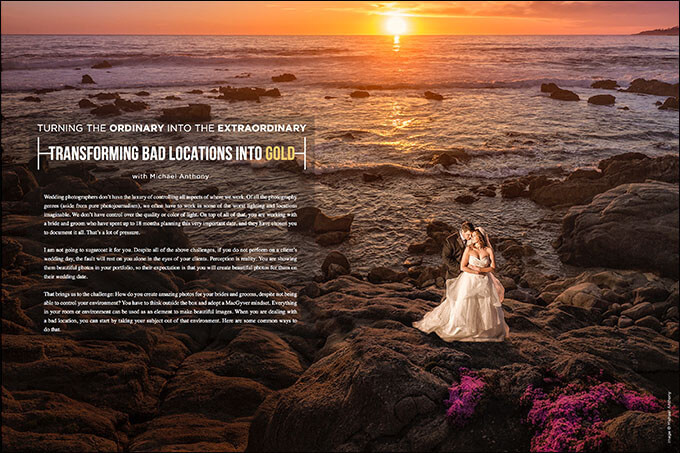
Turning the Ordinary Into Extraordinary: Transforming Bad Locations Into Gold with Michael Anthony
Wedding photographers don’t have the luxury of controlling all aspects of where we work. Of all the photography genres (aside from pure photojournalism), we often have to work in some of the worst lighting and locations imaginable. We don’t have control over the quality or color of light. On top of all of that, you are working with a bride and groom who have spent up to 18 months planning this very important date, and they have chosen you to document it all. That’s a lot of pressure.
I am not going to sugarcoat it for you. Despite all of the above challenges, if you do not perform on a client’s wedding day, the fault will rest on you alone in the eyes of your clients. Perception is reality: You are showing them beautiful photos in your portfolio, so their expectation is that you will create beautiful photos for them on their wedding date.
That brings us to the challenge: How do you create amazing photos for your brides and grooms, despite not being able to control your environment? You have to think outside the box and adopt a MacGyver mindset. Everything in your room or environment can be used as an element to make beautiful images. When you are dealing with a bad location, you can start by taking your subject out of that environment. Here are some common ways to do that.
Example 1
Use light to remove your subject from the distractions.
This image was photographed using a single speedlight placed inside a closet. The church lady was rushing us to get the bride out of the dressing room, and gave us five minutes to make this shot happen. We were able to complete it in less than two minutes because the elements of the photograph were very simple. By bouncing the speedlight off the wall in the closet, we were able to create soft light on the bride. I had Jennifer give the veil some motion, which made this image look like it was created from an open window.
We did not move any of the elements you see in the before image to create this final shot. By just using light where you want it, you can hide elements of an image that are not conducive to your final result.
Example 2
Add light to common light fixtures to create beautiful images.
In this image, we placed the bride under a sconce light. The light on the bride’s face, though, was competing with the actual light source, and was obviously darker, making the light source the brightest part of the image, rather than my bride. I had my assistant use a Westcott Ice Light with a CTO gel to match the ambient light from the lamp, and we used barn doors to concentrate the light on the bride. I had the bride wrap herself in her veil to bring attention to her face, and I turned her body away from the light but her face back into it. This allowed the texture on the veil to show through, and it also lit the short side of the bride’s face. We took two images, and in the final image, we removed the light trail from the Ice Light.
Example 3
Use all of the elements of your environment.
The trick to getting water or smoke to look great on camera is to get your light source behind it. We originally were going to use a can of fog to get this shot, but it was a bit too windy. There was a barbecue close by creating a ton of smoke. I placed the groom with his back to the sun, and the sun spilled some light rays through the smoke. We placed a Profoto B1 with a 2-foot Octa box camera left, and took a low angle with our Canon 11-24mm F/4.0L lens to accentuate height and give him a powerful appearance. You can see in the final shot how all of the elements came together to create a unique and dynamic image.
Example 4
Use abstract elements to create interesting images.
This was a technique I first wrote about back in the 2015 wedding addition, but here we are doing it with lights rather than glass. When we got to this location, the room had very little for us to work with. I noticed the table had a decoration that featured small orange bulbs. I thought that I would be able to use those bulbs to create an interesting foreground element. I placed a CTO gelled flash on the ground pointing upward at the wall to give the groom some separation from the wall. Finally, I placed a gridded flash directly at the groom’s face. We gridded the flash to keep light from spilling onto the wall and washing out the light created from the background light.
When shooting through objects, it’s important to make sure the object you are using as your foreground element is not too bright, or it will detract from your subject.
We keep two sets of battery-operated string lights in our bags: one cooler-toned color and another warmer-toned color. You can get these on Amazon for less than $10, and you can use them for both shoot-through elements and backgrounds for your ring shots and other macro images. Experiment with shooting through water, smoke and glass for different effects.
Example 5
Try these simple setups for ring shots.
I used to stress out about finding the perfect photograph of the wedding rings when I started shooting weddings. Today, we typically photograph ring shots in less than two minutes. A ring shot comprises light, a background and a setting.
I usually start with a background for a ring shot. I look for anything that creates good bokeh. Jewelry or anything sparkly is our best option. From there, I look for a setting to place the rings. I look for a reflection or another sparkly surface, such as a bride’s shoes, purses or, in this case, a glass table (granite works great as well). In this image, we used the decorative pinecones on the center of the couple’s table as a background. Wherever you are right now, look around—I guarantee you will find a surface that will make for a good ring shot.
Camera Settings
Camera settings are extremely important. I usually photograph ring shots at f/8 to f/11. This is crucial to getting that ring tack sharp. Even shooting at F/5.6 leaves me with a lack of good focus. When you shoot at such small apertures, you rarely have enough quality light to get a good exposure. Enter the Ice Light, one of my favorite tools for bridal prep. You can also use standard video lights. Place your lights on either side of the rings, and make sure the light is hitting some of that sparkly background. Experiment with different compositions to get the best result.
Remember, as wedding photographers, it’s always going to be up to us to perform on the day of the wedding. If you consistently show creative imagery in your portfolio, your clientele expects you to provide similar results. Bad lighting is not an excuse that will fly with your clients. Take extra care to make sure you are able to deliver on your client’s expectations.
Understanding how to push your surroundings to the limit requires you to have an extensive knowledge of light—how it behaves and how you can manipulate it to meet your creative goals. You also have to understand how your camera settings influence the final image. For instance, in our shoot-through technique, shooting at a wider aperture produces better results than shooting at F/11. This is because the bokeh at F/2.0 is a lot more pleasing to the eye as a foreground element when the aperture is wide open.
As with most things in photography, the best way to get better is by practicing until you have a solid grasp of the foundations of a good image. From there, you will naturally see the potential in new locations, and you will be able to push them to their maximum potential.


This Post Has 4 Comments
I also don’t see the sample shots.
see above… log in and launch the magazine. 🙂
I do not see the example images.
per the instructions above… log in and launch the magazine. 🙂