
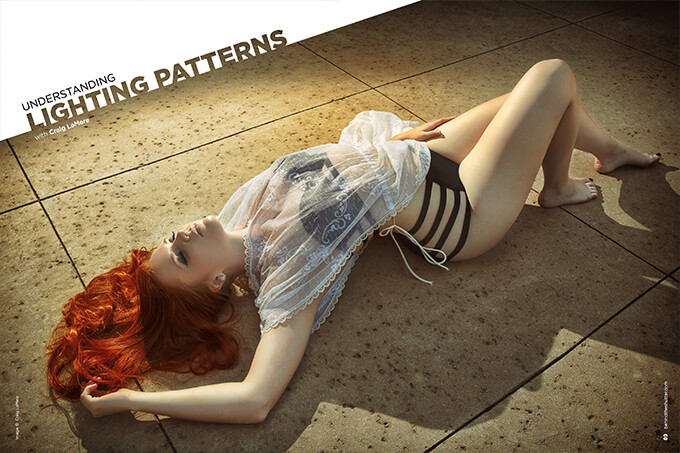
Understanding Lighting Patterns with Craig LaMere
When I first got into photography, I had no idea how much goes into creating amazing images. I thought you were either blessed with artistic talent or you were not, and that is what made certain photographers great and others not so great. Since I have been in the industry for a little bit, I have found that what I thought about talent is kind of true and kind of not true. What I have found out, from all my speaking and teaching I do around the country, is there is definitely not a lack of talent out there. There are some amazingly talented shooters, but what is missing is a lack of fundamental knowledge of the individual parts of photography.
While there is a lot of commonality in the different genres of photography, like composition, exposure and aperture, there are a lot of very specific points of knowledge in the different genres. Landscape photography has certain challenges that product photography does not. Commercial photography has pitfalls that photojournalism does not.
Trying to tackle all the parts in one article would turn this into War and Peace, so this month, I address the basics of lighting and lighting patterns. Understand light patterns and how to use them to convey any mood you want, any look you want, so you become an educated creator and not just a talented picture taker.
Lighting patterns have been around since even before anyone thought it would be a good idea to invent the camera, and have been used by painters forever. I have racked my brain trying to remember where and when I was introduced to lighting patterns, but I can’t for the life of me remember. I just know I was introduced to them or I stumbled across them, and they became the foundation of how I shoot people.
I’m a huge believer in previsualization when it comes to creating images. I feel like I should be about 95 percent sure what my images are going to look like before I ever push the shutter button. When your client comes to you with a vision in mind for their shoot, they expect you to be able to deliver their wants. Some clients might want a soft glamor look they saw in a magazine. Some clients might want a super-badass look like they see with professional athletes in ad campaigns. Some clients might want a very stoic and proper portrait to hang in their office.
Each of these scenarios is very different, and each one has a totally different type of light or different combinations of light to create the look. Over the next few issues, I will cover some of the combinations you can use to create any look you can dream up. This month I lay out what I believe to be the foundation of lighting: lighting patterns.
Split Light
Split lighting is when you have divided the subject into two halves with light. One half is in the light and the other half is in the shadows. The light comes directly from one side and a horizontal plane splits the face or body in half.
When to Use: I use short split lighting when I want a very dramatic and moody image. I either split the face or the body.
General Setup Directions: The key is to not let light that is unwanted spill onto the lit part of the subject. Place your gridded strip light, on a horizontal plane, on the side you want to light, and feather the light just enough to allow one half to be lit. I often add a fill light to bring some details out of the shadows.
Rembrandt
Rembrandt lighting is when the shadow from the nose connects with the chin to create a triangle of light on the cheek below the eye. This lighting pattern is very dramatic, proper and stoic.
When to Use: I use this pattern for elegant, stoic and moody images. I also use it for formal and regal portraits. This pattern should never be used for smiling or laughing images.
General Setup Directions: Place the light to the side of the subject at a 45-degree angle and bring it around till the shadow from the nose connects with the cheek, making a triangle of light under the eye.
Loop
Loop lighting is when the shadow from the nose creates a loop on the side of the nose. This is the most flattering pattern for general use because you are filling both eyes with light and still creating some depth on the side of the face opposite the light source.
When to Use: I use this pattern for glamour, bridals, seniors, older clients and any situation that needs to be bright and soft.
General Setup Directions: Place the light to the side of the subject at a 45-degree angle and bring it around until the shadow from the nose disconnects from the cheek, making a loop shadow on the side of the nose.
Butterfly
Butterfly light, or Paramount lighting, is when the light source is in front and above your subject with the light facing down on the subject. The light is called a beauty light, as the eyes are filled with light, the light is straight onto the subject and any skin flaws are lessened and the cheekbones are hollowed, making your subject more beautiful. The pattern is signified by a shadow under the nose that resembles a butterfly.
When to Use: I use this pattern for headshots, fashion, glamour and when I have a client with really bad skin. I use it to showcase the subject’s face.
General Setup Directions: Place the light in front and above the subject. You will angle the light down until the shadow from the nose makes a pattern resembling a butterfly directly under the nose. You want to be careful of making the angle too steep, or you will make raccoon eyes, which are black pockets in the eyes. Some people do not like how dark the shadow is under the chin on the neck. You can add a fill card under the light and kick some light into the shadows.
Short
Short lighting is considered a feminine lighting pattern since it slims and flatters the face of the subject. In portraiture, short lighting is used on females to make the face seem narrower. Short lighting is usually not used on men in portraiture, since it is not typically pleasing to make a man look slimmer and less masculine. But if you have a male with a large face or a very round one, short lighting may be far more flattering for your subject than broad lighting.
When to Use: I use short lighting for formal women’s portraits when I want to slim, and when I want to give my images power, confidence and depth.
General Setup Directions: Short light is typically shot at a 45-degree angle so you are able to get light in the subject’s eyes. It can be used in a loop or modified Rembrandt pattern. You want the smallest part of the face toward the camera and nose facing the light source so the short part of the face is being lit. Short light is the exact opposite of broad lighting. The easiest way to short light is having the subject turn their face to the light source.
Broad
Broad lighting is in general a masculine lighting pattern due to the width the light creates in the subject’s face. In portraiture, broad lighting is used on males to make them look larger and more masculine. Broad lighting is usually not used on women in portraiture, as it is not typically pleasing to make a woman’s face more broad, especially if they have a larger or round face. The exception being when I’m shooting fashion or glamour and l feel the subject’s face will be flattered by the pattern.
When to Use: I use broad lighting for formal male portraits and when I want to convey power and dominance in my subject.
General Setup Directions: Broad light is typically shot at a 45-degree angle so you are able to get light in the subject’s eyes. It can be used in a loop or modified Rembrandt pattern. You want the largest part of the face toward the camera and nose facing away from the light source so the “broadest” part of the face is being lit.
Rim
Rim lighting is when you use a light to add highlights to your subject. It can also be seen as back lighting, but a true rim light is when a glow is added along the edge of your subject, outlining them in light.
When to Use: I use rim pattern when I want to separate my subject from the background or when I want to emphasize someone’s form.
General Setup Directions: Place the light behind, to the side and parallel with the subject. The height of the light will determine how far up the body of the subject the light goes. The one thing you have to be careful of is bringing the light too far around the front of the subject, or you will put light on the cheek or nose of your subject.
Hair or Separator Light
Hair light is used mostly to separate the hair from the background.
When to Use: This is done in case you have a person whose hair could get lost in the shadow because of how dark the hair is.
General Setup Directions: Place the light above your subject and behind enough so there is no spill of light onto the face of your subject. I do not use hair lights. I find them too confining and restricting. If your subject is static, it works well, but if your subject moves, they can easily be out of position. When I need to separate my subject, I light up the background behind my subject rather than the hair itself. This accomplishes what you need, and it does not hamper the rest of the shoot.
Now that you have the building blocks of lighting, next month we will put it all together and start creating specific moods.


This Post Has One Comment
nice general intro to classic lighting patterns… would be better with pictures of each…