
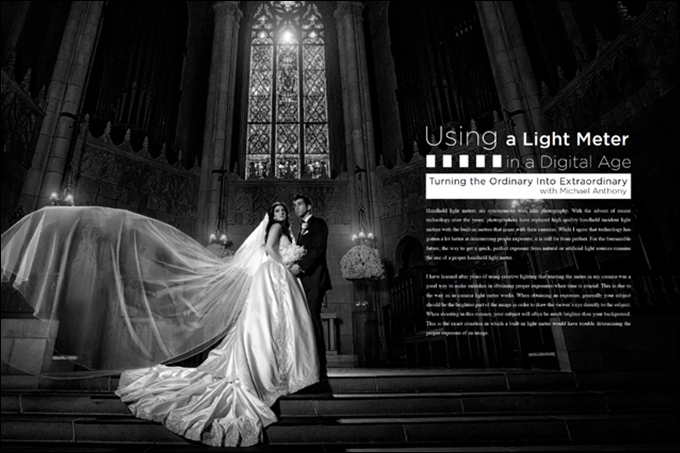
Turning the Ordinary Into Extraordinary: Using a Light Meter in a Digital Age with Michael Anthony
Handheld light meters are synonymous with film photography. With the advent of recent technology over the years, photographers have replaced high-quality handheld incident light meters with the built-in meters that come with their cameras. While I agree that technology has gotten a lot better at determining proper exposure, it is still far from perfect. For the foreseeable future, the way to get a quick, perfect exposure from natural or artificial light sources remains the use of a proper handheld light meter.
I have learned after years of using creative lighting that trusting the meter in my camera was a good way to make mistakes in obtaining proper exposures when time is crucial. This is due to the way an in-camera light meter works. When obtaining an exposure, generally your subject should be the brightest part of the image in order to draw the viewer’s eye directly to the subject. When shooting in this manner, your subject will often be much brighter than your background. This is the exact situation in which a built-in light meter would have trouble determining the proper exposure of an image.
I know what you are thinking: That is what my camera has an LCD screen for. I will be the first to tell you from experience that the LCD will never give you a consistently accurate result. By using a proper light meter, you are able to get the exact exposure the first time, which saves you time in post-production but, more importantly, allows you to spend more time interacting with your clients rather than fiddling with your lights and camera settings, and judging test shots on your LCD. Once you get used to using one, you will find that using your meter makes you a better, more confident photographer.
To help you get started using a meter, let’s look at some basic functions and exactly how to use a meter on an assignment. I asked Sarah, our client coordinator, to model for me. While this is not a stylized bridal session, this is exactly how I use a meter on any paid job. I never leave the studio without it. It is as crucial to producing images to me as my camera itself.
Keep in mind that, to use any of these techniques—especially when metering flash—you should operate your camera in manual mode.
Incident vs. Reflective Metering
There are two types of light meters, incident and reflective. Your camera’s built-in meter is reflective, meaning that it reads light that is reflected off of a light source, and then bounces it through the lens where the internal calculations are made. The problem with a reflective meter is that many other factors—such as backlight, a dark or bright background, or even the attire your subject is wearing—can influence the reading coming off the meter, causing inaccurate readings.
An incident meter, which we will be using today, reads light that falls on the meter itself directly. An incident meter is far more accurate than a reflective meter because of how they work. My meter of choice is the Sekonic L758-DR, which includes many features, some of which we will talk about. An incident meter, when used right, can be trusted to produce a perfectly accurate exposure every single time.
A great practice when jumping into using a meter is to tape the back of your LCD with gaffer’s tape. We did for this shoot because I want you to see how accurate and quick using a light meter can be to meter both natural and off-camera flash. Resisting the urge to “chimp”—or look at your LCD during a shoot—allows you to learn to trust your meter. When you have done it for a while, you will learn to trust your instincts.
How to meter ambient light
Light meters have different modes, usually ambient, flash and radio mode. On a Sekonic meter, switch to the ambient light function, which is a sun icon. Dial in your ISO and either your shutter speed or aperture (depending on your priority for your shot). From there, determine the placement of your subject in relation to the light. Place the meter under the chin of your subject, being careful not to block the light falling onto it. Where you turn the dome of the meter gives you a different result, and should be done based upon your intentions. With a strong directional light source, such as flash or the sun, aim the dome of your meter toward the light source. In even lighting, aim the dome toward the camera.
In digital photography, we want to expose for the highlights in an image because it is easier to bring out the shadows in post-production than it is to recover blown highlights. I had Sarah standing directly in the sun for this image, so I pointed the dome of the meter directly at the sun, which was at a 45-degree angle to Sarah, so that it was giving me the reading directly for the highlights. (Side note: When you have a white dress being lit by highlights, it helps to obtain a reading on the brightest part of the dress.) I then placed the meter under her chin and pressed the read button, which gave me an exposure of 1/2000th of a second, f/4.0 and ISO 100. When turning the meter toward the camera, the shutter speed dropped to 1/1600th, so it is important to make sure that you are metering for your highlights when you have a directional light source for accurate results.
Here are the resulting exposures.
When metering open shade or even ambient light, place the meter’s dome pointing toward the camera. In this set, there was a strong backlight. This is a situation where using a camera’s built-in meter will give an inconsistent result because our subject had less light on her than the overall scene. To make sure she was properly exposed, I took a reading under her chin with the built-in meter, which gave me an exposure of ISO 100, f/2.0 and 1/1600th of a second. My handheld meter gave me an exposure of ISO 100, f/2.0 and 1/500th of a second.
You can see how using a meter gives you a quicker, more accurate result. On a wedding day, time is always crucial, and being able to work quickly and efficiently shows your clients that you are in control of your equipment, instilling more trust.
Metering for Flash
Metering for flash is just as easy as metering for ambient light. Start the same way: Switch to the ambient light function, and dial in your ISO and either your shutter speed or aperture.
For this image, even though we photographed in essentially the same area, I switched my meter to shutter speed priority to keep my reading under 1/250th of a second, which is my camera’s sync speed. I then obtained my reading by placing the meter on the ground, lying in direct sun, because I wanted to meter for the overall scene, which gave me a reading of ISO 50, 1/250th of a second and f/6.3.
Now, this scene had a lot of contrast, and I wanted Sarah to stand out, so I dialed in an exposure of ISO 50, 1/250th of a second and f/8, exactly two-thirds a stop darker than my meter’s reading.
We have determined our ambient exposure. Now it’s time to switch the meter into flash mode. There are two options for reading flash with a Sekonic. First, if you have the “R” version and are using a Pocket Wizard system, you can trigger the flash with the meter by just pressing the read button after placing the meter into radio mode. The other way is to put the meter into flash mode and press the read button. The meter will wait up to 60 seconds for a flash burst, and then will give you your reading. This is the way we use it because we do not use the Pocket Wizard system.
Now, position your keylight and obtain your reading. Your goal is to match your aperture from your flash reading to the exposure you dialed in when determining your ambient light exposure. In this case, I needed to get a flash reading of f/8 at ISO 50. Remember, when metering a directional light source, always point the meter’s dome toward the light source. Even using a powerful Profoto B1 with a 22-inch soft light reflector, I still had to get the light relatively close to my subject to get the perfect exposure.
When metering multiple lights, you can do each one individually. Or, if you know you want even flash exposure, just position each light at the same exact power and the same exact distance from your subject. Modifiers affect power, so plan accordingly.
Using your spot meter
The reason I highly recommend the Sekonic L758-DR is because of its 1-degree spot meter. The Sekonic L478-DR also has a spot meter attachment that can be purchased. We use this meter often on a wedding day because it is more compact. I often set up lighting far away from my subject, so being able to meter accurately at a distance is an invaluable tool.
For this series of photos, we hiked up a hill with Sarah (my brides and grooms actually hike into hard-to-reach places to get shots with us). I brought the B1’s up to the top of the hill and positioned them with one behind Sarah backlighting her and another at a 45-degree angle to her. The lights had the Profoto OCF grid system attached to control spill.
To use the spot meter on the Sekonic, turn the eyepiece ring to Spot Meter mode. Look through the eyepiece, and use the small circle to determine the exact area where you want to obtain your reading. This works in ambient or flash mode.
I then went back to the bottom of the hill and used the Sekonic’s spot meter to give me a reading of the sky close to the horizon line (where it was brightest at that time of the day). I got a reading of ISO 50, 1/250th of a second and f/8. Using the same thought process as before, I underexposed the sky one stop and dialed in the exposure at f/11. Now comes the really cool part. I then used the spot meter to determine exposures for the flashes.
As my assistant changed the position of the lights in order to better serve the composition of the photograph, I got new exposures without having to climb up the mountain again. Using the Profoto Air TTL-C remote, I adjusted flash power. (I make the exposure decisions myself because I want to be in full control of the final outcome of an image.)
Determing flash/ambient ratios
Photographers new to flash photography often obliterate the ambient light and overpower it with their flashes. While this look can be great, keeping a balance between flash and ambient lighting is almost always better. In fact, when I purchased my first light meter, it was because I wanted to be able to determine the exact percentage of ambient light to flash light without relying on my camera’s LCD.
When you blend flash and ambient perfectly, your flash looks like gorgeous natural light, and not at all like flash. For this image of Sarah, I metered the ambient light at 1/250th of a second, f/4.0 and ISO 160. I then matched the ambient light and adjusted my flash power to expose at the same settings. The meter gave me a 50% flash-to-ambient ratio. I matched the flash exposure to the ambient exposure, with the intent of adding a direction to the flat light source.
Take a look at the difference in the light of this image: While one is flat and even, the other has a direction to it, giving it a unique look. This image was photographed with a Profoto B1 and a 22-inch soft light reflector.
Effective metering on a shoot
So how do you use these techniques on a shoot without slowing down the pace? Isn’t it easier to take test shots and adjust?
Let’s look at this from a time and workflow perspective. In the beginning, you will work at a slower pace because you are learning. Over time, you will be just as confident with it as you are adjusting your camera settings. By obtaining readings over and over again, you will already know what exposures look good in different situations. By using solid information to determine your exposures, you will eventually become a master of lighting. You will understand how to create images that look amazing every time you push the shutter button. And you will be able to do it in a matter of seconds.
In the beginning, though, you will still save time because you will be taking fewer test shots and doing less correction to your exposures in post-production. Your clients will also appreciate the work that goes into creating these images. If you were the client and your photographer was creating your image based either on trial and error or by competent use of a tool, which method would you perceive as more professional?
Perception is reality. The perception of professional competence justifies your fee.
Be sure to watch the video attached to this article to see more about how to practice without an LCD.


This Post Has 3 Comments
I appreciate the article. What do you recommend as a “advanced not quite professional” light meter? $600+ for a L758 is a bit nutty for my budget.
Hi David! I really love the Sekonic L-478D. It is only $285 from the large camera stores. It is compact, and easy to carry with you. In addition, the software inside is updatable and has already experienced impressive updates since I had our first one a few years back. When budget allows, you can add the spot meter attachment for only $99. I use this meter often on a wedding day because it is so compact and easy to carry. Let me know if you have any other questions.
Thank you so much! That’s a lot more pleasing to this starving artist’s budget. 🙂