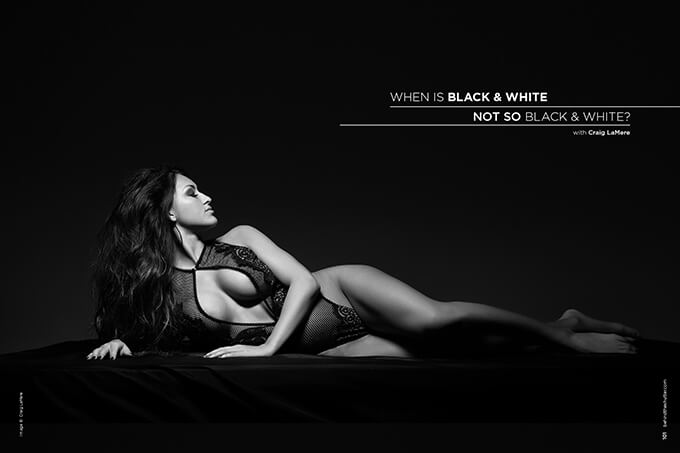
When is Black and White Not So Black and White? with Craig LaMere
When is black and white not black and white? Answer: Always. A lot of shooters oversimplify the black-and-white imagery they create. Because of this, a lot of black-and-white images are pretty average in quality.
When I say “oversimplify,” I guess a better way to put it is a lot of shooters are very lazy in their approach to black and white. Most new shooters think of black-and-white images as nothing more than desaturated color images, which is not the case.
For me to create a killer black and white, there are a number of factors I take into consideration that help me create a by-design black and white rather than just desaturating a color image. This month, I show you how to create even better black-and-white images.
Most of the time when people are shooting for black-and-white in studio, that is the order they think in: black, then white. That is fine, but there is a better way to think depending on the end result you want. If my final image is going to be predominantly white, then I think in terms of white as the main with black as the secondary. If black is going to be predominant, then I think in terms of black as the main, white as the secondary and the variety of gray tones as the filler on both. When white is the main, I watch out for the highlights since it is easy to let them get away from you and start to blow stuff out. When black is the main, I watch the shadows like mad so I don’t start to clip or, worse, start to blend into the background.
White and Black and Not Black and White
Let’s say I’m going to shoot an image on one of the white walls in my studio. I have a couple of decisions to make that will affect my image greatly. Some of the decisions are what I consider to be my universal decisions. These universal decisions are ones I make with every image. One way to think of these choices is that they are the main ingredients in a dish: focal length, crop (is the image a full length? half? tight headshot?) and f-stop. Once I have the fundamentals of the image worked out, I begin to think in terms of the final look. If I want a bright white image, there are three shooting options I typically use.
High Key
My least favorite option—and the most boring one—is to light the wall up and then shoot my subject. This method is traditional high key. You take a couple of lights, one on each side of your background, and try to evenly light the drop, which is a pain in the ass. You have to get the perfect spread of light. The only way I know to get even f-stop across the drop is to meter. You have to meter all over the drop to make sure you do not have hot spots. If you are not a light meter user, this is not good for you at all. Another downside is that you need at least three heads to shoot this way.
Using a Softbox as a Drop
My next option I have used only for creating silhouettes, and it works really good. For this you need at least a 3×4 softbox; a 4×6 softbox works best. This is super simple and gives you killer results.
Put your subject in front of the softbox and shoot. Because your subject is so close to the light source, the light softly wraps and fills in any spaces on your client. You can regulate the amount of detail in your subject by adjusting the f-stop relative to the power of the strobe. To get the best idea of what your final product will look like, turn your camera to mono mode so you are seeing black and white on the back of your camera. Moving to mono lets you see what your highlights are doing.
In white and black, you have to watch your highlights. It’s easy to blow stuff out. The most important thing to know when shooting in mono is you have to shoot in Raw. If you shoot in JPEG, your image has no color information. When you shoot in mono and Raw, it displays only in mono. When you open the files later, all the color information will be there. I’m sure you could use this method in conjunction with a keylight and get sweet results.
Distance to Create Light
The third option is the one I use the most because it is the most versatile. I place my subject very close to my drop and use either a wide light source or a narrow harder light source. My two go-to modifiers when shooting strobes for white and black are my 28-inch Mola Setti and my barn doors.
The key to getting a white background using one light is distance. The closer your subject and your light are to the drop, the whiter it is going to be. The farther away you get, the more gray your image will be. What I like about this method is I have a ton of control. If I put the mod straight on, I get more flat high key, and if I move the mod, I get nice directional light, and can use the shadow as part of my image. The difference in the two modifiers is that the beauty dish gives more even soft light and the barn doors give more directional, harder light.
Black and White
Shooting for black and white is a little simpler to me because it is way easier to manage shadows and the darkness of the background than it is to manage the white scenario. When shooting primarily black in the studio, I use one of three setups. Each is easy, and each gives you very different looks.
Distance to Control Light
All the walls in my studio are white, so it’s easy to get the spill from any lights I shoot to get to the wall and boost the ambient. So when I want a very dark image but I want more of a dark gray background, I don’t use any drops. I use distance from the wall to determine the light and darkness in the image. When shooting like this, I use strip lights or small softboxes to control the amount of light reaching the walls. I bring the light across instead of shooting at the subject to try to control the amount of light that becomes your ambient. I never use a second light with the setup, but if I need a little more detail, I use a white or silver reflector.
Muslin Better Than Seamless
If I want a pure black background, I shoot using a black drop. A lot of people like to shoot on black seamless paper. I’m not a huge fan of seamless. The main reason is I don’t have a backdrop system, so I have to take the paper up and down every time I shoot. I’m pretty much a one-man show, so that is a big pain in the butt; most of the time I tear it or put a crease in it, and then have to cut it and start over.
My solution is to use unpainted black muslin, which I also used for my hand-painted drops. It is light because it has not been painted. You can fold and store it easily, and you just hang it, spray it with water and boom—a wrinkle-free drop in less than five minutes.
Another reason I like muslin is because of its ability to suck up light. Unless you are right next to the fabric, you are not going to get any reflection or hot spot from the drop; this allows you to be creative and shoot multiple lights a lot easier than on other drops.
Thinking in terms of black and white and white and black has helped me create better images. Separating the two has helped me identify issues faster and see the final image in my head better. I hope some of these tips will help you take your black and white or white and black images to another level.