
Why You Should Intentionally Shoot For Black & White with Nino Batista
So, let’s start with a quick poll: Raise your hand if you’ve ever pulled all the color out of an image in post-production because you simply didn’t know what else to do with it, and making it black and white seemed like the way to go. Your hand better be up, because we’ve all done that. That is testament to the lack of respect we often give the genre of monochrome photography. If changing an image to black and white is a careless afterthought, what are the chances that you’ve created a monochrome masterpiece? When we change our mindset from “I don’t know what else to do with this so black and white it is” to “I am going to create black-and-white photos today when I shoot,” a radical thing happens: Your monochrome images become more focused and striking.
In the world of film cameras, black and white is seldom an afterthought. You simply start with black-and-white film and you set out to make black-and-white images. Easy. Before color film was prevalent, most photographers created monochromatic images exclusively, whether you were Ansel Adams or my grandmother in the Bronx with her Brownie. Black-and-white film wasn’t a limitation that was finally resolved with the invention and widespread use of color film. It was an art form unto itself—and still is.
There’s a very good reason for that: Great black-and-white photos are not as simple to create as they might seem.
Don’t Get Lazy
Digital photography affords us the luxury of making an image black and white after we’ve shot it in color. While this is clearly convenient, it has also become a crutch for the modern digital photographer. Too many times we convert to black and white out of frustration with color issues, boredom or to post both color and monochrome versions of the same shot to social media while asking the question “Which do you guys prefer?”
All of this does an injustice to the art of black-and-white image making.
Setting out to shoot for black and white simply by changing your mindset to the idea of doing it intentionally is the first step to crafting great monochrome images. Thinking about value alone, with no real consideration for hue, is often liberating when you first set out to deliberately shoot for black and white on set. You should be thinking about shadows, highlights, textures and specularity when shooting for monochrome.
Overall contrast is paramount to just about anything else in black-and-white images, as there are no colors to create separation, interest or dynamics in your shot. Everything revolves only around the interplay of black, white and millions of shades of gray. Style your shoots, your sets and your wardrobe with mostly contrast in mind, and you’ll be far happier with your monochrome work.
Are you using monochrome preview mode on your camera on set? Every camera brand has a slightly different way to go about changing this, but seeing your shots fully desaturated on the back of your camera helps immensely when you are envisioning your black-and-white project on set. This makes a big difference in previewing your intentionally black-and-white projects. And don’t panic—the Raw files will come into your computer in full color, as usual. Hence the term monochrome preview mode.
But simply desaturating your image is the most limiting way to make it monochrome in post-production. There are so many subtle (and not so subtle) possibilities in changing your color Raw files into black and white.
Black-and-White Conversion
You’ve likely used the black-and-white function in Lightroom or Capture One Pro, or the black-and-white adjustment layer in Photoshop. If you haven’t, give them a try. If you’ve used them with success before and wished you had even more control over how the value shifts occurred across your image’s hues, there are some additional tools at your disposal.
These are the same tools that have always been there. You may not have thought to use them before when converting to black and white simply because you weren’t thinking about color and overlooked them.
It all starts when you realize that the black-and-white function in Capture One Pro, for example, changes every hue in the image to its equivalent value in grayscale actively and nondestructively. But did it occur to you to go to your Levels function and shift the sliders in each of the red, green and blue channels or the red, blue and green channels of a Curves adjustment? As you shift the midpoint around on the red channel, for example, your black-and-white image starts taking on new possibilities that you may not have realized were possible.
In Photoshop, try adding your Black and White adjustment layer on top of a Levels, Curves, Selective Color or Color Balance adjustment layer. Anything you modify on any of the color modification layers below the black-and-white layer starts to affect your monochrome image in new and cool ways. Experiment with these until you start finding looks you enjoy, and see how your black-and-white converting advances overnight.
I like to do most of the heavy lifting of black-and-white converting in Raw. Whether it’s Lightroom, ACR or Capture One Pro, major shifts to your image should always be done in Raw for the smoothest results. Black-and-white converting in Photoshop via adjustment layers can get great results, make no mistake. But getting your head around black-and-white conversion in Raw (even if you do further contrast tweaks later in Photoshop) will give you the most control with the best results, no matter how wild your creativity.
What’s Old Is New
While monochrome photography was simply the only kind of photography possible at one time, it has persisted well past the invention of color photography—for good reason. Monochrome images evoke a unique response from viewers, whether it’s a vintage vibe or a dramatic flair that color images simply cannot reproduce.
Despite the oddly persisting myth, color blindness in humans is not the inability to see color, but instead the inability to differentiate between (usually) two complementary colors. Since almost all humans see in color to some degree, a black-and-white photo is a literal depiction, or capture, of reality in an unrealistic way. This alone creates interest in monochrome images by showing us our world in a unique manner.
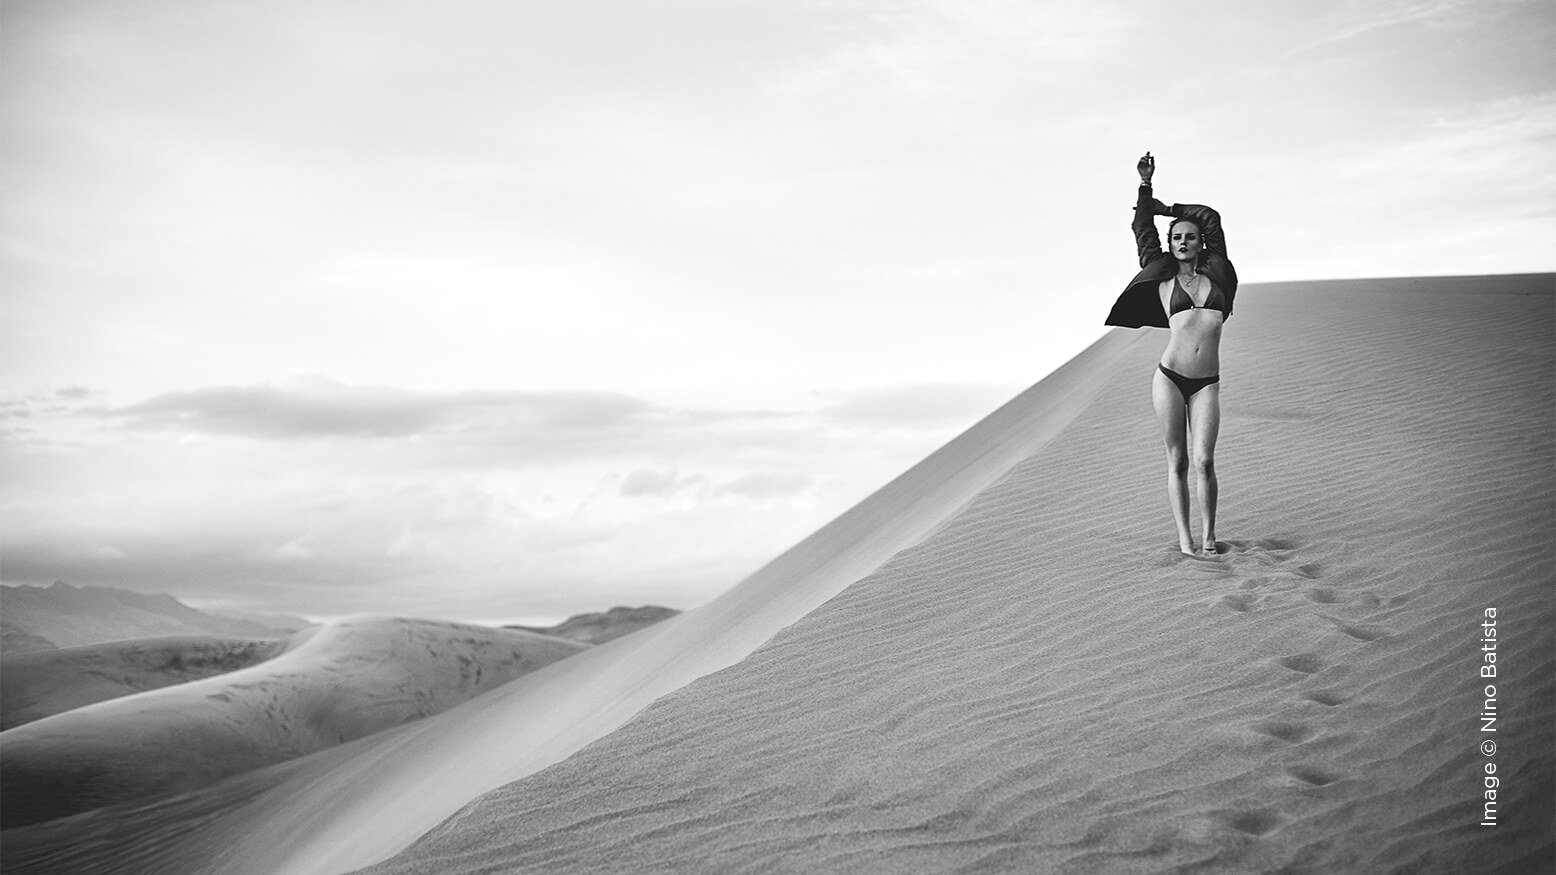
Black-and-white images have more intense shifts in contrast and texture because any adverse affects that these radical changes cause to the image’s colors simply do not matter. This was the deciding factor for creating a new ongoing project I am doing with Josie Fox entitled “El Camino Encantado,” which is exclusively in black and white. Apart from the mood that monochrome gives the project, it also gives us a little more freedom to create in
almost any lighting scenario or location because there are no color considerations to worry about. Naturally, I start shooting with monochrome in mind, and all I generally worry about lighting-wise is contrast. (Find out more at http://www.patreon.com/josienino.)
Summary
Don’t let black-and-white photography be that incidental afterthought. If you have to desaturate an image and then post the color version and monochrome version to social media to see what others think, you probably didn’t set out to do black-and-white photography with enough intent. If you want to flip over your desk because a shot’s color isn’t cooperating with you in post and you converted to black and white as a quick fix, again, you probably didn’t set out to do black-and-white photography with enough intent.
Happy accidents notwithstanding, craft your monochrome images from planning to shooting to editing with a deliberate focus, and watch your black-and-white work change overnight.


