
10 Must-Have Shots on a Wedding Day with Phillip Blume
I answered her, and my heart broke. I saw the disappointment on her face.
“I’m sorry. No, we didn’t take any full-length bridal shots of your daughter alone. But look. Here are several good full-length images of the bride and groom together,” I said, trying to lighten the mood. I mean, is a solo bridal shot really such a big deal?
Yes, often it is a big deal. Getting those must-have shots is a skill we, the Blumes, have learned the hard way over many years and hundreds of weddings. If you want to succeed in this industry, it’s all about surpassing clients’ expectations.
But I messed up. As a result, I broke a chain, a chain I didn’t even know existed: four generations of full-length wedding-day bridal portraits that hang side by side in that family’s home. True, no one had told me. But they also weren’t wrong to expect a full-length photo of the bride.
It’s too easy to let our ego get the better of us.
“My clients should know my style and what they’re getting.”
“I shoot what inspires me. I don’t accept a shot list.”
“They hired me for my creativity, not for standard shots anyone can take.”
“The bride and groom are my clients, not the mom.”
Thankfully, this particular mother-of-the-bride was gracious. She recognized the high level of service we provided and even appreciated our nontraditional style. But I know she still felt disappointed. So did I.
(And by the way, if you’re not as sensitive to the intangible, consider this: She also left our studio without purchasing the giant bridal portrait she’d already budgeted for.)
I’d like to spare you disappointment. So here’s my Top 10 List of must-have shots every wedding photographer should remember—and how to make them great.
10. Important Details
If you asked me what our style at The Blumes is all about, I’d say it’s about people, not things. But you better believe we’ve taught ourselves to get fantastic detail shots, too. Even if you don’t specialize in product photography, don’t neglect this skill set.
I never feel the need to shoot a catalogue of details. Early on, I felt obliged to photograph every tube of lipstick and gift bag. I just didn’t know what was expected, and I didn’t want to miss anything. Now I don’t waste my time on most objects. But I know how to find important story elements.
Start before you pick up your camera. Send your clients a survey that asks about any personal details, and guide them to what you’re looking for: “Will you have any meaningful items we should know about? Something borrowed or blue? An heirloom veil or jewelry? Personalized cufflinks or wedding gifts to each other? (Email me separately if it’s a secret.)”
I ask the bride to have these objects with her while she’s getting ready, and I photograph them first when I arrive. It also gives me time to build a comfort level with the bridal party before I stick a camera in their faces.
When the answer is “No, we’re not concerned with details,” then I’m free to focus more on portraits without disappointing anyone. But I always get a few shots of the wedding rings and dress before they’re wearing them. For close-ups, a specialty lens (like a 105mm macro) is worth the investment.
And we all know the value of detail shots for vendors, right? It’s cliché but true: If you take the time to share reception details with the florist and planner, you’ll be one of the few who actually does. Brownie points. You don’t have to shoot everything, but shoot it well. Use a long lens (85mm or higher) and off-camera flash set at 90 degrees to the table/centerpiece, and you’ll blow them away.
Your wedding albums will suddenly be easier to design too. Your clients spend a lot of time and money coordinating their details—now your book benefits from their styling, tying the photos together. Take advantage of it.
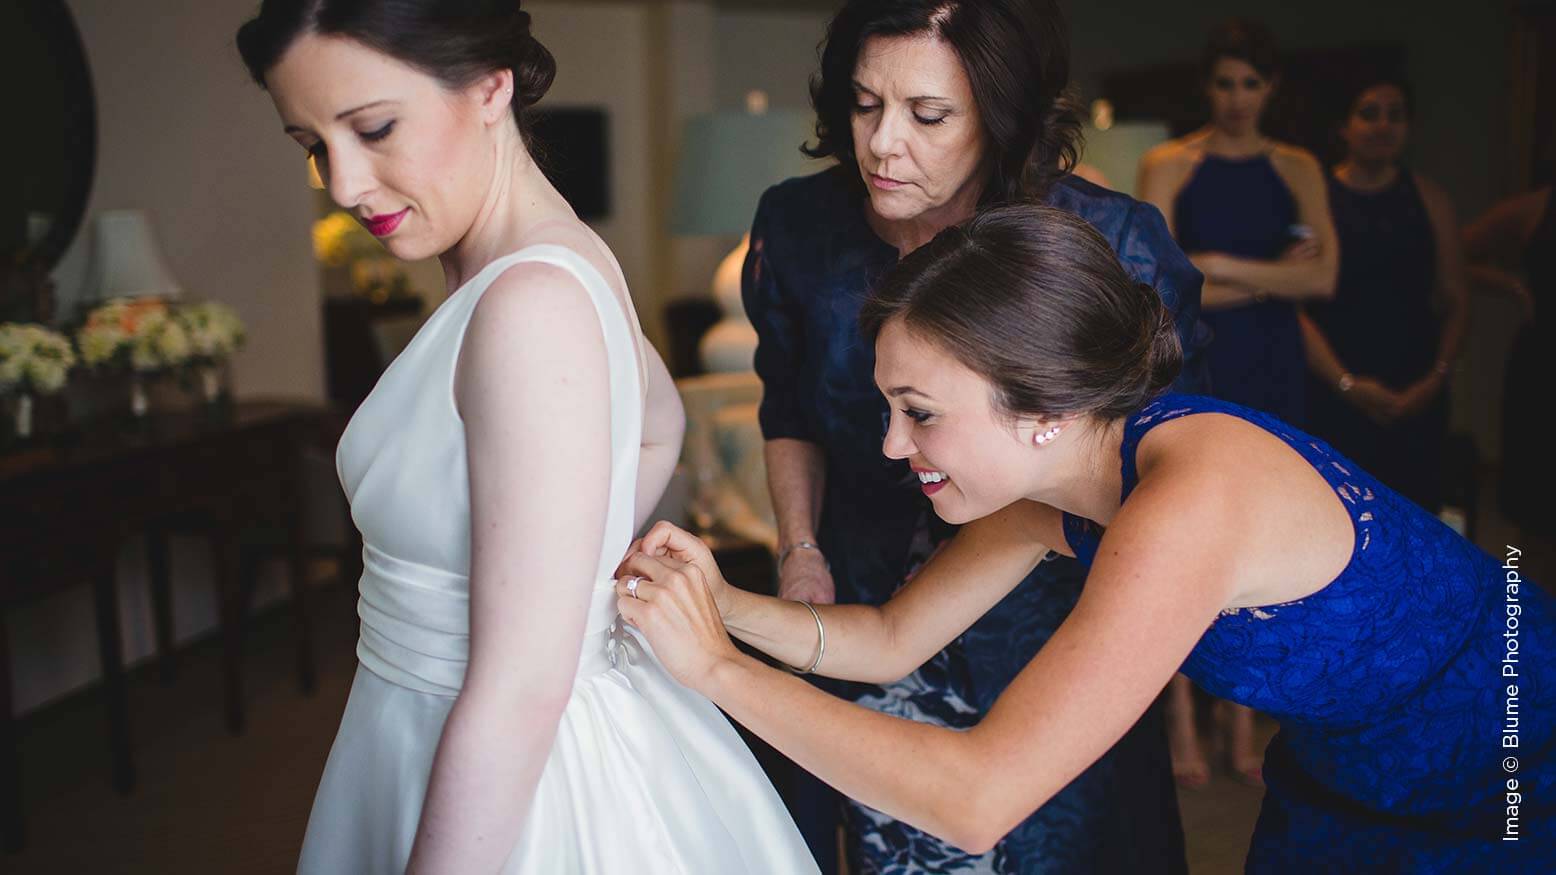
9. Putting On the Dress
I’ve had several brides tell me, “I don’t want a photo of the dress before I put it on. It always looks kinda spooky.” Have you heard that? They’ve likely seen too many backlit dresses in front of hotel windows on Pinterest shot at wide angles like a hovering ghost. There’s a right and wrong way to shoot the dress.
Why not humanize your dress images? We ask the bride to approach her dress alone, then touch it and take a moment to soak in the memory of it so when she’s 80 years old she can remember how it felt. Voilà—emotional images that mean something to your bride.
Next we avoid awkwardness by asking in our survey, “Who will be helping you into your dress?” Traditionally it’s Mom. But sometimes the bride just wants her sisters or bridesmaids to do it. We gather the right people and get a series of storytelling images. Never hesitate to tell your clients where to put on the dress. We always move brides into window light, and have even walked to other rooms or buildings for a better dressing environment. Clients rely on our expertise.
Get in close for every helping hand and button, but avoid unflattering close-ups of arms in the foreground. Now twirl around for the reaction shot of everyone’s face.
8. First Look With Father
Some dads show emotion. Others don’t. Either way, if the bride plans this traditional moment, you can bet it’s important to them both. Get it right.
It’s wonderful when two photographers can cover dual reactions. Just be sure you observe the 180-degree rule: both of you on the same side of the action so a photographer is never in the background. Or if I’m alone, I get Dad’s reaction first. If he’s the type to hide his emotions, this is the millisecond when his expression is authentic before he starts to suppress it. Then I can turn to the bride for her reaction, then the wide shot as they come together. This all takes less than a minute—make sure it’s part of your schedule, not happening randomly when you’re on a potty break.
7. Bridal Party Solos
Let’s assume you’re always taking bridal party portraits already. Do you know how quick and easy it is to get a single headshot and “buddy shot” with every single member? It doesn’t matter if there are 20 bridesmaids. It’s fast.
You’ve just finished a lined-up pose with bouquets in hand. Now ask everyone to space out to an arm’s length between them. All you have to do is walk down the line snapping a sassy personality-filled portrait of each bridesmaid. It’s that fast, and you’ve provided a great service: individualized attention for all those potential clients. Additionally, our couples often like an extra Brady Bunch-style spread in their albums, a grid with all these fun, expressive shots.
Even if they don’t tell you, most brides and grooms want a buddy shot alone with each member of their bridal party, too—something to include in a thank-you note later. So now invite the line of bridesmaids to join the bride one at a time. A quick snap each, and you’re done. If there are siblings or roommates, knock those out now, too. Just be ready to capture all their inside jokes and antics together.
6. Couple Portrait Solos
Now you’ll begin to notice a pattern (and I’ve already described the heartache you can cause by leaving out this particular shot). When you have your couple together for portraits, don’t forget that they are also individuals. If the groom pretends to be too humble to want an individual portrait, remind him he will want a timeless portrait of his bride as they grow old together. So will she of him. And so will their parents.
Let the bride spin in her dress like she’s a 6-year-old girl playing dress-up. Get those full-length shots that highlights the front and back of her dress. Let him go GQ for a minute, looking off into the light while pretending to fasten his watch, then turning to stare you down in camera. Boom. You got it.
5. Thoughts and Prayers
We always get our couple tucked away an hour before the ceremony, when guests start to arrive. So there’s a lot of waiting around, but it’s not break time.
You’ll want to begin with guest arrival photos (or have your second shooter do it). These are some of the best interactions of the day—even better than the reception, when you likely have better lighting and friends are greeting each other for the first time in a while.
Closer to ceremony time, though, when more people are already seated, return to the bridal room. A lot of meaningful moments take place as the big moment draws near. This is when I see parents finally overcome with emotion, or a bridal party gather around their friends to pray for them before they begin their marriage. You can plan your ceremony shots later. This is more important.
4. Coming Down the Aisle
This may be the single most anticipated image your bride has had in the back of her mind for years: “How will he look at me when I’m coming down the aisle?” I don’t leave this to chance. Before the ceremony, this is what I tell our grooms: “When she’s walking down the aisle, don’t get distracted. Don’t take your eyes off her. She needs to see how excited you are. So mouth, ‘You’re beautiful’ or ‘I love you.’ It’s all you. Just don’t freeze or forget.”
And you thought great wedding photography was candid? No. A good wedding photographer is a master director. Follow her down that aisle (at least briefly—I don’t care what the church lady said) and get his reaction over her shoulder.
3. The Kiss
I almost never see the kiss coming. It’s my bane. Officiants think of so many new, cutesy, original ways to say, “You may now kiss your bride.” I can’t stand it. But I know this. Without the kiss shot, my ceremony images are incomplete. So I run like crazy to get all my desired angles early in the ceremony. Then I’m back at the center aisle for that clear shot well before it happens.
2. Family Formals
Candids are what we’re about. But family formals matter. They are the genealogy that generations of people will have to trace their family tree. No pressure.
There’s a simple art to doing family formals faster. Start with the largest group first—say, the entire extended family. Make sure everyone is turned toward the bride and groom, squeezed in, faces visible. Snap it a few times to make sure eyes are open. Now thank the family and release the extended family to leave (not hang around).
Now you have a much quieter, saner room in which to finish immediate family photos. Finish her side with just her parents, but don’t let them go. Instead, add his parents as well. After that, bring in the rest of his family as her parents leave. Easy.
For big groups (especially in the dark), remember that one light can cover everyone as long as you set it far enough away and angle it slightly toward the far side of the group.
1. First-Dance Close-ups
So the venue is all lit up and looks awesome, and you can’t stop reshooting that epic wide shot of the first dance. Get the wide shot, then get close. Those tender moments during a dance are priceless. But they’re hard to capture in the dim light while they’re moving. These aren’t posed photos, so you need to shoot a lot to get a few good ones.
BONUS: Grand Exit
Know how your couple is exiting. Will they have sparklers? Great, you have some additional ambient light to play with. Bubbles? You better plan to backlight those suckers if you want to see them well. But don’t make exits harder than they need to be. Shoot at a higher aperture than usual to be sure you get them in focus as they run at you. This is also the rare time when a direct flash is good, but even better if you set it to –1 or –2 compensation. They’ll show up well enough, but use your available light or backlighting strobes to create more ambiance.
A wedding is not that complex. Even though it’s a fast-moving live event, a lot is predictable—especially if you ask the right questions (and make the right suggestions) ahead of time. I have to reassure myself of this fact when I get butterflies before every wedding I shoot.
Know the schedule. Know your must-have shots. Once you get those in the bag, you’re on your way to satisfying your client and you’ll have what you need to fill a wedding book. You’ll feel more free and confident to do the creative signature images that help you stand out from the crowd.


