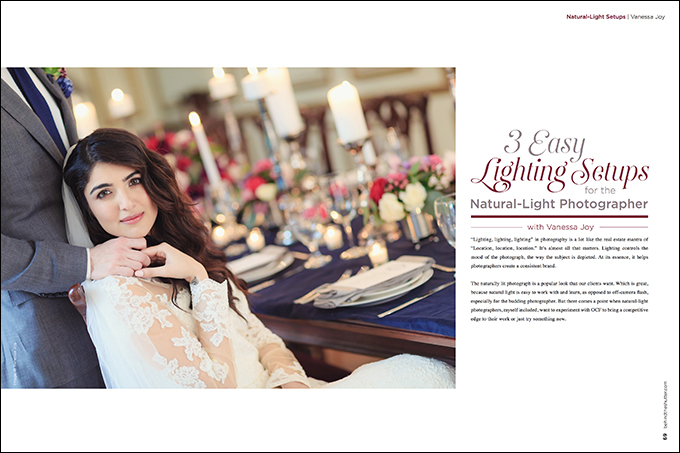
3 Easy Lighting Setups for the Natural-Light Photographer with Vanessa Joy
“Lighting, lighting, lighting” in photography is a lot like the real estate mantra of “Location, location, location.” It’s almost all that matters. Lighting controls the mood of the photograph, the way the subject is depicted. At its essence, it helps photographers create a consistent brand.
The naturally lit photograph is a popular look that our clients want. Which is great, because natural light is easy to work with and learn, as opposed to off-camera flash, especially for the budding photographer. But there comes a point when natural-light photographers, myself included, want to experiment with OCF to bring a competitive edge to their work or just try something new.
OCF, for most natural-light shooters, is daunting. Instead of working with existing light and manipulating it to create the image you’re envisioning, you have to bring in lights and learn to make them create the effects you want. Top that off with potentially tricky equipment, and most people put down the flash before they even squeeze off a picture. I’m here to give you some hope. It doesn’t have to be that frustrating.
The first step is getting equipment you can learn. I started with PocketWizards on Canon Speedlites, and then RadioPoppers, but didn’t love their functionality at the time. Just the fact that I had to troubleshoot misfires constantly from a plethora of things that could be wrong was too much for me to deal with on a fast-paced wedding day. It’s a bit more of an investment, but I ended up with the Profoto B1 and B2 systems, and I haven’t looked back. I’m not saying you have to go with Profoto lights—you just have to find a system that you can work with and that will be a help, not a hindrance.
After learning your equipment, experiment with these three simple lighting setups. They will give you a good basis to start incorporating OCF into your portfolio and shooting workflow.
1 – Fill it in
If you’re a natural-light shooter, this setup will not only be easy, but it will fit nicely into your existing brand since it can be done in a way that doesn’t look like it’s lit. In fact, using OCF as a fill is a great way to work with harsh overhead sun or cloudy days when a reflector just isn’t cutting it.
Normally, I position my light around a 45-degree angle to my subject, slightly above eye level, bare bulb or with an umbrella. I set my exposure in-camera for my background, set the B2 to ETTL and fire. If I want to make any adjustments from there, I can switch to manual on my transmitter and adjust the intensity from there.
2 – Backlight
This is another easy-peasy setup for natural-light photographers and one that will add depth to a photograph. Plus, in the absence of sun on a cloudy day, you can add some flare.
If I’m adding backlight to a day photo, I’ll gel my light to give it some warmth, but if it’s a night photo, I’ll leave it daylight balanced to keep it cool and matching the twilight sky that I hopefully have to work with in the background. After that, just place the light roughly 8 feet behind the subject, pointed toward her head, expose for the rest of the image and let ETTL do the rest.
3 – Double it up
Now that you’ve gotten the hang of using a light to fill a shot and using a light to backlight a shot, try both at the same time. This setup is one I typically use for night shots of my bride and groom because it lets me create a dynamic night photo with the couple properly lit instead of going to a silhouette (which I also do).
The same process applies, with one light behind the couple and one light to the side. Normally I position the front light closer to a 90-degree angle than a 45 to give more drama to the light and image. Set your camera exposure for the background and use ETTL on the lights, and you should be all set. If I want to brighten or lessen either light, I switch from ETTL to manual on my transmitter and adjust it until I like the ratio.
If you’re working with a nighttime photo, don’t be afraid to lower your shutter speed a bit below normal. It’ll let in more ambient light, making your background brighter, and you won’t have to worry about motion blur as much because your flash will typically freeze your subject.
Get help
Have an assistant help you move your lighting around. Not only will it help speed things up if you want to make adjustments to your light’s position, but having a human light stand ensures that your lights won’t fall over, trip someone or blow away with any small gust of wind.
Having the freedom of OCF on my weddings has helped me in so many scenarios, from difficult lighting to creating images with a bit more oomph than if I had just used natural light. The night photos in particular tend to be the “wow” images that my clients love, and end up on their walls and as full spreads in their albums. Using OCF as a natural-light photographer has expanded my photography knowledge, made me much less worried about lighting conditions that are out of my control and let me create images that Uncle Bob just isn’t getting.
Getting used to your lighting equipment may involve a bit of a learning curve. Make sure you know it in and out. It’s not something to test out for the first time on a paying gig. Once you’ve mastered these three easy OCF lighting setups, branch out and learn how modifiers affect the light, and just have fun with it. Before you know it, you’ll be able to use your lighting bag of tricks on command on any job.