
5 Reasons to Build Custom Lightroom Profiles with Dustin Lucas
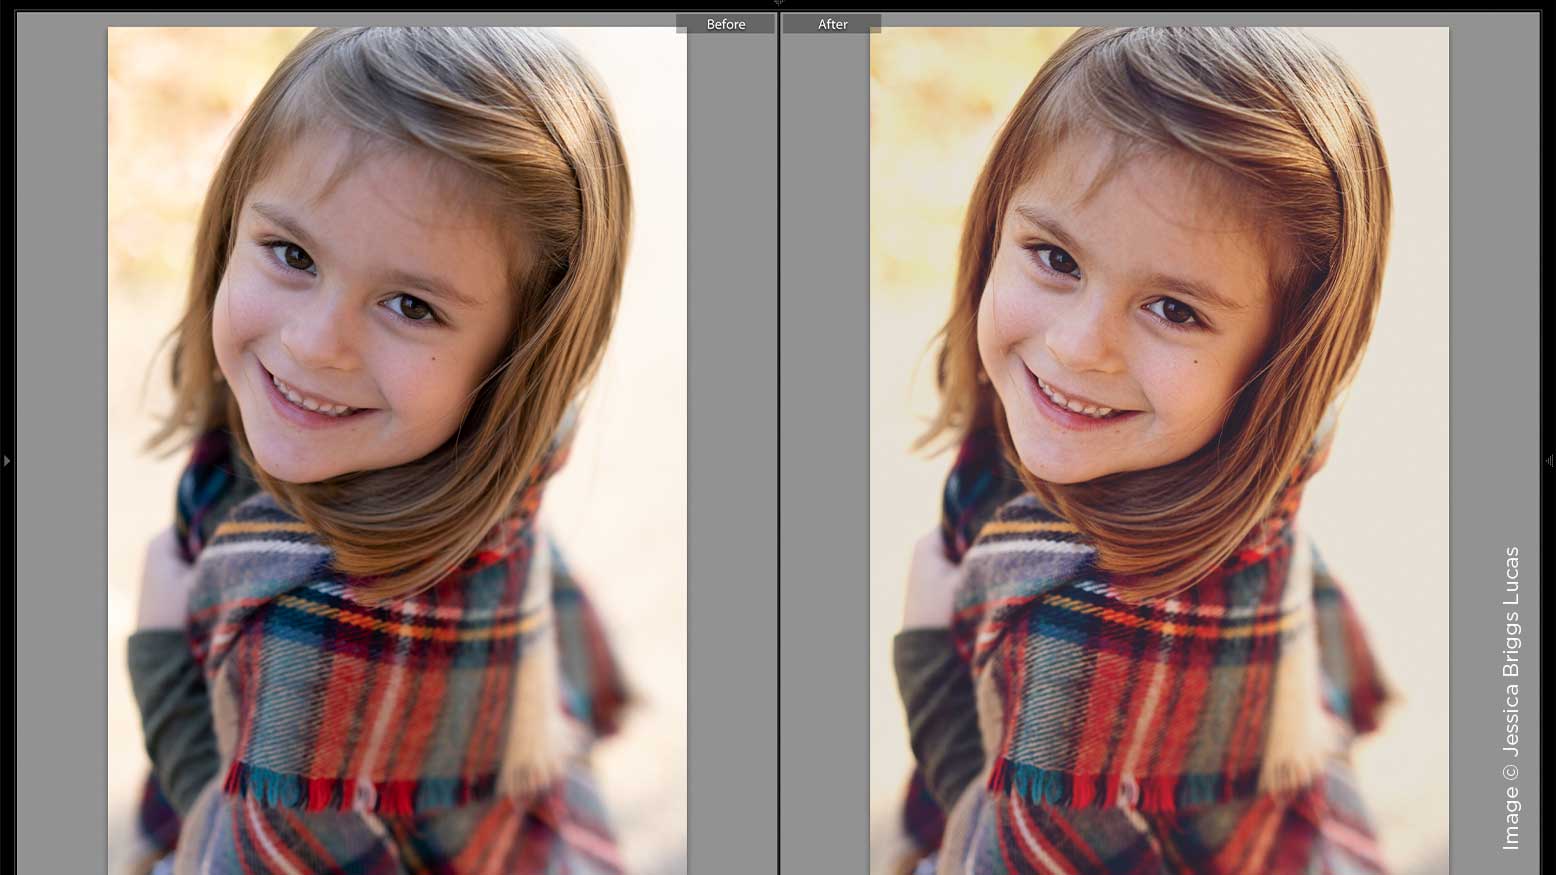
When it comes to editing creatives, I want to work in Lightroom so I can quickly apply different styles to my images with a single click. Beyond applying just a preset, you have the ability to add a more creative shift to your images using profiles. Applying a profile is the newest way to shift your corrected image to the next level without requiring you to re-edit—it’s the one-click solution you’ve been waiting for. Here is why I use profiles and how they’ve transformed my editing workflow.
1) Profiles are simple to use, and building one is as easy as saving a preset in Lightroom. 2) Using custom profiles is the most efficient way for me to choose what creative look I want. 3) When it’s all said and done, quality cannot be compromised, and you want to work with the best tool. 4) I can build multiple profiles to offer a wide variety of styles to a single image. 5) With a busy workload, I have to rely on a convenient workflow and work in one place for my editing.
1. Simple – Building a Custom Profile Is Easy
Let’s dive into how simple it is to build a custom profile for Lightroom. First, we need to open a RAW file into Adobe Camera Raw and apply some develop settings. Now, you have to keep in mind, we will be applying this to an already-edited image with a custom white balance and exposure. I always leave these untouched for building profiles. If you are editing with a creative preset already, that would be fine to apply as well. One additional thing to remember is that the following modules do not save in the profile: Detail, Lens Correction, Calibration and Transform.
For example, I use a custom Kodak Portra 400 film-style look that I’d like to tweak the tone curve of for a flatter look. Once I apply the preset, I’ll need to adjust a few things first to ensure my custom profile saves everything I need. When you are ready to save the profile, you will need to go to the Presets tab, hold option, and click on the New Preset icon in the lower right corner. The New Profile dialog box pops up for you to Name and choose the Group to add the profile. All the other settings below will automatically select what you need. Once you click OK to save the profile, you can relaunch Lightroom, and then you’re ready to go.
Once you find the image you want to edit, navigate into the Profile Browser to apply the new custom profile we built. You can instantly see how it’s gonna look by hovering over each listed name. You can even change the view mode to grid to see thumbnails of each profile applied.
2. Efficient – Make Creative Editing Faster
Working in Lightroom with Custom Profiles massively cuts my editing time down and allows me to focus on more important things in my business. Being creative doesn’t mean I lose efficiency, and with custom profiles, I can quickly choose what I need to apply. To take this a step further, I can create a preset with this profile to apply to multiple images at once. First, apply your profile, adjust the Amount slider to the value you want, and hold shift and command while striking the “N” key. Then, you can name the preset, store in a custom group, select only Treatment & Profile, and click Create. Now you’ll be able to select multiple images in grid mode, drop down the Quick Develop module, and choose the new preset to instantly apply the profile.
This is the level of efficiency I expect when working in Lightroom—I always want to work smarter, not harder. With this type of workflow, you have endless combinations of presets and profiles to apply. Make your life easier by building custom profiles now.
3. Quality – Work With the Best Tool
With creative editing in Lightroom, you want to ensure quality is not compromised in the end. Many of you might have actions in Photoshop that you use because you like those tools better. Luckily, you can convert actions into LUTs in Photoshop so as to not compromise any aspects of your image. Open an image into Photoshop, and apply an action to get started. Now, keep in mind, only adjustment layers will save, so you will need to ditch an image layer. First, select all the adjustment layers you want to export. Then, go into the top menu bar, and select Export>Color Lookup Tables. You will need to name this file and leave everything else as is. Choose to name and save it in a convenient location.
Once this is completed, open an unedited image into Adobe Camera Raw and go to the Presets tab to save a new profile. After you name and choose which group to add the profile to, check the Color Lookup Table box to choose the correct table we created earlier, and look for the .CUBE file. Then, you can relaunch Lightroom and apply your new preset. Exporting LUTs from Photoshop into Lightroom Profiles makes it so you don’t compromise image integrity. It also saves you on all those actions you have not using.
4. Variety – Apply Multiple Styles
When I edit for corrective aspects in Lightroom, I want consistency across my images, mainly in the skin tones. My client should not shift from scene to scene, even when the color of light does. For my creative edits, I work to be cohesive, so there is some variety, but I am not confusing the client, and am always sticking to my brand. Having the ability to group, manage and apply custom profiles makes this possible. Seeing what the profile looks like on an image and adjusting the Amount are huge positives. This is a completely new option, as most sliders pertain to a single adjustment.
The Amount slider allows you to tone back on some images while amplifying on others to push for more cohesiveness. In Lightroom, you can create virtual copies as well, so you can keep spare copies of your color-corrected files, black & whites, etc. You can select all images in grid mode, then hold command while striking the apostrophe key to duplicate all your files instantly. Next, you can apply any profiles you want in order to start adding a variety of creative styles to your images. You can offer this as a luxury service for top packages so your client can feel like they are getting a full service. Better for you to convert and control edits instead of them doing it.
5. Convenient – One Place for Editing
In the end, I want to work in a single place for all my editing, and Lightroom makes this so convenient. The ability to take actions from Photoshop and apply them as a Profile in Lightroom is huge for my workflow. Beyond that, I can instantly apply them to multiple images with a single click. Then, I will refine each scene with the Amount slider if the effect is too heavy. With the convenience of editing, I do not have to compromise on quality—this is what custom profiles allows me to do.
If I haven’t convinced you to try this out in Lightroom, I don’t know a better way to spell it out for you. Building custom profiles is simple and efficient, and it gives you quality, variety, and the convenience of working in a single program. There’s no better time than now to start building your arsenal of profiles to get ready for busy season.


