
Cinematic Rules for Wedding Photographers with Christine Yodsukar
Although it’s been common in Facebook photography groups to bash the video team at a wedding, we can learn quite a bit from their craft and apply it to our own. My husband, Rich, is a cinematographer, and through working with him, I have learned ideas and techniques that have improved the way I photograph a wedding and the way I deliver wedding albums as well.
When we are photographing a wedding, we want to begin with the end in mind: a beautifully designed album. We want that album to have symmetry and balance, proper proportions and beautiful leading lines. This is how we use cinematic rules for our photography.
As I watched my husband and his cinema team prepare for a wedding, they talked about what one another would be capturing and how they would capture it. What side of the subject would the light be on? Would the subject be looking and moving camera left or camera right? Would their transition shot entering the getting-ready rooms be a pan up or a pan left? They talked about these parts of the day beforehand so they could film symmetrically to one another without being in the same room.
How does this translate for us photographers? Let’s imagine you are photographing one partner getting ready and your second shooter is photographing the other partner. To create symmetry between the two sets of photos, you can photograph your subject with your light source camera left and your second can photograph their subject with the light source camera right. When you create your album design later, you can create two spreads that are symmetrical to one another or you can create one spread that shows symmetry between the two storylines.
You can also create symmetry with movement, even in a still image. If you show your bride “going to her ceremony,” she can be moving from the left side of the frame to the right side of the frame. The groom can be shown going to the ceremony by moving from the right side to the left side of the frame. This type of storytelling makes each of their stories cohesive while still having their own separate stories. The alternative to this, which is what we don’t want to do, would be photographing both partners exactly the same with the light source on the same side of their portraits, and movement going the same way. This becomes repetitive and doesn’t give each partner their own storyline.
Think about all the ways you can create symmetry between storylines throughout the day.
When Rich’s cinema team set up for a ceremony, they would make sure that the two cameras on the couple’s faces had the same frame. They wanted the headsizes the same for each partner. It would be weird if in their final film, one partner’s head was smaller than the other as they cut back and forth. Subliminally, headsize within your frame can also translate to power and authority. With a wedding story, we want to avoid giving one partner authority over the other. They also did this for multiple cameras during toasts, special dances and performances. This allowed our editor to cut together beautiful sequences that matched with headsizes.
Keeping headsizes consistent is something we can incorporate as well. Not only is this important for telling their story, but it is important when designing their album. We want each partner to have portraits with complementary headsizes to their partner’s portraits, but we also want a series of each person where their headsize is the same. Instead of constantly zooming in and out randomly during the bride’s portrait session like I did when I first started, I now take multiple series of portraits, keeping the headsize consistent in each series. So I do five to 10 full-body portraits of the bride, keeping her headsize the same. I move in for a medium shot of her, and get five to 10 of those. I can move in for tight closeups and get five to 10 of those. Now when I design the album, I create stunning layouts of series of photographs that go together beautifully.
I use this technique when doing portraits for each partner, bridal party portraits, family photos and grin-and-grabs. I also use this idea for reception details. I get wide, medium and tight photographs of each detail so I can create cohesive spreads of the reception in the album as well.
At your next wedding, keep your feet planted for a minute and take a series, then move in for another series and so on. Or shoot a sequence of photographs with one lens, and then shoot the same sequence with a different one.
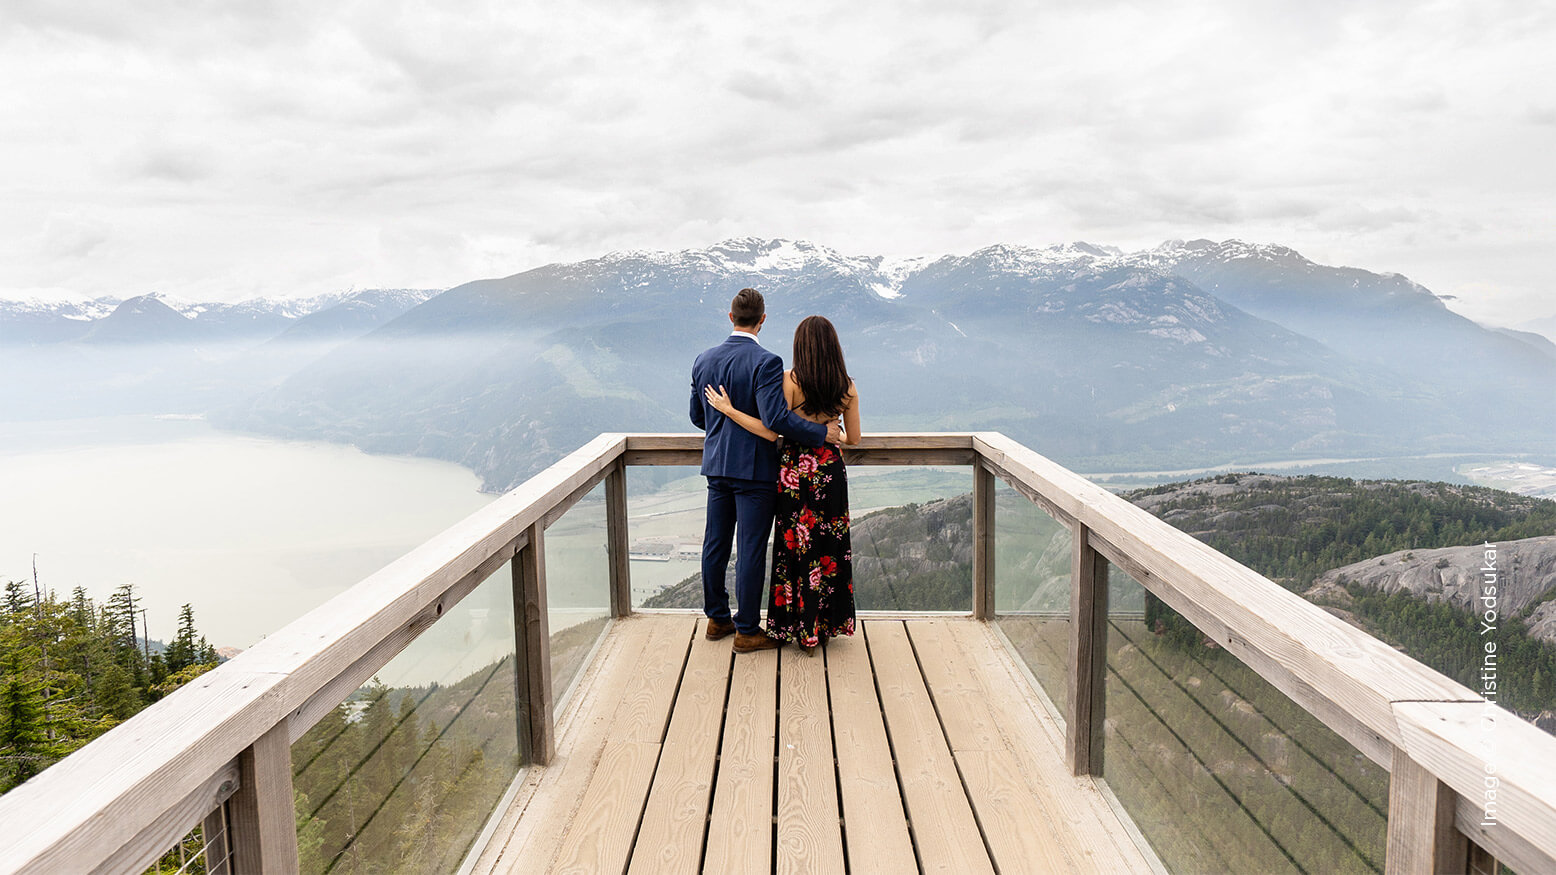
Leading lines is something I learned from one of the cinematographers on our team who is now one of our grooms. Of course I had heard of leading lines, but he took my understanding to a whole new level. As we designed his proposal and engagement album, he saw details that I was not paying attention to, and the result was the best album we’ve ever designed.
Rich and I photographed his proposal and engagement using hand railings, a bridge and the horizon as leading lines to lead your eye to the couple. We even used their bodies. When we were designing the album, our team member suggested we incorporate the leading lines into the album’s edges and corners. We had leading lines originating from the corners of the album. We made horizon lines parallel with the top and bottom of the album. The resulting album contained leading lines in the photographs, but the album itself became part of the leading lines too.
Wedding photographers’ job is to tell the best story possible so that years down the road, our couples and their kids can relive their day. By borrowing storytelling techniques from cinematography, our stories can be stronger and more cohesive—and also stand the test of time for our clients.


