
Creating Consistent Images At Every Session with Kiamarie Stone
Having a consistent look to your images is the one thing most photographers struggle with, but it’s the best thing to help you in establishing a recognizable brand and attracting your ideal client. But what does it even mean to be consistent, and how can it be achieved throughout your portfolio? Let’s take a look at five things that have helped me establish my signature photography style over the last few years, in order of their importance to me and my brand.
LOCATION & WARDROBE
The best thing I ever did was keep track of the locations I really loved to shoot at, then start to recommend them to my clients. You know those beautiful places where the lighting is always perfect, where there’s plenty of clean space—open fields, shaded areas, pretty landscaping—somewhere that just radiates love? Yes, those places! Start making mental notes of the areas you really love shooting at the most, and start recommending those places to your clients. It doesn’t necessarily have to be any of the above that I mentioned; those are the places that work for me and my style, but just pick your favorite places and take your clients to them. Being a professional photographer means having our clients’ best interests at heart throughout the entire process, and shooting location is at the top of that priority list.
Location, of course, then ties in to what your clients wear. To match my style, I always suggest nude colors, light pastels, tans or whites to my clients. But if you are all about color, then own it and tell them to put on their best red dress and show up ready to conquer their session with you!
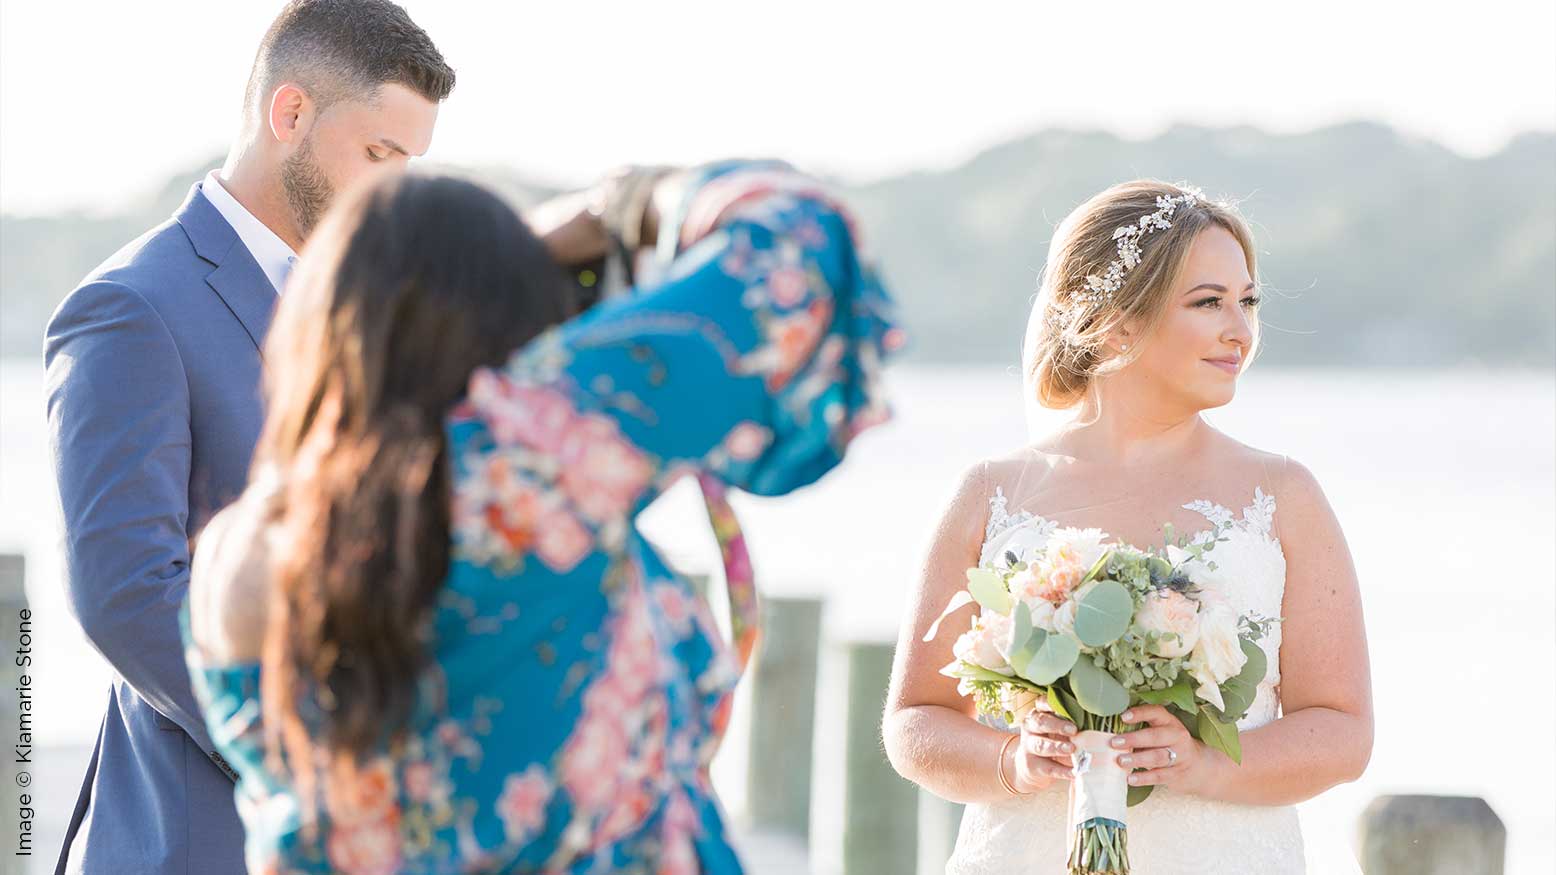
LIGHTING
I wish I could tell you that I always have clients who are willing to shoot at the golden hour, but unfortunately, I am at the mercy of their schedules. So what’s the next best thing to that perfect sunset light? Backlight. Yes, backlight! Any time of day, anywhere you are, backlight your subjects by placing the sun to their backs. This will solve the problem of those nasty raccoon eyes, hot spots on the skin, and too much squinting from the sun in everyone’s eyes. Backlighting really is the ultimate life-saver during those harsh, sunny days where you have no control over timelines and a location that lacks shaded areas. If you find your subjects have too harsh of a shadow while they are facing you and the sun is to their backs, a little fill flash from your speed light will even out the front areas super quick. You could always use off-camera flash too, but I personally just increase my ISO and adjust for shadows later on in post-processing. Try backlighting the next time you shoot, and have fun with it.
LENS CHOICE
Prime lenses — are you familiar with them? If not, let me tell you about the magic that is a prime lens. Shooting with the same focal length or “fixed focal length” creates sharper, dreamier, more consistent-looking images every time you click the shutter. If you really want to up your consistency game, try using a 35mm, 50mm, 58mm, 85mm or 135mm lens instead of a 24-70 or 16-35, and you will notice the difference in the quality of your images immediately. My favorite lens of choice is my 58mm, and it remains on my camera body for 75 percent of my wedding shoots. If I had to pick a second-favorite lens, that would be my “nifty 50,” hands down. Either one of those lenses works perfectly for me and my style, helping me to achieve consistent-looking images at every wedding and session I shoot. On a personal note, I would recommend renting the different lenses first and trying them out to see which one you like best before making a purchase. You don’t want to ride the wave of always buying the next best thing in the photography world, but rather the wave of making the next smart decision in achieving consistent-looking images.
F-STOP
Ah your F-stop. F-stop is everything. It’s like the paintbrush to Monet’s hand. The F-stop you choose to shoot at is the ultimate deciding factor of the image you will produce. I like a softer background, with my subjects more in focus, so my sweet spot for a shallow depth of field and a dreamier/softer image is F2.0 or F2.8. If I were to choose an F-stop at, let’s say, F8 or F11, that would produce an image where almost everything is in focus, and that wouldn’t remain true to my shooting style and the look that my clients pay top dollar for. Decide which style speaks to your soul, and start shooting with that same F-stop (or somewhere in that range) at each session.
EDITING
OK, you shot at the bomb location, the backlight was on point, your lens was as smooth as can be, and that F-stop never strayed … so what’s next? You have to edit. Yes, yes, yes—we all have to do it. Some of us love it, some of us not so much, but it has to be done. The best thing to do is edit the photos you captured in the same location, with the same light, at the same F-stop, with the same lens—everything the same. What does that mean? That means that we don’t want to be that photographer who makes one photo dark and moody and the next photo light and airy and the next somewhere in between the other two. Break that habit, and try to start editing your photos the same. My absolute favorite tool in Lightroom is Sync, because with it, I can edit one photo in the series and then sync that edit to the rest. What used to take me days to edit now takes me just a few hours. If you are still on the fence about doing the legwork or maybe editing just isn’t your thing, invest in a reputable retouching company like Evolve Edits. Start by developing a working relationship with them, tell them the style you are trying to emulate, and let them handle the rest. Outsourcing is the bomb dot com, trust me. If there are things you don’t love doing or that you need a little help with, it never hurts to ask or hire someone who can do them better.
So take my five tips for a spin, and let me know how you do. When you start doing the same thing over and over, you will begin to notice a difference in your images. Not only that, your social media presence and aesthetic will thank you! Images with a consistent look post really well on Instagram. They also help you to start attracting your dream client, the kind whom you want to work with and who appreciates you as an artist through and through. I personally struggled with being consistent at the start of my career and knew I had to figure out who I was as an artist if I was ever going to get those top-paying clients I desired. A consistent body of work has truly elevated my brand, and my bank account currently thanks me.


