
Focus Stacking for Greater Depth in Landscape Photography
It never fails when I read about new ways to better my photography: There’s usually an equipment pitch. It’s all about having the best lenses and cameras. Or on the flip side, I find large-format film photographers preaching lessons in the landscape. Hauling my 4×5 view camera everywhere was great when I was shooting for 40-by-50-inch prints and I had grant money to blow on art projects. But technique is often more important than equipment. One technique, “focus stacking,” can lend greater depth to your landscape imagery.
We’ve all shot a landscape or two. I don’t need to go into great detail about what makes a landscape, or how to shoot one with a great depth of field. Wide or telephoto lens—does it matter? It seems simple enough: You can just stop down to f22, and everything will magically be in focus…. That depends on how you define focus versus sharpness. Also, where in the landscape are you choosing your focal point? Focus stacking allows you to precisely shoot a landscape with a sharp foreground, middle ground and background.
Before we go any further into focus stacking, let’s look at some essential components: focal lengths, apertures and where to focus.
There is a great deal of debate about lenses and focal lengths when photographing landscapes. With this shoot, I used my kit zoom lens, a Nikon 24–120 f4 VR, to experiment with wide, normal and slight telephoto focal lengths. I like wide to tele-zoom lenses because, for landscape photography, I am usually shooting at f5.6 on a tripod (and if you care about depth of field, you don’t care about fast, expensive lenses—just putting that out there). I will stick with a focal length of 24mm for the widest perspective of the scene and the greatest depth of field. Greater depth in a landscape is composed with a defined foreground, middle ground and background.
OK, lets just take a photo already. What did you focus on in the scene.
The rule of thumb when focusing is to choose a spot one-third into the scene. This is easier if you have a row of trees or telephone poles: Just divide them by three and shoot away. By following this strategy, naturally the best thing to do is stop down to f22 or f32. Everything will be in focus near to far—right? Well, not exactly. Small apertures introduce an issue known as “diffraction.” Basically, diffraction spreads the sharpness from the near point in focus to the far, usually infinity. This introduces a softening into the image that you do not want. Lenses have a peak focus based on apertures, which is where the conversation gets very technical. Try to keep your lens between f5.6 and f11 when you don’t know specifically.
So far, we have introduced how to focus the scene and what apertures to use, but even f8 isn’t going to accurately cover a landscape extending to the horizon. What now? A technique to calculate the hyperfocal distance is a great solution to focusing a single image with tack-sharp details. Focusing at the hyperfocal distance can be figured out with a depth-of-field calculator. I downloaded DOFMaster from the Apple App Store on my phone. It allows me to plug in all my shooting data, giving me a distance to focus.(1) You can also figure this out if you know your “near limit” of acceptable focus. Your near limit is the distance from your camera to the beginning of what is in focus. If you double that distance, you get the approximate hyperfocal distance. (That’s great if you didn’t forget your 100-foot tape measure!)
So, what now?
Finally, we are getting into the process of focus stacking. For this shoot, I kept my aperture set to f5.6, set up my tripod and fired three images. For the first image, I focused on a point in the foreground.(1ab) For the second, I focused almost at the horizon line.(3ab) If you’re able to focus on a point in the middle ground, go for it.(2ab) Usually the wiggle room between foreground and background is tiny, and, when shooting at f5.6, the coverage is sharp near to far once you stack the images together.
Now let’s move into Photoshop and stitch these images together.
In the menu bar, click File > Automate > Photomerge.(5) A dialog box opens with a few options. Under the Layout settings, choose Auto or Collage. Either of these is fine, so Collage it is. In this window, it is important that you uncheck Blend Images Together.(6) Photoshop opens a single document with all the images as layers. Select all the layers, and then in the menu bar, click Edit > Auto-Blend Layers.(7) Once the dialog box appears, select Stack Images and keep Seamless Tones and Colors selected.(8) Select OK. The image will be Blending the Layers Based on Content and Creating Layer Masks for blending. Once its completes the process, you will have a well-blended image.(9)
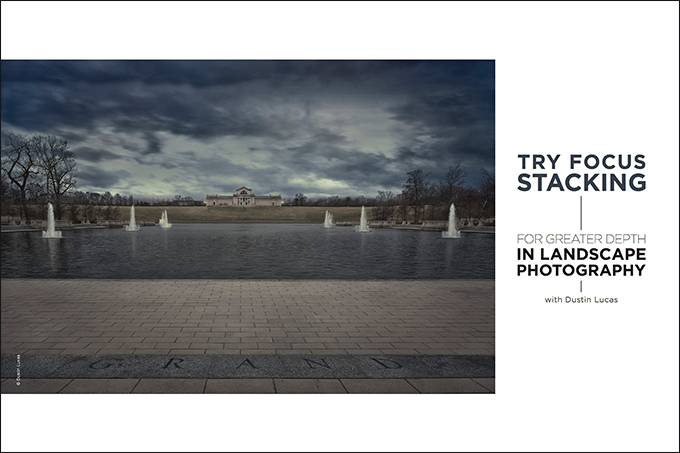
Remember to flatten the layers after you have checked the blended seams. Movement in the image can be problematic during this stage. Simply mask out those areas and clean up any issues, as I have. You’re done.(10) This technique of focus stacking allows me to then push the image further in post-production, as I have for the opening image in this article.
When using this technique for landscapes, you need to remember to use a tripod, shoot between f5.6 and f11, use a remote trigger to reduce vibration and choose a less windy scene, because motion in the images can greatly affect the blending. A vacant landscape is easier to blend together than a busy roadway. (It’s funny that I chose a difficult scene to capture, because now my post-production abilities have to save the image.)
Try this technique next time you go out shooting, and let me know how it works for you.


