
Lighting 101 | Keeping It Simple with Lori Nordstrom
Great portrait lighting is a must for the pro photographer. It can make or break an image, and even someone who doesn’t know good light will choose a properly lit image over one with poor lighting every time.
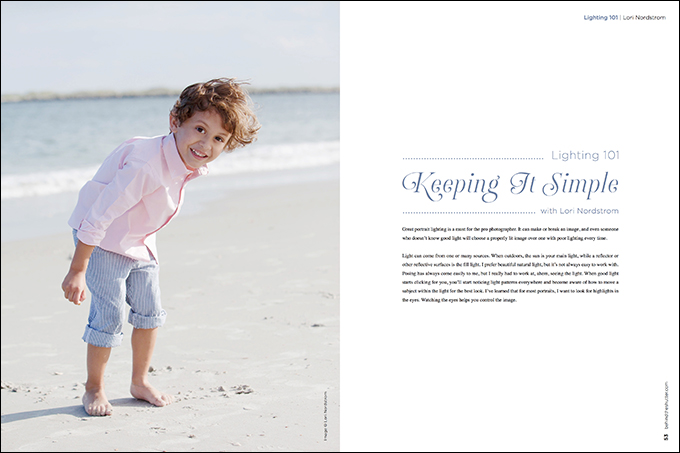
Light can come from one or many sources. When outdoors, the sun is your main light, while a reflector or other reflective surfaces is the fill light. I prefer beautiful natural light, but it’s not always easy to work with. Posing has always come easily to me, but I really had to work at, ahem, seeing the light. When good light starts clicking for you, you’ll start noticing light patterns everywhere and become aware of how to move a subject within the light for the best look. I’ve learned that for most portraits, I want to look for highlights in the eyes. Watching the eyes helps you control the image.
Lighting baby steps
When I moved to a studio space after having worked on location for several years, I purchased lighting based on the only thing I knew, which was natural light and window light. I had moved from Texas to Iowa, which is really cold all winter, and realized I would not be able to photograph outside all year as I had been doing where I grew up. I knew I would need some sort of indoor studio lighting, so I bought what made sense to me at the time, which was a 4×6 softbox (my window) and a large reflector.
I began photographing in my new studio with my new lighting, and, while I was in a new retail space and I was selling portraits, I still felt like I wasn’t as “real” a photographer as many of my friends and the instructors I saw who wrangled all sorts of lights and moved them around with ease to create beautiful work. For a time, I felt bad about my simple one-light system. I watched photographers I admired using a three-light system, or even five lights, adding not just a main and a fill, but a background light, a hair light and some sort of kicker. Off-camera flash is popular, but I still prefer the simple, sweet look of natural light or one light in the studio for my style of portraiture.
100 images that changed everything
Not long after purchasing my new lighting, I took a weeklong class with portrait photographer Darton Drake. This class made me believe in myself as I came to realize the power of using one main light. Just the fact that Darton himself was primarily a one-light shooter was enough to make me feel better about my lighting choice.
One of the projects that Darton had the class do was to take one subject, one light and just one prop (a chair) and photograph 100 different images. What a great lesson in posing and lighting. I encourage you to try it—it will teach you so much. I discovered a true love for lighting with one main light: a 4×6 softbox and one large reflector. To me, the 4×6 is the next best thing to natural or window light, my first love. The large softbox gives a wonderful, soft light and a beautiful “wrap” around the subject. I normally place my subject toward the backside of the 4×6, and place the softbox about shoulder height. This allows for a really natural fall-off and “vignette” of the subject.
Giant steps
Some would say this lighting is somewhat flat. But once you play with the lighting and practice the 100-pose challenge, you will find that the placement of the softbox and the subject makes a huge difference with just this one light. You can create many looks, from very dramatic to even and soft.
Get to know your lighting. Learn to really see what happens when you add or subtract light. Look at contrast and separation. Look at details, and especially the highlights in the eyes. But don’t beat yourself up, like I did, when choosing what works best for you and your situation. Get to know one light first, and then add lights as your experience—and, more specifically, your style—call for them.
My lighting gear:
Photogenic lights
Radio poppers
4×6 SweetLight softbox
72˝ SweetLight silver reflector
Action Plans
- Contact your local chamber of commerce.
Take a look at your chamber of commerce’s website, social media presence and annual directory. Are the images cohesive? If not, do what I did and offer to help brand them. Show them my before-and-after piece if needed.
- Offer extreme senior shots.
Offer a new “extreme” product to all your senior clients. Photograph a boy and a girl of high school age. Do as I have instructed in the video. Post to all social media outlets, explaining that you are now booking seniors for extreme sports shoots. If you need inspiration, check out our website and social media platforms for examples of posing, style and processing. If you need further help, just ask.
- Build your food/product images.
Contact a local restaurant and offer to take pictures. Explain that you are building your portfolio. Look everywhere for inspiration, and start creating. Begin building your commercial photography business this way, or to add to your existing business. As a bonus, a restaurant might just let you sample some of its cuisine.
I encourage you to experiment with all different kinds of lights. Choose strobes, ringlights, flashlights, chicken lights, etc.—whatever your lighting preference, just try something different. Think outside the box. Choose a light and a style that will help set you apart.


