
Lighting Male Portraits with Michael Corsentino
Want more information on this article? Get access to video content and additional supporting images. Launch the October issue of the magazine by logging in or signing up for a free account by clicking here. Shutter Magazine is the industry’s leading professional photography magazine.
Men and women are lit in very different ways. With men, there is more flexibility with hard light, deep shadows, a harder look overall. The goal with women is to portray them beautifully and softly. A stronger, more masculine, powerful portrayal is more applicable to men. But as roles shift and blur on both sides of the gender divide, there are no hard and fast rules.
There are women with bone structure and bodies that can handle even the harshest light and still look beautiful and strong—think Helmut Newton. But a pretty look wins the day with women and a strong look with men.
These are a few of the basic considerations in my thought process when I’m working with the genders. The previsualized lighting and styling for a set of portrait images is always dictated by subjects and their environment. We’re talking strictly about light and style, while an environmental portrait takes this approach one step further, capturing the subject in his or her typical environment. The overall concept is the same: The image should help tell the subject’s story or convey a message about them to the viewer.
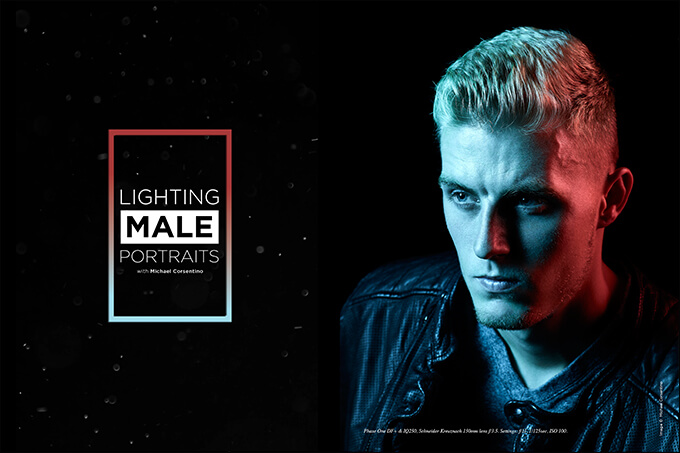
When shooting a portrait for a young up-and-coming male actor and model, my mission was clear: Create iconic portraits that deliver drama, show off his strength and intensity, and showcase his star-worthy good looks. My initial concept was for black-and-white images with strong dimensional light, a high degree of contrast, deep shadows and a modern twist on the classic Hollywood portrait style. My goal with the lighting was to sculpt the face, accentuate bone structure and create drama. Along with a more contemporary, edgy lighting plan and a solid idea of what was to come in post, I decided to give the classic Hollywood portrait a modern twist by adding color with gels.
When I shoot, I’m thinking editorially, working with a layout in mind. This helps me create a flow and a narrative with the images. I do this by shooting a variety of poses—both tight and loose, three-quarter length, full length, seated and standing, and perhaps some detail images. I also try different lighting arrangements to create a variety of looks that work well when paired together. In addition to the dimension light planned for this shoot, I had a flat light setup in mind that I knew would be easy to quickly transition into using the same tools I already had on set.
Strip Boxes
Designing the look for portraits is always my first step. This happens before the subject ever steps foot in the studio. I always request sample images so I know what they look like, what kind of bone structure they have. Take the time to incorporate this step into your work. When you work this way, your images will always be better than when you simply wing it. Never be afraid to deviate, but having a solid plan and lighting look will help you be more deliberate and thoughtful, and provide a roadmap that dictates the tools and methods needed to reach your destination.
When I designed this portrait, I knew I wanted dimensional light with a lot of deep shadows and quick fall-off. I also knew I wanted the face divided in two, with tightly controlled vertical slashes of light on either side of the face. Again, the goal was to sculpt the face, accentuate bone structure and create drama. I wanted a specular (high contrast) look that worked well for black and white, but also translated well for the color gel version. Having a clear concept made it easy for me to pick the tools and map out the techniques I’d be using.
For the second look, I decided to go in a completely different direction and create a flat-light look that resembled a ring flash effect but that would require no additional tools or setup to pull off. Pairing images together with opposing lighting styles creates variety and counterpoint. My weapons of choice for both looks were two Elinchrom 14×35 strip boxes. These would deliver the side-to-side vertical slashes of light I needed for the first look and the right amount of top-to-bottom illumination needed for the second three-quarter-length look.
Grids
I outfitted both strip boxes with Lighttools 30-degree ez[POP] Soft Egg Crate Grids for both the black-and-white and color headshots. These allowed me to constrain and precisely control where the slashes of light created by the strip boxes fell. This kind of control just isn’t possible with grids. For the second flat light look, I removed the grids, which weren’t necessary. The strip boxes alone, placed equidistant left and right from the subject, were all I needed to create a punchy overall wash of light without any shadows.
Modifying the Quality of Light
I wanted a punchy, specular light for the images. It would be easy to assume that softboxes would be the wrong tool for this. Remember, though, that softboxes are versatile tools with exterior diffusion and internal baffle material, and, in the case of Elinchrom, numerous plastic deflectors that can be placed over the flash head to further modify the quality of light. So even though I was using two strip boxes, I was able to coax the punchy light I wanted from them by simply removing the interior baffle material. This gave me the look I wanted. I could have gone even further if I wanted to by also removing the exterior diffusion panel.
My Ghetto Gel Technique
Adding color by gelling your lights is a great way to bring additional emotion and mood to your portraits. That said, gels are tricky. The first step is to find the right mixture of colors—primary, secondary, etc.—and making sure they convey the mood you’re after. Think about it: What do these colors mean in real life? Where do they exist?
The next and most challenging step is to find the right balance of color and white light. This is one of those Goldilocks propositions, looking for what’s “just right.” This means experimenting with strobe power, distance and the amount of gel covering your strobes. These factors contribute to the amount and intensity of color produced.
Completely gelled strobes can create too much color and look intrusive and unnatural. I prefer some of the white light from the strobes to mix with the colors from the gels, creating a softer effect. Since I use Rosco 12×12 Gel Kits instead of their larger rolls of individual gels (which could easily be tapped to the front of my softboxes), I’ve developed what I call my “ghetto gel technique.” I gaff-tape the gels inside the softbox, partially covering the flash head. I adjust the amount of color and white light until I get the desired effect. If you opt for this method, do not use your modeling lights, or you’ll melt your gels in the blink of an eye.
Keep in mind that gels may reduce the amount of light delivered by your strobes. You’ll need to account for this by adjusting strobe power, moving your strobes closer or adjusting your aperture. When I added the gels for these portraits, they cut a full stop of light, requiring me to open my aperture from f/16 to f/11.
Dimensional Light vs. Flat Light
Lighting that has direction relative to the subject creates shadows, and shadows create a three-dimensional sense of volume and shape, hence the term dimensional light. The black-and-white and color headshot portraits get their drama and intensity from this style of lighting. As you can see from the BTS images—and, to lesser extent, from the lighting diagram—this was essentially a modified cross-light arrangement. Call it cross light 2.0. The strobe in front of the subject and camera left was placed at approximately 45 degrees to the side and angled down, while the strobe on the right was placed lower, with little to no angle.
You’ll need to experiment with the angle of both lights to dial in this look. Work with one light at a time to see the individual contributions being made. It’s much easier to see exactly what’s going on with each light this way.
Flat light, on the other hand, is dead simple and something I knew I could easily knock out with the two strip boxes I was already using. I simply removed the grids, moved one strip box to the left of my subject and one to the right, angled both toward the center of the background where my subject was standing, took a new meter reading, dialed in the desired power, metered again and started shooting. I always use a handheld light meter: a Sekonic L-478. Nothing can get you shooting faster, more accurately or more consistently then a handheld flash meter. I’m assured a perfect exposure the first time I click the shutter, no chimping, no guesswork.
Try both of these setups. They’re easy and fairly light on gear, plus they’re fun and deliver the goods.
Want more information on this article? Get access to video content and additional supporting images. Launch the October issue of the magazine by logging in or signing up for a free account by clicking here. Shutter Magazine is the industry’s leading professional photography magazine.


