
Make Your Mark with Masking in Lightroom Classic with Dustin Lucas
Want more information on this article? Get access to video content and additional supporting images. Launch the January 2018 issue of the magazine by logging in or signing up for a free account. Shutter Magazine is the industry’s leading professional photography magazine.
With the new year approaching, I finally found time to explore more of what Adobe has released in Lightroom Classic. Beyond the long-waited performance upgrades and the faster preview generation, what editing capabilities does it offer? Local adjustments and masking have always been a necessary component of my workflow, but the lack of performance when doing so in Lightroom required me to go into Photoshop. I can quickly Edit In any program, and the resulting rasterized edit saves in my catalog. Like most Lightroom users, I want to stay in Lightroom because it is my wheelhouse.
So what’s all the hype with the new masking feature? Much like the addition of the Auto-Mask added in the brush panel, there is a new innovative and more accurate method called Range Masks. Instead of your mask’s edge being analyzed for hard edges and somewhat similar tones, you have more control in choosing the range of Color and Luminosity. Like many of us, we fear Photoshop because of its complexity and inefficiency with hundreds of images.
In this article, I show you how to keep things simple, how to move fast and, above all, how to create quality edits.
Localize Your Adjustments With Brushes
Using Local Adjustments in Lightroom can be a time-consuming process because you have to meticulously paint masks or drag a gradient and/or radial filters to mask each image. Even dodging and burning an image can be a painful process. There are editing techniques to help with this, like underexposing an image entirely and dodging the main subjects. This is common during a bridal prep when the portraits are window lit and the naturally heavier shadows bring the viewer right to the subjects. I typically lower the exposure a stop or two. Then, I choose a radial filter, invert the mask, click and drag over the face and add any missed areas with a brush. (2) Match your effect with exposure lifted to the same amount you dropped the entire image to originally.
When you do that for 100 images, you’ll find yourself spending up to an hour editing before even getting to the first look—and this is for simple compositions. That’s not a scalable workflow.
With a more complex image, we don’t have the luxury of a quick mask for dodge and burning, but we can be more selective with the brush tool. After applying a gradient or radial mask, the brush tool can add or remove the mask. With the brush tool, you can adjust within the painted mask, adding and subtracting masked areas of the image. For skies, large foregrounds or half the image needs darkened, so I go to a gradient to apply a nice natural adjustment. Doing this pours the adjustment effect onto areas I do not want to affect.
I use the adjustment brush tool for the majority of masking because it’s simple and gets into the tight spots without shifting back and forth between masking tools. The way you get back some of that large area masking efficiency is with the Auto Mask option.
Auto Masking With Effects
Auto Masking was a huge step in the right direction, allowing users to maintain that speed and accuracy they expect from Lightroom.
This feature is available exclusively with the adjustment brush and can be used as a refining mask tool for the gradient and radial filters. Let’s start by applying a gradient filter to the foreground to remove the blue cast and brighten this area. Strike the “M” key to get us quickly into the gradient filter. Click at the bottom of the frame and drag the cursor upward to paint on our mask. To see where we are masking, strike the “O” key to show the selected mask overlaid on our image. Faded red areas are where our effect will be applied. This is a different approach to masking—we typically see adjustments masked out, like in Photoshop. Just imagine painting white on a layer mask that is painted black, and it’s clear as day.
I could achieve the same effect at the cost of efficiency by just striking the “K” key and using the adjustment brush with Auto Mask as well. This does a pretty decent job where there is distinct contrast and hard edges between areas where we want to apply effects. This image is quite simple, with limited busy distractions in the background. Remember that masking already implies more time on a single image; do what you can to reduce time spent.
Auto Mask is a great tool for easier masking, but how do we retain the efficiency of Lightroom? I am talking about the ability to paint a quick mask, adjust sliders and sync this between multiple images. Syncing images from the same sequence does not work with current auto-masking techniques, as you can see here. There is a solution to this workflow crisis in Lightroom Classic called Range Masks.
Reach Beyond Auto With Range Mask: Color
With the inception of Lightroom Classic, you may have noticed a new addition to Camera Calibration Process versions. There is a Version 4 (current) added to the list of previous versions like 3 (2012), 2 (2010) and 1 (2003). Luckily, Adobe hasn’t updated the 2012 Color Process on us just yet, throwing our edits into a tailspin. With change, there is always going to be resistance, but with this upgrade, you get more functionality with the new Range Masking feature. This will not alter the appearance of your images, so take advantage of this upgrade for any images. Go into Develop, select all images in the filmstrip, click on the lightning bolt symbol in the Histogram panel and choose Update All Selected Photos.
Now we are ready to dive into the Range Masks and see what they can do. There are two options to choose: Color or Luminance. Each option has its advantages, but most of us will need the timesaving tool. Let’s start with Range Mask: Color.
First, we need to paint a mask and adjust the sky. Strike the “M” key for the gradient tool. We can drag from the top of the image that is darker to just past the horizon line, or into the mountains, in this case. Turn on our Mask Overlay to see that our mask is spilling onto our subject. Instead of auto-masking her out, we can click on Range Mask: Off and choose Color. Our mask options have changed with a recognizable dropper tool, an Amount slider as well as a few tips below for selecting color ranges in our image.
This may become difficult to mask since the dress has blue in it as well. This is why the HSL target adjustment tool would not help us control the sky only, and why we have to mask.
Since the sky has a range of colors, we can click the dropper tool and click and drag the cursor over the areas to which we want to apply an adjustment. To add other colors to our mask’s range, hold Shift and continue clicking. With our mask applied, I can see shadow areas of the mountain and dress being affected. This is where the Amount slider allows us to alter this wide range mask to remove the unwanted areas. Drop it to 20 so the mountains retain their original look, and then adjust for the sky. This works really well for cloudy skies, and retains some separation between the blue sky and white clouds.
I especially like to use this tool when removing colorcasts in the groom’s suit. Using Auto Mask with the adjustment brush selects his white shirt, tie, skin, hair and jewelry. Instead, I can paint a quick mask over him, choose Range Mask: Color, pick the dropper tool, click and drag over gradation in the suit and apply my blue suit effects preset. To increase your efficiency here, paint a slightly oversize mask so you can sync this local adjustment to multiple images in the same sequence. If you need to move the pins when you adjust your subject’s position in the frame, simply click and drag the pins over the same area. Boom, you are done!
Reach Beyond Auto With Range Mask: Luminance
With Range Mask: Luminance, you can choose the dark to light values within the range. This becomes increasingly useful when the Color Range limits your mask’s reach. In areas where the contrast in tones is wider, the Luminance Range shines.
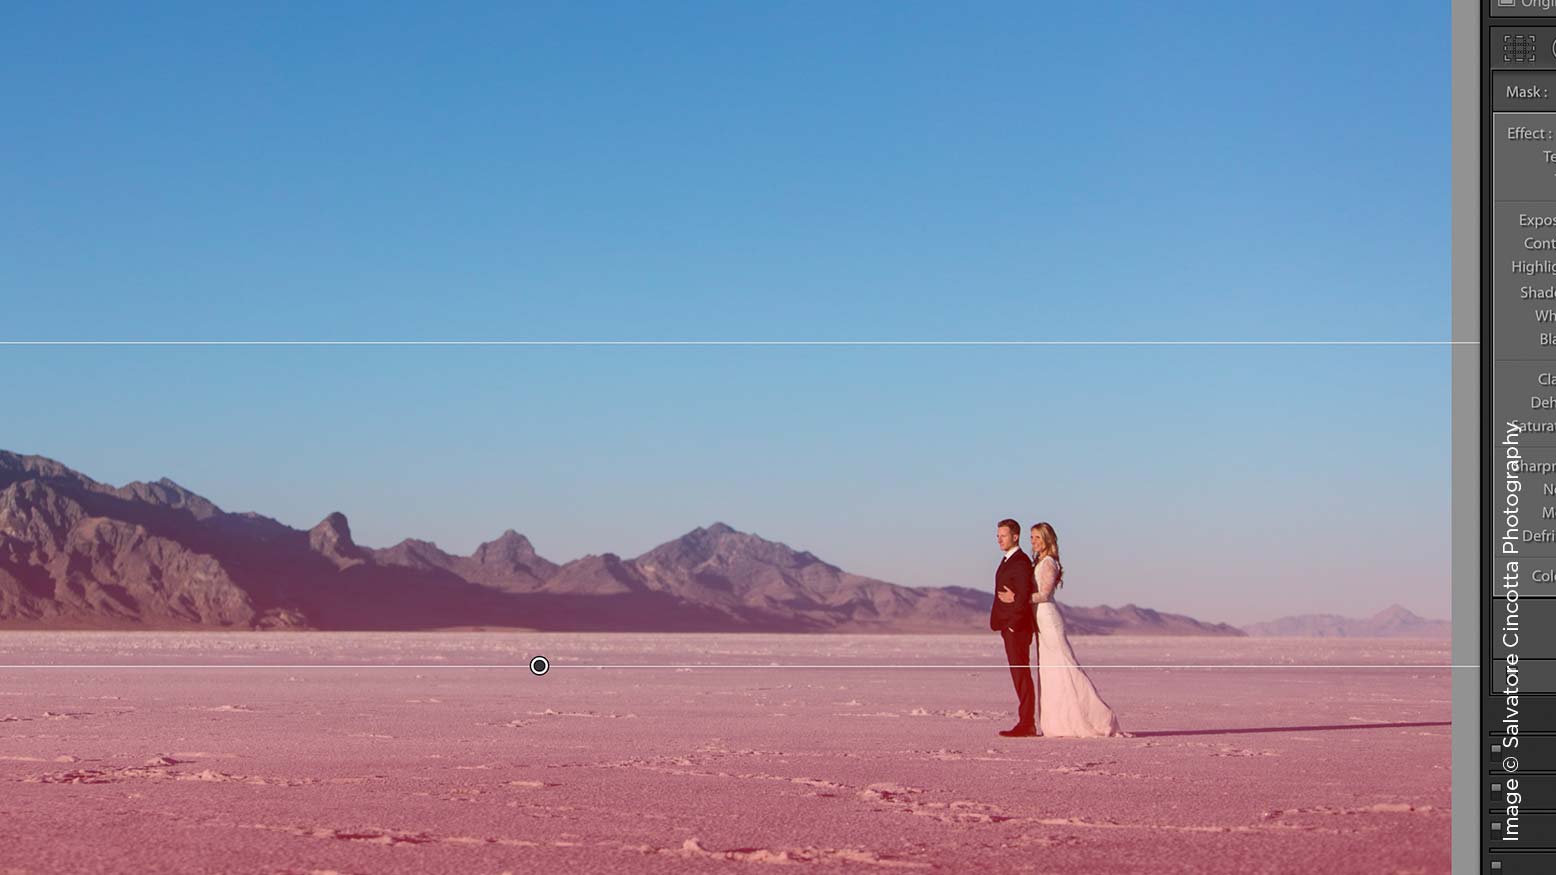
After we apply a gradient filter and drag upward through the salt flats to the top of the mountain, we can click on the Range Mask options for Luminance. Our slider options are Range and Smoothness, which allow us to fine-tune the mask’s selection. The Range sliders might look familiar to Photoshop users with experience adjusting Layer Styles Blend If. Not to worry if you haven’t used this before—Lightroom makes everything simple and quick. The left slider drops the range in dark tones by moving it to the right. Vise versa for the bright tones and the right slider.
It’s easy to exclude the darker tones in our Luminance Range Mask. Move the slider until the red overlay is removed from the suit. If you are having trouble seeing this mask, change the color of the overlay by going into the menu bar and clicking Tools < Adjustment Mask Overlay, and choose green, white or black instead. I recommend moving the slider in 10-point increments so you can remove the suit without losing more of your Luminance Range. After moving the dark value to 50, we finally see the mask overlay disappear. This is where smoothness comes into play so you can refine the mask’s edge and overall coverage.
Default settings are at 50. If we drop this to 25, we see an immediate change to the feathering effect in the suit. With such a dramatic change, we can start to move the dark value back toward the left, and at 25 there is little to no difference. There’s no reason to exclude these tones if they do not affect the suit, and I landed at 25 for my final setting. A little overlay is important to keep the image looking a little more cohesive and realistic, photographically speaking.
Now we can sync Local Adjustments for our gradient and adjustment brushes. These local adjustments have more sync-ability for a sequence of images because they can incorporate color or luminance range versus relying only on the custom painted mask. Masking used to rely on still-life shots to sync, but not anymore. Because we photograph moving subjects, we need this flexibility.
The Results
At the end of the day, this new masking feature isn’t perfect. For those of you who touch all 800 images selected from a wedding, these techniques won’t shave off hours of post-production. Adobe just isn’t there yet, but it will help you create more accurate and efficient adjustment masks. Brush in larger areas using Range Masks to extend coverage when syncing images shot in the same scene. Auto Mask can help on a single image, but make sure to apply a range mask to allow flexibility when syncing images as well. Effects presets can go a long way, so you don’t have to repeat the same slider movements to remove blue from the groom’s suit.
Take some time to get familiar with Range Masks in Lightroom Classic now to make your mark with masking. This is just the beginning.


