Perfect Reception Lighting with Phillip Blume
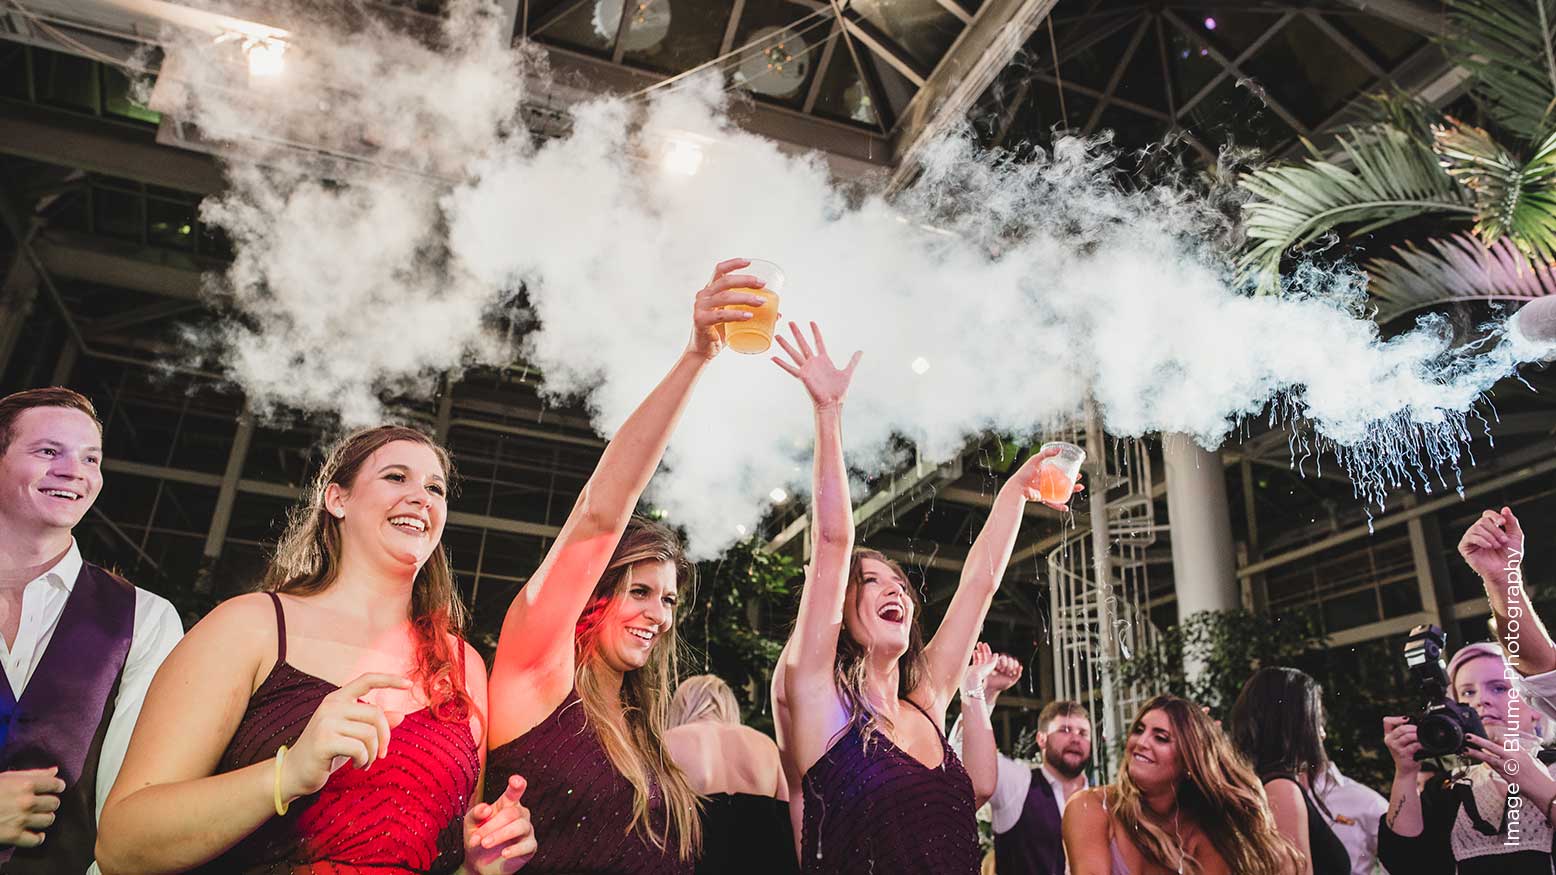
It’s a photographer’s house of horrors—a dark reception hall. Imagine yourself there. A warm ambiance fills the room, the bride and groom come together for a romantic first dance, and you’re all dialed in for the perfect exposure. Everything’s great. Then something happens!
Inexplicably, someone kills the lights. (What?! Don’t they know the difference between ambiance and a game of German Spotlight?) You fumble to increase your exposure before the moment is lost, slowing your shutter to let in more light. Whew! Crisis averted. Or so you think. You check the images on your camera and stare in shock! Surely 1/60 second shouldn’t have caused the blurred images you now see. Oh no, you forgot to account for the added shake of your 200mm lens. Frantic, you up the shutter speed to 1/320 along with ISO. Brilliant! You knew you could handle this. But wait!
Now the DJ starts up a rainbow disco ball and red laser lights…at the same time! (Has he no decency?!) The couple now look like unicorns with radioactive chicken pox. That’s it. No more Mr. Nice Natural-Light Photographer. You reach for the nuclear option: your flash.
Blowing off a layer of dust, you thrust the flash into your camera’s hot shoe, point it at the couple and…BAM! White light floods the room for a glorious fraction of a second. That must have done the trick! (That seemed easy. Why haven’t I used flash before?) But the image preview makes no sense. The bottom half is a solid black band. In the top half, the reception hall looks like a cave, even darker than in reality and tinged with an eerie green color. Your couple, on the other hand, radiates like a glowing mass in the front of the image…still bathed in red laser lights.
Hey, don’t beat yourself up. We’ve all been here. The good news is, there are countless tools and techniques photographers pile on top of these problems: studio strobes, gels, softboxes, light stands, LED panels, reflectors, tripods, meters, triggers and more. (OK, so that’s actually just more bad news.)
Let me simplify everything for you. Below, I’ll lay out the easy system we at The Blumes use to create crisp, color-balanced, commercial-quality reception images every time. You’ll just need your camera, three cheap flashes, and a few rubber bands. Sound good?
Flash Position: Draw a Line (of Light)
We’re going to address the “fix” to every issue outlined in the story above. So let’s get straight to it. I’ll give you our exact lighting setup for almost any dark reception, no matter what specific environment we find ourselves in.
Ever heard of the “Triangle of Light,” a now classic technique our friend Bob Davis popularized for receptions? It’s brilliant, and it inspired the setup we use. My personal problem with it though—since the Triangle of Light calls for several flashes set up on stands around the room—was struggling to finish setup in time before the first dance began. When I did get it all set up, I still got confused alternating between three groups (a way to control remote lights individually). I just made too many mistakes and missed shots.
Then I realized I could get the same effect with just two off-camera flashes! By placing one flash in each corner of the reception hall and facing them toward each other, I created a “line of light” that met in the center of the room. (A third flash goes on your camera.)
This new line had some very positive side-effects for me: 1) I now had only two groups to remember (“A,” the first flash I set up, and “B” the second); 2) The strength of my flashes grew stronger where their light met in the room’s center, helping outweigh their lost intensity as they traveled through space (this takes the Inverse Square Law into account, creating a more even brightness that fills the room!); 3) I needed fewer heavy light stands and eventually stopped using them altogether (see sidebar); and 4) I moved faster without the need to constantly change my settings (and even gained the option to forget “groupings” and just use the same settings all night).
Pro Tip: Leave heavy light stands at home!
How many times has a drunken wedding guest tripped over your light at a reception? Our system will keep you from getting sued. Because a “line of light” calls for placing flashes far into the corners of the venue rather than on the dance floor, you can lose the light stands and mount flashes safely on solid walls instead. Just use strong yet temporary 3M strips like those I demonstrate in this month’s video. Stand on a step stool to mount them above head-level. Boom! You’re good to go all night long.
Camera Position: Don’t Cross the Line
You do have to remember one thing: Never shoot across the line of light. In other words, imagine a string connected between your two off-camera flashes, face the string perpendicularly, and try to photograph subjects only on your side of that string.
Basically, you’re turning those off-camera flashes into dual backlights (or hair lights). If you’ve tried using off-camera flash at receptions before but gave up because it cast weird shadows over everybody’s face, this is why—you were shooting across a “line of light.” These flashes should not to be used as key lights to directly illuminate your subject. Instead, they remain behind to create a crisp rim illumination around dark objects. But, as an added bonus, a backlight also tends to reflect off any surface it finds; this softens the light quality and helps to subtly fill shadows on your subject’s face, too.
Want to photograph someone on the other side of the line of light? No problem. Just walk to the other side of the room, turn around so you’re facing the line of light from the other side, and now you can photograph subjects on that half of the room.
You may want to turn and shoot against the flash (so your camera is parallel to the line). You can create cool light flair, or keep the flash hidden behind your subject for a romantic glow. But remember, if you do this you will need to change one important part of the setup—turning off the off-camera flash that is now positioned behind your shoulder. I use fully featured Godox flashes so I can easily switch off either the Group-A flash or the Group-B flash, whichever is behind me, remotely.
With this method, you can shoot all night without changing camera or flash settings (which I’ll cover below). That’s because there is no “correct” exposure for a backlight—you can make it as bright or as subtle as you like without truly damaging your exposure. Just set to taste, then get to work! But what if you want more flexibility to move around the room and shoot new angles?
Camera Settings: Retain Ambiance
With modern ISO capability and big marketing behind low f-stop lenses, it’s very tempting to use these camera settings as a cure-all. Don’t do it! As you know, dark receptions can mean slow and difficult focusing. If you shoot below f/2.8 at the reception, you probably find a lot of your images end up blurry. You’re not a bad photographer—you’re just asking too much of your equipment. Besides, it’s not necessary.
Try shooting receptions at f/5.6 or higher. You’ll hit focus even when your subject is dancing like crazy. And remember, depth of field is affected by focal distance too, not just aperture number. Since reception shots tend to be closer-up, you’ll still get the bokeh you’re looking for. But when you’re at a distance, new stories will emerge—suddenly you’ll see the emotional mother in the background as the bride dances with her father. These are images that mean more than “creamy dreamy” blurred backgrounds.
Next, choose an ISO setting that creates a darkened exposure, not a “perfect” exposure. Don’t be afraid of high ISO if the environment demands it, but the point is not to expose the whole scene with this setting.
I take a test shot that barely allows candles and lights to show up; the rest of my scene is nearly pitch black. From here, you’re okay with a somewhat slower shutter speed, though probably not below 1/60 of a second unless you’re trying to get creative with light dragging.
The important thing is to keep this ambient exposure dark enough so ambient light (especially accessory DJ lights!) is hidden. It’s okay if this light shows up, but it must not be blown out! Shoot with manual camera settings and check your histogram. Flash photography is all about ratios, so if you use flash to make the DJ lights a smaller ratio of the total light hitting your sensor, they will fade or disappear—almost miraculously! Hallelujah!
In general, I find my settings end up near f/5.6, 1/100, ISO 3200 pretty consistently.
Flash Settings: Bring the WOW!
Here’s the final ingredient to make this work. It sounds scary, but you have to put your flashes in manual mode. Get rid of TTL/automatic. Believe it or not, you’ll find manual to be easier—and more consistent! I promise.
I begin by setting my two backlights (my “line of light”) to a power of 1/32. Again, this is totally a matter of taste. You can tweak to go brighter or dimmer. But you’re using small flashes, not studio strobes. So you’re going to want lower settings that allow your battery to recycle quickly and last all night. Luckily, low settings and small flashes are all you need for already-dim receptions—strobes are totally overkill.
Finally, what about your on-camera flash? This is the cherry on top. If there’s a white ceiling, turn the camera’s flash toward it for a soft key light. But instead of shooting straight up, aim the flash slightly back over your shoulder at 45 degrees. Find a manual flash power that creates one beautiful exposure and stick with it! Is the ceiling black, or a high barn with rafters that don’t reflect light?
You may find this crazy, but I will then shoot direct flash into my subject’s face! I know, “direct flash” is a big no-no. But this is the perfect example of understanding the rules so you can break them. In this case only, set your on-camera flash to TTL with a flash compensation of -1.7 or -2.0. This compensation along with the combined power of your off-camera flashes can still create natural light that will WOW your clients. Enjoy the reception!