
Photographers work in an industry where technology and software are evolving so rapidly it’s hard to keep up. Who hasn’t had the kind of experience where you’re ready to convert and process files, and you find out Adobe just launched a new version of Photoshop?
“Adapt or die” is the motto we use at SCP when you are staring into the abyss. You have to be ready for change, embrace it. Working with Evolve Edits forces me to constantly research options for wedding workflows and post-production. I speak with studios on a daily basis that are stuck in Adobe Camera Raw, Adobe Lightroom, etc., and they don’t want to budge. Can’t say I disagree with using Adobe Lightroom—it’s our bread and butter. But there are other options out there, like DxO Optics Pro 10 and Capture One Pro 8.
If you aren’t familiar with these RAW processing programs, you can download free trials of both. In this article, I dig into RAW processing specifically, not just converting RAW files. I want to be clear in stating that. I shoot with a Nikon d750, and the typical software used with it is Capture NX-D. I am looking for a total workflow solution for the possibility of hundreds of RAW files in a nondestructive program. What I am bringing to the table is a quality versus quantity comparison of Capture One Pro 8, DxO Optics Pro 10 and Lightroom CC.
Color & Tonality
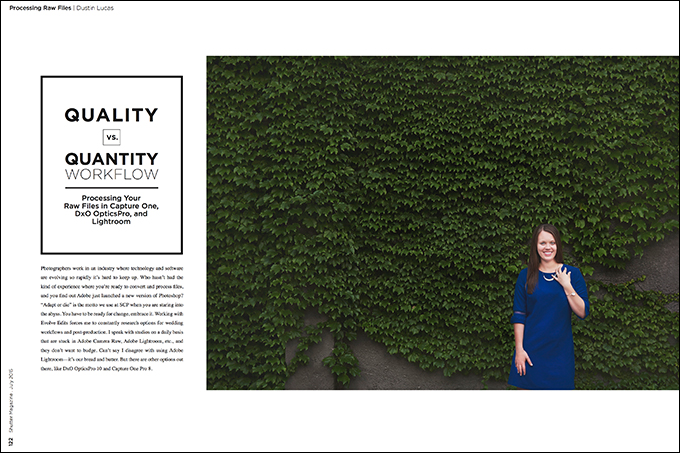
After importing the image into each program and selecting a file, I am ready to compare. My first task is to increase the exposure a little more than a stop in order to compensate for my underexposed image. Noise reduction and shadow recovery will be interesting with this image. White balance is as-shot throughout all of these images and set to be neutral in the overcast lighting. No other settings are taking effect other than the ICC profile generated from the camera’s manufacturer. I did my best to match these images between programs.
The rendering of the Capture One version has a nice range of color and tonality. Greens and blues in this image are quiet nice overall. Saturation isn’t too high, and the gradients across the ivy backdrop are rendered well. Compared to the others, the dynamic range is slightly wider. Shadow detail is smooth from capture, without adding any recovering effects into the equation.
DxO and Lightroom do a good job with the color, but they lack the dynamic range of the Capture One file. Contrast seems to be heavier, especially with the crushed black point. I have to raise the exposure past two stops to relieve the black clipping.
I understand that the capabilities of the DxO software at an automation level are fantastic, but at a simple RAW conversion level, it falls short. The same goes for Lightroom. Compared to Capture One, you are getting a good enough rendering of the RAW file. For single-image rendering, I suggest using Capture One for the quality.
Sharpness & Noise
Before making comparisons, I made sure to turn off the Detail enhancements on all three images. The edge detail looks really good in the Capture One image. Noise levels are low since the image was a stop underexposed and shot at ISO 400. However, the strands of hair get a little smoothed over. In the Lightroom and DxO renderings, it’s the details in the hair that sets them apart. Noise levels on the images are higher, which might cause the sharper effect in comparison to the Capture One image.
User Interface and Speed
Having been a Lightroom user, I will say that the Capture One and DxO interfaces are a lot different, and that is normal with any software change. This brings up a great question in regards to workflow and handling a lot of images at once. Capture One is the slowest of the three; having to go through thousands of images to edit it was a nightmare. (A great tip for wedding workflow is to use a culling software first, then import the desired images into a processing program.)
DxO handles hundreds of images as well as Lightroom does. The biggest difference is with DxO, the files don’t have to process through importing; they seem to point directly to the folder with the RAW files without having to build a running catalog. Of course, you have the capability to create multiple projects (individual catalogs). I would not suggest using this software to store many jobs or to organize your files.
With Capture One, you have catalogs and sessions. Sessions were designed to meet the needs of a tethering shoot. Ideally, you would create a new document for every shoot. Catalogs work as an option to organize and access multiple shoots in one document. This is a great program for tethering and editing smaller jobs. They haven’t developed quite the performance boost needed for wedding workflows just yet.
Lightroom to the rescue!
New Workflow Capability
DxO Optics Pro 5 and Lightroom have integrated an export plugin to transfer DNG files back and forth in a nondestructive process. (For more information, check out www.dxo.com.) An ideal workflow would be to use Lightroom to categorize and store the images, and process RAW files through the DxO software. In Lightroom, select a number of images you wish to process, go to the menu bar and select File > Plug-In Extras > Transfer to DxO Optics Pro 10. From there, you can process files through the DXO software, and it saves a side-by-side copy back into Lightroom. All you need to do is select the option Export to Lightroom. Saving time is everything, and this plugin definitely does that.
Closing Results
With the results, I have determined that image quality ranks highest with Capture One 8. I wasn’t too surprised considering it’s been the leading RAW processing software for a while. Lightroom is still my choice for editing efficiently for an entire wedding—I can’t seem to shake it at this point. Moving forward, I suggest downloading trials for both Capture One and DxO, and see what you think.


